Mountains

North-South Lake, North Point, The Catskills, NY

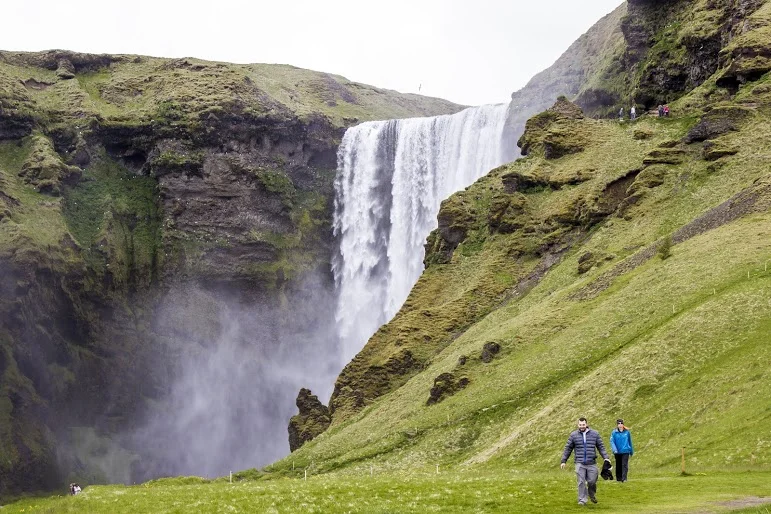
Trail Description: This great day hike in the Catskills at North-South Lake utilizing multiple trails offers stunning views such as Artists Rock, Sunset Rock, Newmans Ledge, and North Point. Also, some popular features such as Ashley Falls, Badmans Cave, and more.

Trail Info:

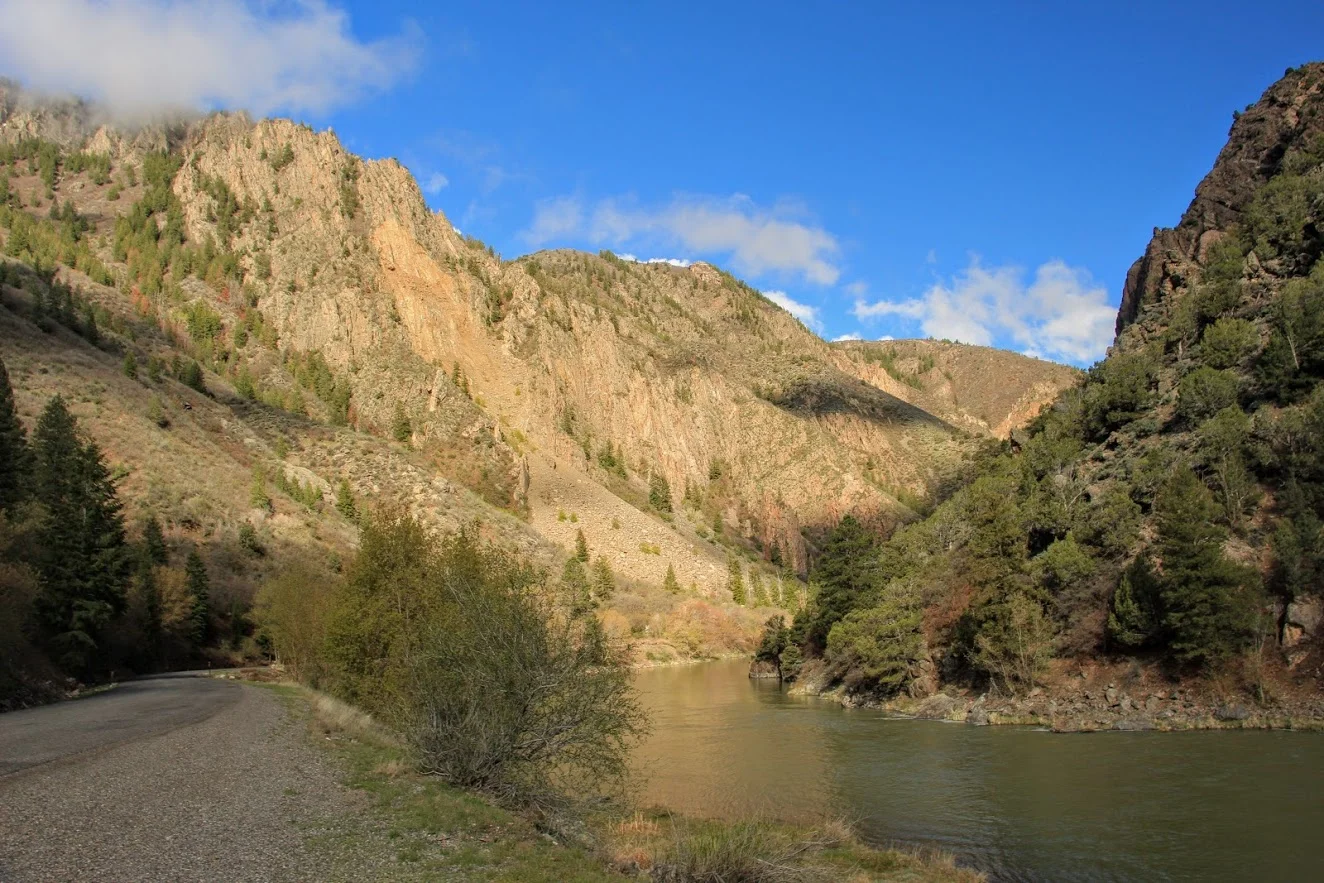
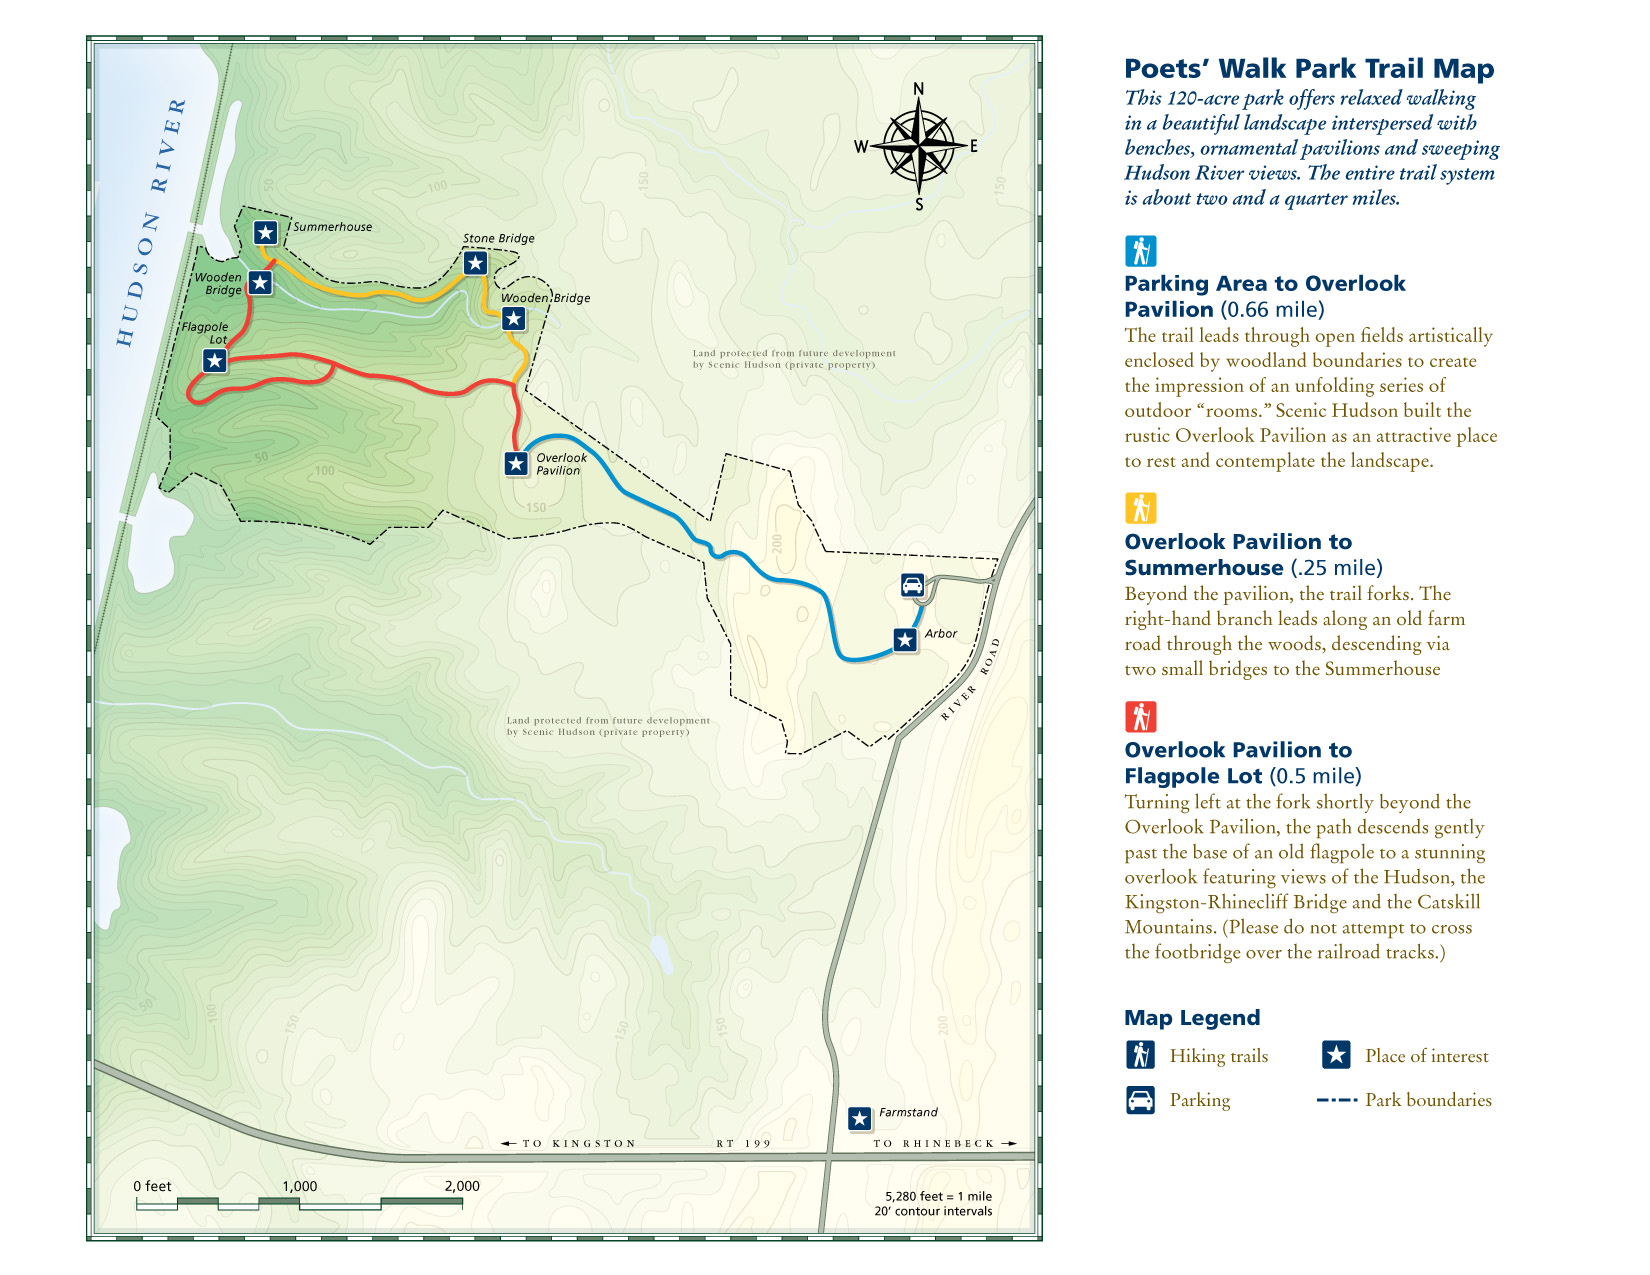
Where: Haines Falls, NY Distance: 7.0m (4-5 hours) Difficulty: Difficult Trail Type: Loop Features: Views, Mountains, Valley, Lake, Water, Cave, Catksills, Hudson Valley

How to get there:

93 North Lake Road, Haines Falls, NY 12436

https://goo.gl/maps/9rUFAjK3PieRJY7U9

Put the address above in your GPS. You will need to drive through the state park to find the trail. As you get closer, you will pass Scutt Road on the right, then go past the guardhouse. Turn right onto the first fork around the lakes heading south. Follow this road passing a big parking lot on the left until you reach another big parking lot at a dead end, past the pavilions. Park in this area and the trail will start in the back corner.

Hiking Tips

  • Not great phone service, so make sure to screenshot a map. Or my guide!

  • Lots of signage throughout trail, but keep an eye on the trail markers.

The Hike

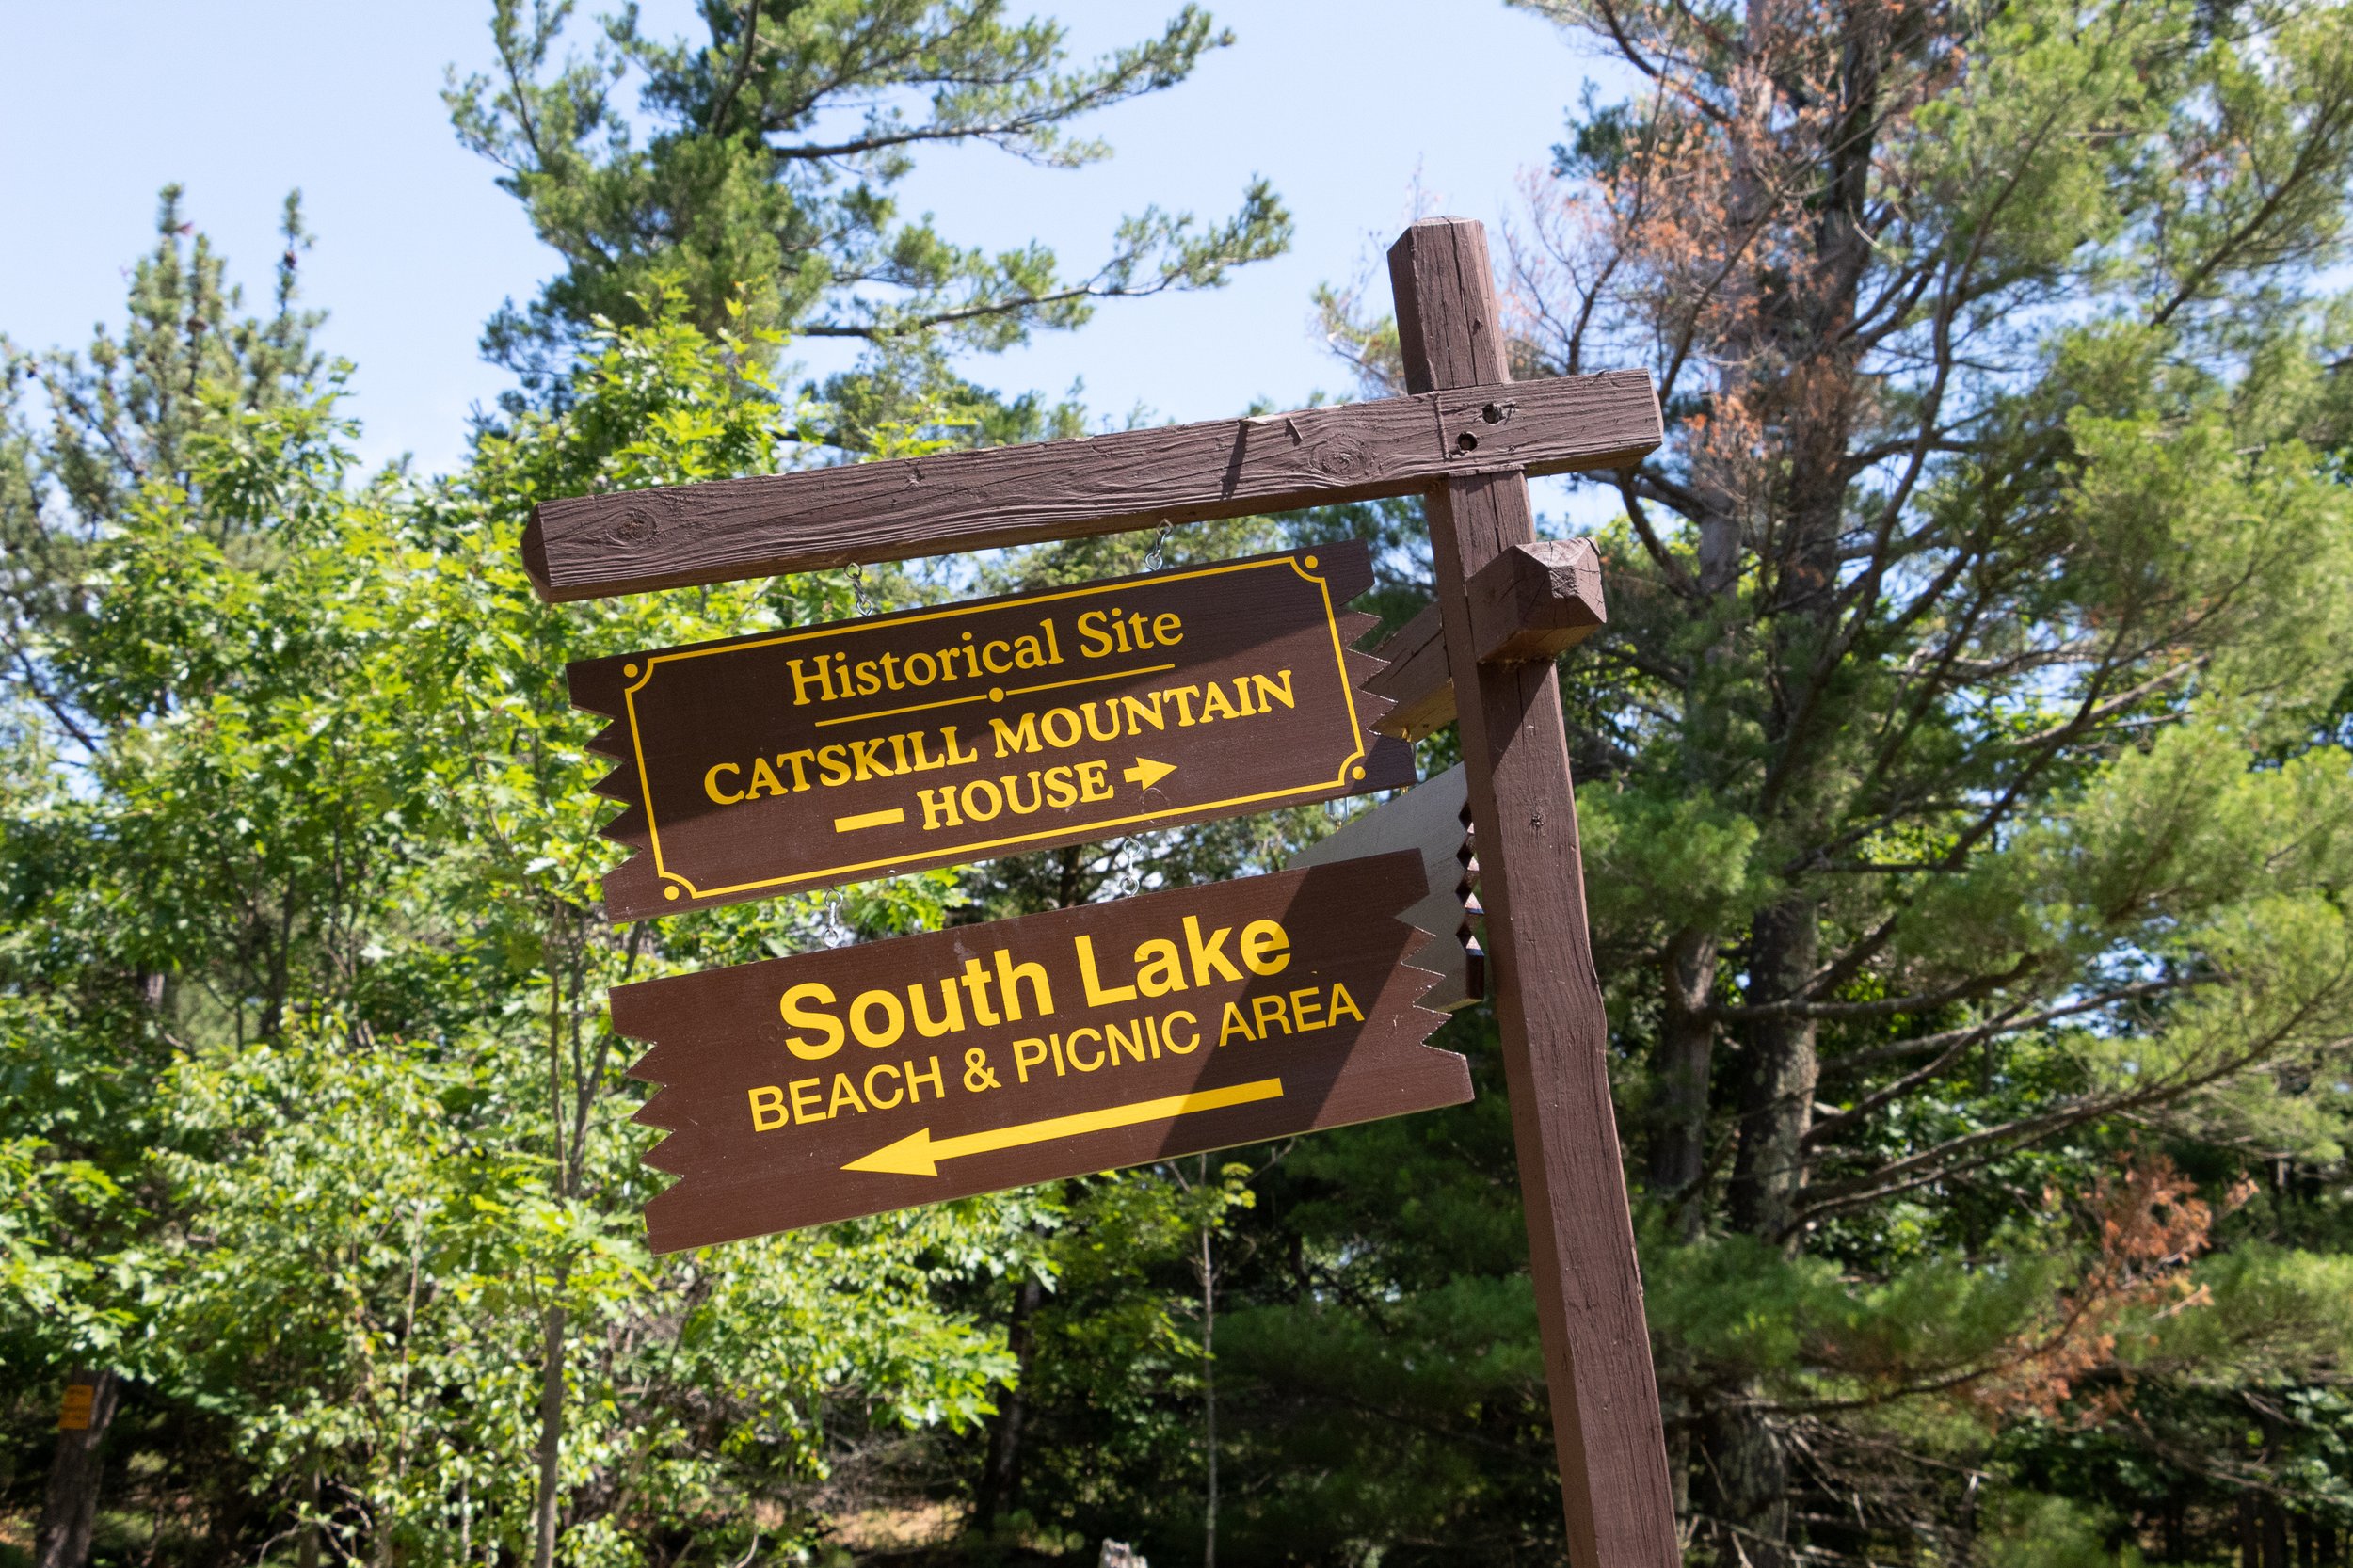
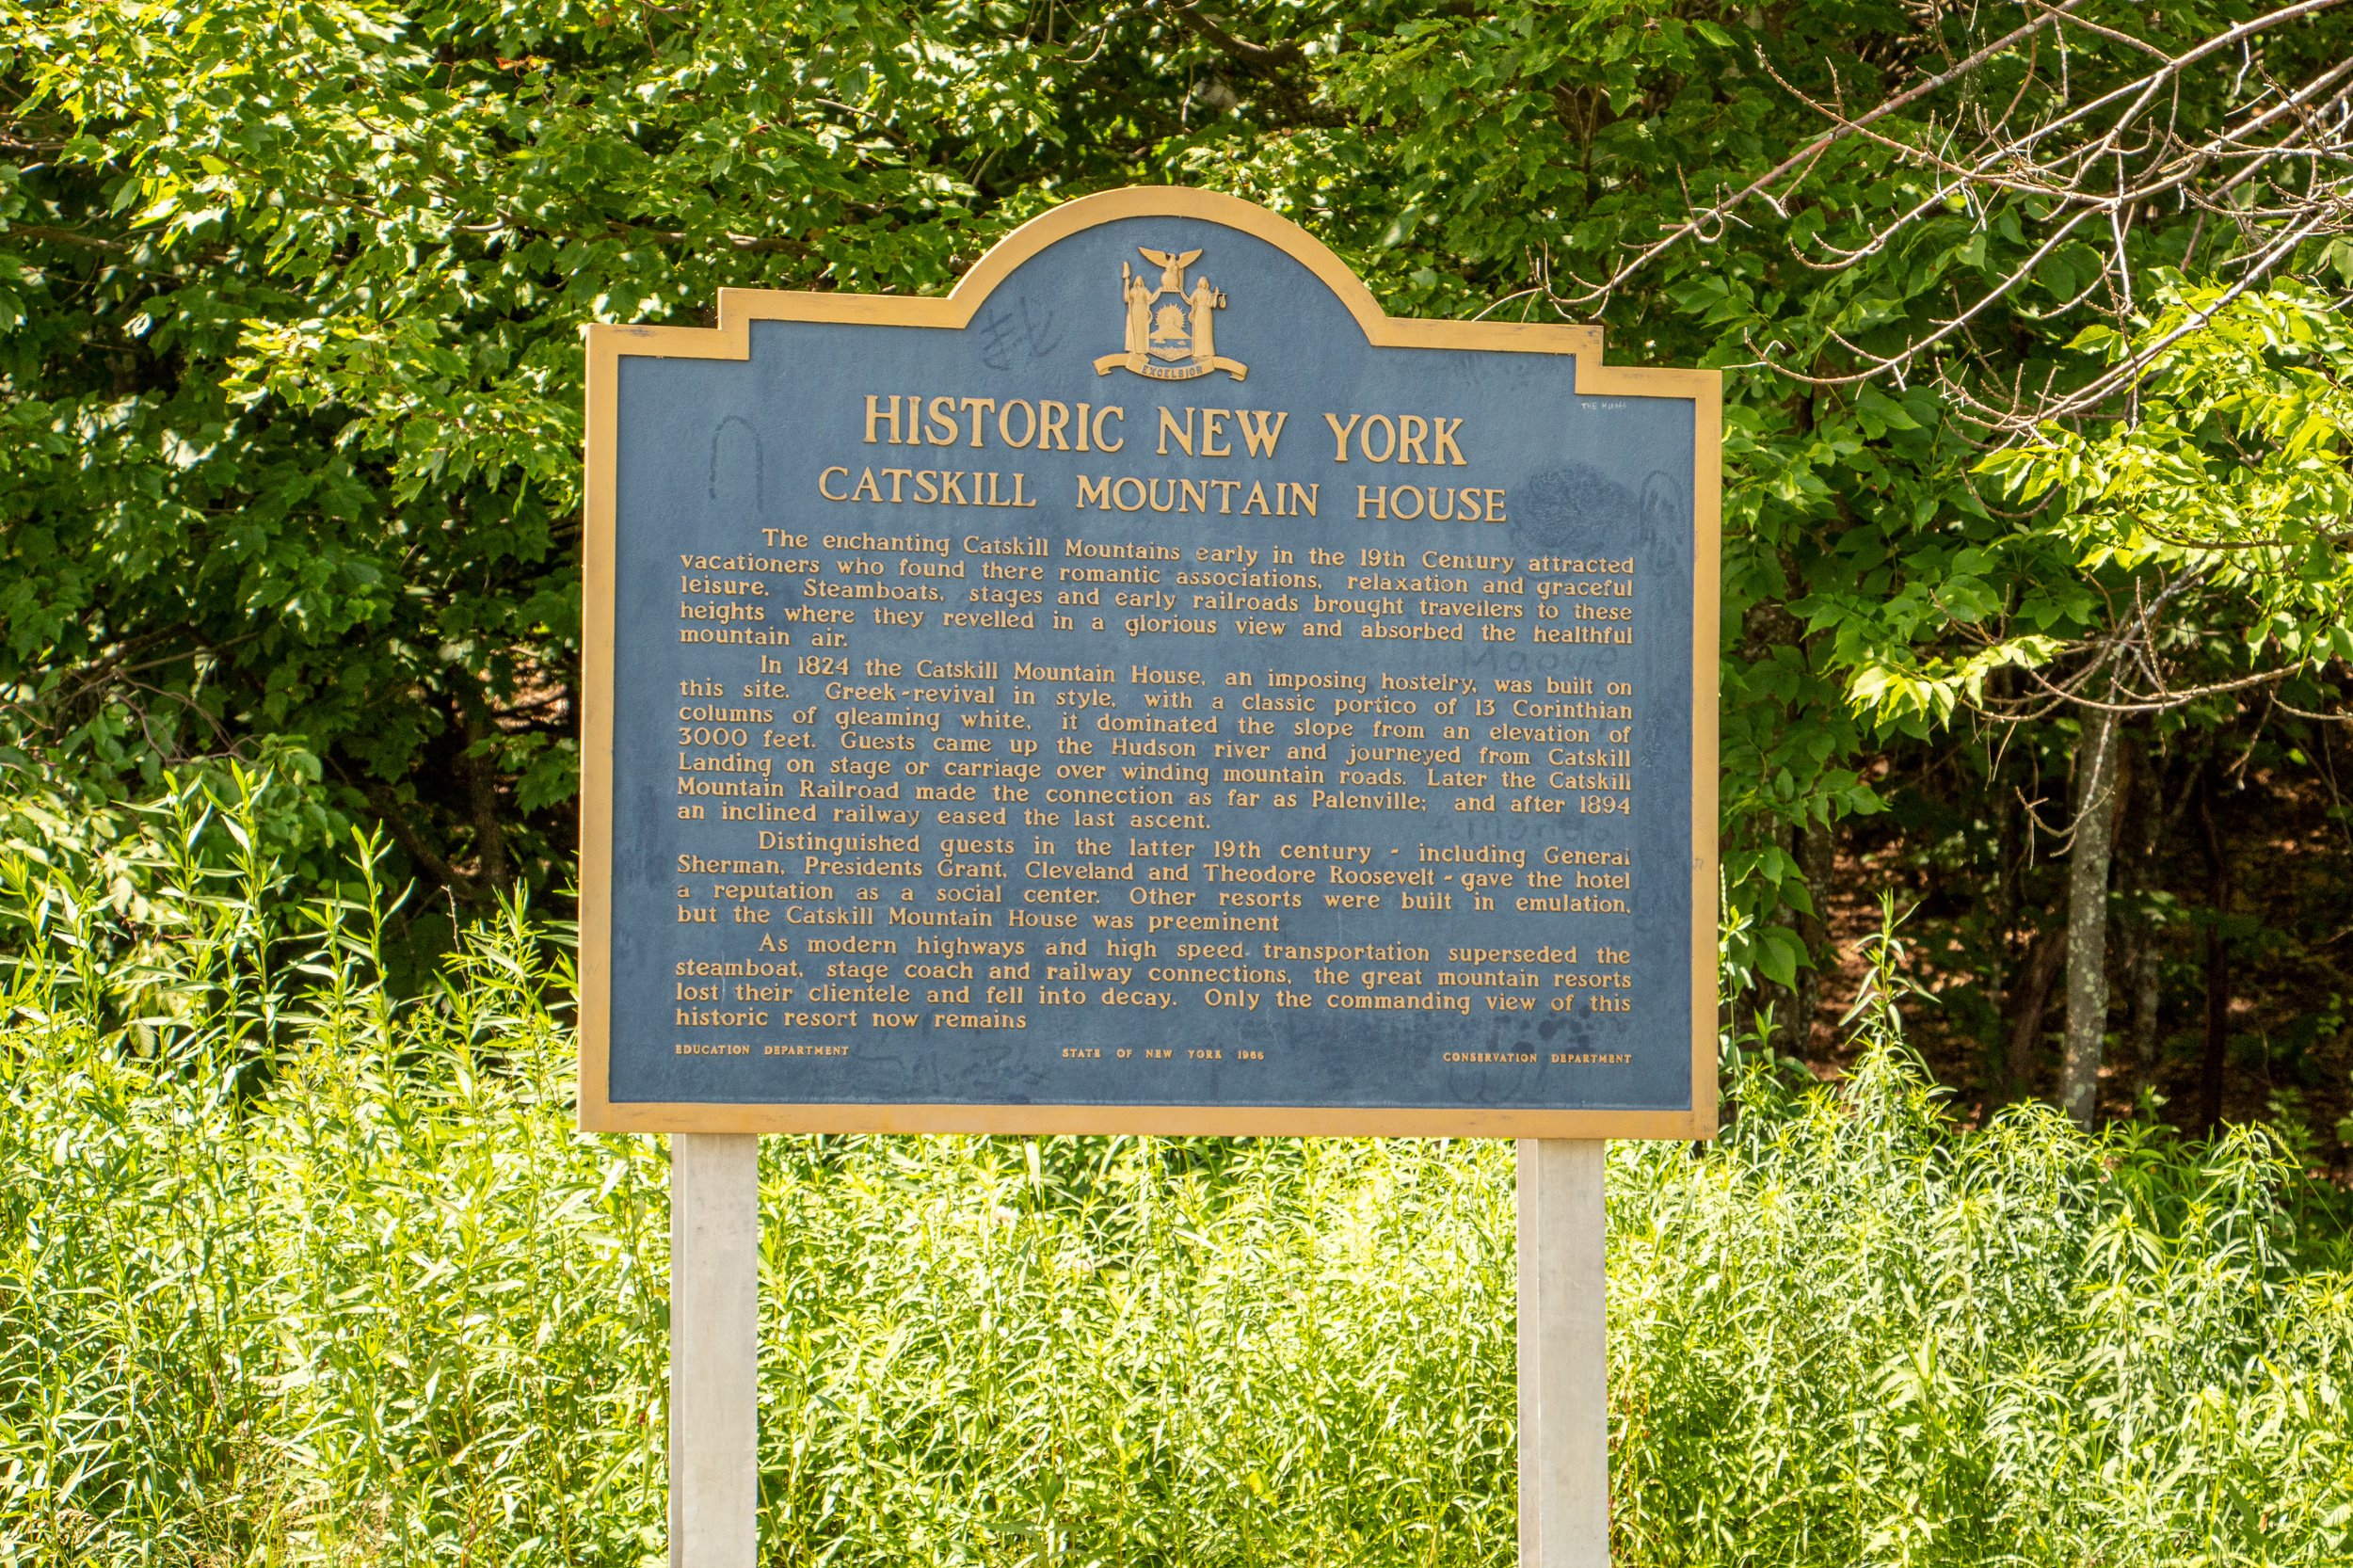
This is a long one folks. Make sure you have all the snacks and hydration necessary on this hike. Once you are ready to go, head to the back right corner of the parking lot for the start of the trail, away from the picnic pavilion and lake area. There will be a gate with a stop sign. Go around the gate and start your trek on the yellow trail toward the old Catskill Mountain House, the first of many sites and views on this hike.

There will be a junction with the blue trail. Continue to walk straight across the field at the area of the old Catskill Mountain House. Off the ledge of the field will be the first view of the hike overlooking the Hudson Valley.

Turn around and head back toward the junction across the field. Stick to the right and continue following the blue trail until you see the North Lake signage. Past the guardrail with a stop sign, cross another parking lot to re-enter the woods & head straight across to find the blue trail. I did not see a sign (could have missed it) but just keep an eye for the blue markers.

Pass the picnic tables and this will lead to walking along a chain link fence to the right. At the end of the fence, there is a view off a porch ledge. Keeping straight on blue, the next item to pass is a registration box.

From here, the hike will begin to have an incline. In about 10 minutes will be the first viewpoint, Artist’s Rock. The first of many views on this hike.

Continue on the blue trail as the trail gets steeper toward the next viewpoint, Sunset Rock. There will be a set of cliffs above on the right. Sunset Rock viewpoint sits above these cliffs. The trail will eventually get you there. There will be a sign to hop on the yellow trail for Sunset Rock in 0.2 miles.

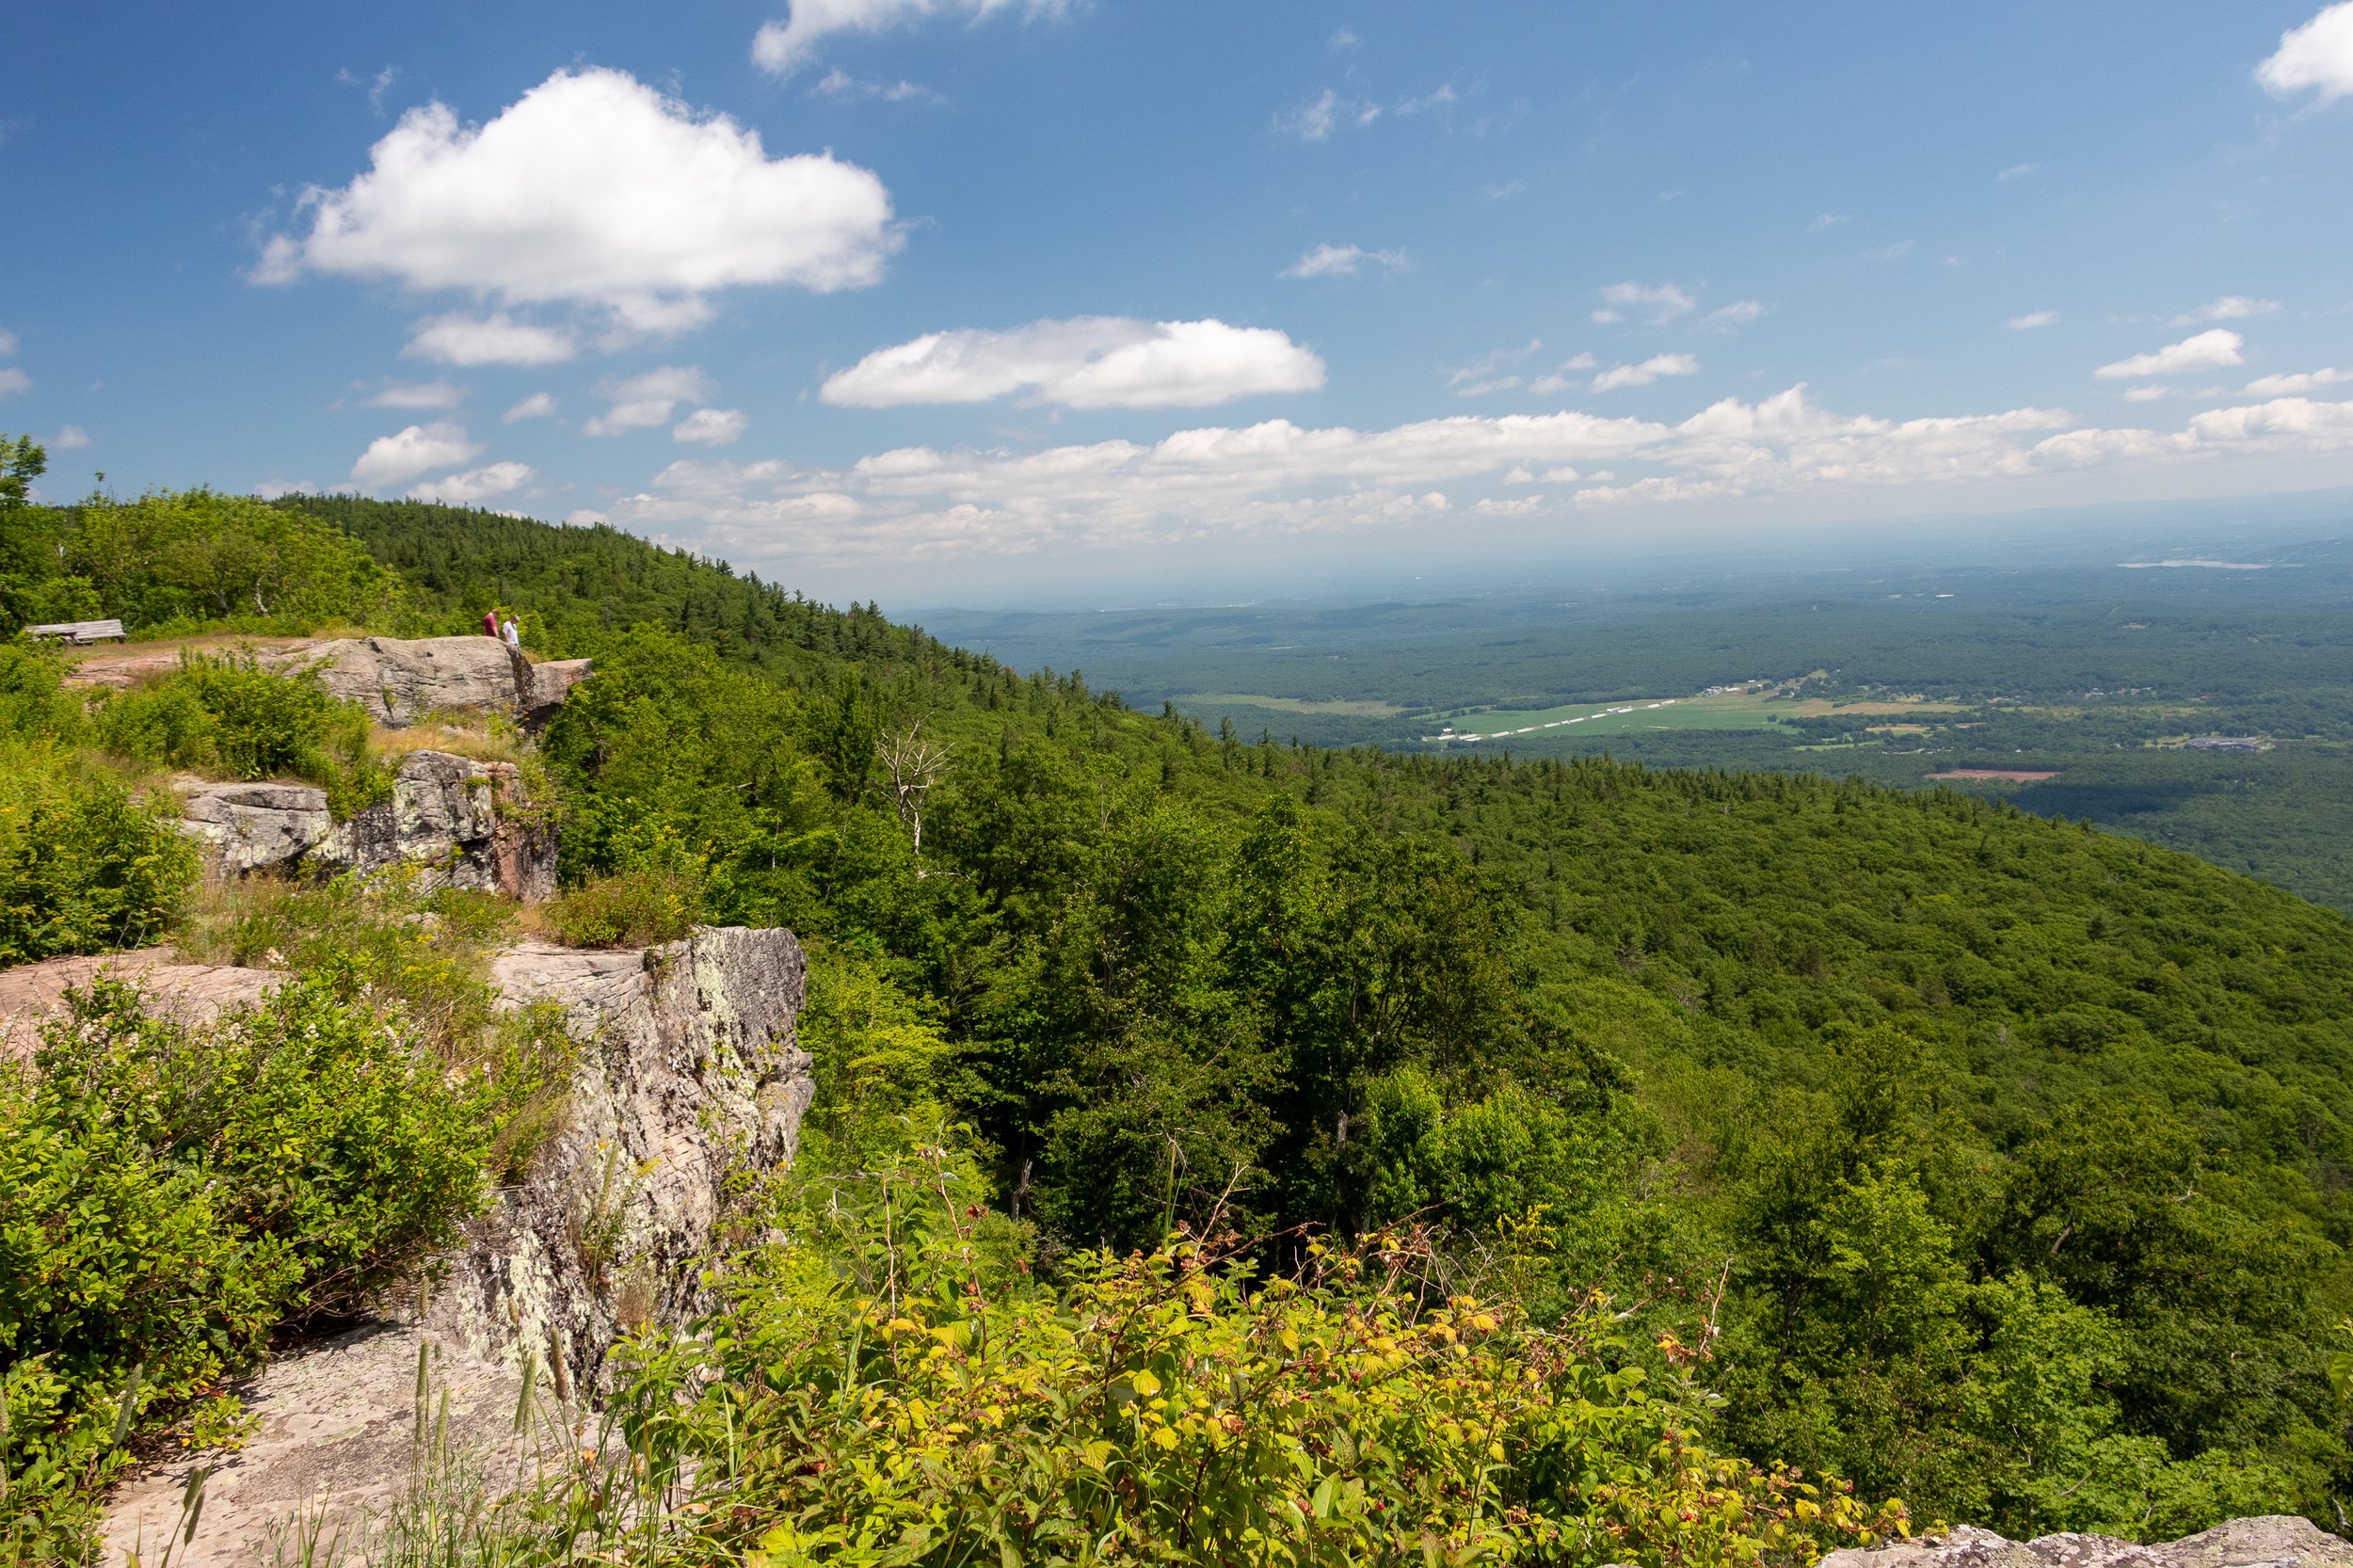
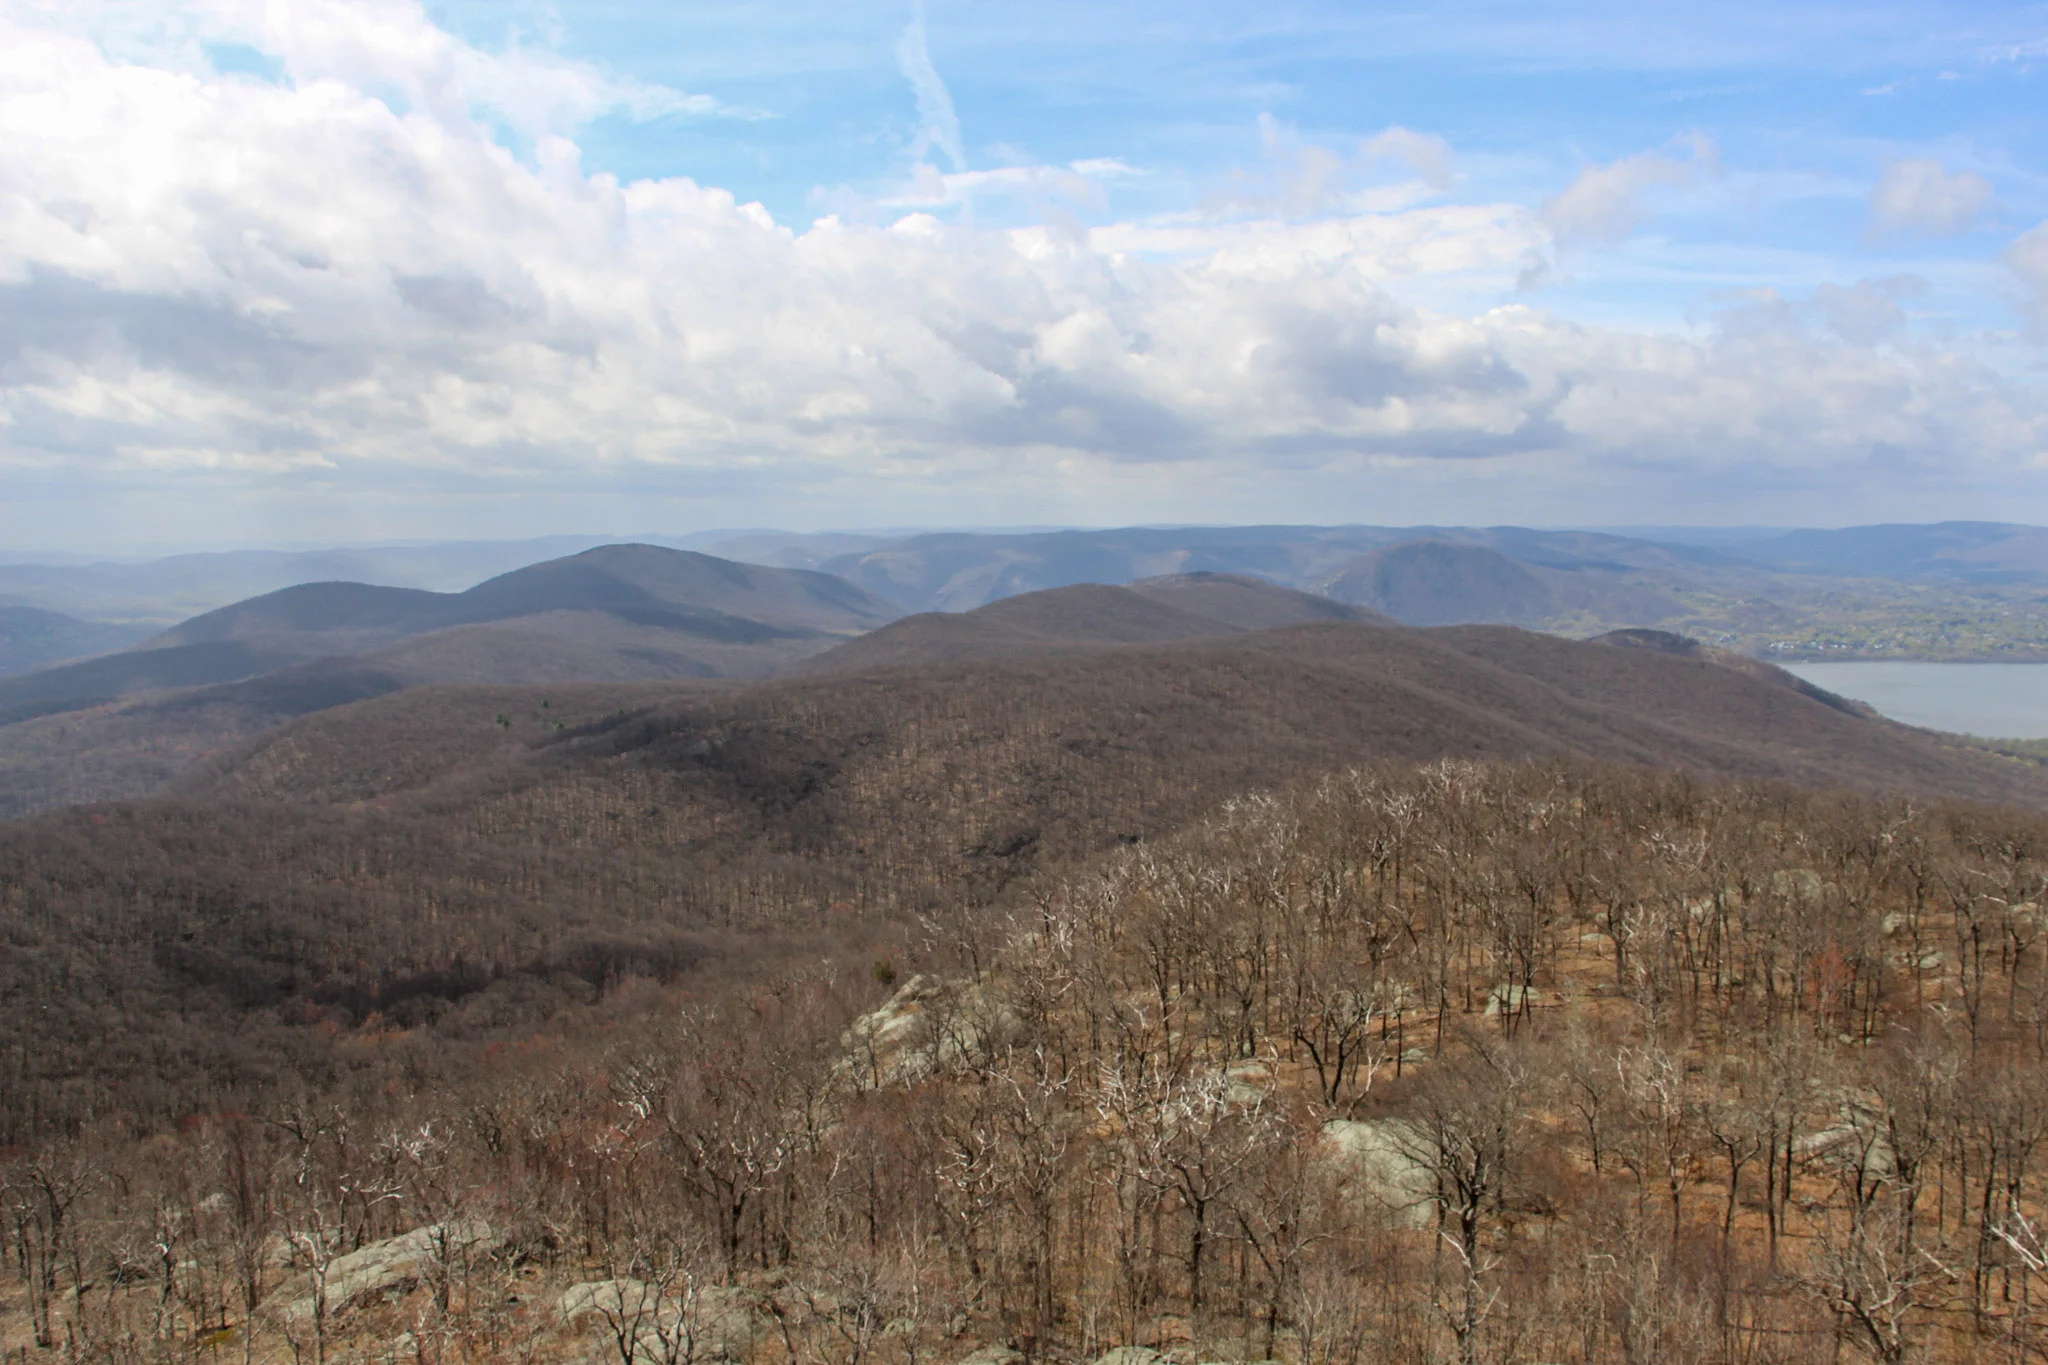
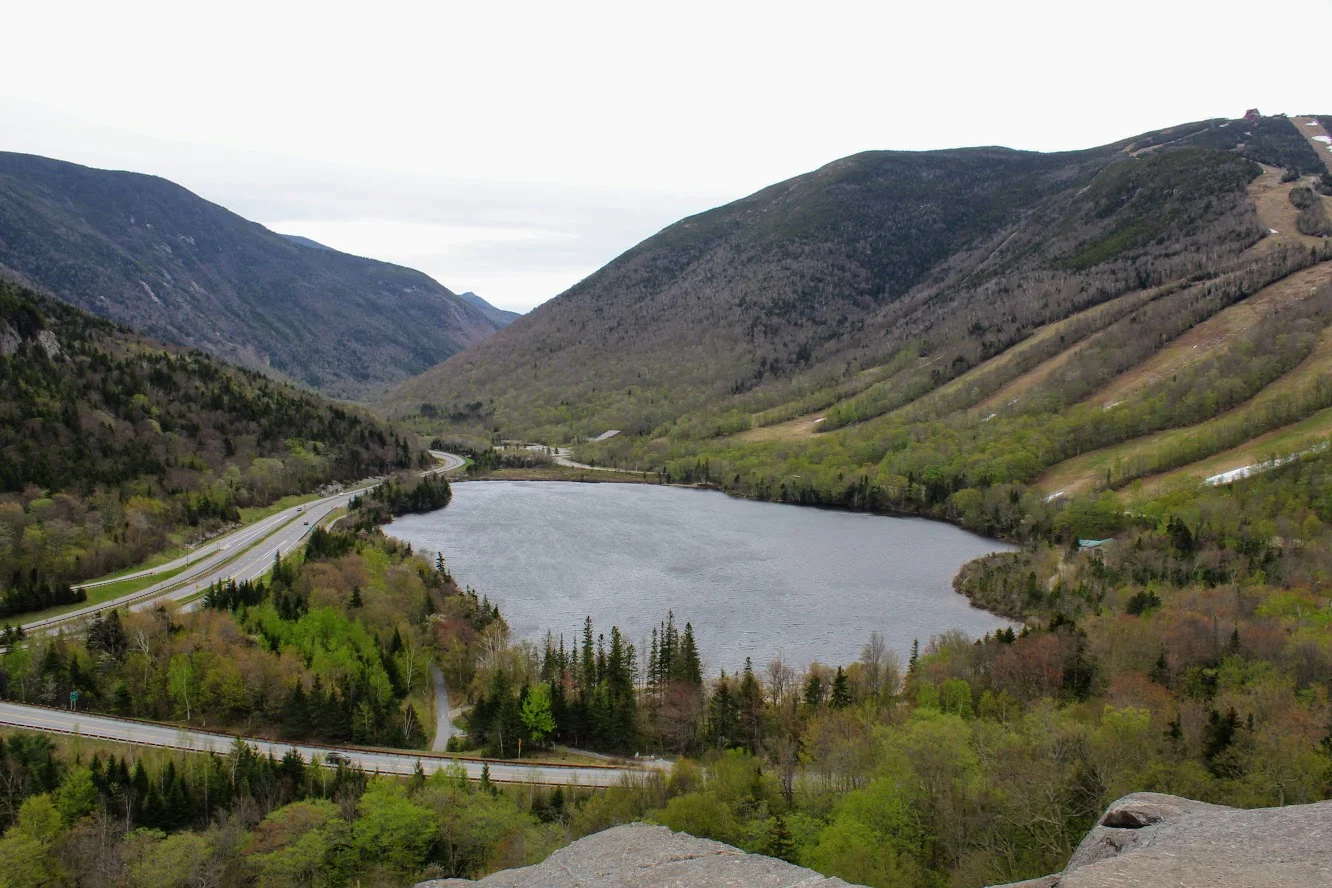
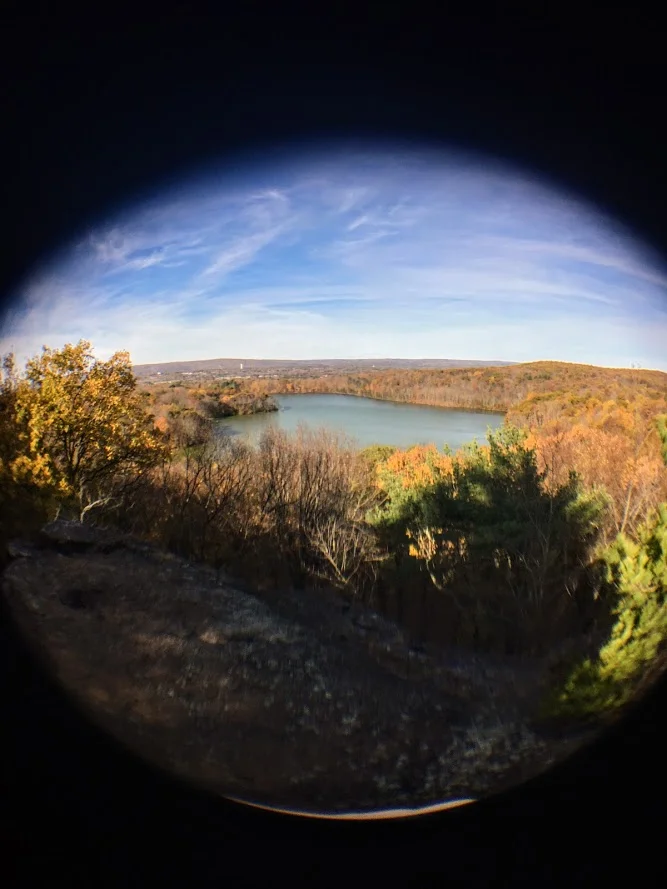
Keep a lookout for the markers, then turn right onto the yellow trail. The views will just open up and another incredible view will be had. But this isn’t Sunset Rock quite yet. Keep along the yellow trail and in a few minutes there will be a big rock to the right. I was actually too enamored with the view, I did not take a picture of the rock! But it will be pretty obvious & there is a sign. This area will have the best views of the hike. There will be views of North-South Lake with the Catskills in the background. Pretty jaw dropping in my opinion.

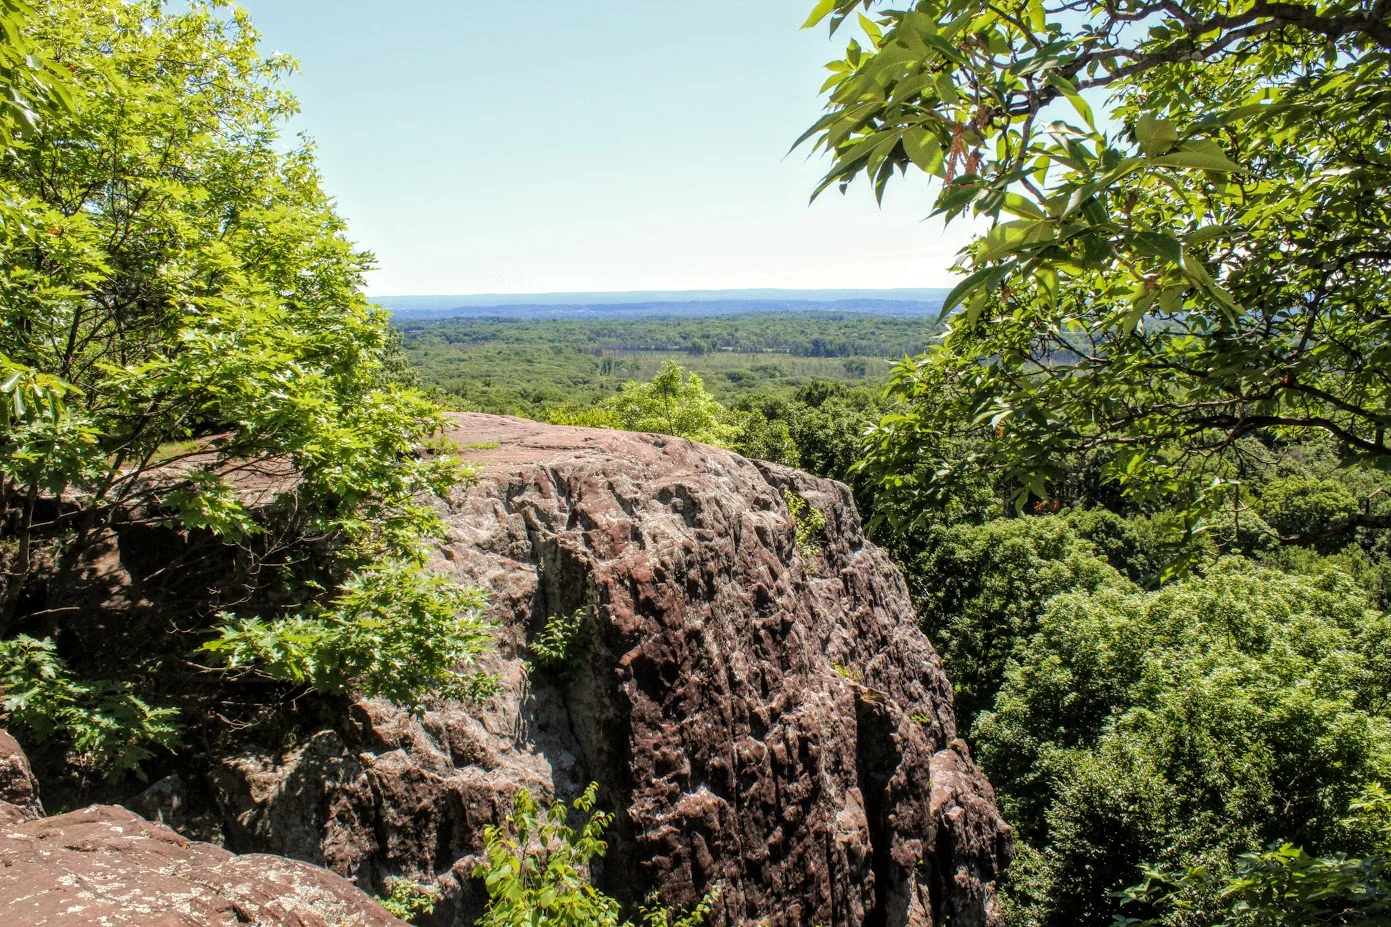
From here, retrace your steps from the yellow trail back to the blue trail. Turn right at the blue/yellow junction to rejoin the blue trail. There will be signage for Newman’s Ledge, 0.2 miles away, and North Point, 1.6 miles away. The trail will get steeper but in minutes you will reach more awesome views off of Newman’s Ledge.

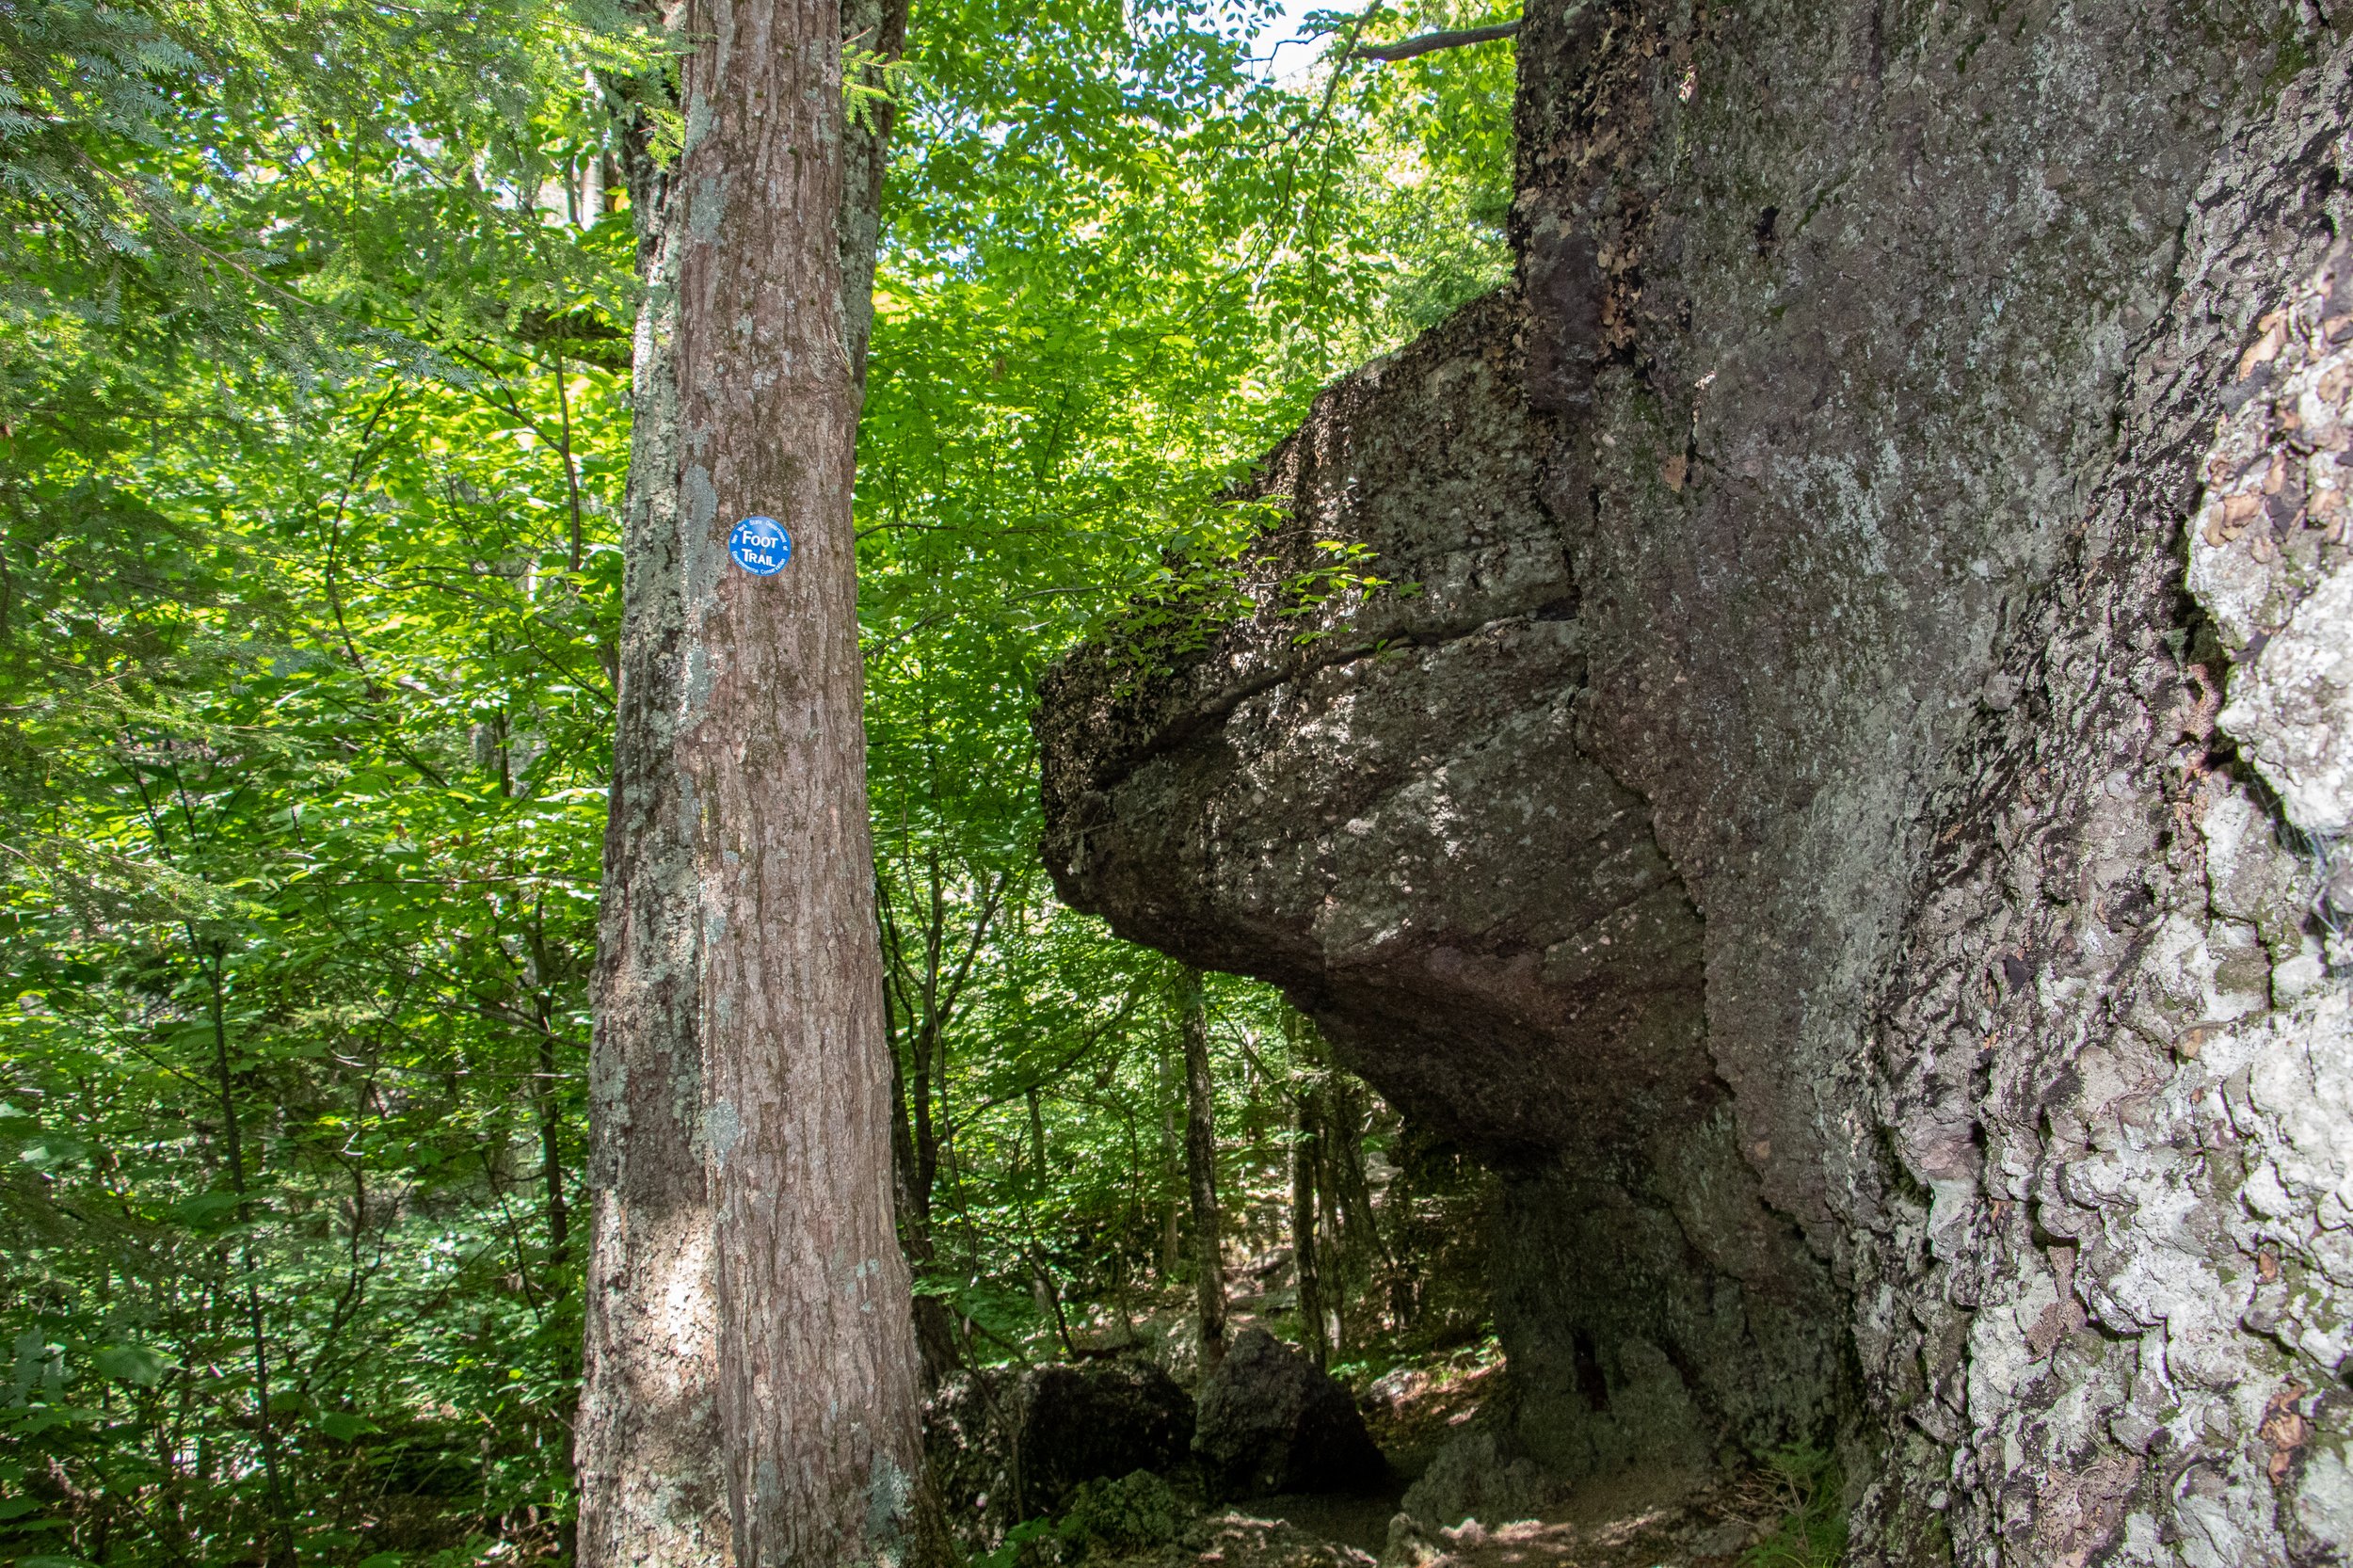
In about 0.6 miles the next point of interest is Badman's Cave following the blue trail.


Continue on the blue trail as it becomes steep then levels out in an open area before re-entering the woods. In 0.6 miles there will be a junction with the red marked Mary Glen’s Trail. The red trail will need to be used but for now continue on the blue trail toward North Point. There will be a sign showing only 0.3 miles to North Point. The ascend for the next 0.3 miles is one of toughest in the hike. There will be a sign for North Point. The views will be beautiful as the Catskills will be right in your sight.

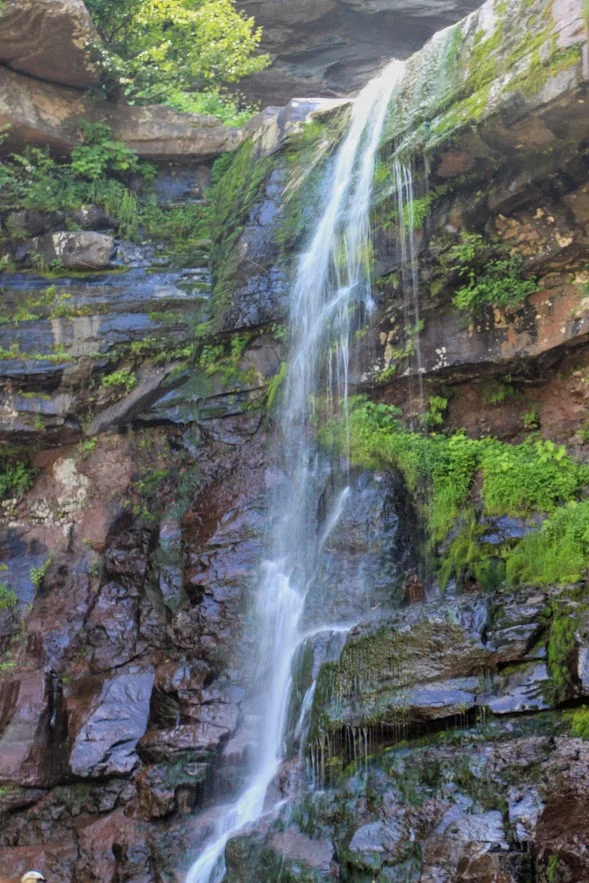
After you soak in the last of the amazing views, begin to head back toward the junction with the red trail. Take a right to hop on the red trail. This will be a rocky, steady decline as you eventually reach the sign for the North Lake Campsite, which will be another 0.6 miles. This will lead around the lakes onto the paved roads of the campsite. Continue to follow the red trail as you cross a footbridge over a stream. There will be a sign for Ashley Falls off the yellow trail if you wanted to take a look, it was very short but no waterfalls on this hot day in the middle of the summer.

Continue on the red and take a left on the road by the campsites. Then it will be almost a mile until you get back to the parking lot. At least it is a flat surface to end! Whew, what a hike. Tough but so many views.
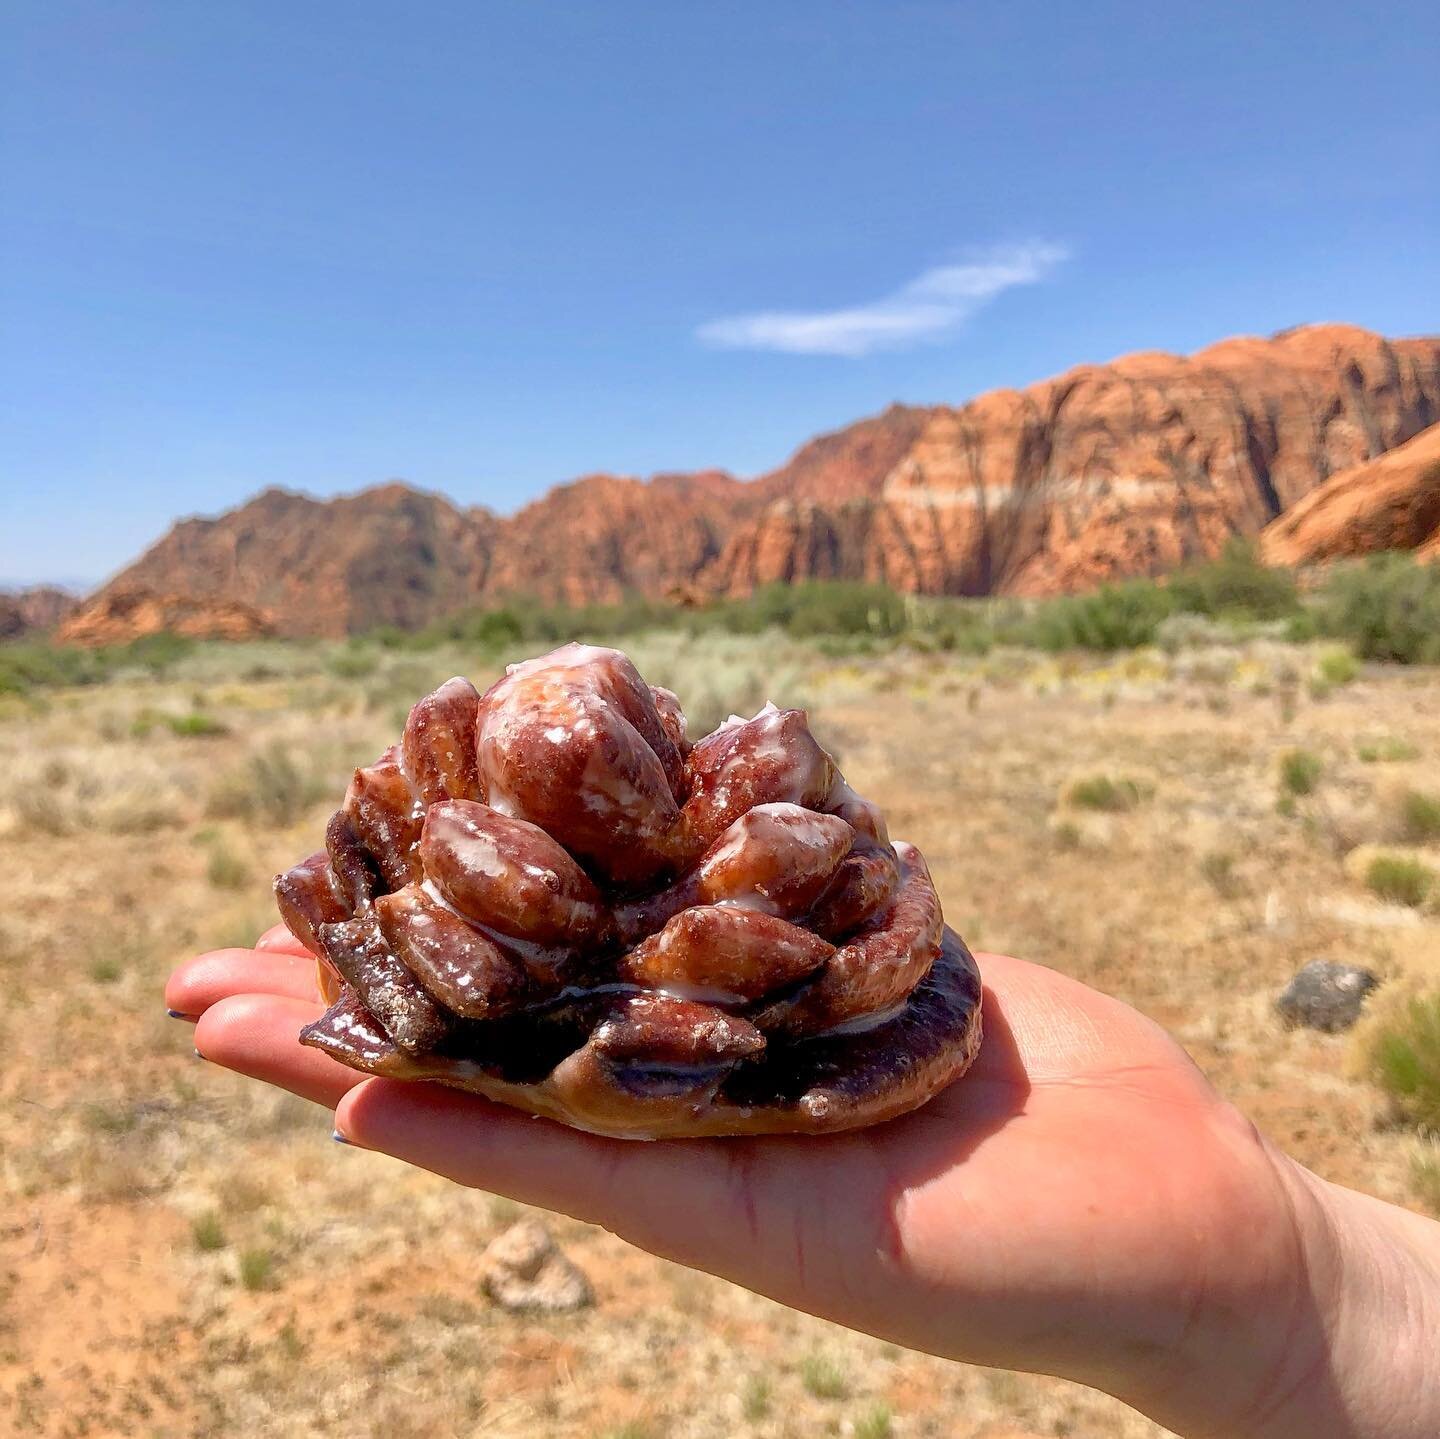
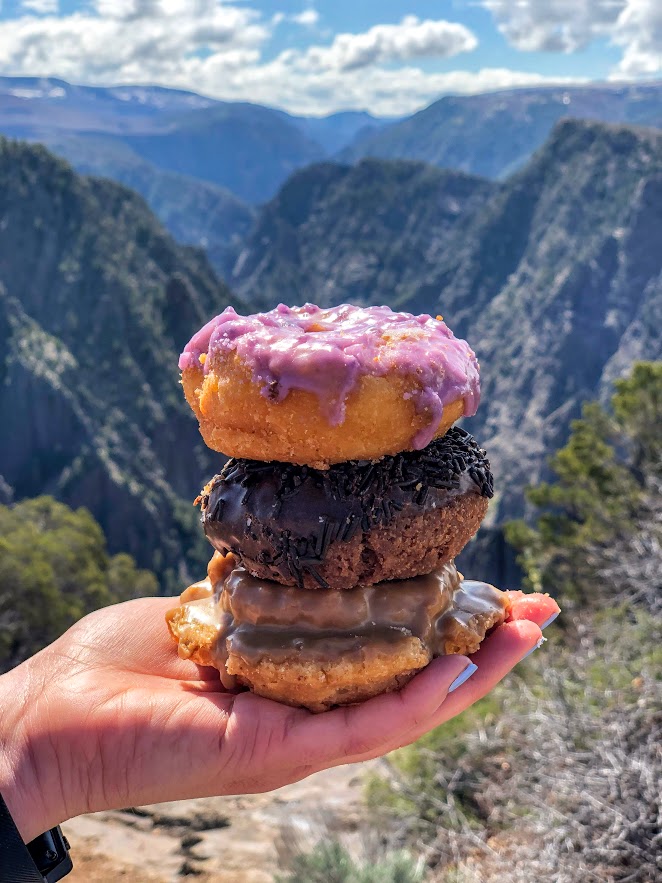
HIKING FOR DONUTS

Hi, I’m Mark. I live in Connecticut. I take new trips every chance I get. A good trip has a great hike, great food, and something fun to do. My goal is to search out new trips and share them to inspire others to try something new and exciting.

If you are looking for posts in a particular place, search City or State here.

SEE OTHER POSTS IN ARCHIVE

RECOMMENDED POSTS

RECENT POSTS

See the latest on Instagram and follow @HIKINGFORDONUTS

3 Easy Hikes in Mount Rainier National Park

Mount Rainier National Park is one of the most beautiful parks in the United States. It’s got mountain views, rivers, waterfalls, old-growth forests, and meadows of wildflowers in the summer months. To say I was ecstatic to visit for the first time would be an understatement. However, this turned out to be a very interesting trip to plan and taught me some valuable lessons. One month before the trip, my wife tore her ACL hiking. I spent so many hours planning and like that, I had to shift plans. Credit to my amazing wife, she still wanted to go to Mount Rainier as planned and make the best out of it. Would I like this to be a full blown guide of the park? Of course. But stuff happens and guess what? Trips always work out. Our trip consisted of lots of driving through the park over 3 days and as many easy walks as possible as my wife was still able to put some pressure on her leg (she had surgery the week we came back). And, we still had an absolutely amazing time. The park is so big that we barely covered it. Sticking to the easier things to do in the park, I realized not every trip has to be insanely packed and hiking crazy to enjoy it. National Parks are for everyone. You don’t need to even hike too much if at all to enjoy it. I saw so many families and many elderly enjoying the park. For me, that is what it is about and I hope to be in my 70s-80s enjoying National Parks still. With that said, we were able to find some easier hikes with amazing views.

Some brief info on the park. Mount Rainier National Park is about 2-3 hours from Seattle based on the entrance you choose and a good 3 hours from Portland, OR. The best time to go to the park would likely be July to October. I would lean toward August or September but it really is a gamble. It was only clear and sunny one day when I visited and the other 2 days were cloudy, rainy, & foggy, and Mount Rainier was covered by the clouds. The park is huge and has 5 main sections: Longmire, Paradise, Ohanapecosh, Sunrise, and Carbon River/Mowich. Paradise is the most common and has the main park visitor center. Always make sure to check for closures and weather. For instance, one of the hikes I will be recommending, Grove of the Patriarchs, is currently closed for the rest of 2022. 

As stated above, the Nationals Parks are really built for everyone these days. There is so much to see and you don’t need to do long or difficult hikes to get incredible views. If you want to get the best experience out of Mount Rainier National, here are 3 easy hikes that will be quick and fulfilling. Plus, a bonus viewpoint that may be one of the coolest areas to photograph in the park.

Myrtle Falls via Skyline Trail

Distance: 0.8 miles Trail Type: Out & Back

Getting to Myrtle Falls is a simple out & back from the Paradise parking area. Starting at the Skyline Trail on the paved portion heading east for about 0.4 miles and then crossing a small footbridge over Edith Creek Basin. Take a left off the path for the Myrtle Falls viewpoint. This is one of the popular waterfalls in the park standing at 60 feet with Mount Rainier standing tall in the background. This short hike is mostly all paved with little incline so this is for all ages and families looking to get amazing views.

Nisqually Vista Trail

Distance: 1.1 miles Trail Type: Loop

The Nisqually Vista Trail, located in the lower Paradise parking lot by the Henry Jackson Visitor Center, offers stunning mountain views and the trail is filled with wildflowers. There are several lookouts to view Mount Rainier, the Nisqually River, and potentially the lower reaches of the Nisqually Glacier. There is not much elevation to this trail and is one of the only paved trails in the park. This is another family friendly option and strollers are welcome starting from the upper Paradise parking lot, which has ramps to access trails. 

Grove of the Patriarchs Trail

Distance: 1.1 miles Trail Type: Out & Back

The one word I felt walking along the Grove of the Patriarchs Trail was enchanted. Walking through the forest, the bright green color everywhere, all the moss, and of course the massive trees! This short hike is located on the Southeast section of Mount Rainier National Park. The trail meanders along the Ohanapecosh River that takes you to a suspension bridge to a small island destination. Here you will be surrounded by Douglas-firs, silver fir, hemlock, and Western red cedar trees. Some of the large trees can be 40-50 feet in diameter and over 300 feet tall. A very unique and breathtaking trail that is very flat for all ages to explore in the park.

Bonus: Reflection Lake

Another easy to access destination with amazing views is Reflection Lake. Located off Steven Canyon Rd, a few miles from the Paradise turnoff, just a short walk from the car is a perfect photography opportunity of Mount Rainier reflecting in the water. A great spot for sunset or sunrise. There are connecting hiking trails around the lake but all is needed is a view off the road. Definitely a bucket list stop in Mount Rainier National Park. My personal favorite of my trip even with the cloudy weather.

HIKING FOR DONUTS

Hi, I’m Mark. I live in Connecticut. I take new trips every chance I get. A good trip has a great hike, great food, and something fun to do. My goal is to search out new trips and share them to inspire others to try something new and exciting.

If you are looking for posts in a particular place, search City or State here.

SEE OTHER POSTS IN ARCHIVE

RECOMMENDED POSTS

RECENT POSTS

See the latest on Instagram and follow @HIKINGFORDONUTS

Bull Hill (Mt Taurus) Hike, Cold Spring, NY

Trail Description: Bull Hill (Mt Taurus) is a loop trail that offers amazing views of the Hudson River and surrounding mountains in the Hudson Highlands such as Storm King and Breakneck Ridge.

Trail Info:

Where: Cold Spring, NY Distance: 5.4m (3-4 hours) Difficulty: Moderate to Difficult Trail Type: Loop Features: Views, Mountains, Valley, River, Ruins

How to get there:

The trailhead is north of Cold Spring village along Route 9D by about a mile. The parking is shared with Little Stony Point. The location you may see searching on google map will be the Washburn Trail, which is where the hike begins.

Click here for parking lot coordinates

Hiking Tips

  • There are multiple trails, can choose short or long route.

  • Stick to a loop trail and connecting to other trails to get back. The terrain is steep going up, probably not fun going down…unless that is your thing!

  • Parking lot is small, fills up very quick on weekends!

The Hike

Starting at the parking area, you have a decision. How long do you want to hike? To be completely honest, my intention was to take the short route but I ended up hiking about the same as the full loop somehow. So, this is the short loop with a little twist. To begin, start trekking on the right to the white marked trail, the Washburn Trail.

The trail follows through the woods along a road at first with a gradual incline. This will lead to an open area with a sign to take a sharp right to continue on the trail.


This is a well marked trail and there are many signs for all the viewpoints.

The first few miles are pretty steep before you reach some viewpoints.


The first viewpoint will be a view of the Hudson River with Breakneck & Storm King Mountain in the background. Shortly after, the second viewpoint provides views of Cold Spring & West Point in the distance.

Continue along the white trail markers as the trail incline increases. There will be more views to take in. Eventually, the trail reaches an intersection. The short loop will be to your left following the yellow marker and the full loop is straight ahead following the white trail. I wanted to reach the summit view of Mt Taurus so I went straight here. Continue on this trail and you will notice some rocks with the word “View” painted with arrows pointing up. This will lead to the astonishing views from Bull Hill (Mt Taurus).

From here, I retraced my steps back down to the intersection and hopped on the yellow marked trail (Short Loop). You could continue on the long loop as well.

Once on the yellow marked trail, there continues to be awesome views such a clear shot of Storm King Mountain.

Follow the yellow marked trail until reaching signage for the red marked trail to connect to. There will be a stream to your right and a bridge to pass. Follow that and the blue marked trail will connect quickly and this will lead you all the way to the parking lot. There will be gradual decline in switchbacks and will become flat pavement for the last mile or so. Along the blue trail, the ruins of the Cornish Estate can be explored as well but this was a very crowded day so I decided to skip that.

This is a fun hike with so many viewpoints and exploration. It is certainly not easy with a lot of steep inclines the first few miles but the views are nonstop you won’t even notice the difficulty. This is definitely one of the better marked trails and there are many trail options to make the hike your own. Fantastic day hike!

HIKING FOR DONUTS

Hi, I’m Mark. I live in Connecticut. I take new trips every chance I get. A good trip has a great hike, great food, and something fun to do. My goal is to search out new trips and share them to inspire others to try something new and exciting.

If you are looking for posts in a particular place, search City or State here.

SEE OTHER POSTS IN ARCHIVE

RECOMMENDED POSTS

RECENT POSTS

See the latest on Instagram and follow @HIKINGFORDONUTS

Ferncliff Forest Fire Tower, Rhinebeck, NY

Trail Description: This is a short hike that brings you to a fire tower with stunning panoramic views of the Catskill Mountains.

Trail Info:

Where: Rhinebeck, NY Distance: 1.4 miles (1 hour) Difficulty: Easy Trail Type: Out & Back Features: Views, Mountains, Water, Pond, River, Fire Tower

How to get there:

68 Mt. Rutsen Road Rhinebeck, NY 12572

https://goo.gl/maps/cXzcj8ZLTL8BxYBh7

Hiking Tips

  • A busy spot for nice weather and fall foliage. 

  • There are multiple hiking trails in this park, plan your route.

The Hike

From the parking lot, there is a kiosk where you can view the trail map. The yellow-blazed trail starts past the gate. Proceed with the yellow-blazed trail as it inclines gradually along the gravel road. The signage is pretty good on this trail and there are signs to the fire tower.

In about 5 minutes, the trail reaches a pond and there will be a cabin with a sign marked “TOWER” .

And, once you pass the cabin, there is a lean-to that points to the right to continue on the yellow-blazed trail marked “TOWER”. That is the trail you want to be on.

The path continues to climb slowly. There will be another lean-to on the trail and at about another 0.6 miles, the fire tower will be on the left. There are multiple paths that lead to the tower. This is the shortest route. Once my wife and I arrived, there was already a line to go up to the tower. Only 10 people can fit at a time and even that is a stretch. Only family and friend groups were going up.


Once we got up to the top, the panoramic views were amazing! Views of the Hudson River, Catskills, and the Kingston-Rhinecliff Bridge. The fall colors were really popping. This is a great spot for sunset or sunrise. We didn’t get to spend as much time as we wanted up top as we wanted to be considerate to others waiting in line. We returned the same way we came but you could get back to the parking lot a different way.

HIKING FOR DONUTS

Hi, I’m Mark. I live in Connecticut. I take new trips every chance I get. A good trip has a great hike, great food, and something fun to do. My goal is to search out new trips and share them to inspire others to try something new and exciting.

If you are looking for posts in a particular place, search City or State here.

SEE OTHER POSTS IN ARCHIVE

RECOMMENDED POSTS

RECENT POSTS

See the latest on Instagram and follow @HIKINGFORDONUTS

Hiking the Breakneck Ridge Trail, New York

Trail Description: The Breakneck Ridge hike is one of the most challenging trails in the Hudson Valley. The mountain is known for rocky terrain, steep rock scrambling, and beautiful views of the Hudson Valley. This trail is immensely popular due to its easy access.

Trail Info:

Where: Cold Spring, NY Distance: 3.7 miles (3.5-4.5 hours) Difficulty: Strenuous Trail Type: Loop Features: Views, River, Mountains, Rock Scrambling

How to get there:

Typing the location “Breakneck Ridge Trailhead” into Google Maps will take you near the parking areas. There are multiple parking spots along State Road 9D, just park where you can north of the tunnel. There is a small lot near the trailhead and a larger lot further down.

Click here for coordinates

For those concerned about parking/driving, this hike is accessible via train. There is a MTA to the Breakneck Ridge train station that is within walking distance to the trail on weekends only.

Hiking Tips

  • Go on a weekday to avoid the crowds, if possible. Go early on weekends. 

  • Be prepared to rock scramble & use your hands to scale the cliff.

  • Not dog friendly (unless small dog that you can carry or your dog is a mountain climber)

The Hike

After parking, make sure you are walking along the right hand side of the road. The trailhead starts to the right of the tunnel, where there is trail signage and maps. 

There are 3 trail route options for Breakneck Ridge. There is a sign explaining this at the beginning of the trail. The options consist of the short loop (2 hours) ,the regular/classic loop (3 hours), or the trail back to Cold Spring (4 hours). This guide will be the option we took which is the full classic loop.

There is a set of rock stairs that will bring you to the sharp ascent. Follow the white trail markers and start climbing! The terrain on the trail is pretty hard right away. There is a very steep ascent and I needed my hands and knees to get me through this portion of the hike. If you did bring hiking poles, I would suggest securing the poles to your backpack here as they will not be helpful. Depending on your level of climbing up, this can be anywhere from 30 minutes to an hour. 

IMG_2114.jpg

Keep climbing until you reach the flagpole. You will see Pollepel Island with Bannerman’s Castle to your right, along with views of Storm King Mountain straight ahead across the river.

IMG_9565.jpg

After taking in the views and enjoying a break, continue to follow the white markers as the incline continues. This part is less intense but still some rock scrambling. There is an area in the trail where you can choose to go steeper or take the easier ascent marked with X with an arrow pointing left & right. The easier route was definitely welcomed after the steep climb.

IMG_2148.jpg

Continue to climb higher and there is another viewpoint with the flagpole far in the distance from above.

IMG_2172.jpg
IMG_9638.jpg

Keep climbing until there are no more bluffs and cannot continue further.This is where you head into the forest. The next few miles are much, much easier. You could go back down the way you came but it’s a tough way down and you will be greeted with a traffic jam of many hikers ascending up.

Continue on white markers &  ignore the yellow marked trail for now.

There will be a fork eventually. Look for a turn off to the red marked trail (tough to miss red marking on rock). Follow red trail down a gradual descent through woods.

IMG_9659.jpg

Depending on your pace, the red trail will dead end in about 30-60 minutes where you take left onto yellow trail (Wilkinson Memorial Trail) and keep going downhill and follow all the way to the parking area.

IMG_2203.jpg
IMG_9666.jpg

HIKING FOR DONUTS

Hi, I’m Mark. I live in Connecticut. I take new trips every chance I get. A good trip has a great hike, great food, and something fun to do. My goal is to search out new trips and share them to inspire others to try something new and exciting.

If you are looking for posts in a particular place, search City or State here.

SEE OTHER POSTS IN ARCHIVE

RECOMMENDED POSTS

RECENT POSTS

See the latest on Instagram and follow @HIKINGFORDONUTS

Poets’ Walk Park, Red Hook, NY

Trail Description: Poets’ Walk Park is an easy jaunt through scenic meadows that offers wonderful views of the Hudson River and Catskills.

Trail Info:

Where: Red Hook, NY Distance: 2.4m (1.5 hours) Difficulty: Easy Trail Type: Loop Features: Views, Mountains, Water, River, Bridge

How to get there:

776 River Road, (County Road 103) Red Hook, NY

https://goo.gl/maps/y9V6GaXcWxRzqd6P9

Hiking Tips

  • Walk the entire loop. Many see the views of the bridge initially and turn around.

  • Not great phone service, so make sure to screenshot a map. Or my guide!

  • For trail map, click HERE.

The Hike

As I continue to look for the best bang for your buck views, I really don’t think it gets better than taking a stroll through Poets’ Walk Park in the fall.  The Hudson Valley is full of amazing landscape and mountainous views. Most of those views require challenging hiking. However, a leisurely stroll in Poets’ Walk Park offers stunning views of the Catskills and the Kingston-Rhinecliff Bridge.

From the parking lot, begin walking on the gravel road by the trail signage. Continuing straight through the open field will lead you to a gazebo structure. Walking through the gazebo, there is the first “oh snap” view of the Kingston-Rhinecliff Bridge with the Catskills looming in the background. There is a neat little wooden bench to take a seat and enjoy the views.

The trail will split from here, where the loop begins. Either direction will bring you back to this spot. We chose left heading toward the river. Some great views of Catskills to the right and a closer view of the bridge to the left. The loop will begin on the right and suddenly you will find myself thwarted into the woods. There will be a few bridges to cross. If you need a moment of solitude, the Summerhouse gazebo area is a good spot to take a seat and look out into the mountains above the river.

From the Summerhouse structure, just retrace your steps back to the trail split and head on back to the parking lot. Easy peasy. The skies cleared on our the way back and the fall colors really popped. Just incredible views.

Depending on how long you choose to explore, take pictures, and enjoy the benches, this shouldn’t take more than an hour and half, give or take. Definitely one of those places I considered keeping to myself but the place was crazy packed. There is no secret here. It’s a spectacular park to visit for stunning views.


HIKING FOR DONUTS

Hi, I’m Mark. I live in Connecticut. I take new trips every chance I get. A good trip has a great hike, great food, and something fun to do. My goal is to search out new trips and share them to inspire others to try something new and exciting.

If you are looking for posts in a particular place, search City or State here.

SEE OTHER POSTS IN ARCHIVE

RECOMMENDED POSTS

RECENT POSTS

See the latest on Instagram and follow @HIKINGFORDONUTS

Jordan Pond Loop Trail, Acadia National Park

Trail Description: The trail is an easy hike that circles Jordan Pond with many opportunities to explore the shore and observe wonderful views.

Trail Info:

Where: Mount Desert, ME Distance: 3.4m (1.5-2 hours) Difficulty: Easy Trail Type: Loop Features: Views, Mountains, Pond, Water

How to get there:

The Jordan Pond North Parking Lot is located on the left side of Park Loop Rd at the Jordan Pond House. There is another lot next to the restaurant for additional parking as the lot fills up quickly.

https://goo.gl/maps/oQGDyrrCaNHjccsb8

Hiking Tips

  • Weekends are super crowded. Beware! Parking can be tough.

  • Post hike, eat at the Jordan Pond House. Get a popover & blueberry lemonade!

The Hike

One of the more iconic landscapes you will see at Acadia National Park is Jordan Pond. If you find yourself in Acadia, this has to be added to your list of things to check out. The shoreline of the pond has amazing views of The Bubbles, two glacially sculpted mountains at the northern end of Jordan Pond. The views are great all times of day, especially sunset and stargazing at night. Not only are the views spectacular, but the rewards of delicious food at the Jordan Pond House is almost worth the visit alone. 

This was my very first trip to Acadia. I was not a happy camper to show up to nothing but fog. However, as I am learning, planning trips for national parks is impossible. You take what you can get from mother nature. Even though it was foggy, my wife and I decided to circle Jordan Pond as intended. We did have a few moments where the fog began to lift for some cool views on the pond and a tease of that fall foliage we drove 6.5 hours for! But that dissipated rather quickly. Even so, the eerie look was pretty cool. 

The beginning of the trail can be found at the end of the field at the Jordan Pond House.  The trail will be split as you approach. We chose to head right to stroll along the east side first. This section of the trail is more level. There are some bridges to cross over the streams that flow into the pond. As we made our way to the left side, there is a dirt trail, boulders, and a wooden plank path through the wetlands. The last 0.5m of the hike was on elevated boards, which I thought was a really cool way to protect the ecosystem. There are various points on the trail where you can hop off and explore the pond's shores. Other than that, the trail is well-marked and pretty self-explanatory. 

The other great thing is that you do not need to really hike that entire trail to see some amazing views. The Jordan Pond House practically overlooks the pond. We did not get a chance to eat there the first day so we came back the next day and the weather was beautiful. I walked around the east side again briefly and I was able to see the stunning views I came here for.

Make no mistake, the views are as advertised. BUT do not, at any circumstance, miss out on a popover from the Jordan Pond House. By far, the best meal I have ever had in a national park. That popover with the jam and butter and you have to get the blueberry lemonade, magnifico! We actually tried the bison meatloaf sandwich too. Pretty damn good.

For views like this in a national park, this is as easy as it gets for a hike, or leisurely stroll. The trail is for everyone including children & dogs. It’s a great starter hike to get blood flowing or cool down after some more treacherous trails. This is a classic Acadia hike that should be added to your National Park bucket list. The view of the water with the curves of The Bubbles in the background is quite memorable. And, when you finish, it’s time for a popover!

HIKING FOR DONUTS

Hi, I’m Mark. I live in Connecticut. I take new trips every change I get. A good trip has a great hike, great food, and something fun to do. My goal is to search out new trips and share them to inspire others to try something new and exciting.

If you are looking for posts in a particular place, search City or State here.

SEE OTHER POSTS IN ARCHIVE

RECOMMENDED POSTS

RECENT POSTS

See the latest on Instagram and follow @HIKINGFORDONUTS

Pine Knob Loop Trail, Sharon, CT

Trail Description: The Pine Knob Loop Trail is located in Housatonic Meadows State Park and Housatonic State Forest. This short, challenging trail connects to the Appalachian Trail. The hike will bring you to a beautiful vista view of rolling hills over the Housatonic River valley.

Trail Info:

Where: Sharon, CT Distance: 2.8m (2 hours) Difficulty: Moderate Trail Type: Loop Features: Views, Mountains, Valley, River

How to get there:

By google mapping, “Pine Knob Loop Trail” this should lead you to the trail parking area. Link below.

https://goo.gl/maps/36Fa5oy7HjjrHTZP9

You will see the parking lot located on the left coming from Route US-7 N. There is a visible sign as well. The lot can fit 15-20 cars.

Hiking Tips

  • Go counter clockwise if you like your knees!

  • Not great phone service, so make sure to screenshot a map. Or my guide!

  • Due to storms, some trees are down with trail markings. Just make sure to keep an eye out.

The Hike

Beginning the hike, the trail leads directly into the woods. There is a small brook to cross that leads to the fork of the start of the trail, where you will see the blue blazed trail sign. Prior to the hike, my wife and I did some research and counterclockwise was recommended based on our findings. We prefer to go up an incline & scramble then come down on a steep decline. This is the knee friendly option and safer in my opinion (lessons learned). Also, I like to get the hard stuff out of the way. Staying straight at the fork on the blue blaze trail is how we started. The steep incline starts gradually about 0.4m into the hike. Really get the blood flowing out the gate.


The terrain will be a bit of a strenuous incline then leveling off with a small decline and then right back to steady uphill climb. Nothing your average hiker can’t handle.

At 1.1m, this is the time to catch your breath when you reach the first sneak peek of views. Then it is all worth it when you see the spectacular vista view of the hills and mountains of the North West valley of Connecticut. From here you can see Bald Mountain, Bread Loaf Mountain, Woodbury Mountain, DudleyHill, and Whitecomb Hill. Really impressive view.

Pine Knob Loop trail , Sharon, CT

After absorbing the stunning views, continue back onto the blue trail until this connects with the Appalachian Trail that is the white trail marking at about 1.3m. 

Connecticut has had a plethora of storms lately so there are many trees down. Some had trail markings on them so be mindful of that. Otherwise, this is an amazingly marked trail and easy to follow. At 1.7m, you will see the rolling hills view again from the east. This view is blocked by some trees but is still amazing nonetheless.

At 2.1m, the blue and white trail will go separate ways. Turn left on the blue trail to finish the loop. We noticed a hatch brook that appears to have water cascading down on certain days but it has been dry lately. Nothing to see on this day. The rest of the hike was a fairly easy stroll through the trees and forest.

The Northwest part of Connecticut is unexplored territory for me. Based on my research, this area of CT offers many great hiking trails. The Pine Knob Loop Trail was my first experience in the area. And, I was not disappointed. The trail was not busy at all. We saw more people once we connected to the Appalachian Trail portion. I would highly suggest hiking poles for this trail. The hike offered various degrees of difficulty and an amazing summit view. This would be a great fall foliage hike. Also, there are two wineries within 15 minutes from the hike if you need to persuade a hiking companion. Looking for something different, check this one out!

HIKING FOR DONUTS

Hi, I’m Mark. I live in Connecticut. I take new trips every change I get. A good trip has a great hike, great food, and something fun to do. My goal is to search out new trips and share them to inspire others to try something new and exciting.

If you are looking for posts in a particular place, search City or State here.

SEE OTHER POSTS IN ARCHIVE

RECOMMENDED POSTS

RECENT POSTS

See the latest on Instagram and follow @HIKINGFORDONUTS

Colorado Road Trippin’ for Donuts

In my years of traveling, Colorado has been my favorite state to visit for the food, the beer, and the outdoors/hiking. I still have barely scrapped the surface. On my third visit this spring, I drove over 1000 miles and visited 7 cities. My prior trips did not consist of too much donut research. Hence, there were many donut shop visits along the way on this trip. This is not a best of list by any means. There are lots of donut shops in Colorado. In this post, I will be sharing my experiences of the donut shops I visited during my trip. SPOILER ALERT, Colorado has some great donuts shops.

Voodoo Donuts Denver, CO

The first stop off the plane was Voodoo Donuts. The popularity of this donut shop makes it a must try.  Once you walk in, you see and feel how different this is than a standard donut shop. There is a hip and fun vibe going on. There’s a big selection of unique flavors and types of donuts. They are known for a raspberry filled donut shaped and decorated like a Voodoo Doll and their wittiness. The crazy options I chose were the Chuckles, chocolate frosting dipped in hot chocolate cocoa powder with peanuts and caramel and chocolate drizzle, and the ODB, chocolate frosting with Oreo cookies and peanut butter. In addition, I had to the get the Voodoo Doll, Plain Glazed, Double Chocolate Cake, and Maple Bar.

City Donuts, Denver, CO

City Donuts has a few locations spread out through Colorado near the Denver area. This was your standard old school donut shop. The customer service was fantastic. The person working went into detail on how their donuts were made and the history of the company.  Appreciated it because it gave me time to decide what I wanted. Unfortunately, I was pretty full from breakfast but I settled on the Maple Glaze and Chocolate Frosted with sprinkles. Super fluffy and tasted homemade. Pretty big sized donut as well. And, they hooked me up with some free donut holes.  The bag the donuts came in was a great touch.

Amy’s Donuts, Colorado Springs, CO

The stand out donut shop in Colorado Springs has to be Amy’s Donuts. This shop had my head on a swivel. Not even over exaggerating, there were over 50 different flavor combinations. To narrow it down was a tough task.  They covered the basics but then went over the top with wild toppings and flavor combinations like Almond Banana Caramel, Butterfinger, and Maple Bacon Fudge. The final decision was the Maple Turtle, Reese’s Pieces, Nutella Crumb, Bizmallow Caramel, and S’mores. And, a Raspberry filled glazed bar to complete the spectrum of donuts. They will pipe in the jelly fresh when you order. Big fan of that. The verdict, the Maple Turtle was amazing as it sounds.

Montrose Donuts and Deli, Montrose, CO

The perfect hiking for donuts location. Located 15 minutes outside of the Black Canyon of the Gunnison National Park, you must visit Montrose Donuts and Deli. When I walked in, I was delighted to see all the options. They had bear claws, old fashion, cake, yeast, cinnamon bun, bow tie, cruller, French cruller, fritter, bars, and filled donuts along with muffins and more baked goods. And, a glazed buttermilk bar. What?!? I had to try this. Best donut of the trip. Tasted like a delicious and sugary glazed biscuit. Along with the glazed buttermilk bar, I also tried the chocolate cake sprinkle, bow tie glazed, blueberry glaze cake, cinnamon crumb, old fashion maple, and cinnamon crumb glaze fritter. The donuts were all pretty delicious. Highly recommend for your hiking for donut needs.

OMG Donuts, Arvada, CO

Located in a small plaza driving through Arvada, I found myself at OMG Donuts. This is another small business, old school shop cranking out the classics.  Very friendly. I got there late afternoon and they still had some good options. I went with the Plain Glazed, Double Chocolate Cake, Maple Bar, Chocolate Frosted and Red Velvet. The red velvet cake stood out to me for some reason and that was the best decision I made. One of the best cake donuts I have EVER had. Wow, super moist and the flavor was on point. The chocolate cake was good also, super chocolaty almost like eating a chocolate cake. The yeast donuts were fluffy and light. This was a great donut shop find.

HIKING FOR DONUTS

Hi, I’m Mark. I live in Connecticut. I take new trips every change I get. A good trip has a great hike, great food, and something fun to do. My goal is to search out new trips and share them to inspire others to try something new and exciting.

If you are looking for posts in a particular place, search City or State here.

SEE OTHER POSTS IN ARCHIVE

RECOMMENDED POSTS

RECENT POSTS

See the latest on Instagram and follow @HIKINGFORDONUTS

24 Hours in the Black Canyon at the Gunnison National Park


The Black Canyon of the Gunnison National Park is one of the least known national parks and that is a travesty. I admit, I wasn’t too familiar with this park myself.  Located in western Colorado, the Black Canyon of the Gunnison did not gain National Park status until 1999, making it the second youngest national park in the U.S. The Black Canyon is named so because the walls are often covered in shadows making them appear black. These steep walls were formed over 1.7 billion years ago. Another awesome note on this park is that it contains 12 out of the 48 mile-long canyon of the Gunnison River.

For most national park or outdoors enthusiast, you want to experience as much as possible in your travels. Planning trips can be difficult and offer time restraints. Exploring most national parks you need anywhere from 3 days to two weeks. On my recent Colorado road trip, I planned for one day at the Black Canyon of the Gunnison National Park. There is a North and South Rim. This guide will be for the South Rim only. This rim is more developed and accessible. Can you explore the entire South Rim in 24 hours? The answer is yes. The best time to visit is April to November. We stayed in Montrose, which is about 15 minutes from the park. The downtown is pretty cool. Oh, and there is an amazing donut shop, Montrose Donut and Deli Shop. The best donuts I had in Colorado. Get the biscuit donut. I digress…..

The South Rim is comprised of a modest 7 mile loop with 12 spectacular overlooks.  I suggest to stop at each overlook. A lot of the overlooks do require walking a short trail but nothing strenuous. I would not miss out on Painted Wall, Cedar Point and Sunset View.  There are multiple hikes on the South Rim. I went out of my way to do them all and to be honest, if you are stressing for time, skip the hikes. If camping is your thing, there are campgrounds here.  Lastly, do NOT leave the park without driving down East Portal Road. I cannot recommend that enough. There is no crowd concern at this park. I counted maybe 30 people on a Friday in mid-May. I read the peak of the visitors stroll through in July. There are even less visitors on the North Rim, which is a 3 hour drive from the South Rim. However, the views are even more dramatic from the North Rim. The scenic driving was amazing. This park should be way more popular. The views were ridiculous. One of the best experiences I had in a national park. Here’s my guide to the South Rim of the Black Canyon of the Gunnison.

How to get there

Black Canyon’s South Rim is about 14 miles from Montrose and 63 miles from Gunnison. To get there from Montrose, travel 7 miles north on CO Highway 347 from the intersection with U.S. Highway 50 east of the city.

Viewpoints (South Rim)

The first viewpoint that visitors will see entering the park is Tomichi Point. This is right off the side of the road, no hiking needed.  The second viewpoint, Gunnison Point, is located right behind the visitor center. A short path down some steps leads views of the canyon facing northwards. The view is more vivid than Tomichi Point and there is sneak peak of the ravine.

The next viewpoint is about two miles down the road at Pulpit Rock Overlook. There is a 134 yard trail leading to this area. The canyon really opens here with the river in view as it curves around a 90 degree bend. Cross Fissure View offers a different a unique look at the canyon. The river is not visible and most of the canyon is hidden. There is a view of overlapping ridges and crevasses from multiple angles. This viewpoint is a 357 yard walk.

Rock Point is a less traveled path at 294 yards.  The longer the path the less visitors you will see. Devils Lookout is the longest path at 607 yards. This path goes right the edge of the rims for great views including the river and the valley. Both this and Rock Point lie above the narrowest part of the entire canyon.

Chasm View is one of those jaw dropping views. This is a very short path off the road above the steepest part of the whole canyon.  Painted Wall View is almost adjacent to Chasm View. This may be the most well-known viewpoint.  Painted Wall is the highest cliff in Colorado at 2,250 feet and a half mile across. 

Every viewpoint from here on is a must see. Cedar Point is a 303 yard path overlooking the lower canyon.  This is a spectacular view as you can see 1.5 miles of the river, flowing rapids, and some greenery below. Next up, Dragon Point offers very similar views. The widening ravine enclosing colorful waters of the river. This can be reached by a path of 300 yards.

Sunset View was one of my favorites. This is the westernmost viewpoint along the South Rim road. There is large parking area along with restrooms and picnic tables. This a great place to soak in amazing views of the canyon. This is the longest stretch of V shaped canyon. The last viewpoint is another mile down the road, High Point.  There’s not much to this but you have to pass this in order to turn around and head back. 

The Hikes (South Rim)

At the end of South Rim road, there is a parking lot where the Warner Point Trail begins. This a 1.5 mile out and back that takes you to the furthest overlook on the South Rim.  The trail starts flat with views of green fields 1,000 feet above Bostwick Park. The trail begins to climb slowly then drops and ascends again before reaching the final viewpoint. This overlook offers stunning views of the San Juan Mountains, West Elk Mountains, Uncompahgre Valley, and the canyon. If you choose a hike in the South Rim, this would be the one I suggest.

Warner Point

The Oak Flat Loop begins by the visit center.  The trail is narrow and traverses down a steep slope. This offers a peek at the landscape below the canyon’s rim. This is the most challenging hike in the South Rim with steep uphill and downhill portions. In total, the loop is 2 miles.

Rim Rock Nature Trail starts at the visit center or the Campground Loop C entrance. You can even hop on this trail from Tomichi Point. This relatively flat hike takes you along the rim of the canyon for views of the Gunnison River and sheer walls of the gorge below. This can be between 1-2 miles.

East Portal Road River Access

Located right at the entrance/exit to the park, you will see the access for East Portal Road. This is a 5 mile road with a significant decline (16% grade) with hairpin turns taking your car to the base of Black Canyon. This is the only way to get down into the canyon. Once arriving at the bottom, the views from down below are gorgeous.  The picturesque surroundings of the beautiful lake and the cliff walls of the canyon from up above are majestic. By far the coolest experience I had in the park. I was just in awe. I read a lot of things online and it made it sound dramatic and dangerous to drive down. Any car/van can handle it. Vehicles with an overall length (including trailer) greater than 22 feet are prohibited. Trailers may be left unhitched and left at a parking area at the campground entrance. This road is closed in the winter. Just be smart about driving down. It took us about 30 minutes. This is a bucket list type event. Don’t chicken out!

The drive down into the canyon.

HIKING FOR DONUTS

Hi, I’m Mark. I live in Connecticut. I take new trips every change I get. A good trip has a great hike, great food, and something fun to do. My goal is to search out new trips and share them to inspire others to try something new and exciting.

If you are looking for posts in a particular place, search City or State here.

SEE OTHER POSTS IN ARCHIVE

RECOMMENDED POSTS

RECENT POSTS

See the latest on Instagram and follow @HIKINGFORDONUTS

Zealand Falls Hut to Zeacliffs, New Hampshire

Zealand Falls Hut to Zeacliffs, New Hampshire

Check out the new blog post an epic day hike in the White Mountains of New Hampshire. This hike follows the Zealand Trail to the Zealand Fall Hut, and eventually to the Zeacliffs overlook. From here, there are incredible views of Zealand Notch and the Pemigewasset Wilderness.

Minnewaska State Park Reserve

Minnewaska State Park Reserve

Minnewaska State Park Reserve is located in Kerhonkson, NY on the Shawangunk Ridge. The park is full of numerous awesome hiking trails to spend hours exploring. This post will cover Awosting Falls, Lake Minnewaska, and Kempton Ledge. Great picturesque views through out the hiking trails. A great visit visit to Minnewaska State Park reserve. Hiking for Donuts approved.

Artists Bluff Trail, Franconia Notch State Park

Artists Bluff Trail, Franconia Notch State Park

Artists Bluff is one of my favorite trails in the White Mountains of New Hampshire located in Franconia Notch State Park. This trail checks off all boxes for a great hike. The views are spectacular. Check it out!

Arches National Park, Utah

Arches National Park, Utah

Utah is filled of awesome and cool areas to explores. Especially, if you want to see some arches. Check out my blog on some must see landmarks in Utah!

Hiking the Rockies: Hallett Peak

Hiking the Rockies: Hallett Peak

If you want to try a challenging hike in Colorado, this post is for you. Check out my Hallett Peak hike and advice not getting lost like me!

Hiking in Iceland: Thórsmörk

Hiking in Iceland: Thórsmörk

In 2010, a Volcano erupted in Southern Iceland. This eruption occurred near a popular hiking path from Skógar to Thórsmörk. Luckily, during my trip, the hiking route was opened. The terrain was difficult and cut the hike short but the views along the way were mesmerizing.

Exploring Iceland, Part 1

Exploring Iceland, Part 1

Iceland is one of the more popular destinations for travel right now. Back in 2014, my college friends and I explored 10 days and 1400 miles. It was the most adventurous trip I have ever been on. Here are some of the sights and destinations of that trip.

Sunset Rock State Park, Crescent Lake, Southington, CT

Sunset Rock State Park, Crescent Lake, Southington, CT

Check out the Crescent Lake trail in Southington, CT. This was a confusing trail but well worth the views. Enjoy!

First trip to the Adirondacks

First trip to the Adirondacks

My first trip hiking in the Adirondacks in NY. I was able to wake up to Paradox Lake each day, hike Mount Severence, and check out Paradox Brewery.