


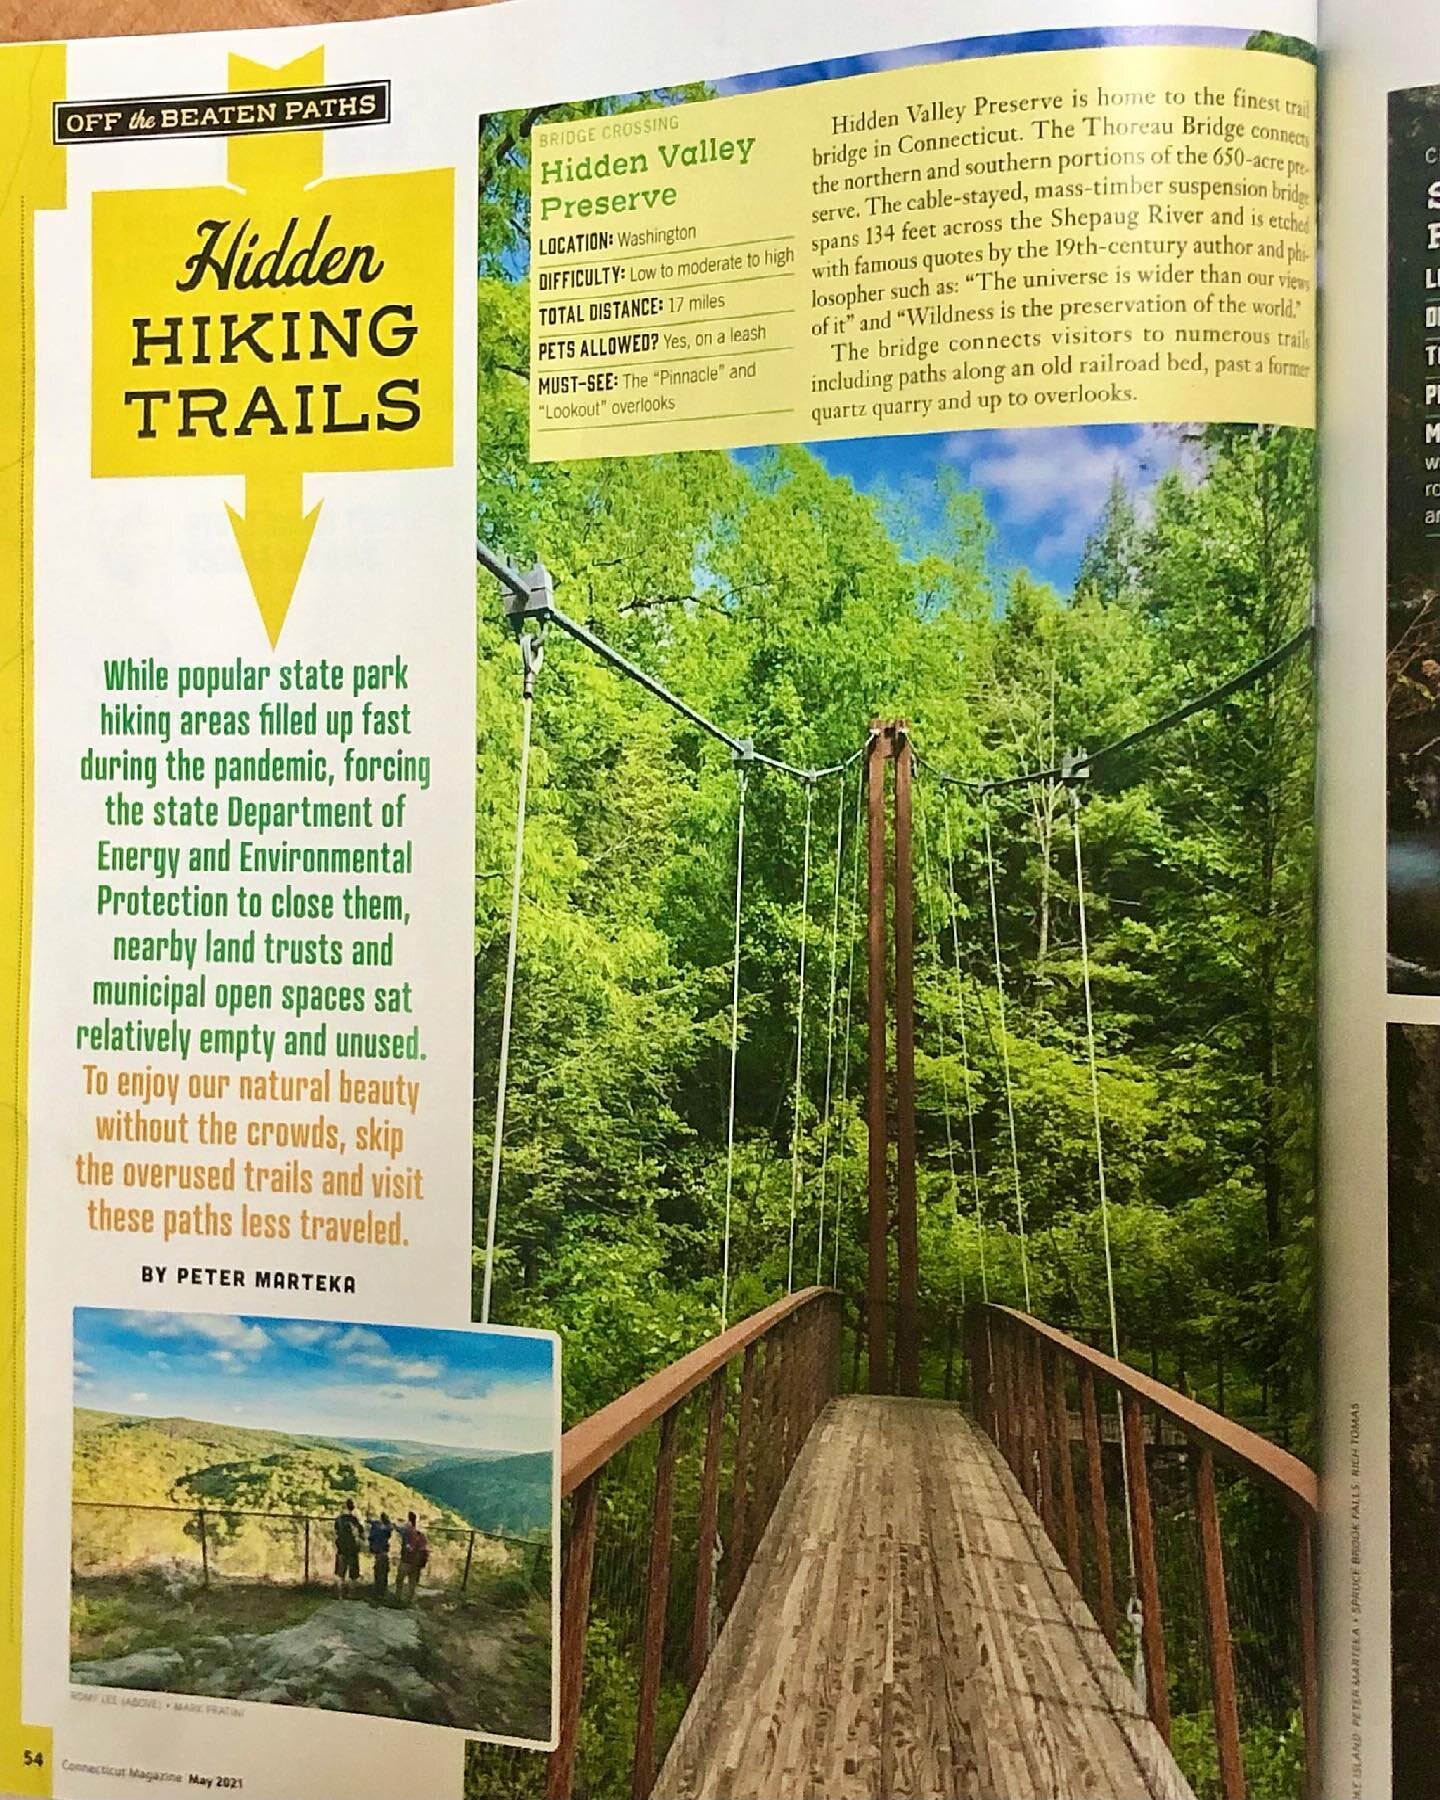
Hiking Mount Agamenticus, York, Maine
Trail Description: The Mount Agamenticus Conservation Region is located in Southern Maine. The Mount Agamenticus Loop is a popular trail that provides 360 degree views at the summit of the surrounding mountains in the distance.
Trail Info:
Where: York, ME Distance: 1.8m (1 hour) Difficulty: Easy toModerate Trail Type: Loop Features: Views, Mountains, Valley
How to get there:
Typing the location “Mount Agamenticus Trailhead” into Google Maps will take you to the parking lot. You can’t miss it. There is a lot of parking. It’s $2/hr to park and there is a barcode to scan for the app to use to pay. It was easy peasy in my opinion. And, worth the money based on how well they keep up with everything.
Coordinates: 43.21720438450835, -70.69198787482621
Link to google maps location here.
Hiking Tips
I suggest caution if it rained days prior. The trails in the forest are mostly roots and rock. Dry it’s no biggie but wet I don’t think it would be as enjoyable.
Download a copy of the trail map here.
There are multiple trail options. This guide is for the loop via Blueberry Bluff, Witch Hazel, and Ring Trail. The Big A trail has separate parking and is a 1 mile loop that’s mostly gravel & an easier option (stroller and wheelchair friendly).
The trail and parking lots are well maintained and great facilities. Nicest outhouse bathrooms I ever been in!

The Hike
Once parked at the Mountain Road parking lot, the beginning of the trail head is visible with markers at end of the parking lot.

There will be trail signs promptly upon starting the hike at a fork. Stay right and hop on the Ring Trail, which is the white marked trail.

As stated prior, the trail is very well marked. However, the trail is mostly rocks and roots. I saw some reviews mentioning that it was muddy and unpleasant after a rainstorm. And, I totally understand what they meant. The rocks and roots could be slippery. For us, it was dry and there were no issues.

There isn’t much of an elevation gain, only about 340 feet. But there is a small incline as you make your way to the top. Hiking along the Ring Trail, at almost 0.7m, there will be a small foot bridge with a path to the left at the end. This is the Witch Hazel trail. I did not see signs but based on the trail map, this was the way to go.

The Witch Hazel trail is brief. Only a few minutes to reach the Big A Trail. There will also be a small foot bridge.

And following the Big A trail at the top is where the first lookout platform is to take in all the views.

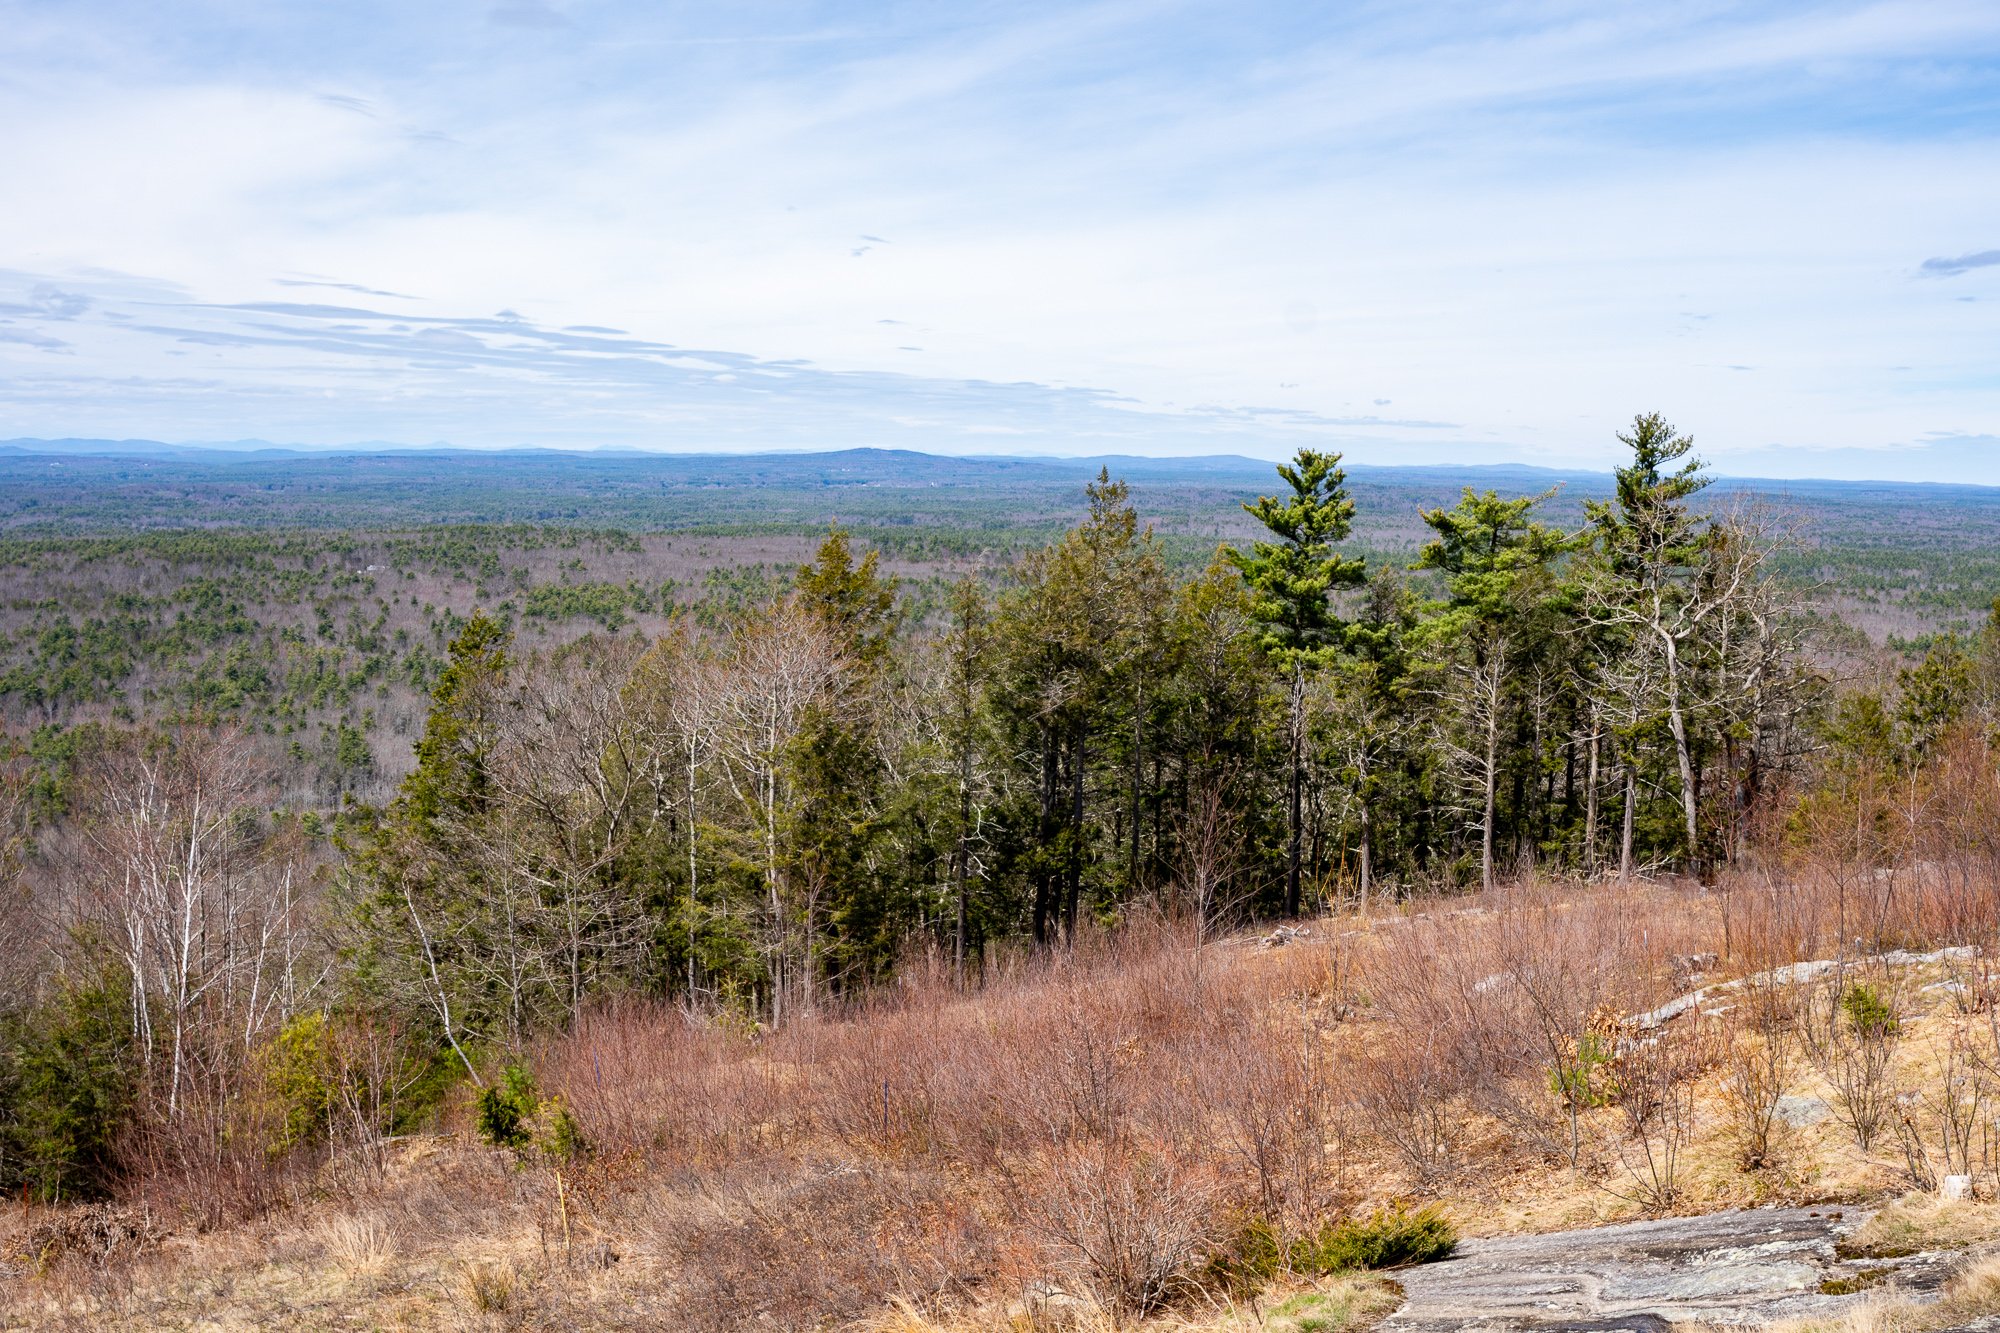
There is another lookout platform with stairs where you can see even higher out into the valley. There is also a fire tower, but it is fenced out and cannot be climbed.


Follow the Big A Trail out until it connects to the Blueberry Bluff, which is marked red. There is also an additional viewpoint here before the Blueberry Bluff.

Continue down the Blueberry Bluff back to the Ring Trail. Take a left at the sign back to the parking lot. You will cross the road at the end to get back to your car.

Southern Maine is tracking to be one of our favorite areas to visit and this was a great first hike in the area. Good hike to get the heart going and see some cool views. The platforms are a cool feature for viewing on the summit. And, the trails and parking lots are so well maintained. I cannot speak highly enough on that. I was not able to find a great guide with details for this hike so I am hopeful this will be helpful for others. It’s also good to see directions/steps before you go to get comfortability. Not a hard hike to follow but I understand where folks can get tripped up. I still do it many times. Luckily, my wife is always the voice of direction.
POST HIKE ACTIVITIES: The fun doesn’t have to stop here. Lots to do in the area. We stopped by the 90s themed brewery, Odd by Nature Brewing, for some post hike beers and nosh, which is about 8 minutes from the trailhead. And, the Nubble Lighthouse is roughly 15 minutes or so away. Definitely a trip to view. Cape Neddick is really cool. Many restaurants in the area as well. No matter what you decide to do, there is a lot to plan for a great weekend or day trip.


HIKING FOR DONUTS
Hi, I’m Mark. I live in Connecticut. I take new trips every chance I get. A good trip has a great hike, great food, and something fun to do. My goal is to search out new trips and share them to inspire others to try something new and exciting.
If you are looking for posts in a particular place, search City or State here.
SEE OTHER POSTS IN ARCHIVE
RECOMMENDED POSTS

RECENT POSTS


See the latest on Instagram and follow @HIKINGFORDONUTS

Zion National Park Travel Guide - Plan Your Trip
Located in Southern Utah, Zion National Park is one of the most popular National Parks. It has been in the top 3 most visited parks in the US over the past few years and I do not see that changing. Zion is a smaller national park but packs a punch with numerous thrilling hikes and breathtaking views. Lots of easy to moderate day hikes mixed in with some overnight backpacking adventures. Zion is home to many iconic trails such as the Narrows and Angel’s Landing. You don’t even have to hike to see Zion’s beauty. Just driving through the park is amazing. There is really a lot to do in Zion and there is something for all park visitors.
However, like most National Parks, it takes a lot of planning and research to maximize your trip and enjoy all the park has to offer in the allotted time available. There’s a shuttle bus to consider, weather, river flow rates, permits and reservations. In this guide, I hope to provide you with all the best information to have an incredible trip in Zion National Park.
About Zion National Park
Zion National Park is located in Southern Utah with the closest airport approximately 2.5 hours away in Las Vegas. And, the next closest is 4.5 hours away in Salt Lake City. You can either do this as a standalone trip and or make it a road trip for more Utah national parks. My trip included Zion, Bryce Canyon, and Capital Reef from Las Vegas. You will need to rent a car from whichever airport you choose.
Travel Tip: Zion has limited parking. If you have an oversized vehicle, most parking lots are not accommodating. Parking in Springdale and hopping on their free shuttle or Zion Canyon Visitor Center would be my suggestion.
Zion National Park shuttle
The Zion Canyon Shuttle is in operation most of the year, typically mid-February/March to November. During the time frame, cars are not permitted to drive in the Park along the Zion Canyon Scenic Drive. Fortunately, the shuttle operated by the Park Service is free, fast, and easy. You do not need to reserve shuttle tickets. The shuttle drops off at all major trailheads in the park and operates 7 days a week beginning mid-March. For more info on the full schedule and hours of operation, check out Zion's website, https://www.nps.gov/zion/planyourvisit/zion-canyon-shuttle-system.htm.
The Park shuttle departs from the Visitors Center in short intervals. Just hop on and get off at your convenience. Make sure you know the correct shuttle stop for your hike. Lines start building up rather quickly mid-morning to board the shuttle. Sometimes over an hour wait during peak season and holiday weekends.
Travel Tip: Try to get in the shuttle line by 8-9am to avoid long waits for the shuttle, especially if you are doing the Narrows or Angels Landing hikes. Also, make sure to check when the last shuttle time for that before you hike. Shuttle start and end times vary depending on the season. Don’t miss the last shuttle. Or else it is another 4 mile walk to the Zion Lodge and then you need to figure out how to get back to the Visitor Center!
If there is no parking at the Visitors Center, there is a second shuttle system in town, the Springdale Shuttle. This connects the hotels in Springdale with the main entrance of Zion in the case there is no parking.
When to Visit Zion National Park
The best time to visit Zion National Park is in the Spring and Fall. The park’s mild weather is best for hiking. And, the crowds are not as bad. April/May and September/October would be ideal. Both times I went were in mid to late May, where the weather was great and crowds feasible for most of the park.
Summer is the peak visitation of the park where crowds can be excessive. Popular hikes can be unpleasant due to the amount of people on the trail. Also, temperatures can often reach over 100 degrees.
Zion National Park is open all year-round, which allows you to hike in the off-season. The park doesn’t see heavy snow in the winter, but it is not ideal conditions to hike the park due to some trails being icy and requiring traction equipment.
With that said, everyone goes to hike the Narrows. This requires more thought. The trail is typically closed in the March to May timeframe when water levels are high. The weather is cooler and the water is much colder. Same conditions apply for the fall. With that said, my last visit was in the middle of May with air temperatures mostly in the mid to high 80s. The water was cold, about 45-50 degrees,but it was not bad at all since the air temperature was so high. No issues with water levels but always check the weather and prepare to rearrange your trip if needed. Summer is a great time to hike the Narrows because the weather is excellent with high temperatures. The days are longer, shuttles run all the way to 9pm, and the water in the river is at its warmest. However, the monsoon season creates the highest risk of flash floods during this time. This can be done in the Winter but the temperatures, air & water, are much colder. The shuttle bus does not run often, only on certain days. And, snowfall can potentially close the trail.

Best Things to do in Zion National Park
Hike the Narrows
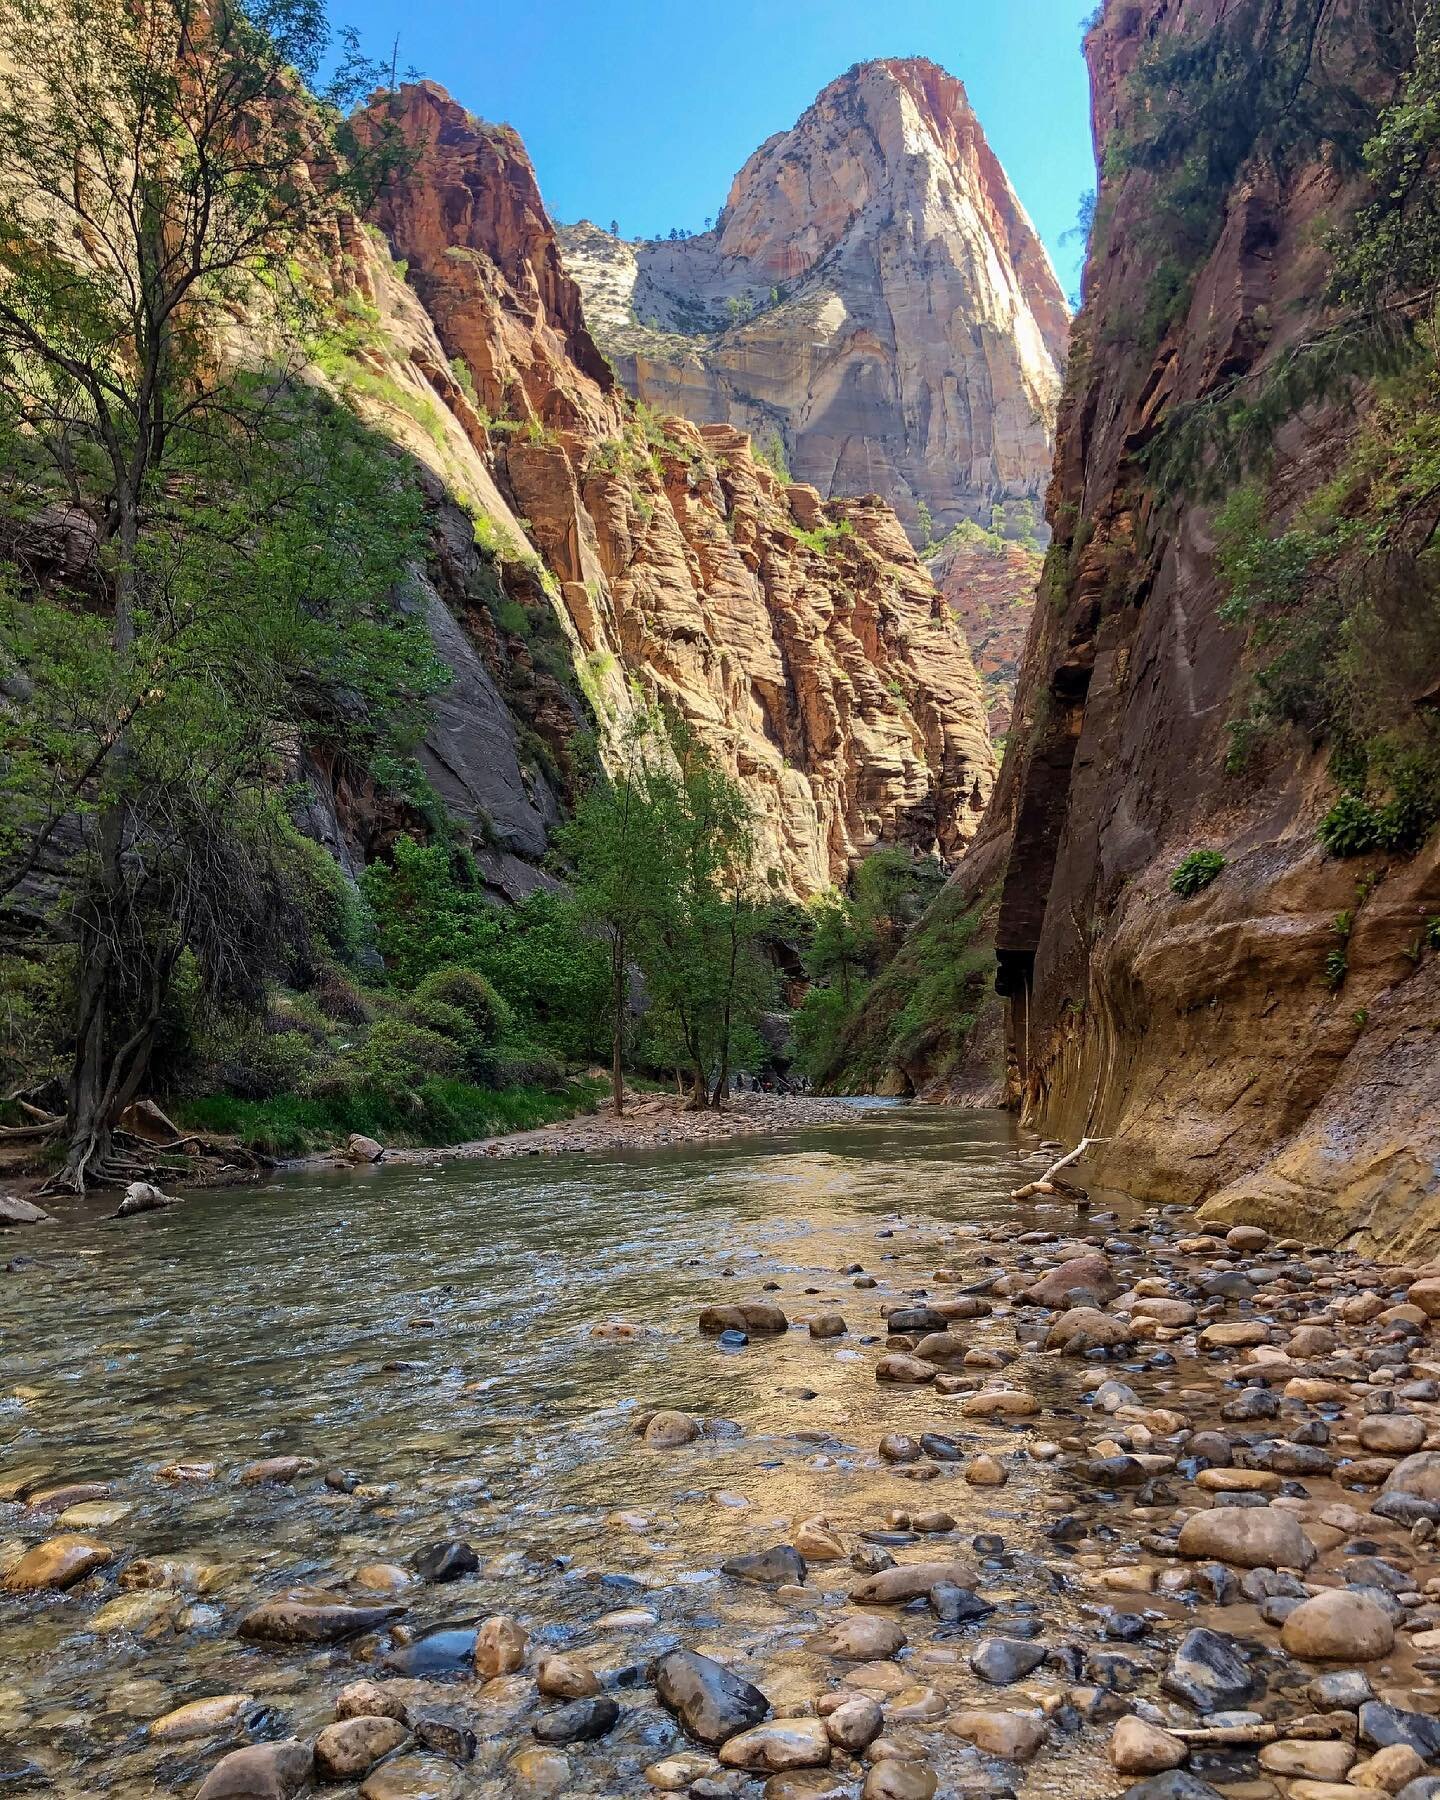
The Narrows leads you through Zion Canyon and the Virgin River with twists and turns through the stunning slot canyon less than 20 feet wide in some areas stretching 15 miles. The “trail” is one of the most popular in the park. There are 2 ways to do this hike, bottom up or top down. Bottom up starts at the Riverside Walk at the Temple of Sinawava trailhead. The hike will continue upstream and the farthest you can go without a permit is Big Springs. This is the route most hikers take. However, for a more adventurous thrill, you can hike the full Narrows top down and a permit will be required. This journey will be 16 miles long and could span over 2 days.
Travel Tip: Catch the Zion Shuttle early. Make sure you watch the weather and bring proper gear for this hike. Do your research!
For more detailed info, including the trail, equipment and more helpful tips, check out my full guide on hiking the Narrows, click here.

Hike Angels Landing
Angels Landing is the most popular hike in the park. Thousands of visitors each year, mostly in the summer, seek out this hike. The trailhead is The Grotto (stop #6 on the Zion Shuttle). This hike is strenuous coming at about 5.4 miles round trip. The elevation gain is 1500 feet. The popularity of the trail due to not only the picturesque view but the thrilling journey to the top. The hike consists of chain-assisted rock scrambling sections and uphill switchbacks. With the final climb scaling a narrow ridge high above the valley floor. This is not for the faint of heart. If you have a fear of heights, this one may not be for you. At the time of my visit, there were no permits and the trail was pretty packed where people were literally on top of each other so I chose to skip. I did not feel comfortable or compelled enough to attempt the\is hike with hikers on my heels the entire time. Since that time, permits are now required via a lottery system. Both seasonally and the day before your planned hike. It costs $6 to enter an application and if you are one of the lottery winners, you will pay $3 per person.
Hike to Observation Point
For some of the best views in the park, the entire hike to Observation Point is stunning. However, the hike is extremely challenging at 8 miles long and 2300 feet of climbing. The climb is steady until the final viewpoint. The trailhead is Weeping Rock (stop #7 on the Zion Shuttle).
More Hiking
Zion National Park is full of so many great hikes. Everyone focuses on the Narrows and Angels Landing but there are others that offer a great hike and amazing views. The hike we were suggested to do by the ranger was The Watchman Trail. I don’t see too much mention of this hike on other guides and I don’t understand why. I felt every bit like I was immersed into Zion as the others do. The trail starts at the Visitor center and slowly climbs with switchbacks and moderate inclines. The total round trip is 3.3 miles. There is a small ¼ mile loop at the end of top of the one way that takes right under the Watchman.
If you have read my guides before, I like to get the best bang for my buck sometimes hiking. They don’t all need to be 8 milers to get the wow effect. The Canyon Overlook Trail is a 1 mile out and back that offers one of the best views in Zion. This trailhead is located on the opposite side of Zion Mt. Carmel Tunnel on Highway 9. You will need a car as the shuttles do not run on this side of the park. This trail starts with climbing a series of steps before walking beside the steep drop-offs of the Pine Creek slot canyon. Eventually, this will lead you to the amazing view at the summit.
Travel tip: Go early or go later in the day for the Canyon Overlook Trail. There is not a lot of parking here.
Looking for something less intense, flat, and has views, the Pa’Rus Trail is for you. The paved trail connects the Zion Canyon Visitor Center and Canyon Junction. The trailhead starts near the Watchman Campground and follows the river for just under 2 miles and ends at the Canyon Junction tram stop. It is accessible for wheelchairs, pets on leashes, and bicycles. The trail crosses the river a few times and wanders through the marvelous landscape of Zion Canyon. This trail should not be overlooked.
Other hiking options include Emerald Pools, Weeping Rock, Riverside Walk, Hidden Canyon, West Rim Trail (full day hike), and The Subway (permit required). As always, check Zion’s website for any closures before planning your trip.
Drive the Zion-Mount Carmel Highway
From the Canyon Junction to the East Entrance, this winding scenic drive is amazing. Along the switchbacks between Canyon Junction and the tunnel you have great views of Zion National Park and ample opportunities to pull over for impressive views. There is a $15 fee for oversized vehicles to drive through the tunnel. An oversized vehicle is any vehicle that is 11 feet 4 inches or higher and 7 feet 10 inches wide or wider. If your vehicle is taller than 13 feet 1 inch you cannot pass through the tunnel.
Explore Kolob Canyons
Kolob Canyons is the less visited area of the park in a smaller section that sits to the north of Zion Canyon Scenic Drive. There is another visitor center here and there are a few hiking trails.
Other activities include horseback riding, canyoneering, biking down Zion Canyon, and a jeep tour.

Where to Stay
There is only one lodging option to stay inside Zion National Park, that is Zion Lodge. This includes cabins, hotel rooms, and suites, plus an on-site restaurant and cafe. Also, the shuttle services the lodges multiple times a day. If you are looking to stay here, this will need to be booked far in advance. Reservations open up 12 months or more in advance! In addition, guests of Zion Lodge are allowed to drive their car through the park to reach the lodge, unlike the other visitors at Zion.
The more common choice is to stay in Springdale, which is outside of the park’s Southern entrance. Springdale offers a wide range of lodging, from motels to luxury resort-style rooms. The small town is very welcoming for all the tourists and has a lively scene including many restaurants, breweries, and bars. In my opinion, it is one of the best National Park towns. Due to the proximity of the park, rooms fill up rather quickly. I would book as far in advance as possible. For more affordable options, the Driftwood Lodge is a great option. If you want more luxury, the Cliffrose Lodge and Cable Mountain Lodge are walking distance to the park’s entrance. My last stay was at Cable Mountain Lodge so I can speak to that personally. It was amazing, super convenient, and had nice views. It was cool to enjoy the pool at night under the red rocks. It was a little more pricey than most but we walked to the entrance most days (5 minute walk) and did not have to worry about parking. You will still need a car to explore other areas of the park/hikes, but not always. Also, the lot across the hotel had a grocery store, brewery, and Zion Narrow rentals. All things of need!
If you like to camp, I may not be the guy but here’s some brief info. Zion National Park has 3 in-park campgrounds: Lava Point, South, and Watchman. The South And Watchman campgrounds are less than 1/2 a mile from the Visitors Center at the entrance of the park. Hence, the most popular. Sites are $20 for tent camping or $30 for a site with an electric hookup. All sites have picnic tables, a fire pit, and access to potable water, bathrooms, and trash containers. No showers are available at the campsites. The Watchman campground has 190 campsites and reservations open 6 months in advance. South Campground offers 117 campsites and reservations open 14 days in advance. Both reservations can be made at https://www.recreation.gov/camping/gateways/2994, or calling the reservation line at 877-444-6777. Lava Point Campground is typically open May through September, weather permitting. This campground is located in the Kolob Canyons part of the park, roughly 1.5 hours away from the main visitor center. There are 6 primitive campsites available to reserve. For more info on all camping, Zion’s website is very helpful and detailed and up to date on closings, https://www.nps.gov/zion/planyourvisit/campgrounds-in-zion.htm.
Where to Eat
After adventuring and hiking all day, this guy needs a good meal. Sometimes it is hard to find when visiting a National Park. However, Springdale offers many options and varieties for restaurants. And, I would venture to say some of the best food spots near a National Park. Depending where you stay on the lodging strip, you could walk or it is a very short drive generally. There is a Thai restaurant near the South Entrance called Thai Sipa, which is pretty good. After some early hiking and needing a late lunch, we went to MeMe’s Cafe. This is a quaint cafe offering options such as burgers, bbq sandwiches, & crepes for breakfast. I recall having a pulled pork sandwich with a slice of pineapple, cheddar cheese, and teriyaki sauce. It was called MeMe’s Hawaiian Sandwich. My favorite spot was Whiptail Grill. This is a Mexican cantina that is very unassuming as this is a converted gas station. I had my favorite meal here. The Whiptail Burrito was one of my favorite burritos I have had. In addition, the Southwest Taco Salad is insanely good. The salad is served in a grilled flour tortilla with mixed greens, black beans, and rice. Topped with house-made vinaigrette, pico, queso fresco and crispy tortilla strips. Highly recommend it.
If you are a coffee fanatic, coffee shops are all over. If you are looking for some baked goods or ice cream, they have it. There is something for everyone, which is rare for a town next to a National Park. Other good options to dine include: Oscar’s Cafe, Kings Landing Bistro, Spotted Dog, Park House Cafe, Zion Canyon Brew Pub, Bit & Spur, Zion Pizza and Noodle Co., and Switchback Grille.
HIKING FOR DONUTS
Hi, I’m Mark. I live in Connecticut. I take new trips every chance I get. A good trip has a great hike, great food, and something fun to do. My goal is to search out new trips and share them to inspire others to try something new and exciting.
If you are looking for posts in a particular place, search City or State here.
SEE OTHER POSTS IN ARCHIVE
RECOMMENDED POSTS
RECENT POSTS
See the latest on Instagram and follow @HIKINGFORDONUTS

Exploring Cincinnati For One Day
Some of the best travel advice I could give anyone is to just go travel to new cities, new states, new countries, etc. You just never know what you may find and what you may like. Don’t knock it until you try it. With that said, I recently made a trip to Columbus, Ohio to visit my friend and we decided to take a day trip down to Cincinnati. First time I have been to either one of these areas. I am a huge baseball fan and would like to visit every baseball stadium so it was a no-brainer road trip to go see a Reds game. And, I really enjoy visiting new cities. I had a great time and it seems like an up and coming destination to me. There is a lot to do in Cincinnati. This trip was very built around what I enjoy - food, donuts, beer, and baseball. And, there is only so much time in the day to do all the things. I just wanted to share my trip and give some love to Cincy as a fun place to visit. I will add some additional popular things to do as options as well for everyone. There is definitely something for all.
The trip down to Cincinnati from Columbus is about an hour and 45 minutes. I learned Ohio is really, really flat. Cincinnati is a pretty large city so having a car was helpful to get around to some places before the baseball game. Our first pit stops were breweries. It was almost 90 degrees and we were parched. The first stop was MadTree Brewing. They had a huge facility and a wood fire pizza restaurant inside. Tons of beer options and non-beer options. Definitely one of the big beer companies in the state.


Our next stop was to Esoteric Brewing. This one was off the beaten path a bit in Paramount Square, a much smaller space. Pretty eclectic vibes inside.
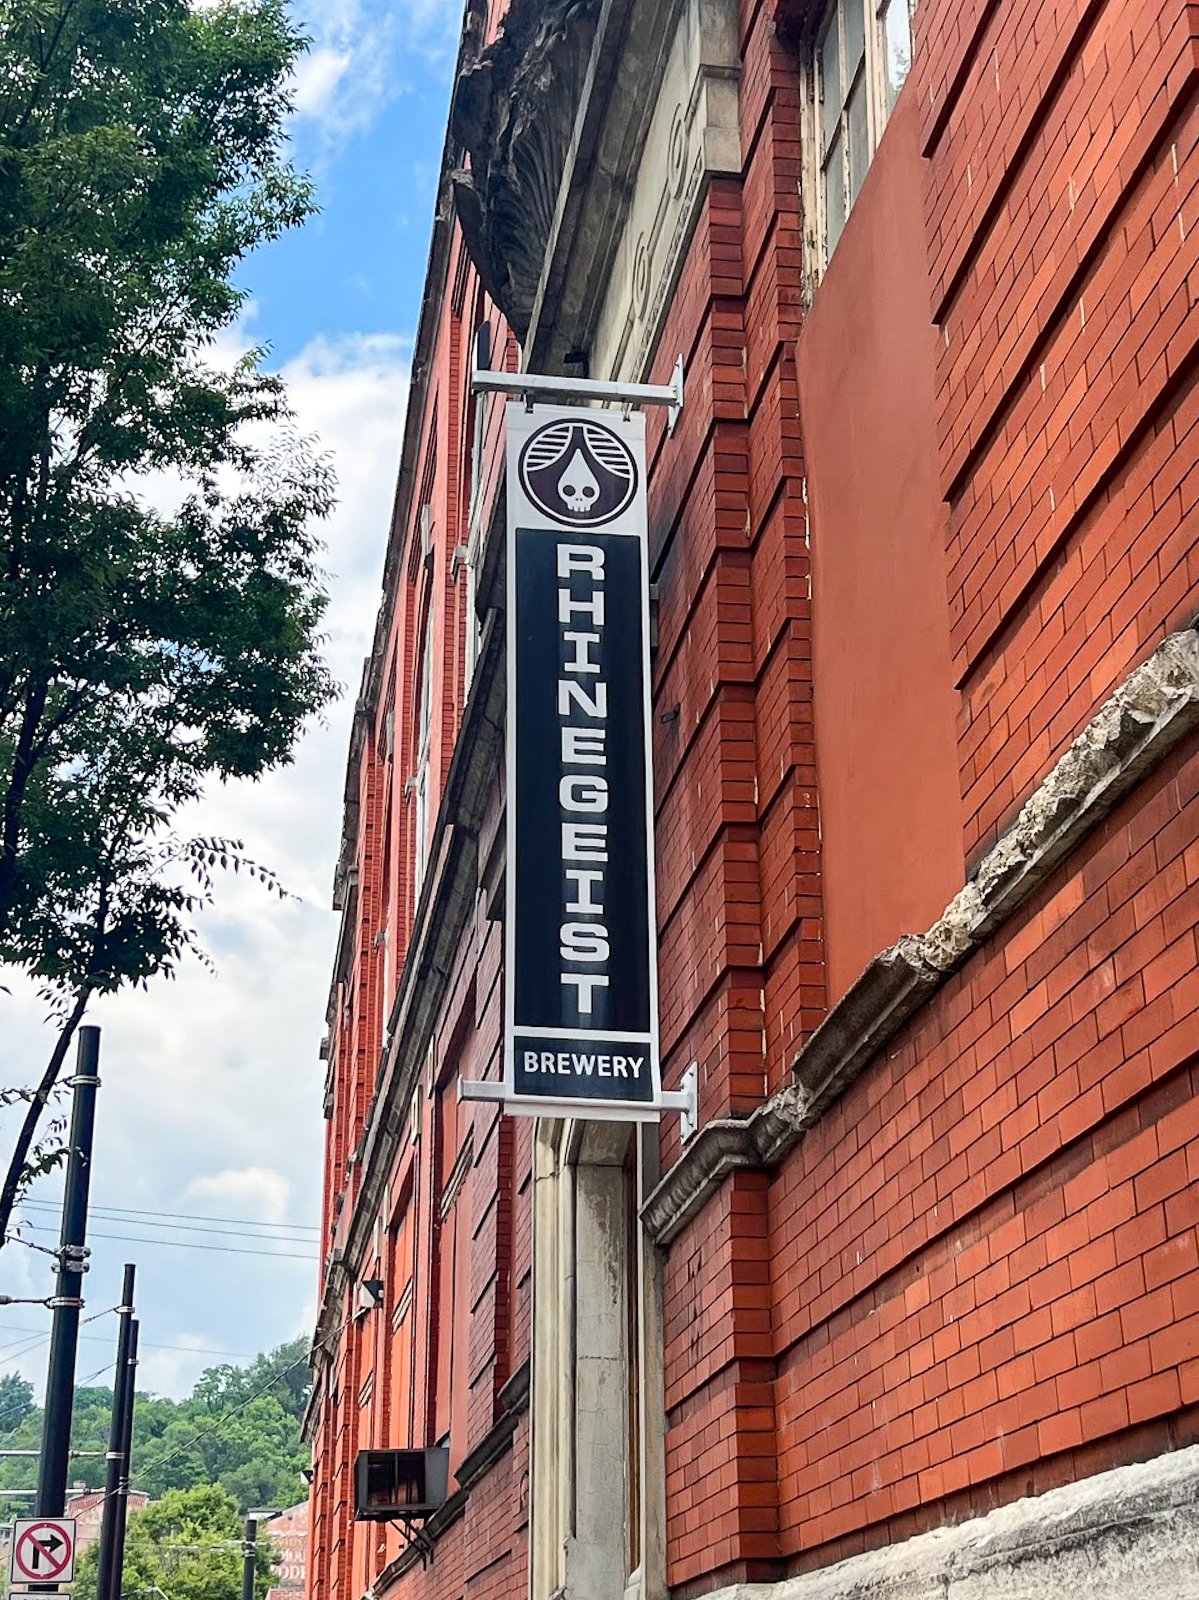
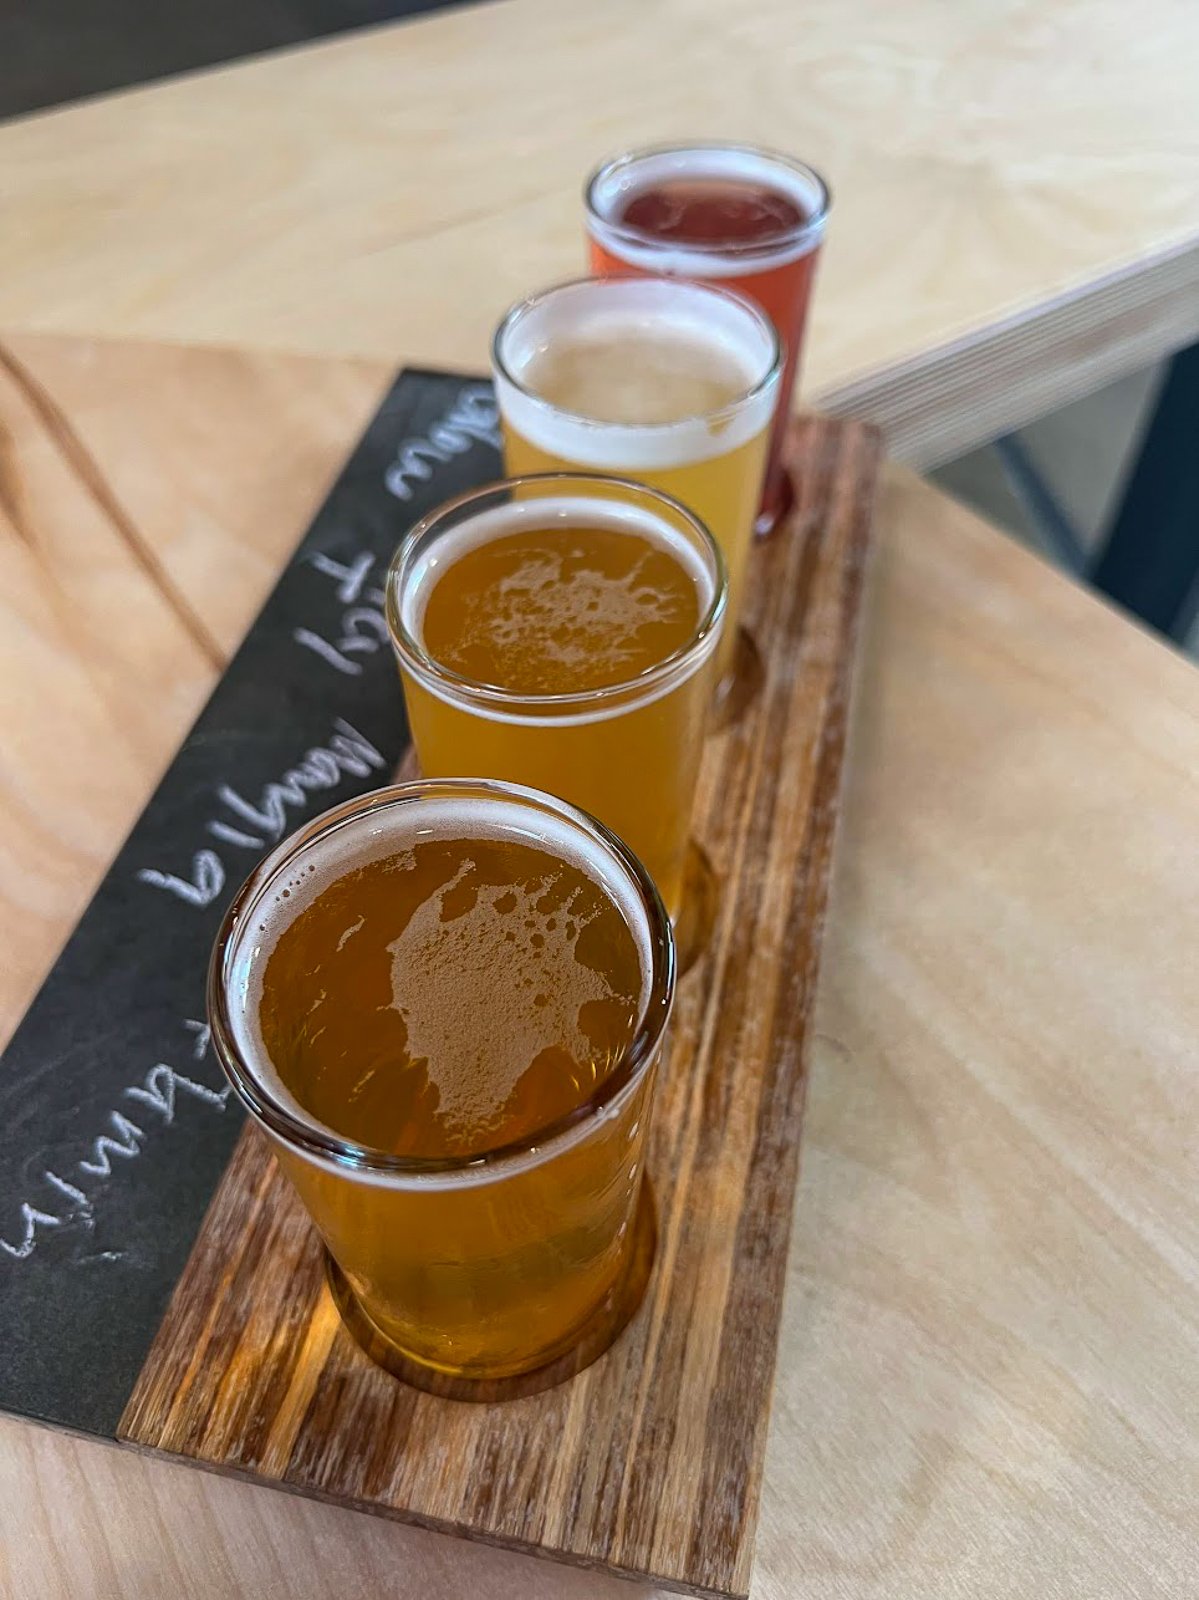
The last brewery we visited was Rhinegeist Brewery, which had the most hype per my research. This was my favorite by far and the best beer in my opinion. They have a massive space as well in a former pre-prohibition bottling plant located in Cincinnati's historic Over-the-Rhine neighborhood. They have cornhole, ping pong, TVs, and even a rooftop space.
Other breweries to check out: Sonder Brewing, West Side Brewing, Brink Brewing Company, Humble Monk Brewing Co, Woodburn Brewing, Streetside Brewery.
After this, we made our way Downtown to our hotel to check in. Fortunately, this was about a 10 min walk to Great American Ball Park since we were running late. For the 2023 baseball season, there have been changes to the game to make it go by faster. This game lasted only about 2 hours and 45 minutes and it was high scoring. Typically, when I go to a new ballpark I like to walk around a lot, get some food, and watch 4-5 innings maybe. The stadium was absolutely packed and the lines were crazy. Given we got there late, I didn’t have too much time to walk around or get a bite to eat. We had great seats and the game was really good and competitive so we watched most of the game. Awesome fans I must say. Really fun environment (since the Reds are doing well). And, from what I saw a really cool stadium that I would like to come back to.


After the game we retreated back to the hotel to cool down and decide on dinner. With the Reds stadium Downtown, there is quite a bit to do around the area. There are lots of restaurants within walking distance. And, we did not feel like getting the car and driving. We decided to go to Nada, a pretty good Mexican gourmet cuisine spot.Very vibrant space with outdoor seating off the street. I believe this is a small chain in Ohio. We could tell a lot of places were busy after the game but we actually were seated pretty quickly.


On the way back to the hotel, we saw the famous Graeter’s Ice Cream founded in Cincinnati. I heard a lot about this ice cream shop. The line was insanely long at night. And, my buddy mentioned there was one down the street from his house in Columbus so we did that instead. But, if you are only in Cincinnati, I would highly recommend it as your late night dessert option. It was really great ice cream. I was overwhelmed as usual deciding on options but I went with Butter Pecan and Cookie Dough. Random opposite selections I know, that’s just my style.

We had limited time so I didn’t get to try as many food options as I would like. Everyone says to get Skyline Chili but it was 90 degrees. Maybe next time. However, here are some other options that were on my list I did get to try: Maplewood Kitchen and Bar, Mazuntae Taqueria, The Eagle,Incline Public House, Moerlein Lager House, Taste of Belgium, Eli's BBQ, Crown Republic.
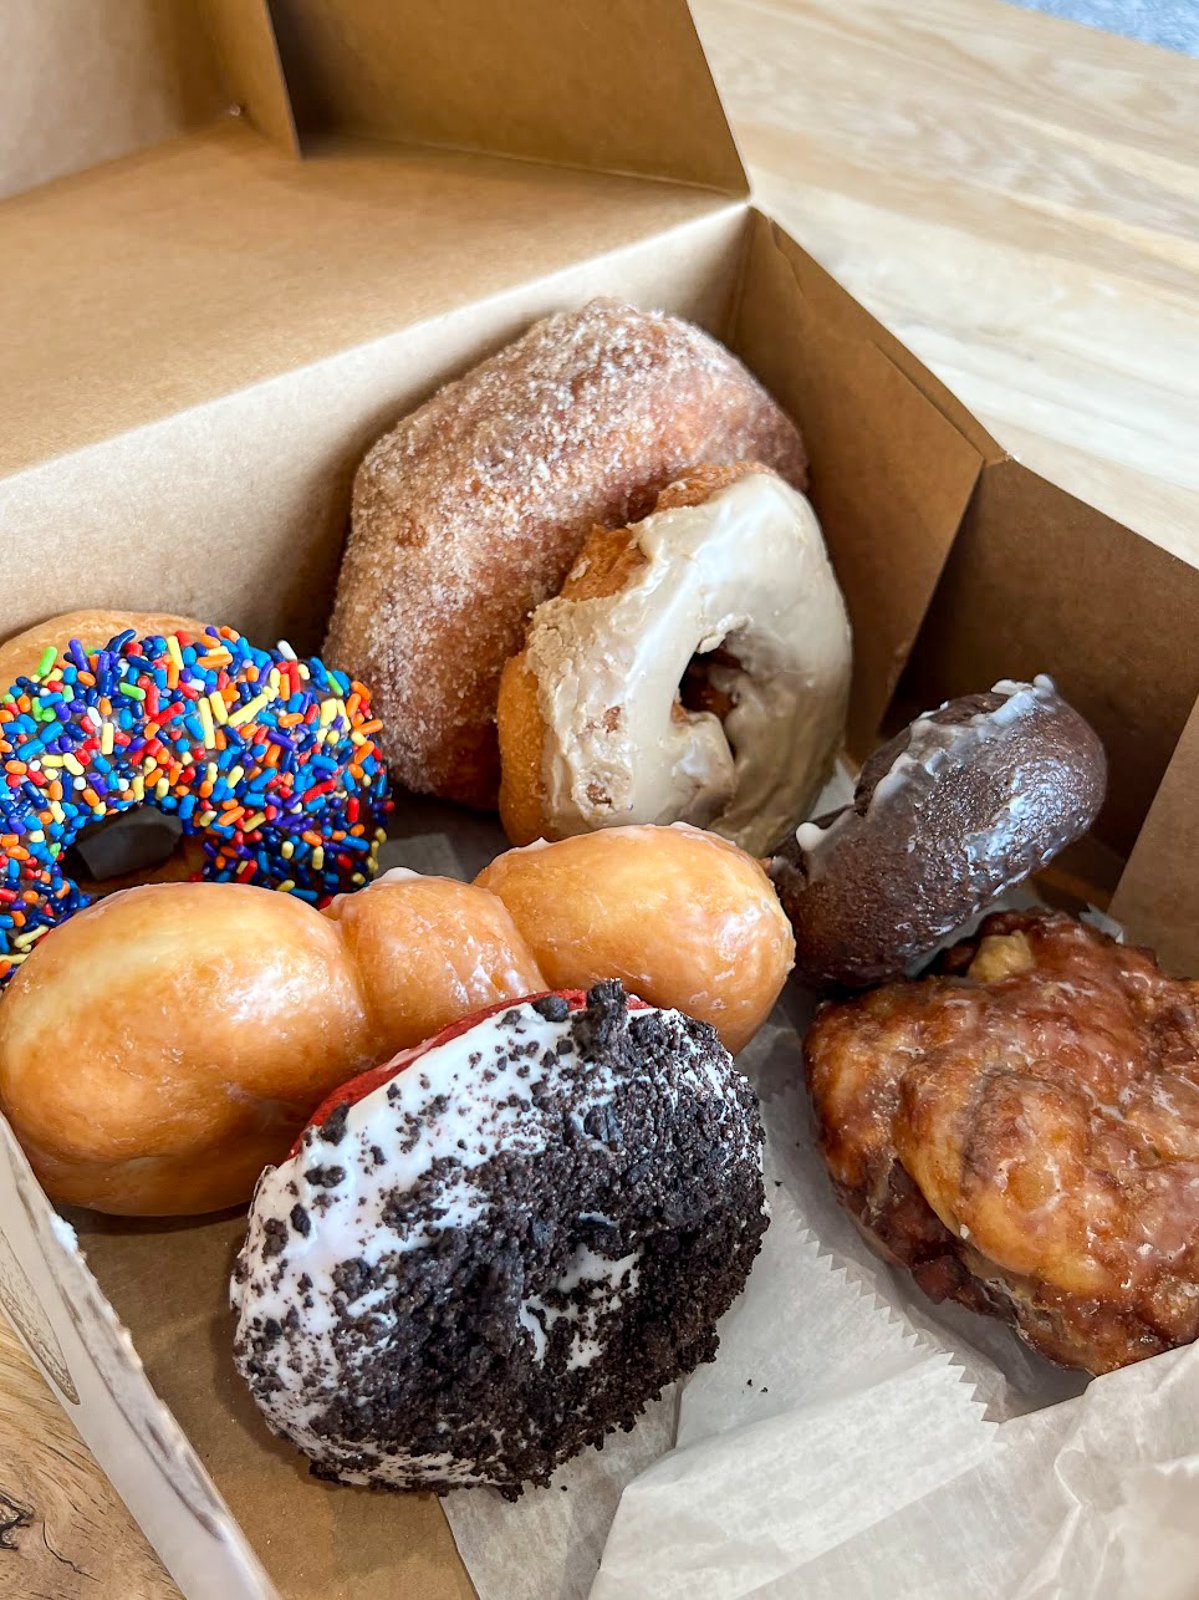
Of course, a trip to a new city would not be complete without seeking a donut shop, preferably the highest rated if possible. On the way back to Columbus, we stopped at Holtman’s Donuts. They had a great selection of donuts from the classics to cronuts to gourmet toppings. This donut shop has been around since 1960 and definitely seemed like a staple for Cincinnati. We got there mid-morning and I could tell the early crowd took a dent in their selections. I went with the apple fritter, oreo red velvet, chocolate sprinkle, maple frosted, chocolate glazed (cake), and my buddy wanted to try the cinnamon cronut. The fritter was really tasty. The red velvet was my favorite. It was vanilla frosting (not cream cheese) with oreo crumbles on a red velvet cake donut that was super moist. It was awesome. I highly recommend it and it’s actually across the street from MadTree Brewing, which we didn’t realize until we looked across the street eating donuts by the car!

All in all, I thought Cincinnati was a great experience. We had very limited time and I would definitely go back to experience more of the city. Downtown is great if checking out the baseball game or football game, as I did see the Bengals stadium nearby off the highway. Aside from what I have shared, here are some other activities to do for all that are popular: Newport Aquarium, Sawyer Point & Yeatman’s Cove, Fountain Square, Findlay Market, Over the Rhine Food Tour, Underground Railroad Freedom Center, Contemporary Arts Center, Contemporary Arts Center, Jungle Jim’s, Cincinnati Zoo & Botanical Garden, Riverwalk, Roebling Suspension Bridge.

HIKING FOR DONUTS
A blog for the outdoors foodie enthusiast
Hi, I’m Mark. I live in Connecticut. I take new trips every chance I get. A good trip has a great hike, great food, and something fun to do. My goal is to search out new trips and share them to inspire others to try something new and exciting.
If you are looking for posts in a particular place, search by city or state here.
EXPLORE OTHER POSTS IN THE ARCHIVE
RECOMMENDED POSTS
MOST RECENT POSTS
SEE THE LATEST ON INSTAGRAM AND FOLLOW @HIKINGFORDONUTS

Zion Narrows Hiking Guide for Beginners, Zion National Park
The Zion Narrows is not an everyday hike. The hiking is different, the planning is different. Without question, this is one of the most popular hikes in Zion National Park, if not all of the National Parks. And, one of my personal bucket list hiking adventures. I wanted to put together a guide of knowledge that I thought was helpful for me before I attempted this hike. There will be lots of items below that may seem intimidating. But I am telling you, this hike is something that you will remember forever. One of the best experiences I have had hiking and I hope the same for anyone else who takes on this adventure. For more on Zion National Park, check out my full park guide to plan your next trip, click here.
About the Zion Narrows
The Narrows is a popular “trail” that leads you through Zion Canyon and the Virgin River with twists and turns through the stunning slot canyon less than 20 feet wide in some areas stretching 15 miles. Red canyon walls tower thousands of feet above, catching sunlight that lights up the otherwise dark passageway. Most of the journey you’ll be ankle-deep in water, but depending on the river’s flow that day there may be some chest-deep or even swimming sections. Proper planning and gear is important for this hike.
The Narrows hike stretches 16 miles from start to finish. However, depending on your route you can hike up to what you are comfortable with. There are 2 ways to do this hike, Bottom-Up or Top-Down. Bottom-Up is the most popular and can be a day hike, as you can turn around when you want. Top-Down could be a very long and challenging day hike or most likely an overnight, two day backpacking trip.
This hike is unlike any other. It is a full on adventure. For instance, there is a lot more to think about hiking the Zions Narrows: water flow rates, flash floods, gear, permits (if applicable), and walking miles on rocks in a river. This may sound daunting but I assure you this experience can be enjoyed by all levels of hikers. I cover all of this in my guide so you can feel comfortable and knowledgeable for the best experience.
HOW TO GET THERE
For the Bottom-Up route of this hike, the roads to the Narrows trailhead are closed to the public and only buses are permitted. Hence, you will need to take a shuttle to get to The Temple of Sinawava trailhead. You will have to park at the Visitor Center, which is near the West Entrance of the park closest to the town of Springdale. The Visitor Center is located inside the park and has its own parking lot. If that parking lot is full, you can try to park in a lot outside of the park and walk over.
At the Visitor Center, the Zion Canyon Shuttle to The Temple of Sinawava trailhead is available free of charge. This is a first come, first serve shuttle. Once on the shuttle, get off on shuttle stop #9, which is the last stop. The shuttle ride from the Visitor Center to the trailhead is approximately 45 minutes.
Hiking Tip: You want to get on this early in order to spend ample time on the hike. Depending on the day/season, this could be overwhelmingly busy. I recommend getting on the shuttle by 8-9am in order to start the hike no later than 9-10am.
If it is a busy time and the wait is cutting too much into your hiking time, another option is to book through an outside shuttle company like Zion Guru, who are permitted to enter the road to the trailhead of the Narrows. This option will cost you more as a roundtrip ticket will cost about $40 per person, but it’s a solid option to avoid potential busy lines for the Zion Canyon Shuttle.
The Top-Down trailhead starts at Chamberlain’s Ranch. This requires a second vehicle or paid shuttle. It takes one hour and 30 minutes to drive from Springdale to Chamberlain’s Ranch.
Hiking Tip: Don’t miss the last shuttle. Or else it is another 4 mile walk to the Zion Lodge and then you need to figure out how to get back to the Visitor Center!
Best Time to Hike the Zion Narrows
In the Spring, the trail is typically closed in the March to May timeframe when flow rates are high from the snow melting and spring run-off. This could vary based on the winter weather conditions. Also, the weather is cooler and the water is much colder. And, yes flow rates are yet another thing to worry about prior to hiking. When the water flow is low, hiking is easier. The flow rate of the Virgin River is measured by Cubic Feet Per Second (CFS). The river is open with flow rates 0-150 CFS, which is considered to be safe hiking rates for bottom up hikers. For top down hikers, flow rates of 0-120 CFS is considered safe. Under 50 CFS is considered easy and over 70 CFS makes the hike a lot more challenging with the faster current and higher water levels. The park’s website will have this info daily as well.
Summer is a great time to hike the Narrows. The weather is excellent with high temperatures. The days are longer, shuttles run all the way to 9pm, and the water in the river is at its warmest. However, the park is crowded this time of year and the weather can be scorching. In addition, the monsoon season creates the highest risk of flash floods during this time.
Fall is another great time to hike the Narrows. The crowds start to diminish and the flow is at his lowest in the river. However, the air temperature goes down as does the water temperature. On September 30, the last shuttle pick-up time of the day is 7:15 pm, cutting your adventure by 2 hours.
This can be done in the Winter but the temperatures, air & water, are much colder. The shuttle bus does not run often, only on certain days. And, snowfall can potentially close the trail.
Personally, me and my wife went in the second week of May and everything worked out great. It was high 70s to mid 80s, which to me felt like 100 degrees! The temperature of the water was cold, roughly 45 degrees, but the gear we chose helped us not even notice how cold it was.
Before you go: Flash Floods
Monitoring the forecast for rain is one of those extra items to worry about if you are looking to hike the Zion Narrows. With rain, the potential of a flash flood in Zion Canyon is very possible. However, Zion National Park does a great job providing info on their website and issuing flash flood warnings. Even with a clear blue sky, the Narrows can close due to a rain forecast nearby.
There are sections of the Narrows with no high ground. Water levels rise very fast when a flash flood occurs in the canyon. There have been deaths with hikers being caught during a flash flood. I do not think this should deter but always proceed with caution. Always check the weather and the flash flood potential before planning your hike.

Can Beginners Hike the Narrows?
In short, of course! A lot of the information and what you read may sound frightening compared to most hikes, but the key to this hike is preparation. I couldn’t wait to hike this but my wife did not have that same sentiment. We just made sure to check all of the boxes that made us both comfortable. If that didn’t happen, we would probably haven’t done it. We researched the gear, watched the weather, spoke with Rangers on the flow rate and we were good to go.
To be honest, the trickiest part is your footing on the rocks in the water and any current that comes along. There is no elevation to worry about. Tons of hikers of all levels, children with families and older people. At any time, you can just turn around and head back.
It’s simple, if all the boxes don’t check, don’t go. But if they do, I highly recommend the time of your life and a memorable experience you will not forget.
WHAT GEAR DO I NEED?
At this point of my life, sometimes it is better to take the easy route. I researched and researched all the gear needed for the Narrows hike. And, it was a lot. Lugging that around on the plane and then spending the extra money on items I don’t have and would possibly never use again. My very smart wife said, stop being stubborn and let’s just rent it. That’s what we did and I have zero regrets. We would have enjoyed our hike less without all the gear I may not have purchased myself. No stress, just enjoyment.
There are quite a few rental equipment companies near the park. Our hotel was a 5 minute walk to the South Entrance and there was a Zion Outfitters across from the hotel, where we saw countless hikers each day go and rent for the Narrows. What they suggest to use, I would say is 100% needed. There are multiple rental options. What we went with was the Dry Bib package, which costs $55 per person that includes: Dry bibs (waders), Adidas Hydro Lace Canyoneering Boot, 5mm Neoprene Socks, and a Wooden Hiking Stick.
The Narrows bottom-up is quite the unique challenge in comparison to most hikes. You will be hiking in a river. Proper footwear, accessories, and clothing are essential.
Shoes - It’s all about grip and traction on the rocks. Canyoneering boots are waterproof and designed for the slippery conditions of this hike. I could not see myself getting by without them. You could use anything you want, but these are optimal for beginners in my opinion.
Neoprene Socks - These socks are very tight, waterproof socks that protect your feet and keep water from entering your boot. This will help prevent blisters. And, depending on the water temperature, keep your feet from getting cold.
Clothing - During the colder months, dry pants will help keep you warm and dry. Hence, we went with the full waders through the rental company. Quick dry, light clothing will be helpful as you go further and the water rises up or if you end up falling in. Bring extra layers as the canyon can get chilly, such as a light jacket, even in summer months.
Walking Stick - The rocks are darn slippery. The hiking stick helped me not fall flat on my face and keep my balance.. If you have your own hiking poles, make sure they are very sturdy.
Dry Pack or Waterproof Bag - This will be everything carrying necessary items such as water, snacks, extra clothes, and sun protection. Snacks and water are necessary if you will be hiking most of the day.
Waterproof Cell Phone Case - This was helpful so I could take pictures without fear of dropping my phone. I did not have it in me to bring my camera along for the trek with concerns of the water. But I did not see a few brave hikers with expensive cameras willing to risk it all.
2 WAYS TO HIKE
From the Bottom Up: This is the route most people will take. By far, the more popular of the two. No permit required. Taking the Zion Shuttle to The Temple of Sinawava trailhead, start at the Riverside Walk. This will lead you upriver for several miles. When you have taken in all the scenery, simply turn around and go back the same way you came. The farthest you can go without a permit is Big Springs, which will make your journey roundtrip 9-10 miles.
From the Top Down: This is for the adventurous hiker. A permit is required for this route. This is a 16 mile trek one way from Chamberlain’s Ranch to The Temple of Sinawava. If you make this a two day hike, you will reserve your campsite when you reserve your permit. For permit details and other info on this hiking route, I suggest doing a quick google. Lots of info out there by some good bloggers/websites. I did not take this route so I can’t speak in depth.
THE HIKE BOTTOM-UP
Trail Info: Distance: up to 9+ miles (1-8 hours) Difficulty: Moderate to Strenuous (depending on water flow/distance) Trail Type: Out & Back Permit required: No Elevation: Mostly flat
The Zion Shuttle will drop you off at the last stop, the Temple of Sinawava, where the trail begins. The first mile will be paved on Riverside Walk along the Virgin River. After one mile, there is a drop off and it’s time to enter the river. This can be a crowded start as all the other hikers on the bus will be right with you. Take your time. The water is cold and the rocks are slippery immediately. Acclimate yourself to the rocks before you increase your pace. I almost fell a few times. Unfortunately for my wife, she took a fall right in catching herself enough to keep her face dry. Her upper body was pretty cold after that.
Sometimes you will walk on small rocks and other areas in the hike will be larger rocks. It is flat but the terrain does change. Then add in the water levels. Sometimes it is ankle deep, knee deep, or even waist deep. Sometimes it’s deeper or more shallow depending on the time of the year. There are even areas where you can swim, but we did not reach that far into the canyon. We went in May and it got up to my thighs and my wife’s waist at its highest. Given, we are shorter people.
The further you go into the canyon, the more narrow it gets. The beginning is the most crowded part of the hike for the first mile or two. The farther you go, there will be less crowds. The first landmark you will come across is Mystery Falls. This is a very small waterfall that flows down the canyon walls into the Virgin River about a half mile into the river. I mean small, you could easily miss it.
The next section is Wall Street, the most popular and well-known part of the hike. This is also the most narrow section of the hike, just after the Orderville Canyon junction. The canyon walls are only 22 feet apart. There is no land to go on, just water so be cautious about flooding here. This is about 2 miles into the water, 3 miles total from the trailhead. Most hikers reach this point and turn around.
The last known landmark is Big Springs, about 3.5 miles into the water. This the furthest you can go on the Bottom-Up route of the Narrows. A permit is required to proceed past this.
You can turn around any time. If it feels too difficult or not safe, just head back to the trailhead. Even hiking the shortest amount in the water will give you amazing views that other hikes do not offer.
ADDITIONAL TIPS
Before you go, always check Zion National Park’s website for conditions and closings, https://www.nps.gov/zion/planyourvisit/index.htm.
The shuttle season is typically from March to November.
Use the bathrooms at the Temple of Sinawava before you start. There are no bathrooms or privacy once you are in the river.
Be prepared to get wet. Your feet and parts of your lower body will be submerged in water, or your whole body if you fall in! Dress appropriately as the water can be very cold. And, bring spare clothing and shoes for after the hike.
Leave no trace! Please ensure to clean up after yourself.
HIKING FOR DONUTS
Hi, I’m Mark. I live in Connecticut. I take new trips every chance I get. A good trip has a great hike, great food, and something fun to do. My goal is to search out new trips and share them to inspire others to try something new and exciting.
If you are looking for posts in a particular place, search City or State here.
SEE OTHER POSTS IN ARCHIVE
RECOMMENDED POSTS
RECENT POSTS
See the latest on Instagram and follow @HIKINGFORDONUTS

5 Places to Eat in Las Vegas You Need to Try
What happens in Las Vegas, stays in Las Vegas. Well, not everything. Las Vegas impressed me as a legit foodie city. And, that is something I need to share. When you think about Las Vegas, you think about casinos, gambling, shows, bachelor and bachelorette parties, which is very true. However, the food scene is way more diverse and expansive than I ever expected. Las Vegas is a lot more than what it once was. I was aware that many popular and impressive chefs have restaurants out here in the casinos, but I didn’t really connect the dots that maybe Las Vegas is a food city. My wife and I spent a few days here after visiting some National Parks. This is not by any means a best of but this is some really good eats I would recommend when visiting. There is tons of amazing food on the strip and even more throughout the city. There are also food tours that are really cool. Next time you consider Vegas as a destination, make sure to account for its impressive food and dining experiences.
Therapy
Therapy is a restaurant and nightclub (after 10 pm) located off the strip on East Freemont Street. They have a creative menu of small shareable plates with some New American dishes and an impressive cocktail list. Definitely felt the club ambiance and Las Vegas flair. We ordered the Mac & Cheese Bites served with home-made tomato & bacon Jam, topped with Sriracha aioli to start. Along with, Devils On a Horseback, which is dates, truffle goat cheese & almond rolled in bacon with romesco. Apparently, dates are a big deal out here due to all the farms nearby and I am onboard with that. The appetizers were delicious and flavorful. For the main course, I had to go big and order the Red Velvet Waffle Sliders. Big red velvet guy so I am biased but the waffle and chicken meshed well together with spicy remoulade & lettuce. I would definitely love to come here for brunch.


Alexxa’s las Vegas
Formerly known as Hexx Kitchen & Bar, Alexxa’s Las Vegas had one of the best brunch offerings I have had. It is located on the strip in front of the Paris Hotel. There is an open air patio that gives guests views of the Bellagio fountains. We started with the Honey Walnut Rock Shrimp appetizer and that was so flavorful. My wife ordered the Cinnamon Roll Waffle which consisted of cream cheese frosting, berries, and candied pecans. Definitely a dynamite waffle. And, I was feeling a bit savory and ordered the Crispy Chicken Sandwich. There was a delightful sweet and spicy slaw with cucumbers on a brioche bun. This hit the spot for a perfect brunch to go along with some cocktails to start the day.


Momofuku
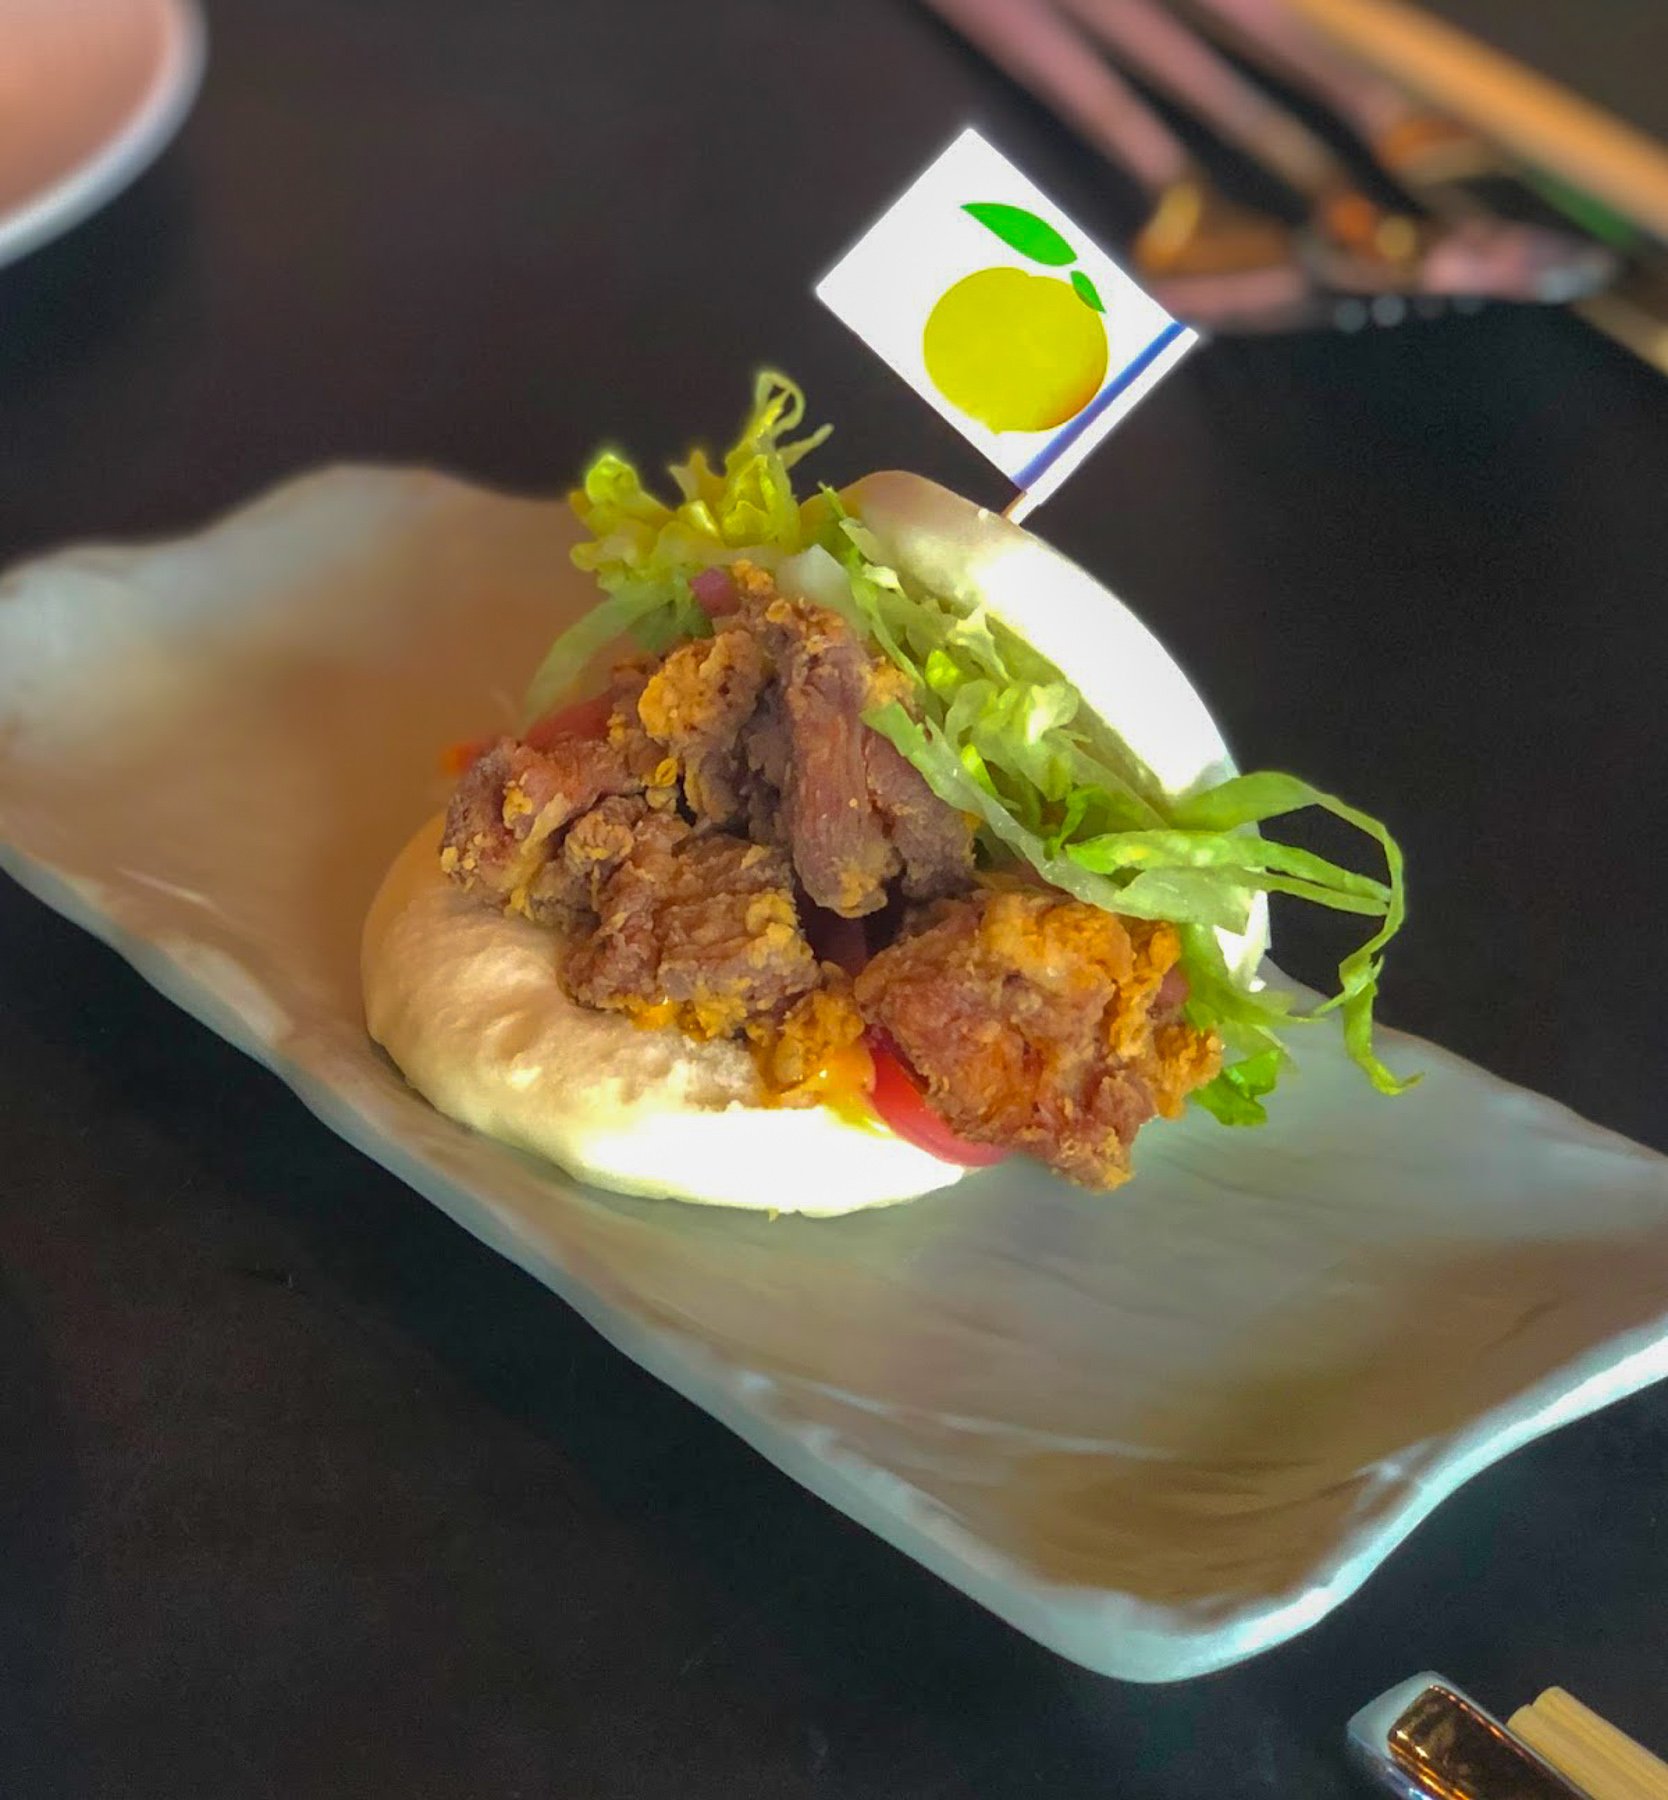
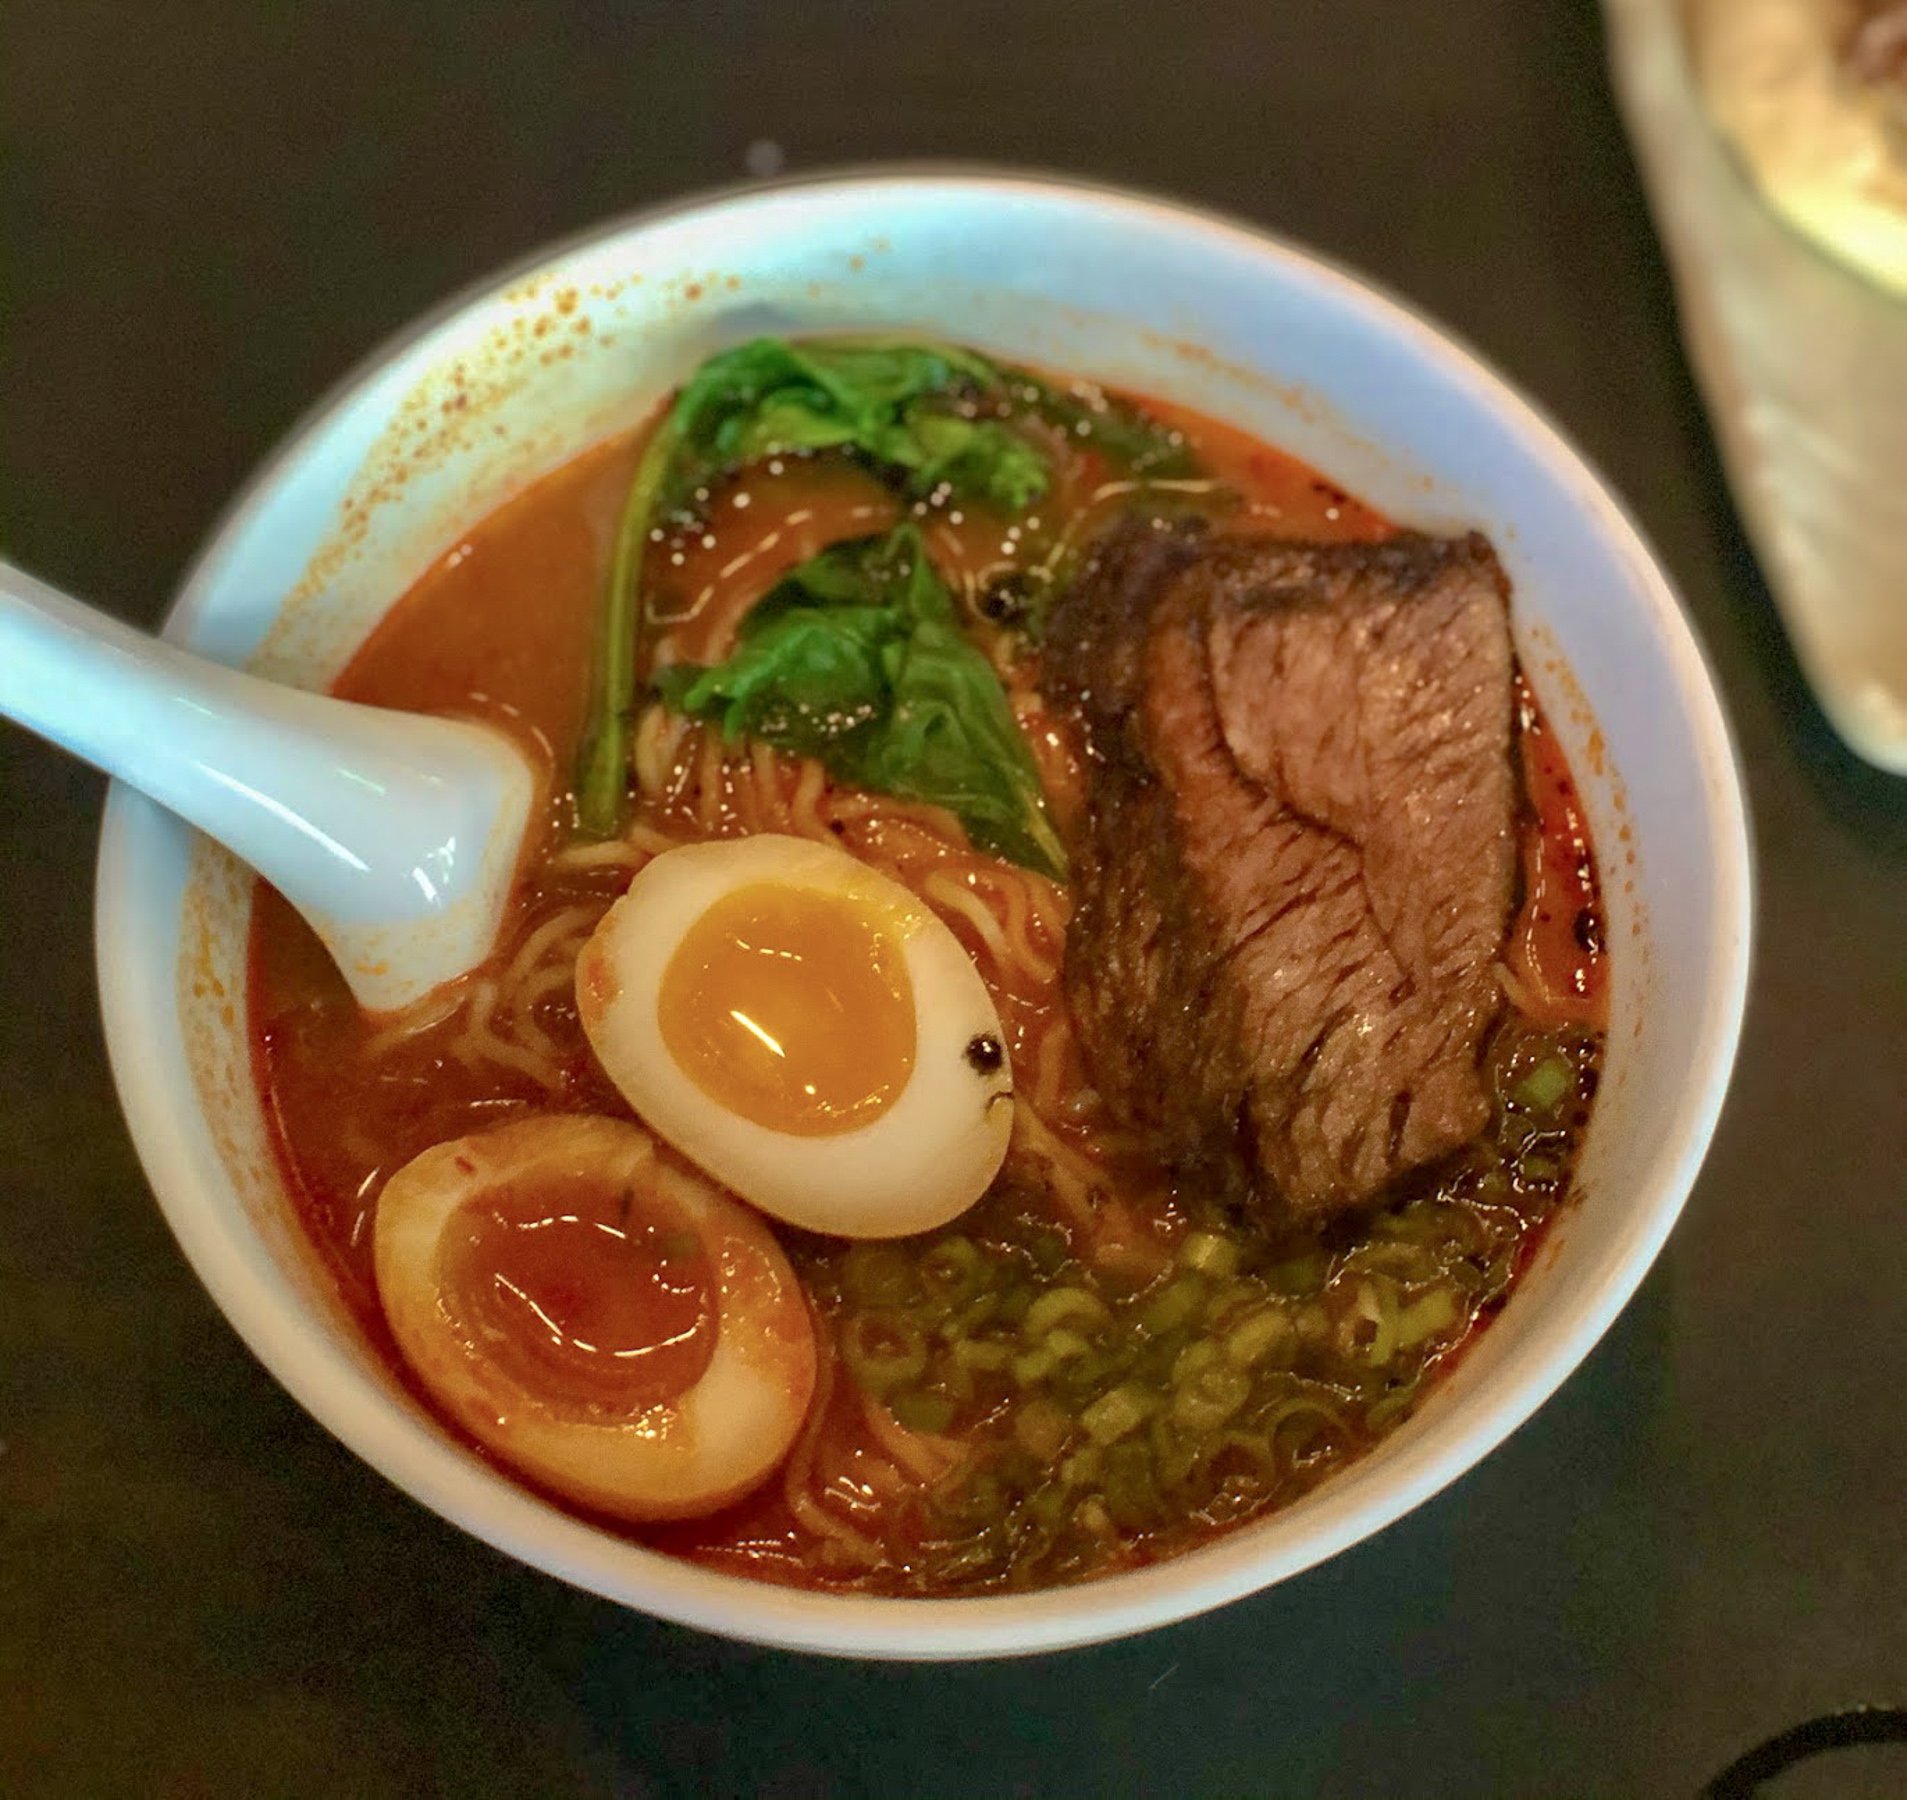
Momofuku has been on my foodie bucket list. I am a huge fan of Chef David Chang. His netflix shows Ugly Delicious and Breakfast, Lunch, and Dinner are two of the best food shows out there. This is an Asian American style cuisine restaurant located in the Cosmopolitan Hotel. There is a raw bar, small plates, noodles, and large meat/seafood dishes. I could not wait to order the ramen, but first, I love to start with a bao bun. We ordered the Chicken Karaage bao bun with spicy mayo, pickled red onion, and iceberg lettuce. Essentially, this was a fried chicken bun but it was really good. Next up was the Shoyu Pork Ramen bowl. The pork belly and pork shoulder was delicious and the broth was extremely flavorful. The menu seems to change up offerings so these may or may not be available. However, the menu is stacked with deliciousness and I wish I could have had more.
Carl’s Donuts
Carl’s Donuts is not located on the strip but it is 100% worth the drive or an uber ride to go there. They close early in the afternoon so by the time we got there I was nervous about what they had left for donuts and I was impressed to see they had many donuts to choose from. That is something you don’t see from a place that makes a lot of different donut flavors/toppings, specifically gourmet. I had to go glazed, the s’mores looked crazy, again red velvet is my jam, and I have never seen a strawberry shortcake donut until now. The glazed is always the true test and this passed with flying colors. Their donuts are fresh and airy. Decent size too. The strawberry shortcake tasted like the Good Humor ice cream bar. Ever since, if I see this donut flavor anywhere I have to get it. The red velvet donut was 100% on point in flavor and the cake donut was moist, not dense. That marshmallow on the S’mores! I have eaten many donuts in my day, this donut shop is up there for me. This may crack my top 10 donut shop list to date.


Best Friend
Another bucket list restaurant in Vegas in my opinion is Best Friend. Chef Roy Choi is another favorite of mine, known for being an LA food truck legend. The Chef Show on Netflix is another amazing foodie show. This was the meal me & my wife looked forward to the entire trip and it did not disappoint. Best Friends is located inside the MGM hotel on the strip. This restaurant has an innovative menu that meshes Mexican flavors with traditional Korean flavors while sticking to some of the chef’s Los Angeles roots. The vibe is LA meets Vegas when you walk in through a liquor store and retail shop where there are high top tables with colorful bar stools where it is fun and the music is loud. I felt nostalgia for the 90s-2000s in this room. Past this, there is also a main dining area. We did not play any games and ordered the Chef Menu, which entails all of Chef Roy’s popular dishes such as Banchan, Kogi Tacos, Slippery Shrimp, Kimchi Fried Rice, Garlic Chicken, Kalbi Ribs, and dessert (Date Cake). We wanted to make sure to try everything they had to offer. It was absolutely amazing and the flavors were something I had experienced before at this level. Blown away and all the expectations were met and beyond. By far, my favorite spot of the trip. I would book a flight to Vegas and go straight here. Even the cocktails were creative and delicious. The drinks, food, and vibe all made this experience special.


HIKING FOR DONUTS
A blog for the outdoors foodie enthusiast
Hi, I’m Mark. I live in Connecticut. I take new trips every chance I get. A good trip has a great hike, great food, and something fun to do. My goal is to search out new trips and share them to inspire others to try something new and exciting.
If you are looking for posts in a particular place, search by city or state here.
EXPLORE OTHER POSTS IN THE ARCHIVE
RECOMMENDED POSTS
MOST RECENT POSTS
SEE THE LATEST ON INSTAGRAM AND FOLLOW @HIKINGFORDONUTS

Garden of the Gods Hiking Guide
Garden of the Gods can be explained in one word: majestic. Colorado is one of my favorite states to travel to and explore. At one time, I visited 3 times out of 4 years. Mostly spending time in Denver, Boulder, and Rocky Mountain National Park. I wanted to see more of the state and my research came across Garden of the Gods. I had to go. And, I immediately included it on my next trip. The park is filled with red rock formations, big and small, overlooking Pike’s Peak and the southern Front Range of the Rockies. It is one of those parks, you have to step your foot in and explore all its beauty. It is 100% percent worth planning your trip around visiting.
About Garden of the Gods
The stunning rock formations throughout the park were created during a geological disruption millions of years ago. The look of the rock you see today is due to subsequent erosion and glaciation. Adding to the park’s distinctiveness, it is also one of the only places in Colorado where you can find red sandstone and Pikes Peak granite together.
Garden of the Gods can be explored by foot, car, or biking with hiking trails and bike lanes throughout the park. There are some wheelchair accessible trails. There are 16 hiking trails that range from 0.25 miles to 6 miles. Most of the trails are relatively easy, but there are a few trails with rockier terrains. And, they connect pretty easily. Rock climbing is another popular activity here as well. There is truly something for everyone at the park.
The visitor center is across from the park itself and is worth a visit to speak to rangers, grab a map, and check out displays and history of the park.
Best of all, the park is FREE. The original owner of the park land, Charles Perkins, wanted to share the experience with everyone. After his passing, his family donated the park to the city to fulfill his wishes. The park is open from dawn until dusk. Check their website for specific hours for the time you are visiting.
How to Get to Garden of the gods
Garden of the Gods is located in Colorado Springs, CO. It is only about 5-10 minutes from the Interstate highway and close to downtown, hotels, shopping, and dining. Traveling from the popular city of Denver will only take just over an hour, which would also make for a great day trip visit. For most out of state explorers, flying into Denver is the best bet and then driving to the park. It is pretty easy to find using your gps.
When to Visit Garden of the gods
The beautiful rock formations and visuals of this park really make any time of the year a feasible time to visit. I went in early May and it was snowing! It was not as warm as expected but the snow made everything look pretty cool. As one would expect, the summer is the busiest time of the year. There is a decent amount of parking but I could see that being filled up by afternoon in the summer/fall time.
Park Entrance
Hiking trails at the Garden of the Gods
There are many hiking trails in the Garden of the Gods. You can’t go wrong with the paths you choose. The park may seem small but you can spend an entire day hiking in the park. The trail system totals up to 15 miles. Here are some of the more popular hikes that offer great sights.
1) The Perkins Central Garden Trail is an easy, 1.5 mile round trip path with minimal elevation. This trail is in the heart of the Park at the base of the highest rock formations. This trail is right near the North Main Parking lot.

Perkins Central Garden path
2) The Ridge Trail is a moderate, 1/2 mile loop with less than a 100 feet in elevation. This trail starts at South Garden Parking Lot and head towards the Sleeping Giant formation to hop on the trail.
3) The Siamese Twins Trail is an easy 1-mile round trip, with less than 150 feet in elevation. On a clear day, there is a fascinating view of Pikes Peak through the natural window of the Siamese Twins. This can be found near the southwest entrance of the park.
Siamese Twins
No views of Pike Peak on this day!
4) The Scotsman/Buckskin Charlie Trail are moderate trails located in the Central Valley of the park that loop through the park. There is a small parking lot to join the Scotsman Loop. It is best to start hiking from the main parking lot and connect to this trail. This area is more open and you can see distant views of the Central Garden formations.
5) The Palmer Trail is a rocky trail that runs along the north and west sides of the park from the North Main Parking Lot to the middle of the Siamese Twins hiking trail. On this trail, there will be more greenery to see and elevated views overlooking Gateway Rock. This is one of the longer hiking trails in the park.
Views from Palmer Trail
6) Choose multiple trails and make your own hiking adventure. It is very easy to connect trails at the park. When I arrived at the park, I went to the visitor center, spoke with a ranger, and grabbed a map. The ranger said the most popular hike in the park to get as many views as possible was taking the 2.7 mile loop starting on the Palmer Trail behind the North Main Parking Lot. From here, you will reach the Siamese Twins Trail and explore this area. Then cross Juniper Way at the Scotsman Picnic Area and hop on the Scotsman Trail. This will lead to the Perkins Central Garden Trail to finish the loop up to the North Main Parking Lot. That is what I did on my visit and I was able to see all the popular rock formations. And, it was a fun and awesome experience exploring amidst all the rock formations.
Hiking Tips: Due the elevation, bring lots of water and keep hydrated to avoid any affects. On those sunny days, be sure to bring sunscreen as there is no shade here. Lastly, as you would expect, come early to visit the park or try the off-season.


Bonus: Post Hike Donuts
It’s called Hiking for Donuts, so it would be a disservice if I did not include a post hike donut shop to visit after the hike. Fortunately, there is a fantastic donut shop in Colorado Springs about 20 minutes from the park called Amy’s Donuts. No exaggeration, they had over 40 different flavors/topping to choose from, which is a very tough decision to make. Flavors from Butterfinger to Fluffer Nutter to Nutella Crumb to all the standard donuts. And, the jelly donuts are filled fresh to order! Great donut shop find.
HIKING FOR DONUTS
Hi, I’m Mark. I live in Connecticut. I take new trips every chance I get. A good trip has a great hike, great food, and something fun to do. My goal is to search out new trips and share them to inspire others to try something new and exciting.
If you are looking for posts in a particular place, search City or State here.
SEE OTHER POSTS IN ARCHIVE
RECOMMENDED POSTS

RECENT POSTS
RECENT POSTS
See the latest on Instagram and follow @HIKINGFORDONUTS
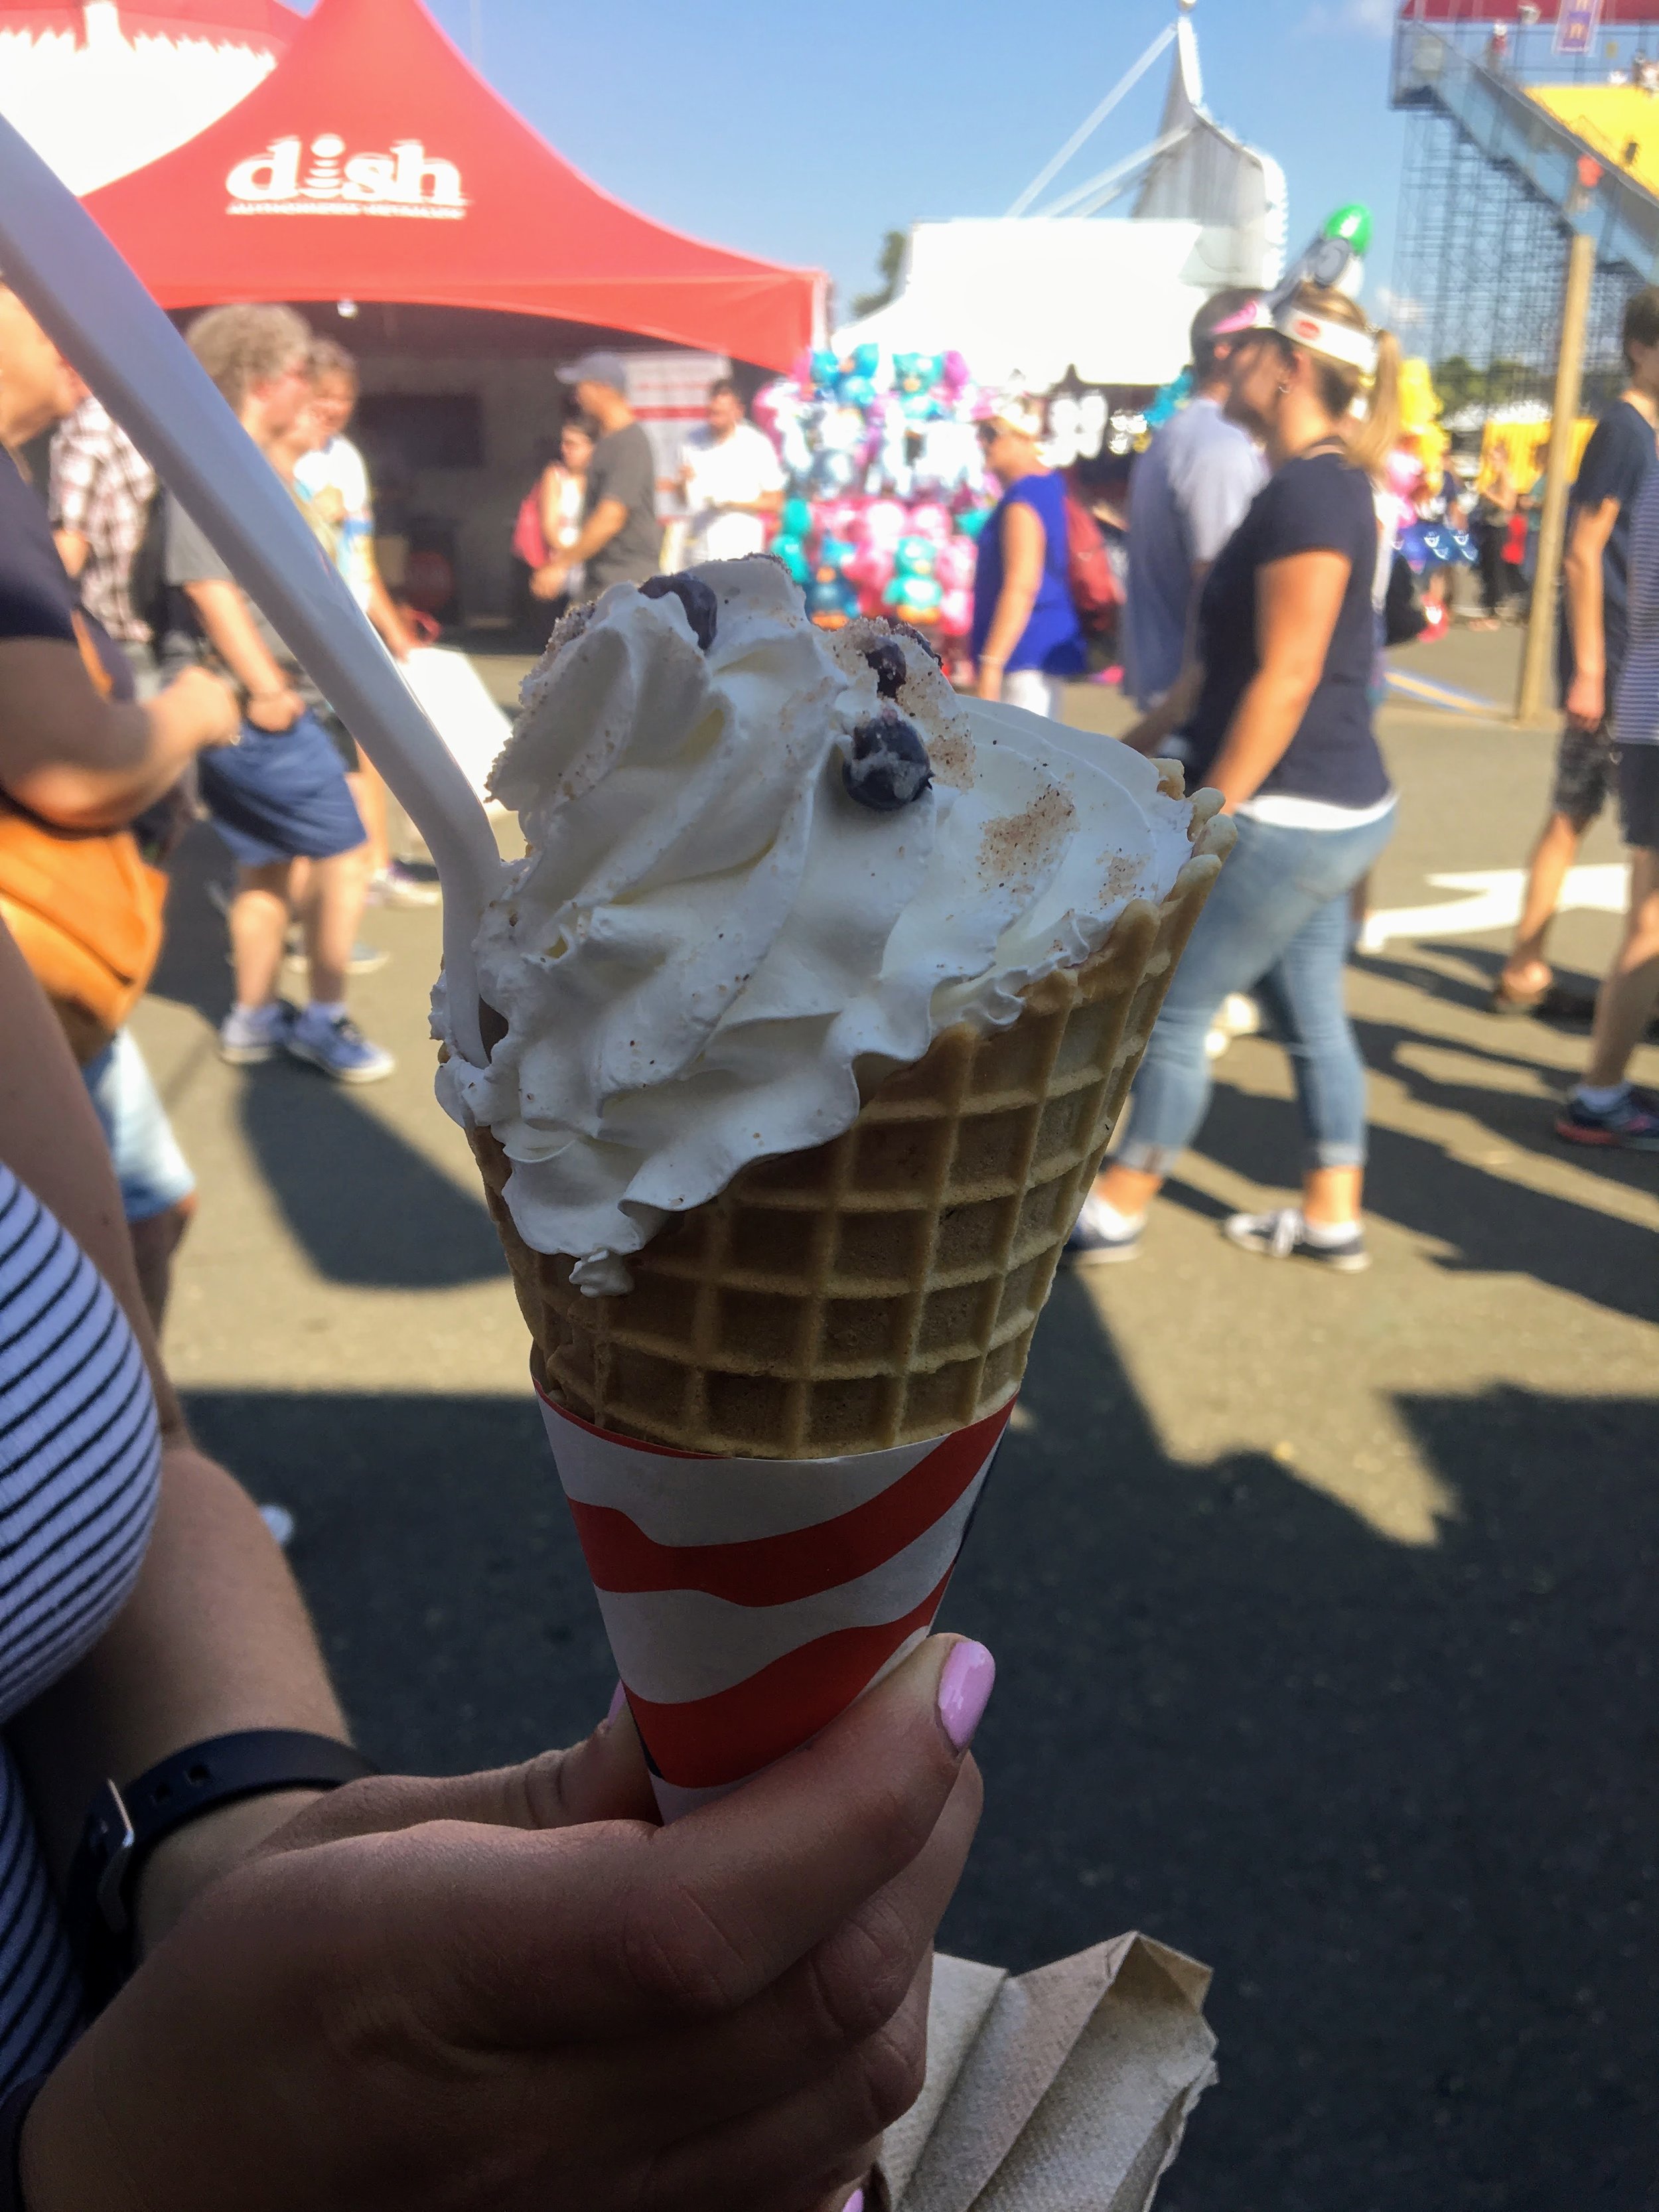
What to eat at the Big E Fair, West Springfield, MA
It's almost fall time and it is fair season here in the Northeast. I haven't been to the Big E in over 5 years. I think it was time to make a trip and show off all the good food I ate!

It’s September. Almost fall time. Everything is pumpkin flavored. And, that means lots fairs and festivals. And, it just so happens the Big E is close to me. I initially wrote this guide a few years back but since the Big E is ever changing, I will update this every time I visit. There were be some oldies and but goodies. And, then some updates of new food I recommend from 2022.

Here are some of my past crowd pleasers I would recommend.
Waffle Chicken Bites at The Deep South Food Company.

Tots-a-Lot, inside gate 9A. They had various gourmet tater tots choices from loaded to buffalo to chicken pot pie. The group wanted to try the chicken pot pie tater tots. Feedback was a big thumbs up.

Perusing through the state houses, I heard the stuffed clams were pretty good from the Rhode Island house. I would definitely agree with that.

The Turducken Sandwich from New England Craft Beer Pub on the Avenue of the States. It was more a meatloaf sandwich consisting of ground turkey, chicken, and duck with cornbread stuffing and cranberry mayo. Overall, really tasty.
We stopped at Moo-Licious, which turned out to be the best decision. Located on Springfield Road. My wife wanted to try the Blueberry Pierogi Sundae. They also have a smash a pie option where they give you a big piece of pie with scoops of ice cream. They have a build your own ice cream doughnut sandwich called a Moo-Nut. And, that is exactly what I got. It was amazing! It was a perfect glazed donut with chocolate soft serve ice cream in the middle topped with peanut butter sauce and Reese's cups.

2022 Updates
Most Big E trips consist of stops at the Sam Adams Beer Garden for Octoberfest beer but this year they had an intriguing new food option. General Tso’s Pizza. I have to say I was impressed how close the flavors were and all the elements of the chicken, mozzarella, scallions, and sesame seed just worked. And, the general tso’s sauce was used as the actual sauce under the cheese.
Not new to me but my wife’s favorite she has to have each time is the Dilly Dog. A giant corn dog but the hot dog is shoved inside a pickle and then battered and fried. This is found on West Road/East Road in the back corner.
Next up, the Chompers Food Truck on New England Ave. I have to go each year and try their special. All of their offerings are great. This year’s special was Chicken Pot Pie with a side of chicken gravy.
My favorite item right now, it is so underrated. The BBQ sundae at Porky’s Palace on Commonwealth Ave. I have had the brisket and this year the pulled pork layered with coleslaw, baked beans, and cornbread. It is so, so good and such a great play on the ingredients.
As my wife said, people order mozzarella stick and don’t blink. So, ordering massive chunks of fried cheddar is the same thing. And, that is what we did for the first time at the Wisconsin Cheese truck on Springfield Road. As you can guess, delicious.
Lastly, I scoured the fair to find one of the newest offerings this year, the Arancini Rice Balls truck. This was off of Springfield Road by Midway. They had a few interesting flavors to choose from aside from the classic and I had to try the Big Mac arancini. It did indeed taste like a Big Mac trenched in the special sauce.


HIKING FOR DONUTS
A blog for the outdoors foodie enthusiast
Hi, I’m Mark. I live in Connecticut. I take new trips every chance I get. A good trip has a great hike, great food, and something fun to do. My goal is to search out new trips and share them to inspire others to try something new and exciting.
If you are looking for posts in a particular place, search by city or state here.
EXPLORE OTHER POSTS IN THE ARCHIVE
RECOMMENDED POSTS
MOST RECENT POSTS
See where I have been recently on Instagram. Follow @HIKINGFORDONUTS

3 Easy Hikes in Mount Rainier National Park
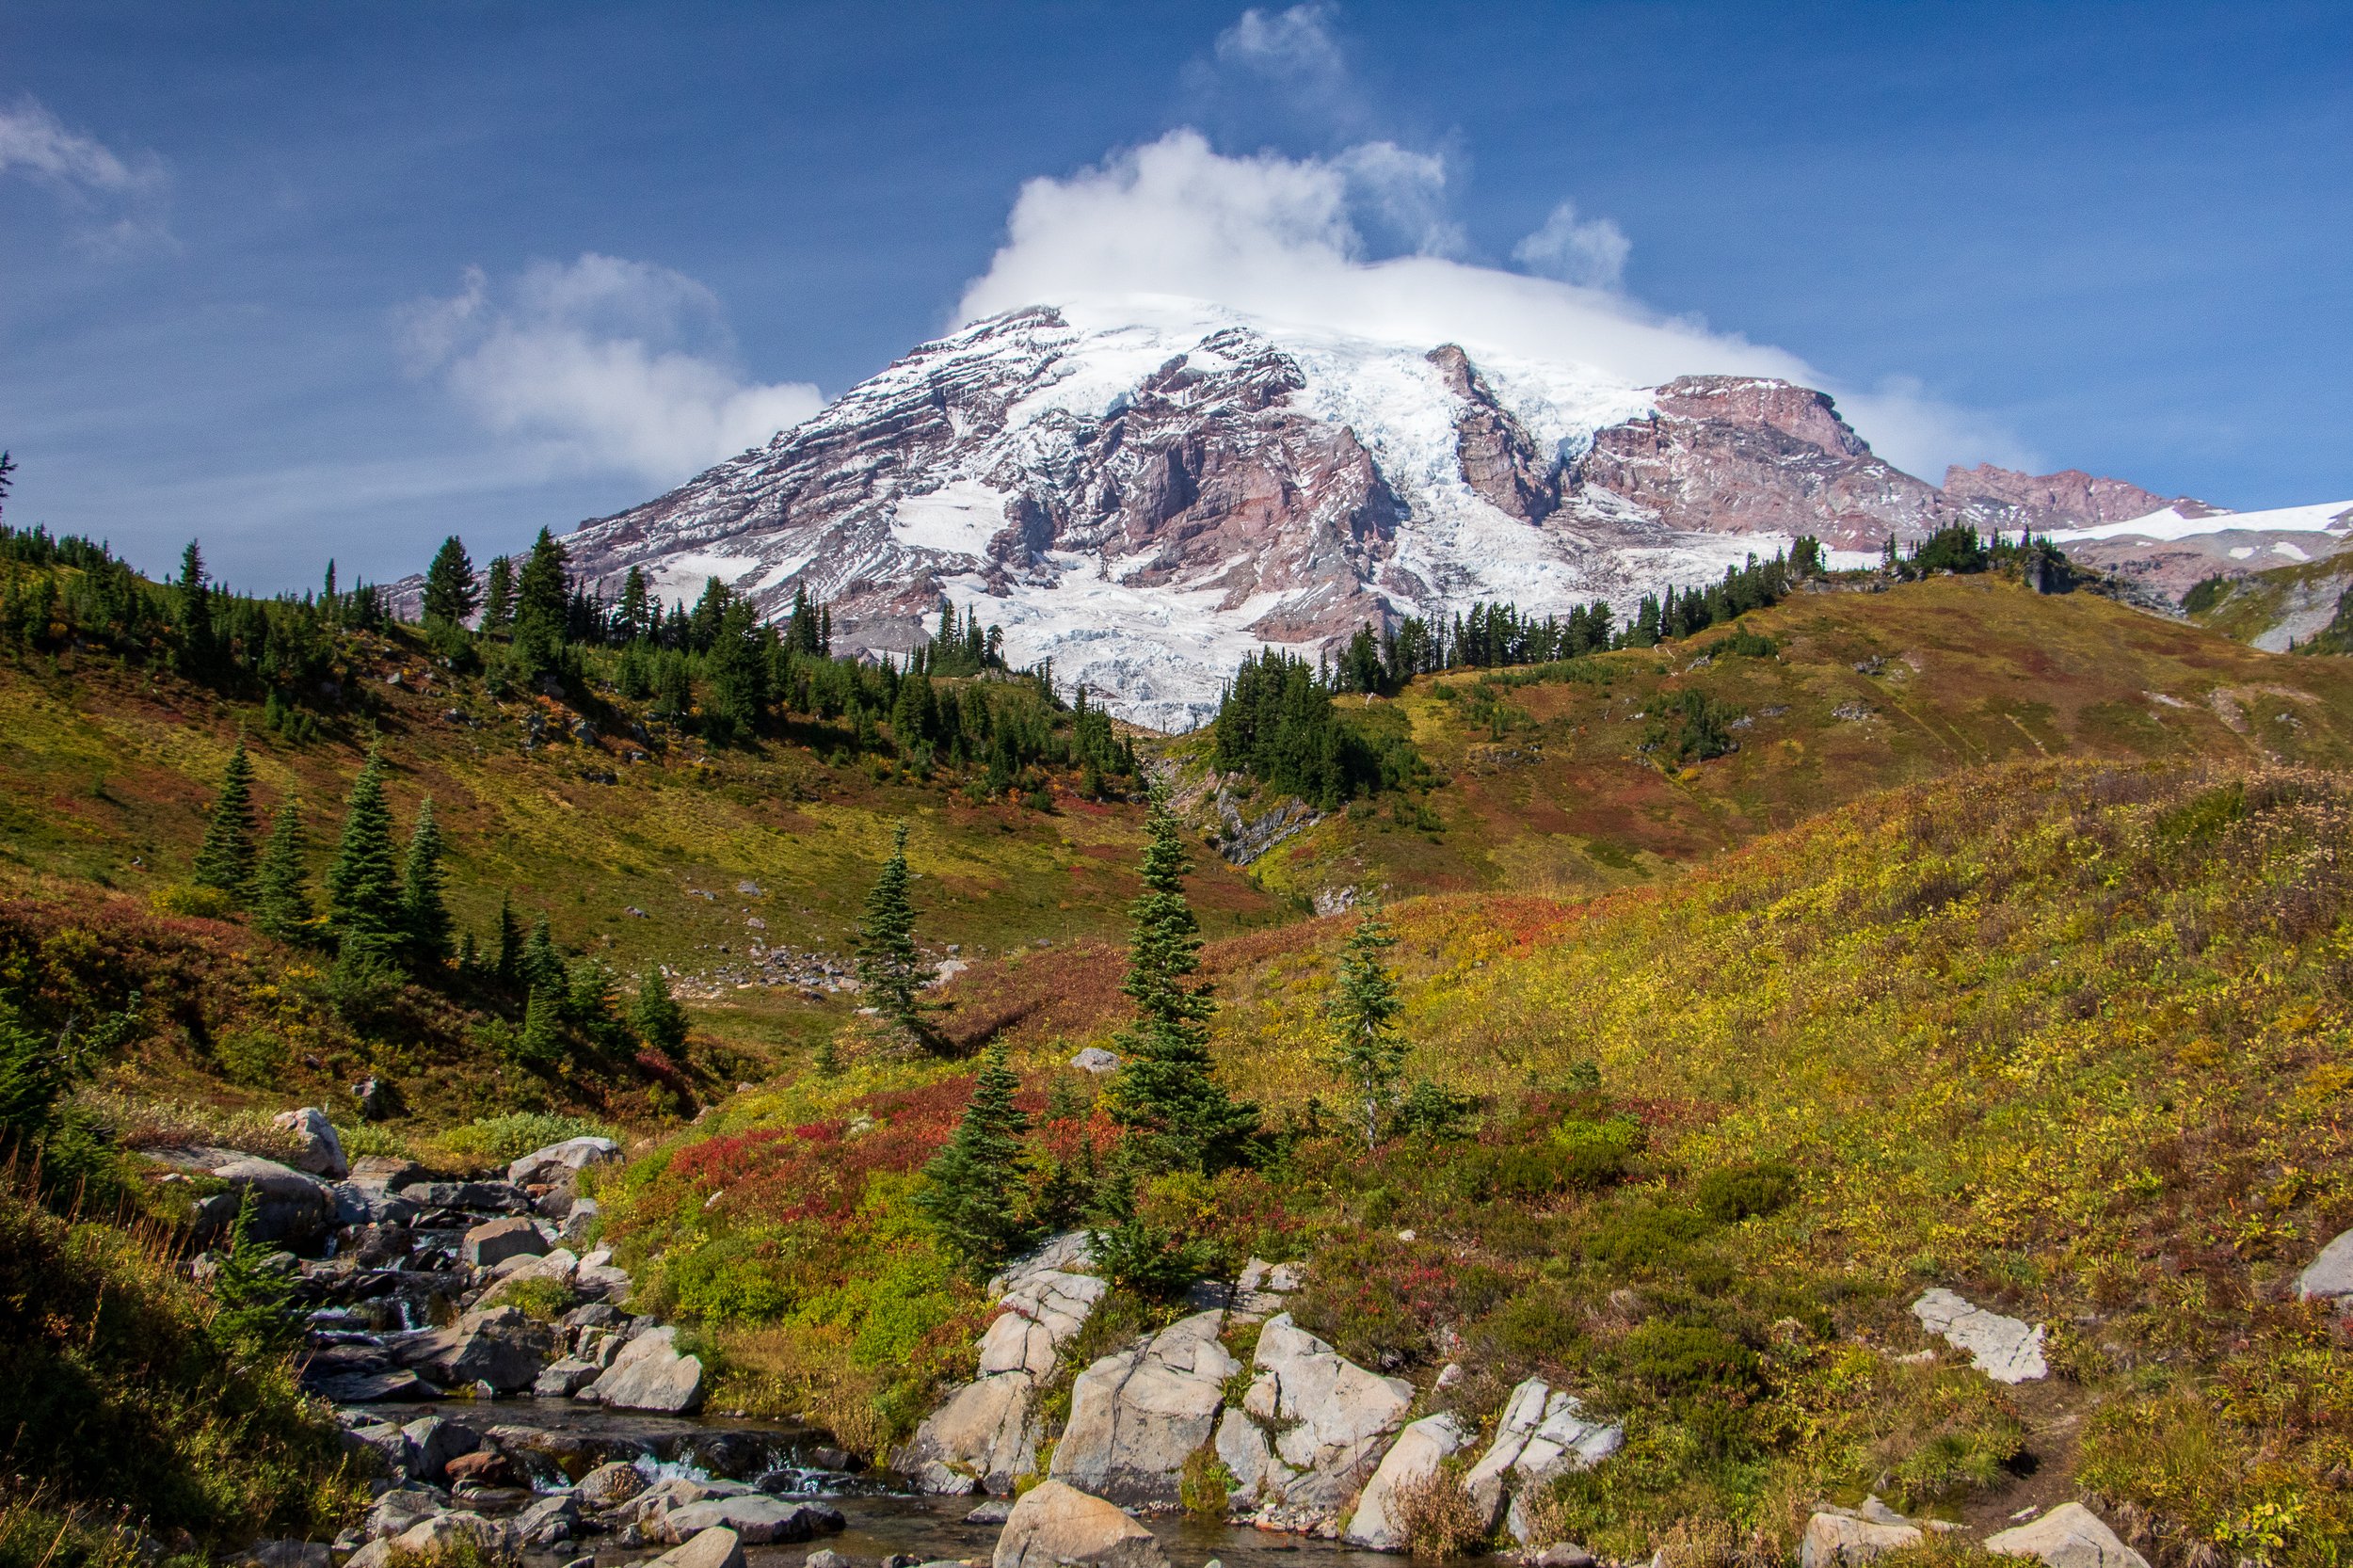
Mount Rainier National Park is one of the most beautiful parks in the United States. It’s got mountain views, rivers, waterfalls, old-growth forests, and meadows of wildflowers in the summer months. To say I was ecstatic to visit for the first time would be an understatement. However, this turned out to be a very interesting trip to plan and taught me some valuable lessons. One month before the trip, my wife tore her ACL hiking. I spent so many hours planning and like that, I had to shift plans. Credit to my amazing wife, she still wanted to go to Mount Rainier as planned and make the best out of it. Would I like this to be a full blown guide of the park? Of course. But stuff happens and guess what? Trips always work out. Our trip consisted of lots of driving through the park over 3 days and as many easy walks as possible as my wife was still able to put some pressure on her leg (she had surgery the week we came back). And, we still had an absolutely amazing time. The park is so big that we barely covered it. Sticking to the easier things to do in the park, I realized not every trip has to be insanely packed and hiking crazy to enjoy it. National Parks are for everyone. You don’t need to even hike too much if at all to enjoy it. I saw so many families and many elderly enjoying the park. For me, that is what it is about and I hope to be in my 70s-80s enjoying National Parks still. With that said, we were able to find some easier hikes with amazing views.
Some brief info on the park. Mount Rainier National Park is about 2-3 hours from Seattle based on the entrance you choose and a good 3 hours from Portland, OR. The best time to go to the park would likely be July to October. I would lean toward August or September but it really is a gamble. It was only clear and sunny one day when I visited and the other 2 days were cloudy, rainy, & foggy, and Mount Rainier was covered by the clouds. The park is huge and has 5 main sections: Longmire, Paradise, Ohanapecosh, Sunrise, and Carbon River/Mowich. Paradise is the most common and has the main park visitor center. Always make sure to check for closures and weather. For instance, one of the hikes I will be recommending, Grove of the Patriarchs, is currently closed for the rest of 2022.
As stated above, the Nationals Parks are really built for everyone these days. There is so much to see and you don’t need to do long or difficult hikes to get incredible views. If you want to get the best experience out of Mount Rainier National, here are 3 easy hikes that will be quick and fulfilling. Plus, a bonus viewpoint that may be one of the coolest areas to photograph in the park.
Myrtle Falls via Skyline Trail
Distance: 0.8 miles Trail Type: Out & Back
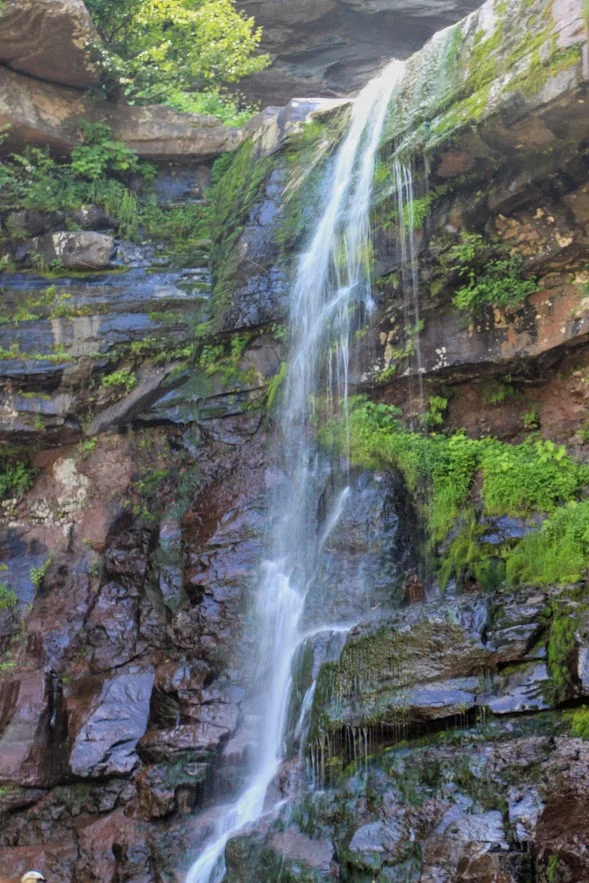
Getting to Myrtle Falls is a simple out & back from the Paradise parking area. Starting at the Skyline Trail on the paved portion heading east for about 0.4 miles and then crossing a small footbridge over Edith Creek Basin. Take a left off the path for the Myrtle Falls viewpoint. This is one of the popular waterfalls in the park standing at 60 feet with Mount Rainier standing tall in the background. This short hike is mostly all paved with little incline so this is for all ages and families looking to get amazing views.

Nisqually Vista Trail
Distance: 1.1 miles Trail Type: Loop
The Nisqually Vista Trail, located in the lower Paradise parking lot by the Henry Jackson Visitor Center, offers stunning mountain views and the trail is filled with wildflowers. There are several lookouts to view Mount Rainier, the Nisqually River, and potentially the lower reaches of the Nisqually Glacier. There is not much elevation to this trail and is one of the only paved trails in the park. This is another family friendly option and strollers are welcome starting from the upper Paradise parking lot, which has ramps to access trails.


Grove of the Patriarchs Trail
Distance: 1.1 miles Trail Type: Out & Back
The one word I felt walking along the Grove of the Patriarchs Trail was enchanted. Walking through the forest, the bright green color everywhere, all the moss, and of course the massive trees! This short hike is located on the Southeast section of Mount Rainier National Park. The trail meanders along the Ohanapecosh River that takes you to a suspension bridge to a small island destination. Here you will be surrounded by Douglas-firs, silver fir, hemlock, and Western red cedar trees. Some of the large trees can be 40-50 feet in diameter and over 300 feet tall. A very unique and breathtaking trail that is very flat for all ages to explore in the park.


Bonus: Reflection Lake
Another easy to access destination with amazing views is Reflection Lake. Located off Steven Canyon Rd, a few miles from the Paradise turnoff, just a short walk from the car is a perfect photography opportunity of Mount Rainier reflecting in the water. A great spot for sunset or sunrise. There are connecting hiking trails around the lake but all is needed is a view off the road. Definitely a bucket list stop in Mount Rainier National Park. My personal favorite of my trip even with the cloudy weather.

HIKING FOR DONUTS
Hi, I’m Mark. I live in Connecticut. I take new trips every chance I get. A good trip has a great hike, great food, and something fun to do. My goal is to search out new trips and share them to inspire others to try something new and exciting.
If you are looking for posts in a particular place, search City or State here.
SEE OTHER POSTS IN ARCHIVE
RECOMMENDED POSTS
RECENT POSTS
See the latest on Instagram and follow @HIKINGFORDONUTS

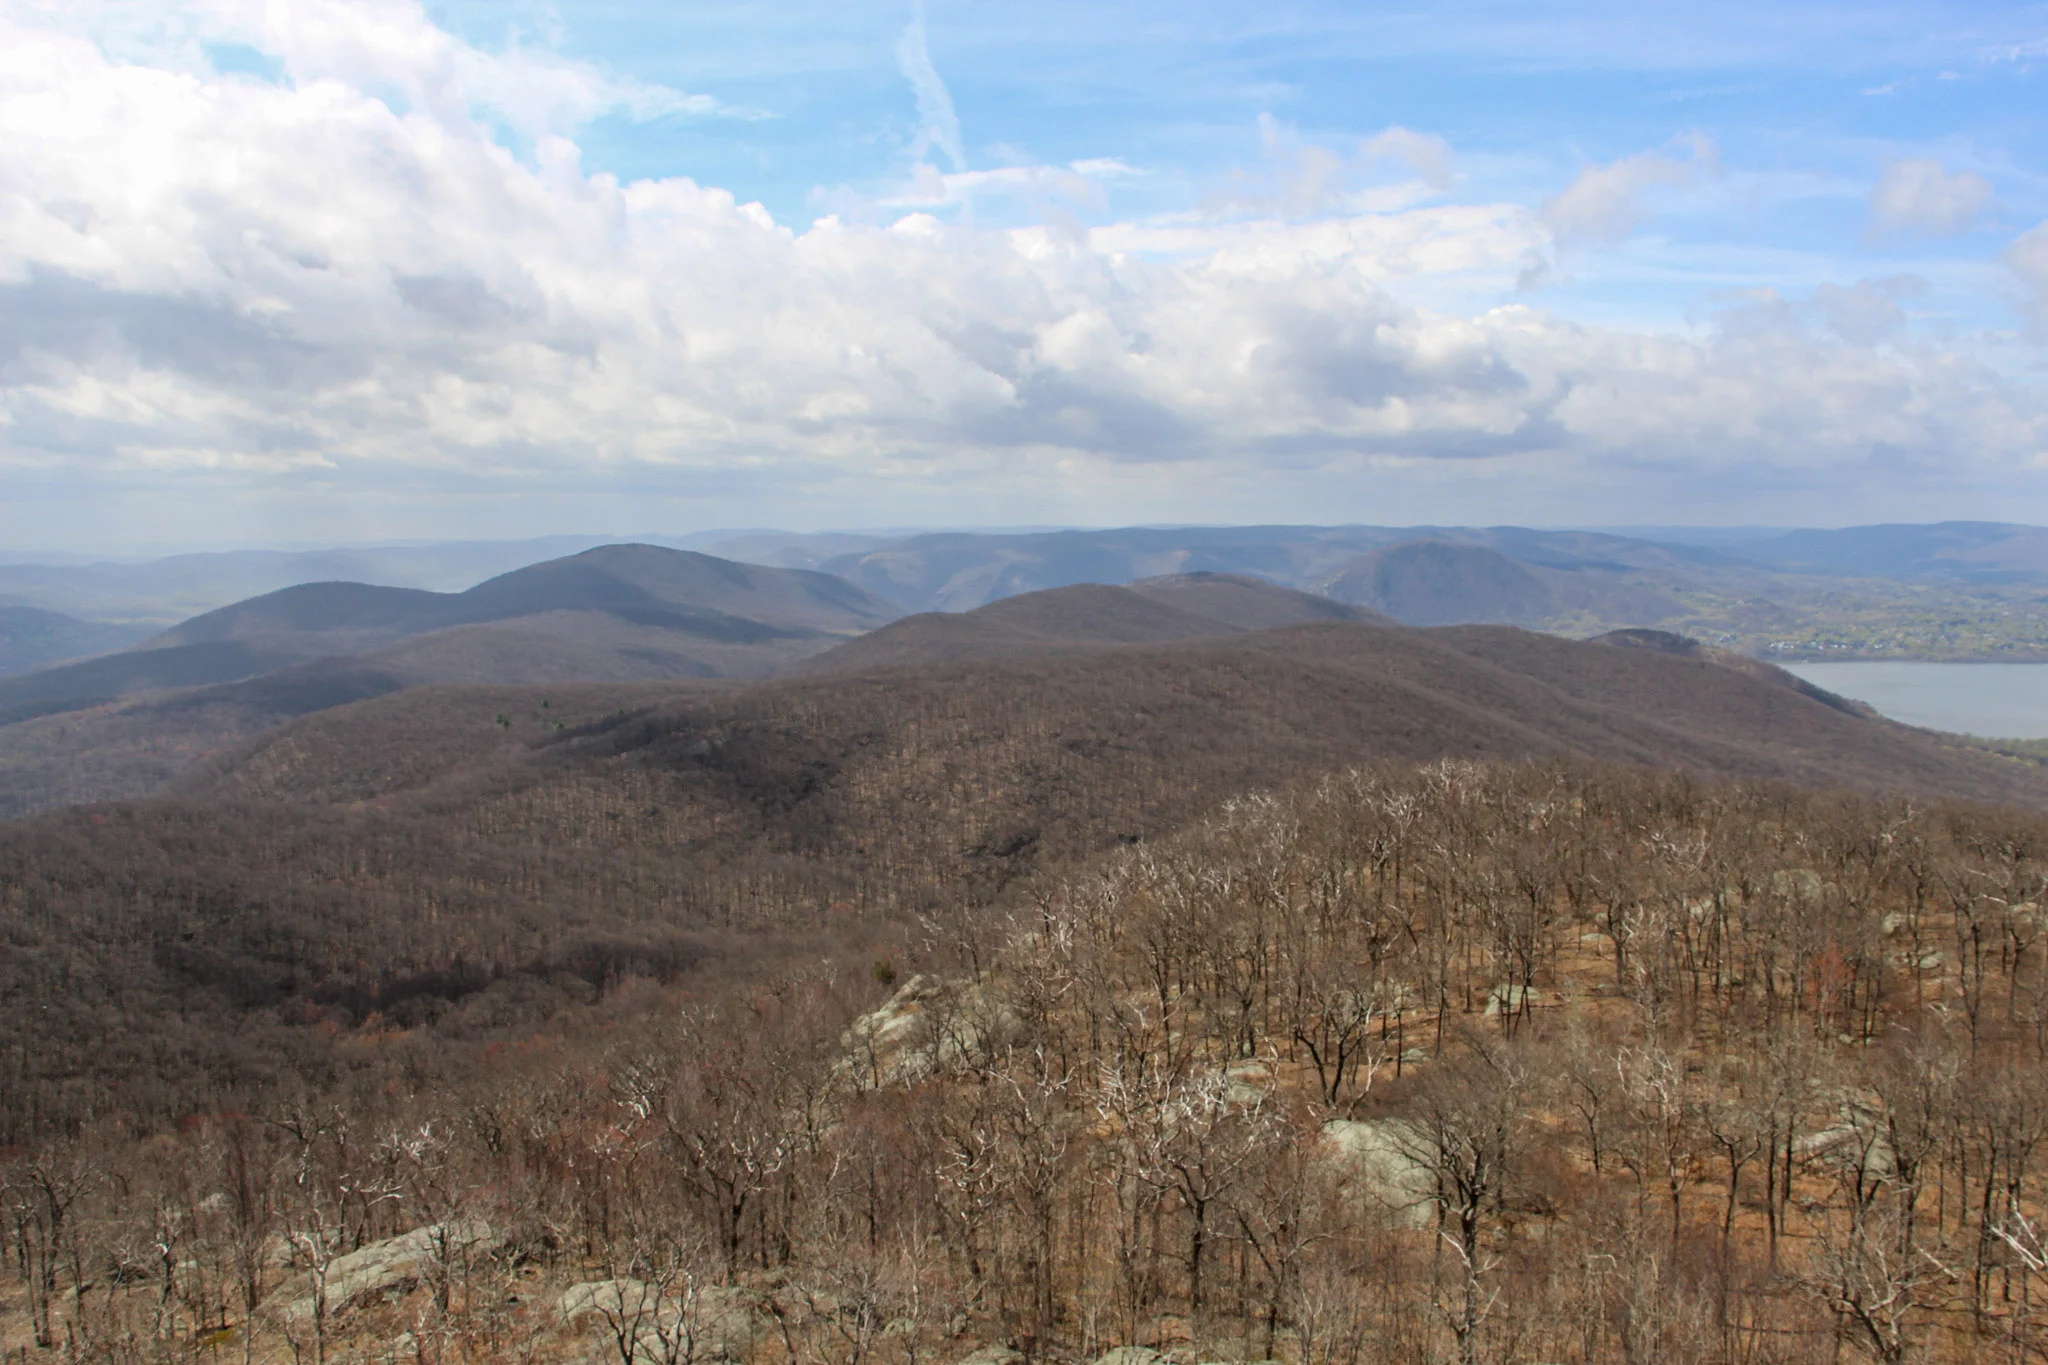
Ferncliff Forest Fire Tower, Rhinebeck, NY
Trail Description: This is a short hike that brings you to a fire tower with stunning panoramic views of the Catskill Mountains.
Trail Info:
Where: Rhinebeck, NY Distance: 1.4 miles (1 hour) Difficulty: Easy Trail Type: Out & Back Features: Views, Mountains, Water, Pond, River, Fire Tower
How to get there:
68 Mt. Rutsen Road Rhinebeck, NY 12572
https://goo.gl/maps/cXzcj8ZLTL8BxYBh7
Hiking Tips
A busy spot for nice weather and fall foliage.
There are multiple hiking trails in this park, plan your route.

The Hike
From the parking lot, there is a kiosk where you can view the trail map. The yellow-blazed trail starts past the gate. Proceed with the yellow-blazed trail as it inclines gradually along the gravel road. The signage is pretty good on this trail and there are signs to the fire tower.

In about 5 minutes, the trail reaches a pond and there will be a cabin with a sign marked “TOWER” .


And, once you pass the cabin, there is a lean-to that points to the right to continue on the yellow-blazed trail marked “TOWER”. That is the trail you want to be on.

The path continues to climb slowly. There will be another lean-to on the trail and at about another 0.6 miles, the fire tower will be on the left. There are multiple paths that lead to the tower. This is the shortest route. Once my wife and I arrived, there was already a line to go up to the tower. Only 10 people can fit at a time and even that is a stretch. Only family and friend groups were going up.

Once we got up to the top, the panoramic views were amazing! Views of the Hudson River, Catskills, and the Kingston-Rhinecliff Bridge. The fall colors were really popping. This is a great spot for sunset or sunrise. We didn’t get to spend as much time as we wanted up top as we wanted to be considerate to others waiting in line. We returned the same way we came but you could get back to the parking lot a different way.


HIKING FOR DONUTS
Hi, I’m Mark. I live in Connecticut. I take new trips every chance I get. A good trip has a great hike, great food, and something fun to do. My goal is to search out new trips and share them to inspire others to try something new and exciting.
If you are looking for posts in a particular place, search City or State here.
SEE OTHER POSTS IN ARCHIVE
RECOMMENDED POSTS


RECENT POSTS
See the latest on Instagram and follow @HIKINGFORDONUTS


Acadia National Park Guide - Best Things to do
Acadia National Park is located along the rocky coastline of Maine and is the only major national park in the northeast. The beauty of the rugged coastline along with the variety of ponds, lakes, forests, and granite peaks are home to some stunning visuals. And, of course, a hiker’s dream with unique and exciting hiking trails that offer breathtaking views or easy strolls along the coastal paths. I can’t believe I waited so long to visit. My national park philosophy is the closer it is, the more opportunities I would have to visit. Thus, I put off Acadia. It took a major life change from a global pandemic for me to make the time to drive up to Acadia. My wife and I decided to take a long weekend trip and visit last October to check out some of the fall foliage. With only a few days to explore, we had an action packed itinerary and were able to enjoy lots of what Acadia National Park has to offer. This guide is based on what we did. However, there is additional info that will give you the tools you need to plan a short or long trip along with some practical tips.
Beehive Trail Summit views
About Acadia National Park
Acadia National Park comprises 3 regions: Mount Desert Island (MDI), Schoodic Peninsula, and Isle au Haut. The majority of the park is located on Mount Desert Island and is the easiest to access from Bar Harbor, the main town where tourists stay. Schoodic Peninsula is the area to visit if you want to get away from the crowds and is about an hour ride from Bar Harbor. Isle au Haut is a remote island only accessible by ferry. It takes a full day to visit Isle au Haut from Mount Desert Island.
The park costs are $30 per car, $25 per motorbike, and $15 per individual coming in on foot, valid for 7 days. Acadia National Park is open year round, however, roads and visitor centers close from late fall to spring.
Travel tip: Stop at the visitor center and get a map. Talk to some rangers to get info on hikes or destinations within the park.
How to Get to Acadia National Park
Acadia National Park is found in Maine’s Mount Desert Island, off the east coast of Maine. The closest city to Acadia National Park is Bar Harbor.
Car: This is the most convenient way to get to the park. And, in my opinion, the best way to travel so you can go wherever you want within the park at your leisure. It is approximately a five-hour drive from Boston, Massachusetts, a three-hour drive from Portland, Maine, and an eight-hour drive from New York City.
Flying: The closest airports to Acadia are as follows:
Hancock County/Bar Harbor Airport (BHB)- 8 miles
Bangor International Airport (BGR)- 50 miles
Portland International Jetport (PWM)- 173 miles
Boston Logan International Airport (BOS)- 274 miles
Travel Tip: If you can not find parking or do not want to have a car, there is a park shuttle that runs during peak season. The shuttle includes stops in Bar Harbor, Hulls Cove Visitor Center, and various places in the park.
When to Visit Acadia National Park
The best time to visit Acadia National Park is in the fall, specifically September and October. This is when the park's gorgeous fall foliage is at full display. This is also one of the busiest times to visit but it is well worth the views and leaf peeping experience.
Summer is a good time to visit but this is the peak season. In addition, there is a higher volume of mosquitoes and ticks. Spring is another good option. Be wary, the weather can change quickly any time due to the park’s far north, coastal location. This can range from rainy to extreme fog to super hot or very cold. Winter is the least favorable option due to shorter days, road closures, facility closings and it’s very cold.
Travel Tip: Currently, during the covid pandemic, this has caused a huge spike in visitors to the U.S. national parks, especially Acadia. Expect the park to be busy, with the exception of winter, as this is the place to go if you are within 8-10 hours driving distance.
Foggy fall foliage at Jordan Pond
Best Things to do in Acadia National Park
Acadia National Park is full of many options for casual tourists, hikers, bikers, climbers, and photographers while visiting. Planning all you want to do can be hard but also the fun part. Here are some recommendations from our long weekend trip.
Views of the The Bowl from Champlain Mountain Trail
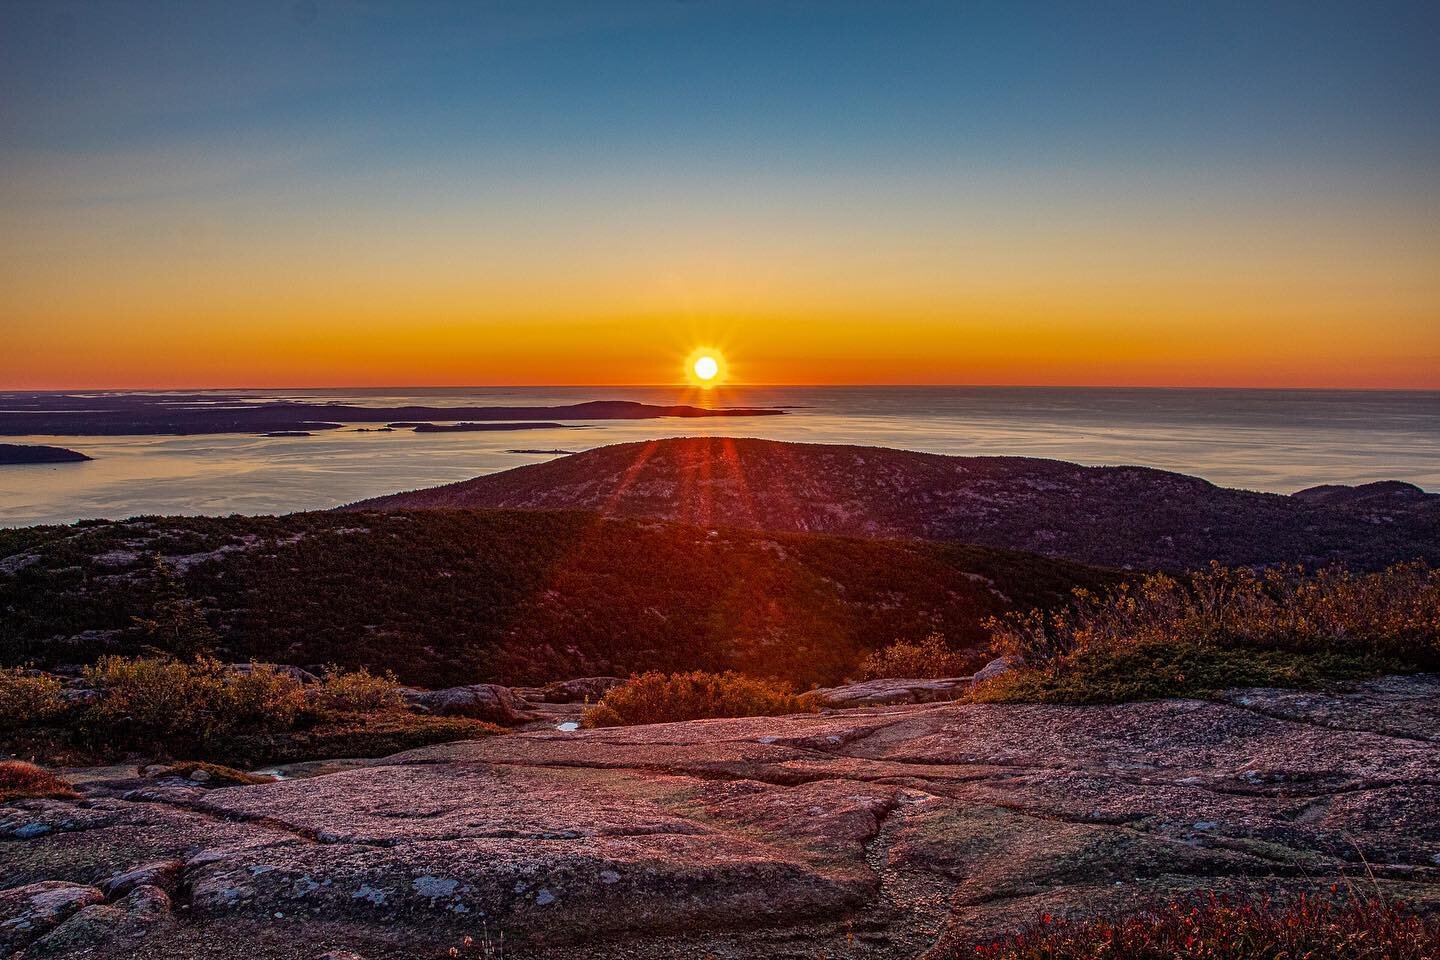
Watch the Sunrise or Sunset at Cadillac Mountain
Cadillac Mountain is the first place in the US to view the sunrise and the highest peak on Mount Desert Island. The sunrise over the Atlantic Ocean was a bucket list item for myself but even if you are only able to catch the sunset, the view is breathtaking. This was definitely worth the 3:30am wake up call.
Cadillac Mountain Sunrise
By far, this is the most popular area of the park. Parking is very limited so I recommend getting there at least an hour before sunrise. Once you drive to the top and park, you can just walk around the summit and look for a place to watch. No hiking is involved. However, there is a 0.3 miles trail at the top if you choose to do so. The weather can impact your experience. We dealt with quite a bit of fog all weekend. Due to the higher elevation, fog could block the views. However, the weather decided to cooperate and the skies were clear. And, we were able to see an amazing sunrise.
**IMPORTANT INFO**: This area of the park, you will now need reservations. The National Park Service has implemented a reservation system late-May through mid-October to cut down on traffic on Cadillac Mountain Summit Road. You can find details here on how to make a reservation.
Travel Tip: The top of Cadillac Mountain can be very windy and temperatures are much colder. Pack layers to stay warm and hand warmers, if applicable. Also, we brought head lamps to find a spot to watch since it was dark.
Go Hiking
The hiking trails in Acadia National Park can vary in difficulty, length, and elevation. There is something for all levels of hikers.
Some of the appeal to the hikes in Acadia is the excitement and thrill. There are a large number of trails with ladders and metal rungs. Similar to a via ferrata, you can hike along narrow ledges and climb up sheer rock faces with the help of metal rungs. Hikes that feature iron rungs and cliff walks include the Precipice Trail, the Beehive Trail, the Jordan Cliffs Trail, and the Beech Cliff Ladder Trail. However, if this is not for you, there are plenty of other hikes to choose from.
Starting with the easier hikes in the park, we did the Jordan Pond Loop, which is a 3.4 mile stroll around the Jordan Pond. Combining this with the Bubbles hike is an option. Check out my guide here on the Jordan Pond Loop Trail here.
Jordan Pond and the Bubbles
Other easier hiking trails include: Ocean Path (up to 4 miles or less), South Bubble (1.5m), & Cadillac Mountain Summit Loop (0.3m).
The Gorham Mountain Trail is a good option for a moderate hike. About 1.8 miles with some steep sections. Unfortunately, we were met with nothing but fog at the top. It was a fun hike but no views to show for.
Other moderately strenuous hikes include: Pemetic Mountain (6m), Penobscot and Sargent Mountains (5m) and North Bubble and Conners Nubble (3.5m).
Let’s get crazy. Of course, we had to do the Beehive Trail. Aside from Cadillac Mountain, this is probably the next popular attraction and the most popular hike. This thrilling hike heads up to a steep mountain that features a section with narrow cliff edges, iron rungs to climb up and several handrails for exposed rock scrambling. This spectacular peak overlooks Sand Beach from the northwest. This hike can be very crowded and there can be a log jam using the iron rungs to climb. This hike is very dangerous so please take your time. If you have a fear of heights, this is not for you.
Hiking the Beehive
Due to the shorter time we had to explore, we included The Bowl and Champlain Mountain summit to this hike as well. They can be done separately but make sense to include. Adding these additional trails brought the hike to about 5 miles. The views were amazing. For more specific info on hiking directions, check out my guide here.
Views from the Champlain Mountain Summit
Additional intense hikes to be deemed as difficult options include: Precipice Trail, the Jordan Cliffs Trail, and the Beech Cliff Ladder Trail.
Travel Tip #1: Weather can shift your plans. Be prepared with additional activities or hikes. It might be too foggy for views or the rain might make hiking dangerous. For instance, any hike with iron rungs, I would not suggest to attempt on a rainy day.
Travel Tip #2: If attempting the Beehive Trail, get there early for parking. The Sand Beach parking lot is where you park and fills up very fast.
Drive along Park Loop Road
Park Loop Road is a 27 mile loop that takes you to all the popular destinations in the park. The loop starts at the Hulls Cove Visitor Center. This scenic drive is a great start to an Acadia trip with some viewpoints and turnouts. Some sections can be very narrow and mostly one-way. The most notable stops along the way include:
Sand Beach
Thunder Hole
Otter Cliff
Jordan Pond
Cadillac Mountain (reservation needed)
Travel Tip: Be sure to grab a park map to plan your stops. Since the majority of the road is one way, you can not turn around if you miss something.
Sand Beach
Located on Park Loop Road, it is worth the time to stop at Sand Beach. From here you can hop on the Ocean Path Trail that is an easy walk along the eastern coastline. The trail is 2 miles round trip to Thunder Hole and 4 miles round trip to Otter Point. How far you go is up to you. You could stroll along like us and make some detours to the rocks & turn around.

Travel Tip: The main parking lot to Sand Beach is the biggest in the park. However, this is parking for all the trails listed for Sand Beach and located right across from the start of the Beehive Trail. We found parking around 8am. And, by 9-10am, the lot was full. Getting to popular parking earlier is always the best bet.
Thunder Hole
Thunder Hole is a natural inlet where you can watch waves come crashing against the rocks, creating a thunderous sound. These thunderous crashes are very dependent on the tide. Calm waves or low tide may offer an anticlimactic experience. We are able to hear the crashing noises but nothing too crazy as far as the water height.

Travel Tip: If possible, per research online, the best time to go is about two hours before high tide. Check out the tide charts here.
Jordan Pond House
The Jordan Pond House has been open since the 1890s and is famous for their delicious popovers. We stopped for lunch and other items on the menu as well were delicious. Get the blueberry lemonade, you won’t regret it.

Famous popover and Blueberry Lemonade
Not only is there great food, but there are great views as well. This restaurant is located at the shore of Jordan Pond, where you can take in the views of the North and South Bubbles in the distance. Also, this is where the Jordan Pond Loop Trail can be accessed.
Travel Tip: Parking is tough midday here. There is a small lot at the restaurant and then another bigger lot down the road. However, it is still not enough. We found better success after the lunch crowd after 2pm to enjoy a late lunch post hike. Also, their hours change by season so I would research before you go.
Bass Harbor Head Lighthouse
On the west side of the park, the most popular destination is the Bar Harbor Head Lighthouse. The amazing views of the rocky coastline along with the lighthouse is about as Maine as it gets. And, this setting is what brings so many tourists and photographers to visit. Upon arriving, there is a very, tiny parking lot. Sunset is the best time to come but the absolute busiest time. You will need to get there a few hours before sunset to get a spot. There is a path to the right where you can walk right up to the lighthouse. However, if you want that coastal view, there is a path to the left at the end of the parking lot that takes you down to the rocks.

Sunset at Bass Harbor Head Lighthouse
Travel Tip: Based on my experience, it was about as busy as going to Costco on a Saturday afternoon on a holiday weekend. We got there an hour or so before sunset on a Saturday. Cars were lined up on the narrow road in a log jam and park rangers were turning cars away. I did see people parking even down the road up to almost a mile and walking to it. My wife stayed in the car & I ran down to the path. When I got down to the rocks, there were so many people, it was hard to get a good view. I had to leap rock to rock and ask for people to move out the way to get a picture (politely of course because there was some yelling going on over pictures!). I would suggest going off peak hours or on a weekday if possible.
Schoodic Peninsula and Isle au Haut
We did not get a chance to visit but I would have looked into these other areas of the park if we had more time. Schoodic Point is another great area to see beautiful views of the coastline, with far less of crowds. And remember, Isle Au Haut is only accessible by ferry. Please note that they limit the number of visitors allowed in the Isle au Haut section to protect the environment, so I would suggest stopping by the Hulls Cove Visitor Center to plan ahead.
Carriage Roads
There are 45 miles of car-free carriage roads that run through the park. Here you will find hikers, bikers, and horses along the crushed rock surfaces. There are multiple access points and just another option to enjoy nature in the park.
Explore Bar Harbor
The town of Bar Harbor may be the one of the most exciting towns in the U.S near a National Park. There is so much to do here. This small town is full of great restaurants, bars, and unique shops. Everything is within walking distance and a very safe environment. Also, there are spectacular views of the harbor.
Where to Stay
There are numerous accommodations to stay near Acadia National Park. Airbnbs, bed & breakfasts, and hotels are plenty on Mount Desert Island. Bar Harbor is the closest town with the most going on. If you want to stay a bit farther away from the crowds, there are options in the Northeast Harbor, Bass Harbor, or Southwest Harbor. And, there are campgrounds as well such as: Blackwoods, Seawall, Schoodic Woods, and Duck Harbor Campgrounds.
We stayed at the Island Place, which was affordable and convenient. Walking distance to food and 15 minute ride to the park. Some other options include the Bar Harbor Quality Inn, Bar Harbor Grand Hotel, Bar Harbor Inn & Spa, Shore Path Cottage, and The Elmhurst Inn.
Where to Eat
If you follow this website, you know it’s about travel, hiking, and food. All about finding the good spots to eat and you know I found where to get donuts. With that said, we actually only ate out a few times and packed snacks & lunch (Hannaford’s is right in the center of town in Bar Harbor). We went to Side Street Cafe for dinner, which is very popular. The wait was pretty long but it was an excellent meal. If you want lobster, this is the place. We actually got lobster stew and it was fantastic. For breakfast, we stopped at 2 Cats for some baked goods, breakfast sandwiches, and donuts! Also, they have pretty funny cat puns at all their signs.
Other recommendations based on research to try include: Havana, Atlantic Brewing Company, Jeanine’s Great Maine Breakfast, Docksider, Rosalie’s Pizza, Mount Desert Island Ice Cream, C-Ray Lobster, & Rose Eden Lobster.
If you have any further questions about planning your trip to Acadia National Park, please post in the comment box below.
HIKING FOR DONUTS
Hi, I’m Mark. I live in Connecticut. I take new trips every chance I get. A good trip has a great hike, great food, and something fun to do. My goal is to search out new trips and share them to inspire others to try something new and exciting.
If you are looking for posts in a particular place, search City or State here.
SEE OTHER POSTS IN ARCHIVE
RECOMMENDED POSTS


RECENT POSTS
See the latest on Instagram and follow @HIKINGFORDONUTS

Best Places to Eat in Portland, Maine
Portland, Maine is one the best foodie towns in the U.S. Every time I visit I find more delicious and creative food spots. The options are endless. Sometimes when visiting such a big food city, it is overwhelming where to start. Don’t worry, I did all the work for you. These are my favorite spots I have stamped with approval. Check out the official Hiking for Donuts food guide to Portland, Maine.
One of my favorite foodie cities to visit is Portland, Maine. There are so many great places to eat. Of course the seafood is fantastic, but the food is much more diverse. Every time I visit, I find new delicious and creative food spots. The choices are endless.And, there are more hits, than misses. My Uber driver said it best, “If it’s not good, it won’t last here.” I haven’t been everywhere, but I think I have done a pretty good job finding some of the best eats in Portland. I assume there will be a part 2 or 3 to this down the road. If you want to eat your way through the city and regret nothing, I got you covered. Enjoy!
Duckfat
One of my favorite restaurants in Portland is Duckfat. This is gluttony at its finest and absolutely fantastic. Hence the name, a lot of items here are cooked in duck fat such as fries, brussel sprouts, donut holes, and even added to a milkshake! With that said, their panini game is top notch. My go to panini is the homemade meatloaf. You heard right. Meatloaf is a heavily underrated dish and they knock it out the park in this sandwich that includes horseradish, pickled onion, cheddar, and smoked poblano mayo between fresh baked bread. So good. The first time I visited Duckfat, I had the meatloaf Panini, duck fat fries, the duck fat milkshake (made with vanilla gelato) and the group sitting next to me offered up some duck fat fried donut holes. I had to go back to the hotel and just lay on the bed directly after the feeding. 100% worth it. Note, the restaurant is pretty small so expect a long wait on busy weekends. This is an absolute must have in Portland.


Empire Chinese Kitchen
I love Chinese cuisine. One of my buddies from Portland suggested Empire Chinese Kitchen for my most recent trip. And, I can’t thank him enough. This spot blew me away. My girlfriend and I went for dinner but it was so packed and the waiting was so long they had to turn us away. I wasn’t leaving without trying so we went first thing the next day when it opened and we got right in. Empire is a family-style restaurant that offers many small plates so you can try multiple dishes. The menu is great and filled with the classics with an upscale take that takes it to another level. We ordered the honey walnut shrimp, lobster rangoons, and duck lo mein. This shrimp was amazing and destroyed any rock shrimp type appetizer I’ve ever had. The lobster Rangoon was the best rangoon I’ve had. And, the duck lo mein was on point. We couldn’t stop there so we ordered their BBQ pork stuffed steam buns and pork fried dumplings. I have been obsessing over finding Bao steamed buns lately and these were money. All the food was great, tasted fresh, and never greasy. My new favorite spot in Portland. Somehow, someway, go to Empire.


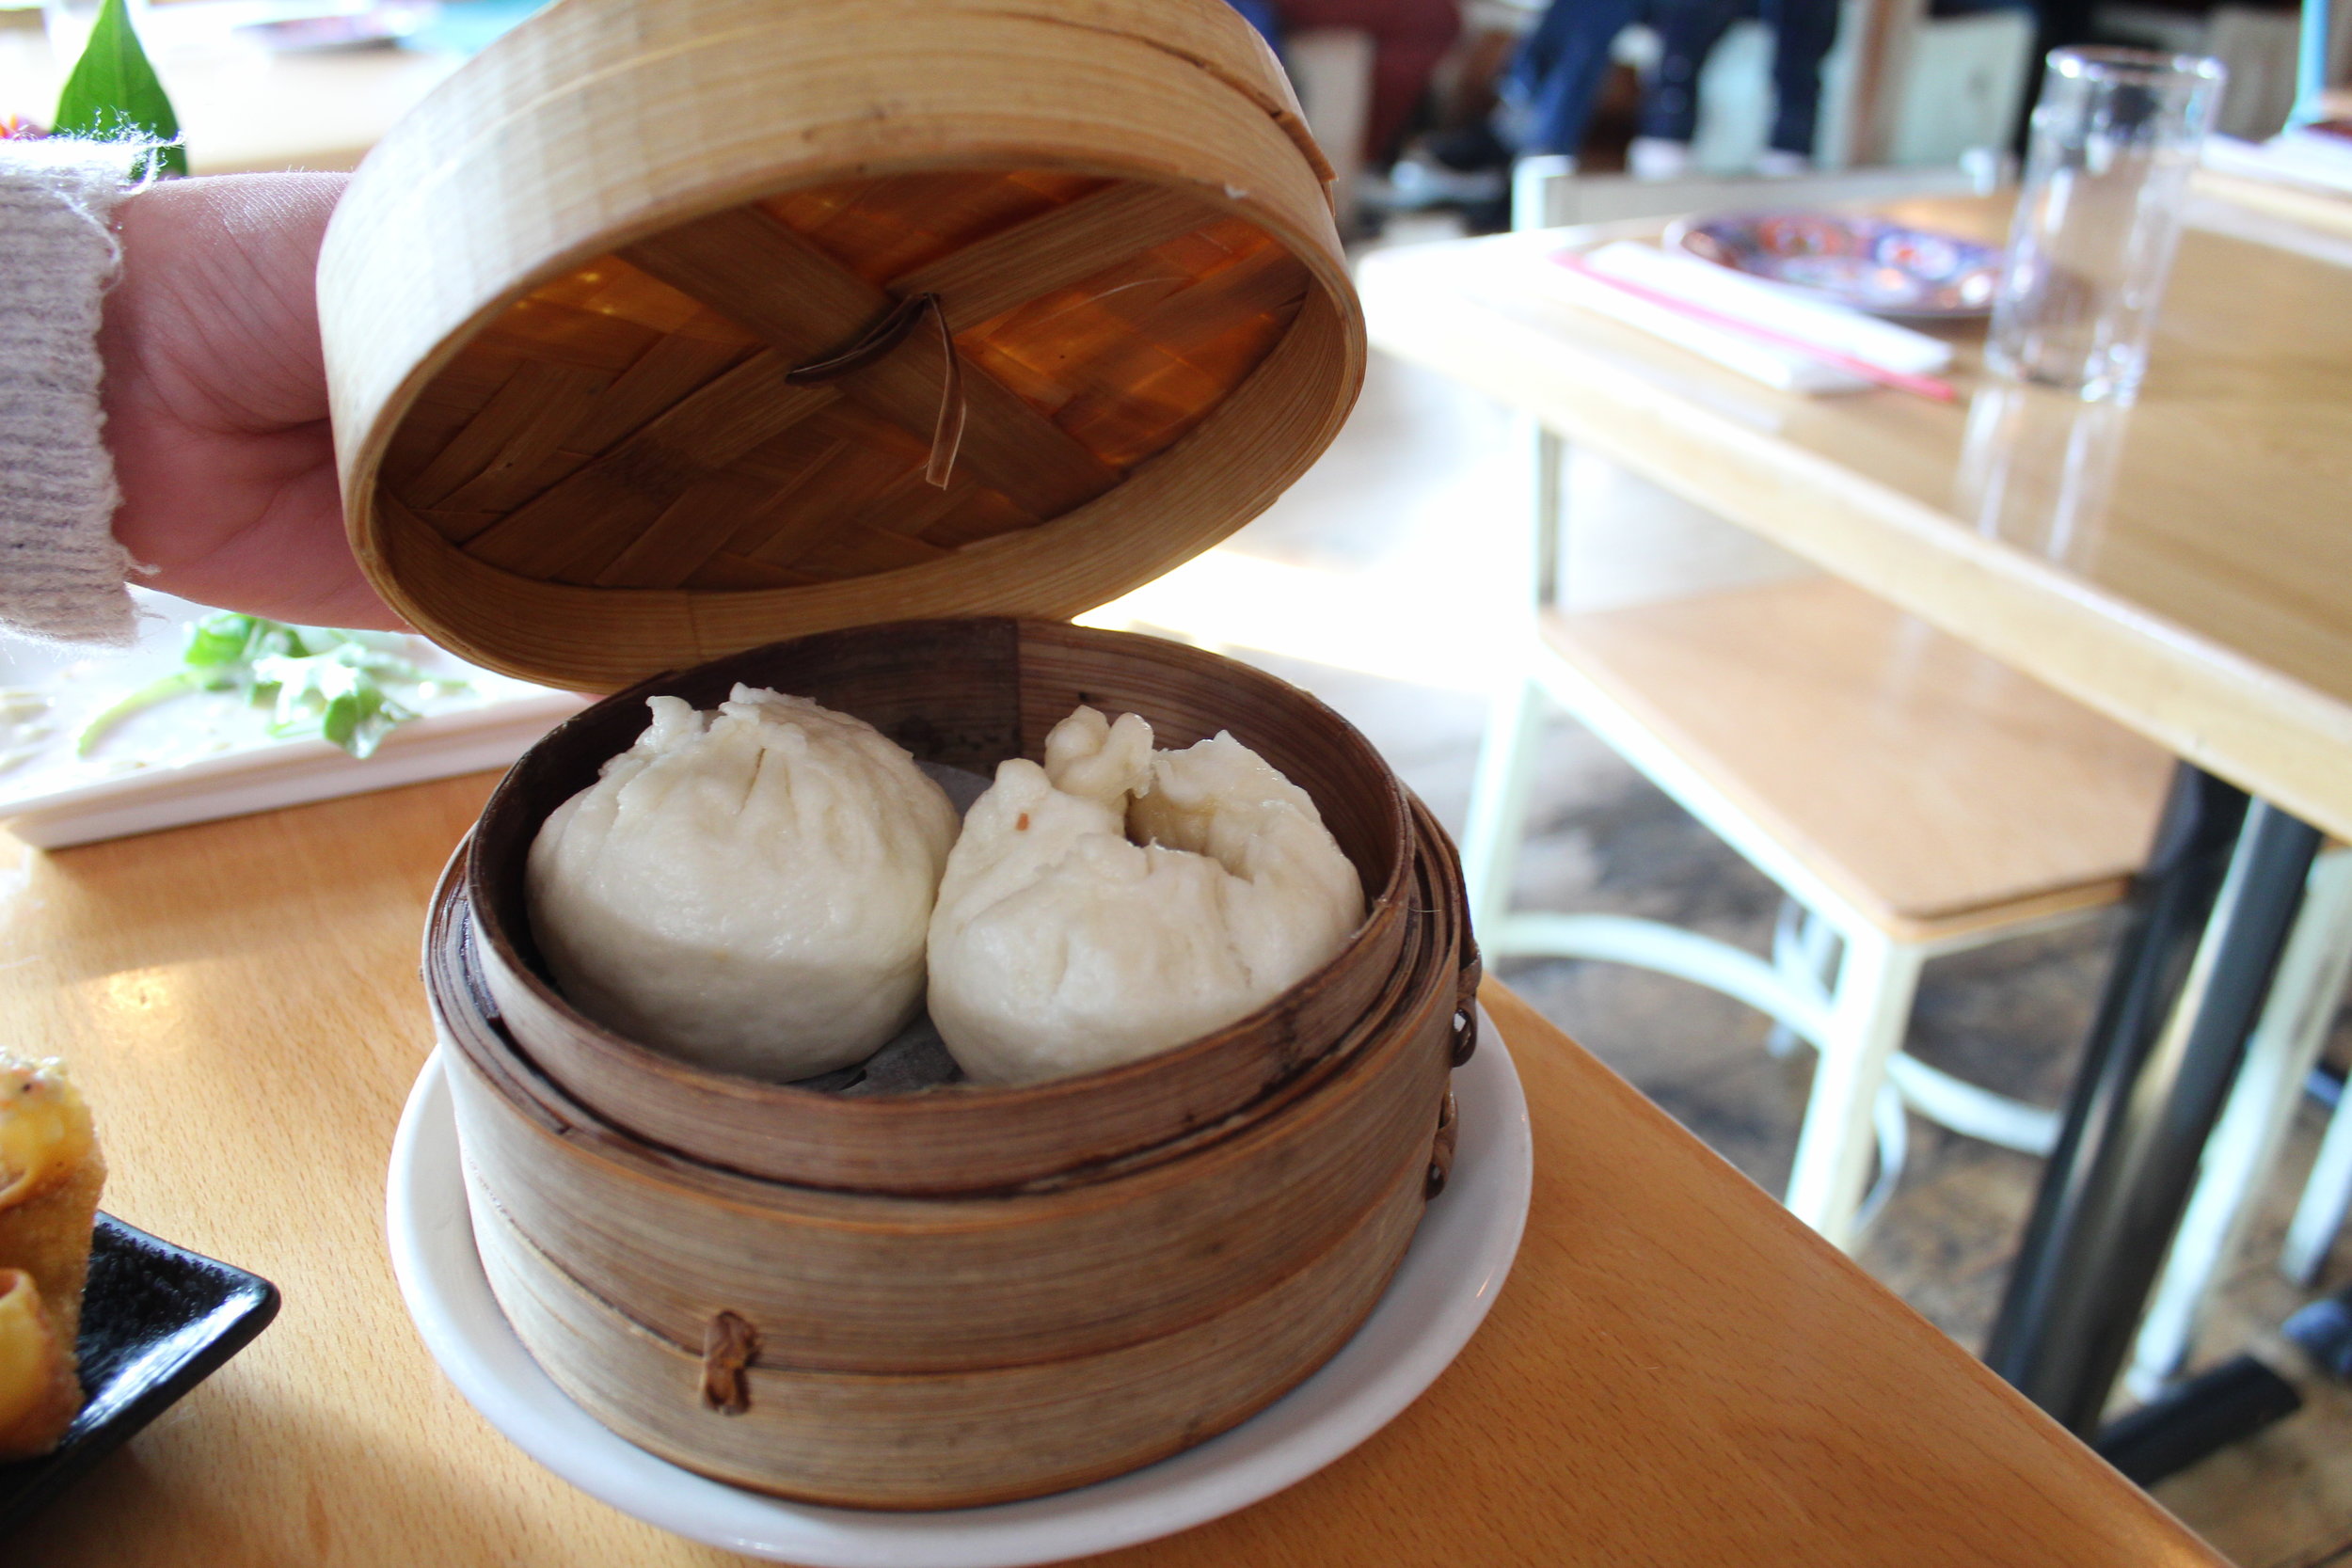


Street & Co.
Street & Co. is one of my go to dinner restaurants in Portland. If you want some awesome seafood dishes, this is the place to go. I have never had a bad meal. The pasta dishes are phenomenal. Every time my wife and I go here we order the mussels appetizer, which is a ginormous mound of deliciousness. Maybe the best mussels I ever had. Anywhere we go and get mussels, they are compared to Street & Co.’s version. Dip the bread in the broth after, the thought gets my mouth watering. On our most recent trip, we noticed they offer tuna bolognese (pictured below). Like fresh tuna, not canned. We had to try it out and we were blown away. I kept saying, “I don’t how or why, but I can’t stop eating this”. One of the more unique tasting dishes I have had.
Dutch’s
Breakfast and brunch is a pretty important meal. It’s always great to start the day with a delicious meal. Portland has great breakfast and brunch spots. Luckily for me, my girlfriend found Dutch’s. This place is another Portland gem that has a lot of classics with a twist. They have a more cafeteria style arrangement where you pick your own table and stand in line to order. They have quite a bit of daily/weekly specials to choose from and their own menu is extensive. I chose 10 different items before I got to the counter and went with the Breakfast Burrito. There was special burrito with sausage, eggs, salsa, and hash browns. I pretty much order a breakfast burrito everywhere I go for breakfast and this was one was up there. It was massive and full of flavor. My girlfriend ordered the Spicy Chicken Biscuit sandwich, crispy chicken thigh, avocado mash and a house hot sauce. This was delicious and rivaled to a sandwich you would find in the South. We ordered the loaded hash browns on the side. They have a bunch of baked available which INCLUDES special donut flavors on Saturdays. So, you know I jumped on that. They had Cranberry frosted and Pecan Pie filled. Listen, I love me a classic yeast raised donut that perfectly chewy, not greasy. The Pecan Pie was amazing. Dutch’s knows how to make a great donut. Maybe one of the best in Portland.

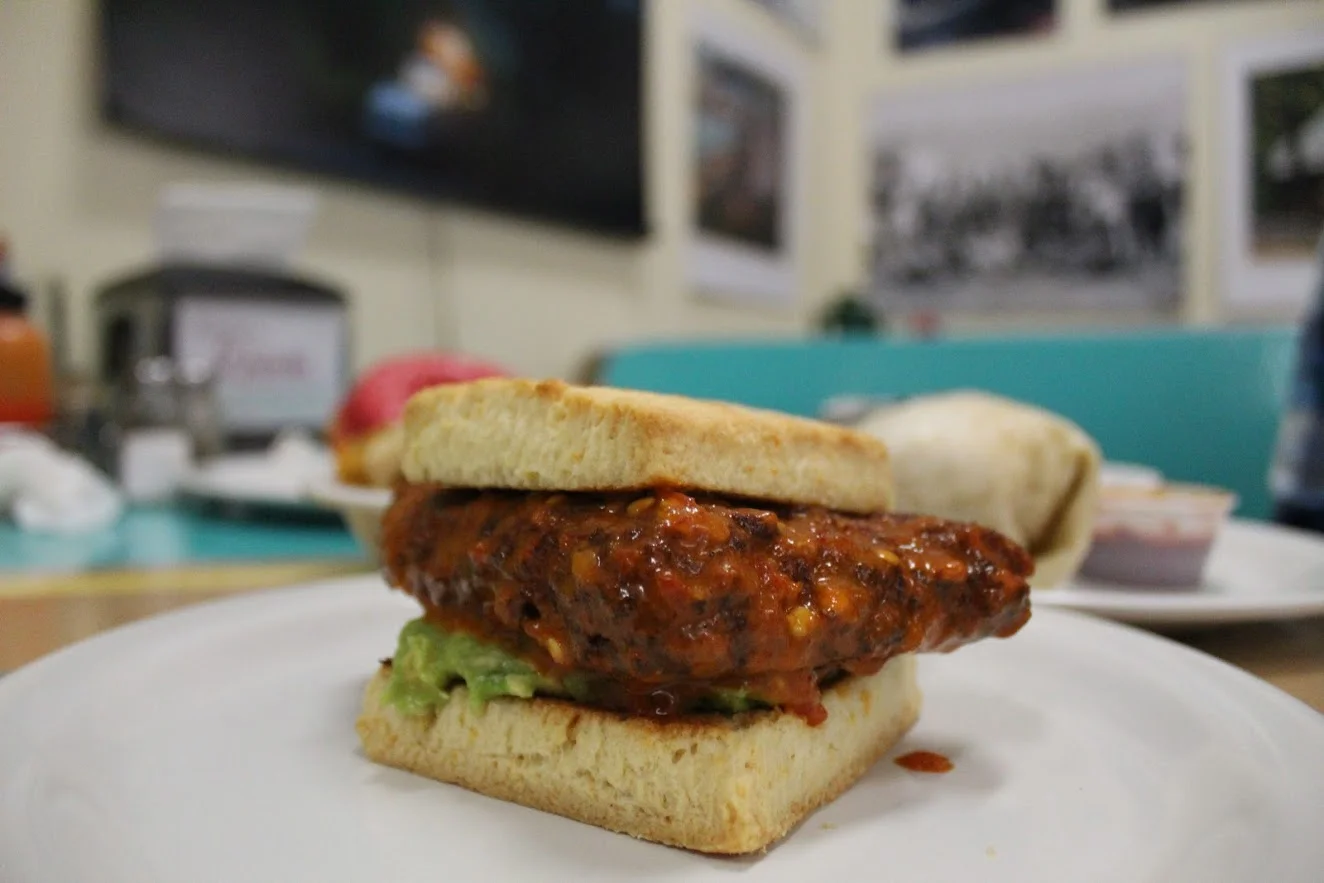


The Highroller Lobster Co.
If you want great seafood, Portland is the place for it. And, if you are in Maine and want seafood, you want some lobster. The Highroller Lobster Co. is all about lobster. Their menu consists of lobster rangoons, lobster grilled cheese, fried lobster lollipops, and of course the lobster roll. They have a cool back patio, chill vibe, and dynamite food. Get your lobster fill here.


Luke’s Lobster
Another lobster roll spot to check out is Luke’s Lobster on the Portland Pier. They are the more traditional seafood roll & fried seafood experience. The lobster roll was fresh and delicious. The crab roll was very good as well. They definitely do not skimp on the meat inside in the rolls. Not only is the food great, but the views from the restaurant are pretty awesome too.


Gilbert’s Chowder House
When you are in New England, one of the must have dishes is chowder! All different versions: corn, clam, seafood, New England, Manhattan, etc. Gilbert’s Chowder House was the spot for me. I tried the clam and seafood chowder. Wow, full of flavor and massive chunks of seafood. Look at that lobster!

Mash Tun
Mash Tun is located close to the waterfront in Portland. This is a great, late night hangout spot with an amazing local beer list. They are known for their burgers. I can’t speak to those as of yet. However, sometimes you just need a snack. In between brewery stops, we needed to nibble and we stopped in at Mash Tun and noticed the Cheese Plate. This as reasonably priced so we gave it a shot. The combination of the cheddar cheese, the briny cornichons, sweet apples, pickled onions, chef’s jam, honey Dijon and the bread was what we needed. It is simple but when it all works together, there is nothing like a good cheese plate. I would go back just for this.

Locally Sauced
Upon arriving at Bissell Brothers for my craft beer fix, I was glad to see a new restaurant opened next door. Locally Sauced offers locally sourced ingredients for their menu consisting of nachos, tacos, burritos, and some Tex Mex options. The restaurant is small but they do an order window next to the entrance of Bissell Brothers and you can take the food into the brewery. Of course, after a few beers we were hungry and I ordered some nachos. Now, they do cost $18 but the portion size can easily feed 4-5 adults. This is a great offering to have next to Bissell Brothers.

Bar of Chocolate
If you are looking for a late night martini and a decadent dessert, the Bar of Chocolate is the place to go in Old Port. Choosing from a menu of over a dozen desserts and martinis, you will find an array of chocolate options. We ordered the chocolate cake with sea salt and caramel frosting along with the Peanut Butter martini. The cake was delicious and the drink lived up to expectations. This is a small, cozy location for a great night cap.
Holy Donut
The Holy Donut is a Portland staple, and by far, the most popular donut shop in town. Walking along the harbor on the cobblestone walkway in Old Port, this donut shop is easy to find on weekends. Look for the lines out the door. I have to stop in every time I visit. What makes The Holy Donut unique is that their donuts made with potatoes. Like most cake batter donuts they are dense but also fluffy and moist at the same time. They are fantastic. And, they have some great flavors available such as Sea Salt Chocolate, Maple Bacon, Toasted Coconut, Coffee Cake, and Triple Berry Cannoli to name a few. In addition, they make a Ginger Sweet Potato donut that is unreal. If you want to try these donuts, make sure you get there early. They do tend to sell out. Warning, these donuts are addictive.


Hi-Fi Donuts
On my last trip to Portland, I was excited to hear about a new donut shop that opened called Hi-Fi Donuts. This donut shop offers a different alternative donut option to The Holy Donut, which I think is great. Hi-Fi Donuts offers a wide variety of donuts, flavors, and textures such as crullers, cake, and yeast donuts in very creative flavors along with some classics. In addition, you can order breakfast sandwiches between a glazed donut! There is something to please everyone. My selection included a black and white cruller, blueberry frosted, candied apple swirl, and the hefeweizen (beer yeast). They were super fresh and I enjoyed all the donuts. There are so many options, I can’t wait to go back to try more.
Lil’s Café (Bonus)
If you are driving on I-95N through New Hampshire to Portland, there is a little spot in downtown Kittery that is the perfect pit stop. Lil’s Café offers really good baked goods, soups and sandwiches. They have coffee options as well but we went with some hot chocolate. This was the good stuff. In addition, we ordered a few cruller donuts, which is what they are known for, along with an almond croissant. The almond croissant was mouthwatering. Very flaky and the middle was gooey with almond paste. I wouldn’t pass there baked goods.


HIKING FOR DONUTS
A blog for the outdoors foodie enthusiast
Hi, I’m Mark. I live in Connecticut. I take new trips every chance I get. A good trip has a great hike, great food, and something fun to do. My goal is to search out new trips and share them to inspire others to try something new and exciting.
If you are looking for posts in a particular place, search by city or state here.
EXPLORE OTHER POSTS IN THE ARCHIVE
RECOMMENDED POSTS
MOST RECENT POSTS
SEE THE LATEST ON INSTAGRAM AND FOLLOW @HIKINGFORDONUTS
Jordan Pond Loop Trail, Acadia National Park
Trail Description: The trail is an easy hike that circles Jordan Pond with many opportunities to explore the shore and observe wonderful views.
Trail Info:
Where: Mount Desert, ME Distance: 3.4m (1.5-2 hours) Difficulty: Easy Trail Type: Loop Features: Views, Mountains, Pond, Water
How to get there:
The Jordan Pond North Parking Lot is located on the left side of Park Loop Rd at the Jordan Pond House. There is another lot next to the restaurant for additional parking as the lot fills up quickly.
https://goo.gl/maps/oQGDyrrCaNHjccsb8
Hiking Tips
Weekends are super crowded. Beware! Parking can be tough.
Post hike, eat at the Jordan Pond House. Get a popover & blueberry lemonade!
The Hike
One of the more iconic landscapes you will see at Acadia National Park is Jordan Pond. If you find yourself in Acadia, this has to be added to your list of things to check out. The shoreline of the pond has amazing views of The Bubbles, two glacially sculpted mountains at the northern end of Jordan Pond. The views are great all times of day, especially sunset and stargazing at night. Not only are the views spectacular, but the rewards of delicious food at the Jordan Pond House is almost worth the visit alone.
This was my very first trip to Acadia. I was not a happy camper to show up to nothing but fog. However, as I am learning, planning trips for national parks is impossible. You take what you can get from mother nature. Even though it was foggy, my wife and I decided to circle Jordan Pond as intended. We did have a few moments where the fog began to lift for some cool views on the pond and a tease of that fall foliage we drove 6.5 hours for! But that dissipated rather quickly. Even so, the eerie look was pretty cool.
The beginning of the trail can be found at the end of the field at the Jordan Pond House. The trail will be split as you approach. We chose to head right to stroll along the east side first. This section of the trail is more level. There are some bridges to cross over the streams that flow into the pond. As we made our way to the left side, there is a dirt trail, boulders, and a wooden plank path through the wetlands. The last 0.5m of the hike was on elevated boards, which I thought was a really cool way to protect the ecosystem. There are various points on the trail where you can hop off and explore the pond's shores. Other than that, the trail is well-marked and pretty self-explanatory.
The other great thing is that you do not need to really hike that entire trail to see some amazing views. The Jordan Pond House practically overlooks the pond. We did not get a chance to eat there the first day so we came back the next day and the weather was beautiful. I walked around the east side again briefly and I was able to see the stunning views I came here for.
Make no mistake, the views are as advertised. BUT do not, at any circumstance, miss out on a popover from the Jordan Pond House. By far, the best meal I have ever had in a national park. That popover with the jam and butter and you have to get the blueberry lemonade, magnifico! We actually tried the bison meatloaf sandwich too. Pretty damn good.
For views like this in a national park, this is as easy as it gets for a hike, or leisurely stroll. The trail is for everyone including children & dogs. It’s a great starter hike to get blood flowing or cool down after some more treacherous trails. This is a classic Acadia hike that should be added to your National Park bucket list. The view of the water with the curves of The Bubbles in the background is quite memorable. And, when you finish, it’s time for a popover!
HIKING FOR DONUTS
Hi, I’m Mark. I live in Connecticut. I take new trips every change I get. A good trip has a great hike, great food, and something fun to do. My goal is to search out new trips and share them to inspire others to try something new and exciting.
If you are looking for posts in a particular place, search City or State here.
SEE OTHER POSTS IN ARCHIVE
RECOMMENDED POSTS
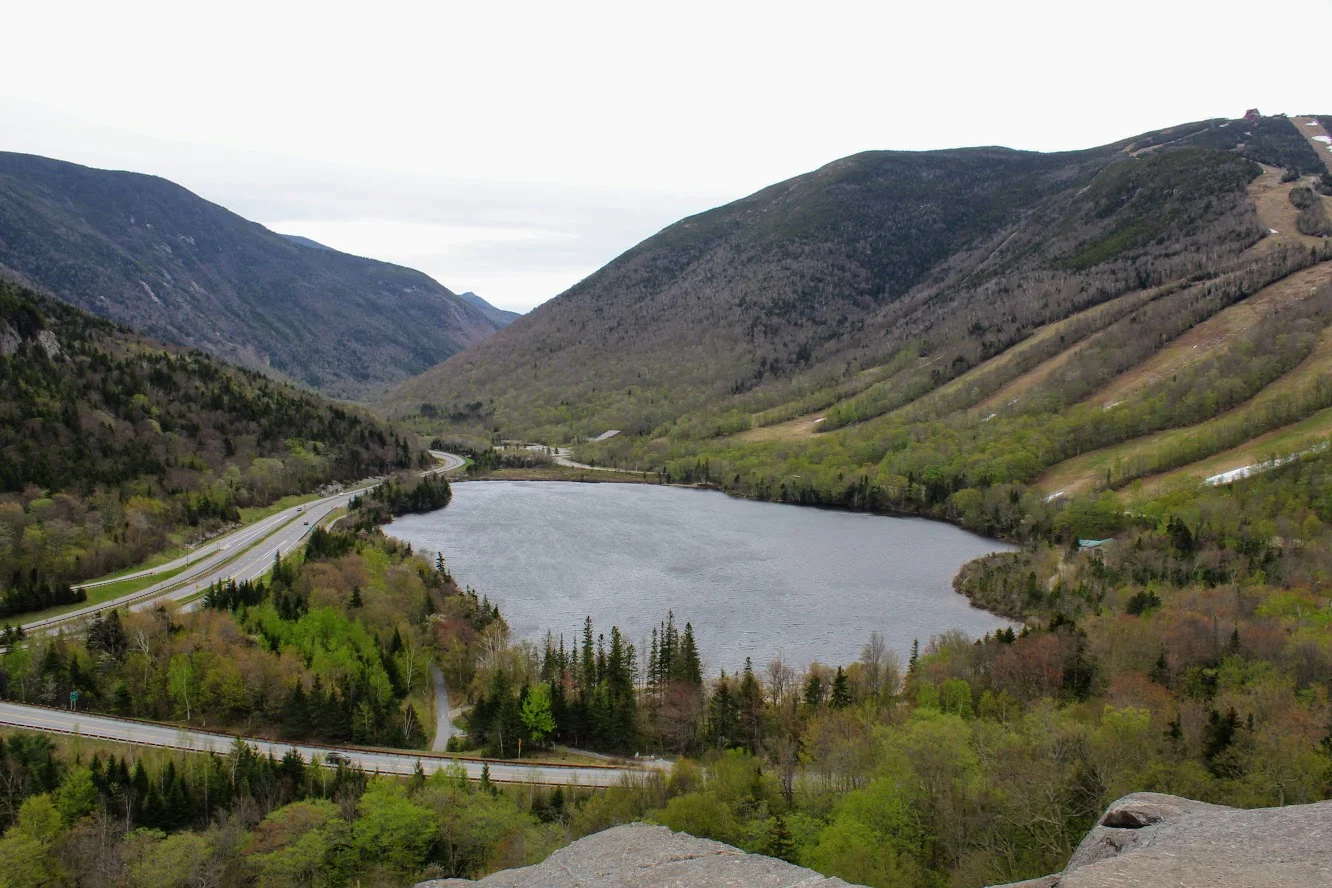
RECENT POSTS
See the latest on Instagram and follow @HIKINGFORDONUTS

Colorado Road Trippin’ for Donuts
In my years of traveling, Colorado has been my favorite state to visit for the food, the beer, and the outdoors/hiking. I still have barely scrapped the surface. On my third visit this spring, I drove over 1000 miles and visited 7 cities. My prior trips did not consist of too much donut research. Hence, there were many donut shop visits along the way on this trip. This is not a best of list by any means. There are lots of donut shops in Colorado. In this post, I will be sharing my experiences of the donut shops I visited during my trip. SPOILER ALERT, Colorado has some great donuts shops.
Voodoo Donuts Denver, CO
The first stop off the plane was Voodoo Donuts. The popularity of this donut shop makes it a must try. Once you walk in, you see and feel how different this is than a standard donut shop. There is a hip and fun vibe going on. There’s a big selection of unique flavors and types of donuts. They are known for a raspberry filled donut shaped and decorated like a Voodoo Doll and their wittiness. The crazy options I chose were the Chuckles, chocolate frosting dipped in hot chocolate cocoa powder with peanuts and caramel and chocolate drizzle, and the ODB, chocolate frosting with Oreo cookies and peanut butter. In addition, I had to the get the Voodoo Doll, Plain Glazed, Double Chocolate Cake, and Maple Bar.

City Donuts, Denver, CO
City Donuts has a few locations spread out through Colorado near the Denver area. This was your standard old school donut shop. The customer service was fantastic. The person working went into detail on how their donuts were made and the history of the company. Appreciated it because it gave me time to decide what I wanted. Unfortunately, I was pretty full from breakfast but I settled on the Maple Glaze and Chocolate Frosted with sprinkles. Super fluffy and tasted homemade. Pretty big sized donut as well. And, they hooked me up with some free donut holes. The bag the donuts came in was a great touch.
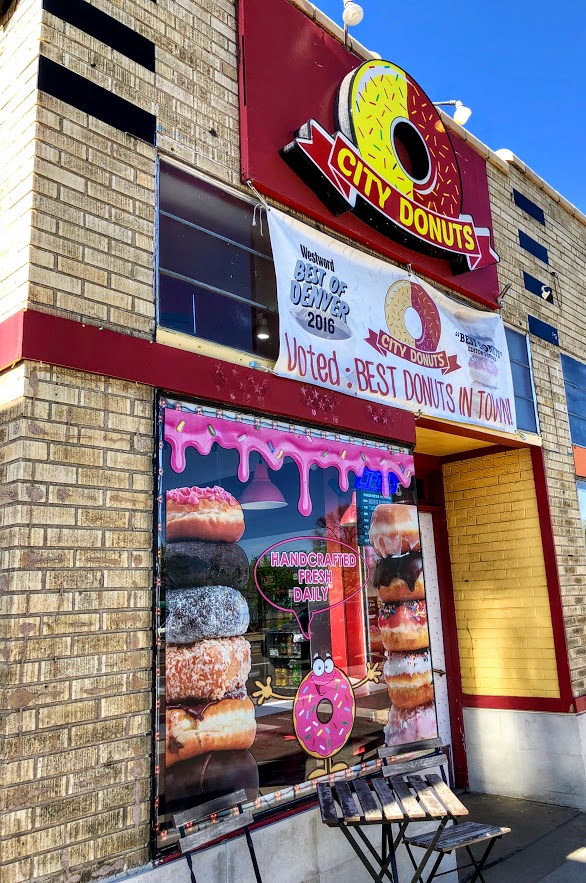
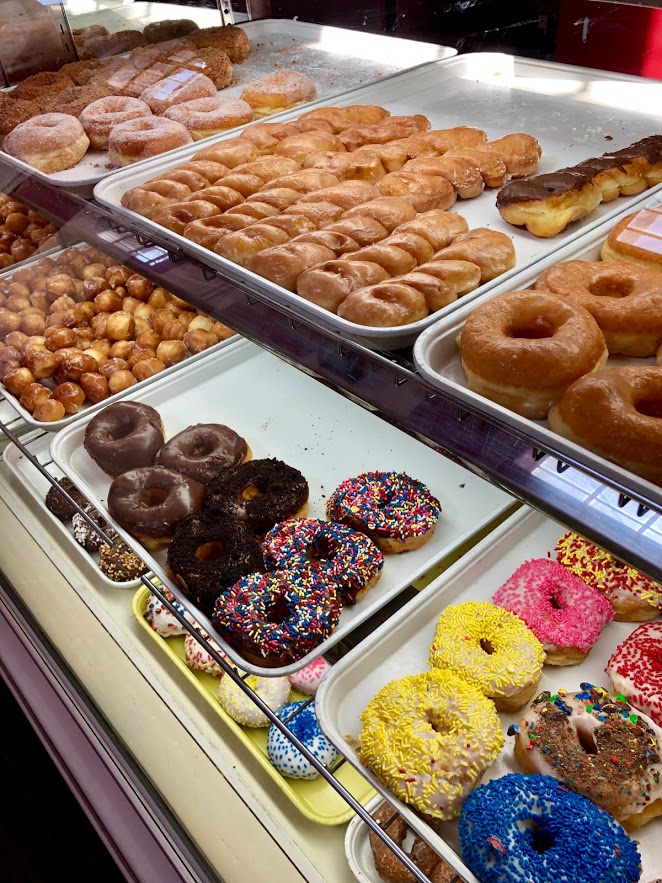
Amy’s Donuts, Colorado Springs, CO
The stand out donut shop in Colorado Springs has to be Amy’s Donuts. This shop had my head on a swivel. Not even over exaggerating, there were over 50 different flavor combinations. To narrow it down was a tough task. They covered the basics but then went over the top with wild toppings and flavor combinations like Almond Banana Caramel, Butterfinger, and Maple Bacon Fudge. The final decision was the Maple Turtle, Reese’s Pieces, Nutella Crumb, Bizmallow Caramel, and S’mores. And, a Raspberry filled glazed bar to complete the spectrum of donuts. They will pipe in the jelly fresh when you order. Big fan of that. The verdict, the Maple Turtle was amazing as it sounds.
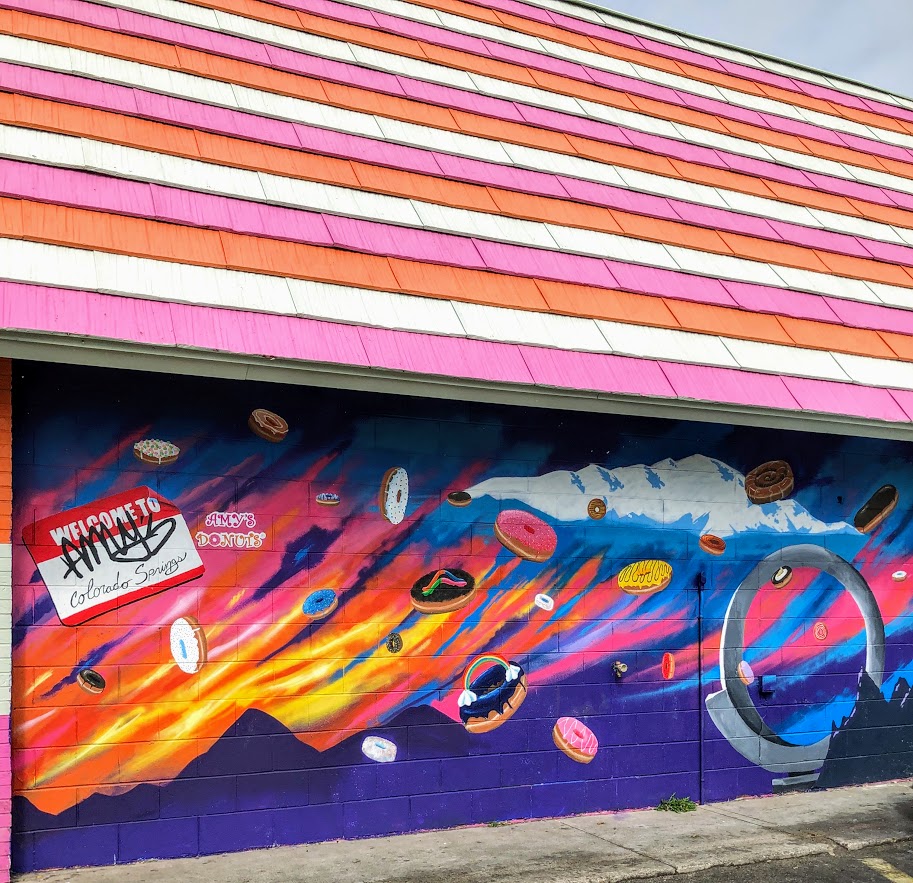
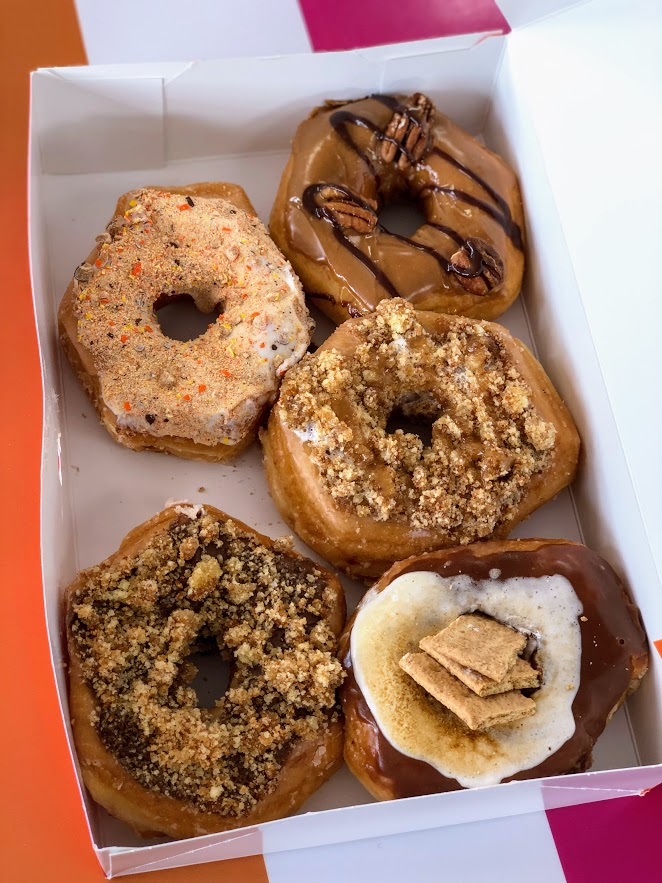
Montrose Donuts and Deli, Montrose, CO
The perfect hiking for donuts location. Located 15 minutes outside of the Black Canyon of the Gunnison National Park, you must visit Montrose Donuts and Deli. When I walked in, I was delighted to see all the options. They had bear claws, old fashion, cake, yeast, cinnamon bun, bow tie, cruller, French cruller, fritter, bars, and filled donuts along with muffins and more baked goods. And, a glazed buttermilk bar. What?!? I had to try this. Best donut of the trip. Tasted like a delicious and sugary glazed biscuit. Along with the glazed buttermilk bar, I also tried the chocolate cake sprinkle, bow tie glazed, blueberry glaze cake, cinnamon crumb, old fashion maple, and cinnamon crumb glaze fritter. The donuts were all pretty delicious. Highly recommend for your hiking for donut needs.
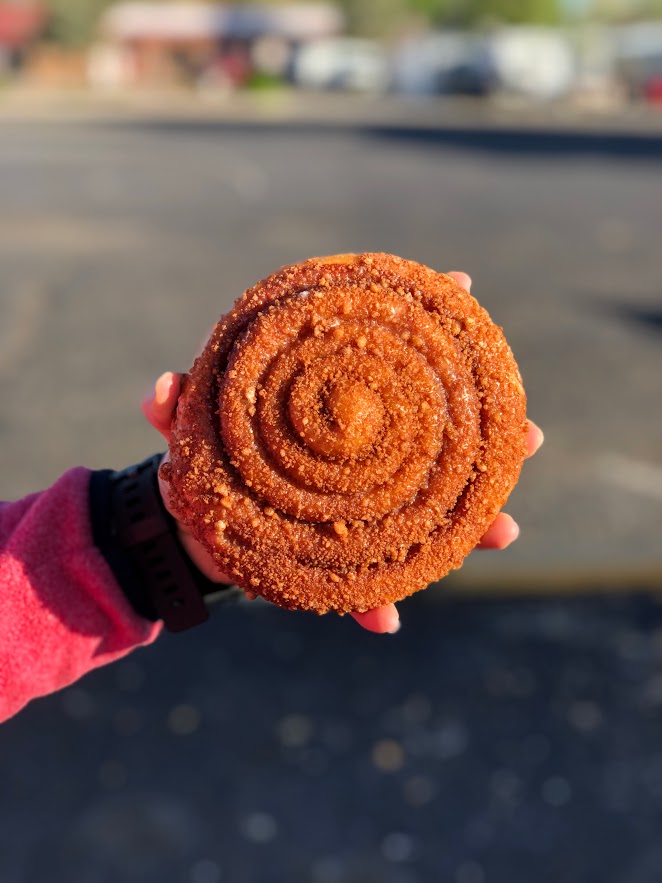
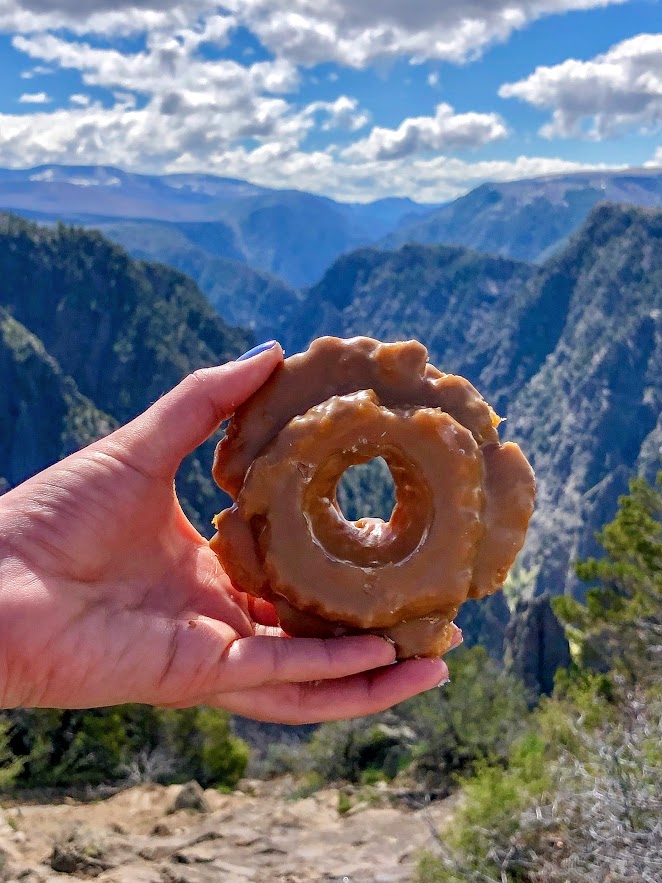
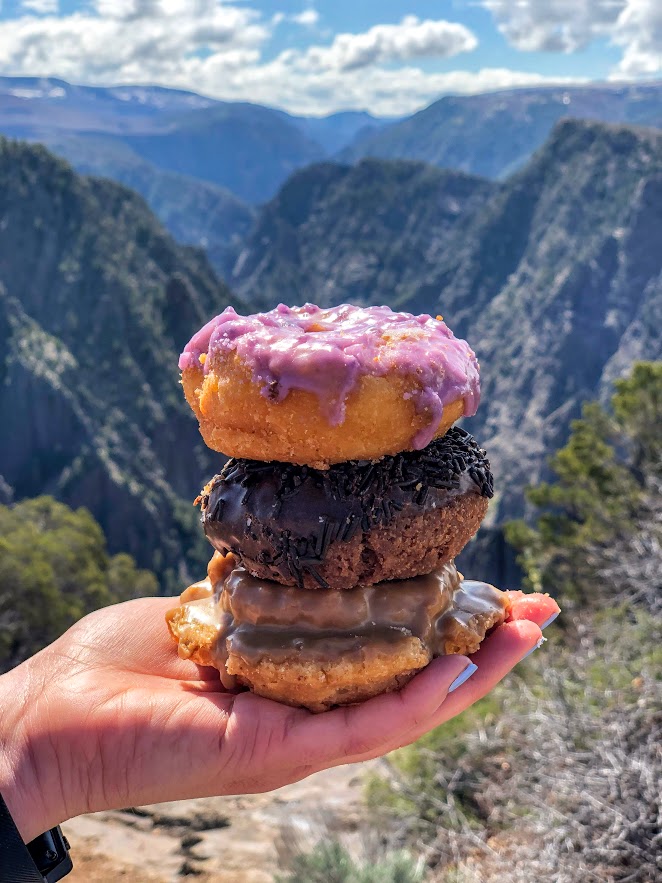
OMG Donuts, Arvada, CO
Located in a small plaza driving through Arvada, I found myself at OMG Donuts. This is another small business, old school shop cranking out the classics. Very friendly. I got there late afternoon and they still had some good options. I went with the Plain Glazed, Double Chocolate Cake, Maple Bar, Chocolate Frosted and Red Velvet. The red velvet cake stood out to me for some reason and that was the best decision I made. One of the best cake donuts I have EVER had. Wow, super moist and the flavor was on point. The chocolate cake was good also, super chocolaty almost like eating a chocolate cake. The yeast donuts were fluffy and light. This was a great donut shop find.

HIKING FOR DONUTS
Hi, I’m Mark. I live in Connecticut. I take new trips every change I get. A good trip has a great hike, great food, and something fun to do. My goal is to search out new trips and share them to inspire others to try something new and exciting.
If you are looking for posts in a particular place, search City or State here.
SEE OTHER POSTS IN ARCHIVE
RECOMMENDED POSTS
RECENT POSTS
See the latest on Instagram and follow @HIKINGFORDONUTS

24 Hours in the Black Canyon at the Gunnison National Park
The Black Canyon of the Gunnison National Park is one of the least known national parks and that is a travesty. I admit, I wasn’t too familiar with this park myself. Located in western Colorado, the Black Canyon of the Gunnison did not gain National Park status until 1999, making it the second youngest national park in the U.S. The Black Canyon is named so because the walls are often covered in shadows making them appear black. These steep walls were formed over 1.7 billion years ago. Another awesome note on this park is that it contains 12 out of the 48 mile-long canyon of the Gunnison River.
For most national park or outdoors enthusiast, you want to experience as much as possible in your travels. Planning trips can be difficult and offer time restraints. Exploring most national parks you need anywhere from 3 days to two weeks. On my recent Colorado road trip, I planned for one day at the Black Canyon of the Gunnison National Park. There is a North and South Rim. This guide will be for the South Rim only. This rim is more developed and accessible. Can you explore the entire South Rim in 24 hours? The answer is yes. The best time to visit is April to November. We stayed in Montrose, which is about 15 minutes from the park. The downtown is pretty cool. Oh, and there is an amazing donut shop, Montrose Donut and Deli Shop. The best donuts I had in Colorado. Get the biscuit donut. I digress…..
The South Rim is comprised of a modest 7 mile loop with 12 spectacular overlooks. I suggest to stop at each overlook. A lot of the overlooks do require walking a short trail but nothing strenuous. I would not miss out on Painted Wall, Cedar Point and Sunset View. There are multiple hikes on the South Rim. I went out of my way to do them all and to be honest, if you are stressing for time, skip the hikes. If camping is your thing, there are campgrounds here. Lastly, do NOT leave the park without driving down East Portal Road. I cannot recommend that enough. There is no crowd concern at this park. I counted maybe 30 people on a Friday in mid-May. I read the peak of the visitors stroll through in July. There are even less visitors on the North Rim, which is a 3 hour drive from the South Rim. However, the views are even more dramatic from the North Rim. The scenic driving was amazing. This park should be way more popular. The views were ridiculous. One of the best experiences I had in a national park. Here’s my guide to the South Rim of the Black Canyon of the Gunnison.
How to get there
Black Canyon’s South Rim is about 14 miles from Montrose and 63 miles from Gunnison. To get there from Montrose, travel 7 miles north on CO Highway 347 from the intersection with U.S. Highway 50 east of the city.
Viewpoints (South Rim)
The first viewpoint that visitors will see entering the park is Tomichi Point. This is right off the side of the road, no hiking needed. The second viewpoint, Gunnison Point, is located right behind the visitor center. A short path down some steps leads views of the canyon facing northwards. The view is more vivid than Tomichi Point and there is sneak peak of the ravine.


The next viewpoint is about two miles down the road at Pulpit Rock Overlook. There is a 134 yard trail leading to this area. The canyon really opens here with the river in view as it curves around a 90 degree bend. Cross Fissure View offers a different a unique look at the canyon. The river is not visible and most of the canyon is hidden. There is a view of overlapping ridges and crevasses from multiple angles. This viewpoint is a 357 yard walk.


Rock Point is a less traveled path at 294 yards. The longer the path the less visitors you will see. Devils Lookout is the longest path at 607 yards. This path goes right the edge of the rims for great views including the river and the valley. Both this and Rock Point lie above the narrowest part of the entire canyon.


Chasm View is one of those jaw dropping views. This is a very short path off the road above the steepest part of the whole canyon. Painted Wall View is almost adjacent to Chasm View. This may be the most well-known viewpoint. Painted Wall is the highest cliff in Colorado at 2,250 feet and a half mile across.


Every viewpoint from here on is a must see. Cedar Point is a 303 yard path overlooking the lower canyon. This is a spectacular view as you can see 1.5 miles of the river, flowing rapids, and some greenery below. Next up, Dragon Point offers very similar views. The widening ravine enclosing colorful waters of the river. This can be reached by a path of 300 yards.


Sunset View was one of my favorites. This is the westernmost viewpoint along the South Rim road. There is large parking area along with restrooms and picnic tables. This a great place to soak in amazing views of the canyon. This is the longest stretch of V shaped canyon. The last viewpoint is another mile down the road, High Point. There’s not much to this but you have to pass this in order to turn around and head back.


The Hikes (South Rim)
At the end of South Rim road, there is a parking lot where the Warner Point Trail begins. This a 1.5 mile out and back that takes you to the furthest overlook on the South Rim. The trail starts flat with views of green fields 1,000 feet above Bostwick Park. The trail begins to climb slowly then drops and ascends again before reaching the final viewpoint. This overlook offers stunning views of the San Juan Mountains, West Elk Mountains, Uncompahgre Valley, and the canyon. If you choose a hike in the South Rim, this would be the one I suggest.
Warner Point
The Oak Flat Loop begins by the visit center. The trail is narrow and traverses down a steep slope. This offers a peek at the landscape below the canyon’s rim. This is the most challenging hike in the South Rim with steep uphill and downhill portions. In total, the loop is 2 miles.
Rim Rock Nature Trail starts at the visit center or the Campground Loop C entrance. You can even hop on this trail from Tomichi Point. This relatively flat hike takes you along the rim of the canyon for views of the Gunnison River and sheer walls of the gorge below. This can be between 1-2 miles.


East Portal Road River Access
Located right at the entrance/exit to the park, you will see the access for East Portal Road. This is a 5 mile road with a significant decline (16% grade) with hairpin turns taking your car to the base of Black Canyon. This is the only way to get down into the canyon. Once arriving at the bottom, the views from down below are gorgeous. The picturesque surroundings of the beautiful lake and the cliff walls of the canyon from up above are majestic. By far the coolest experience I had in the park. I was just in awe. I read a lot of things online and it made it sound dramatic and dangerous to drive down. Any car/van can handle it. Vehicles with an overall length (including trailer) greater than 22 feet are prohibited. Trailers may be left unhitched and left at a parking area at the campground entrance. This road is closed in the winter. Just be smart about driving down. It took us about 30 minutes. This is a bucket list type event. Don’t chicken out!
The drive down into the canyon.


HIKING FOR DONUTS
Hi, I’m Mark. I live in Connecticut. I take new trips every change I get. A good trip has a great hike, great food, and something fun to do. My goal is to search out new trips and share them to inspire others to try something new and exciting.
If you are looking for posts in a particular place, search City or State here.
SEE OTHER POSTS IN ARCHIVE
RECOMMENDED POSTS
RECENT POSTS
See the latest on Instagram and follow @HIKINGFORDONUTS
Lone Elk Park, St. Louis County, Missouri
Lone Elk Park is located in St. Louis County, Missouri. This park is only 35 minutes from downtown St. Louis and is a must visit bucket list. This park offers you a great nature adventure without needing to get out of your car. I never thought I would find elks and bison roaming in Missouri. This was an fun and exciting adventure. Read more about this in my latest blog!
I bet if I were to tell you, within a 35 minute drive from downtown St. Louis you would find a park that was reminiscent of Yellowstone National Park; you would think I am out of my mind. Lone Elk Park gives you that type of experience. Don’t get me wrong, it is nowhere near the size of Yellowstone, it is pretty small in comparison (only 2600 acres). Nor does it offer any of the landscape of Yellowstone. However, being able to drive among wild animals in nature from your car is a very cool experience that reminded me of when I was in Yellowstone. Again, at a very smaller scale. But come on, this is in Missouri!!! Who would of thought? As the name of the park states, you will see a huge elk population roaming. In addition, you will see bison, wild turkey, waterfowl, and deer. Essentially, you drive a loop around the park that takes about 30 minutes and hope to see some animals walking around. And, the park is totally free!
Entrance to the park. Veer left.
The park is tucked away in Valley Park, around Hwy 44 and Hwy 141. It is very easy to get to via gps. The park opens around 7am in the summer and *am in the winter. After doing some research online, I read the best time to see animals out is early in the morning or late at night before the park closes (sunset). Pretty good advice.
ELk butt.
We drove in from our hotel and got there around 8am. We pulled up to the park entrance. There is a bird sanctuary to your right if that is what you like. You will see the caution signs to stay in your car. Within the first 20 seconds of driving in, Nichole says to me, “Umm…is that fake?” And I responded, “Oh snap. That is as real as it gets”. The first animal we see in the middle of the road was a massive male elk with huge antlers. It honestly did look like a statue from far away. We crawled slowly past the elk and it was almost arm’s length away from the car. We made sure not to make to make it angry. We had a small rental car and this guy would tear it up.
this is real. First Elk we saw. Massive.


Great view of the lake and ELk.
As we proceeded, we saw more elk in the woods and a herd to our left as we saw a full view of the lake. We continued to drive along the loop and we started seeing more deer and wild turkeys. The deer here were big guys. We passed the lake and once that was behind us, we started to enter the bison area. You we see more signs here as they want to make sure no one gets out of the car. On this morning, we did catch a few bison out in the fields but they were further away. Not as close as the elks. After that, there isn’t much to the drive and the exit was upon us.

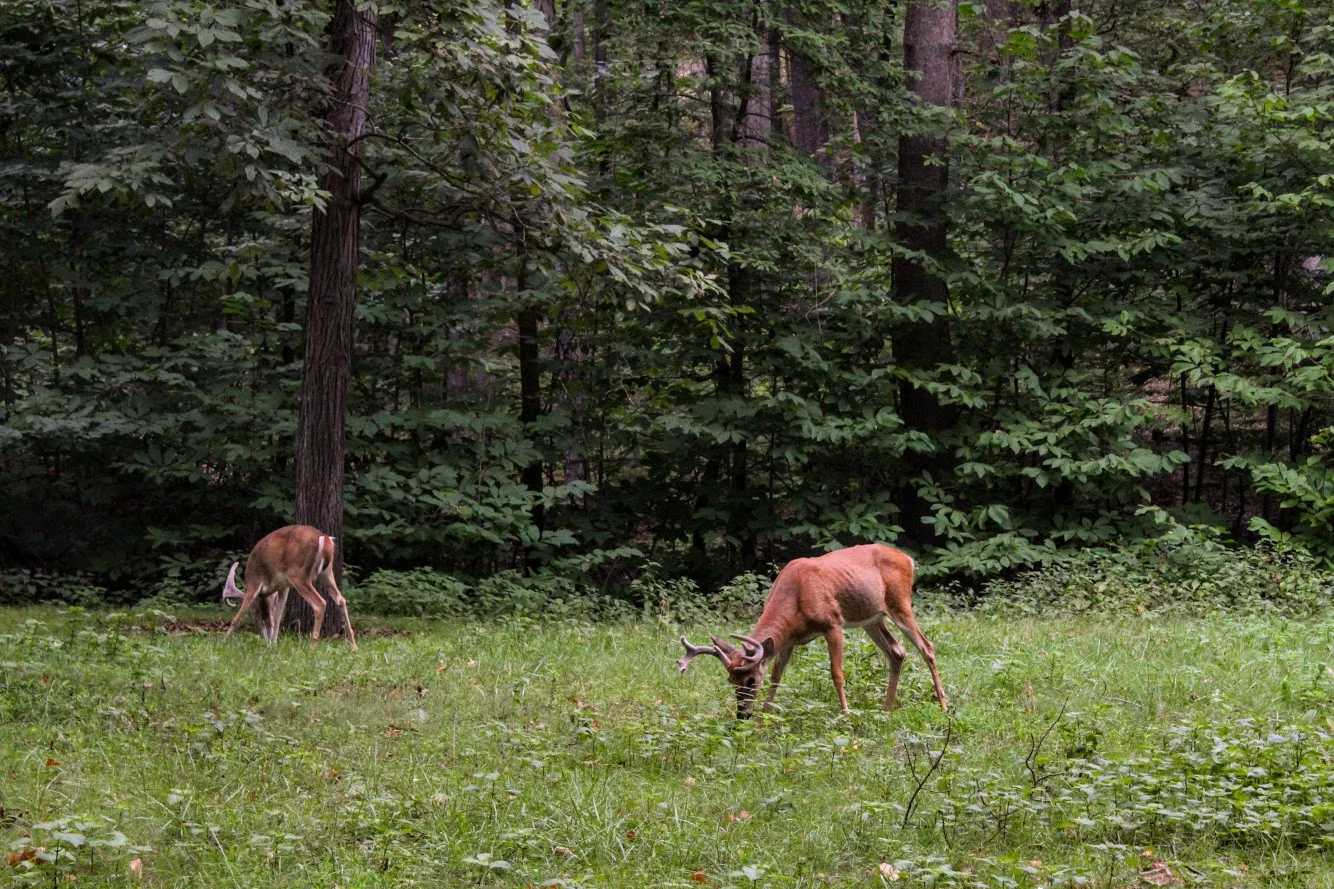


The great thing about this park is you can keep driving around as many times as you want. We wanted to take one more loop to see if more animals came out. Unfortunately, they moved further away the second time. But worth a shot. Also, the park does have hiking trails where you can be out in the open and potentially cross paths with the animals. On your feet or in your car, be careful. Bison and elk will gore you or your car.
Second time around the elk went to down the water. The model stayed put.
That’s where they went.
MOre of the big elk in the lake.
This was first time Nichole has seen wildlife like this so close. It was a cool experience. Note, if you want pictures, make sure you are driver side. I went in the back seat. No way was I driving, too excited! Definitely glad we came across this place in our research and made the drive. If you are visiting, this is a must add to your list. It is a great opportunity to get in touch with nature and you don’t even have to leave your car.
Lake views from the top of the hill.
I don’t trust turkeys.

HIKING FOR DONUTS
A blog for the outdoors foodie enthusiast
Hi, I’m Mark. I live in Connecticut. I take new trips every chance I get. A good trip has a great hike, great food, and something fun to do. My goal is to search out new trips and share them to inspire others to try something new and exciting.
If you are looking for posts in a particular place, search by city or state here.
EXPLORE OTHER POSTS IN THE ARCHIVE
RECOMMENDED POSTS
MOST RECENT POSTS
See where I have been recently on Instagram. Follow @HIKINGFORDONUTS
How to spend a weekend in Burlington, VT: Food & Breweries
Burlington, VT is a great long weekend destination. Lots of food and breweries in walking distance. Check out my blog post on the best food and drink spots in Burlington, VT.
My first trip to Burlington, VT was a few years ago. I couldn't believe I hadn't made a trip to this great city. There are lots of breweries, food, and outdoor activities. You could walk pretty much everywhere. In the summer, there are farmers markets and food trucks. I really enjoyed my stay but it was short. My girlfriend, Nichole, had never been and I thought it was a great weekend trip idea. Also, I have been wanting to stay at Hotel Vermont and they have a sweet black friday deal. And, it is a perfect location to walk around and Lake Champlain is across the street. Hotel Vermont was only a mile or two from everywhere we went, it was a great central location to stay. If you read the blog, you know we really get after it when we travel to new cities. And, Burlington was no different. We went to as many breweries as possible and ate our faces off. I did all the work for you! Here is a list of the best places to eat and drink in Burlington. If I missed any, please comment. I will be back.
The Food
Farmhouse Tap & Grill was the first meal we had in Burlington. This was the typical fancier local restaurant. It is always super busy. We had to wait over an hour for a table, given it was a Friday night. They have a great beer menu. The food is actually pretty good, especially the burgers. However, it is a bit pricey to me. There is a big farm to table presence in Burlington and that drives the price up.


The Swingin' Pinwheel Café Bakery was the surprise of the weekend. Do not pass up this breakfast when you walk by. The hostess was hilarious and friendly. The menu has so many good options. It is a smaller spot so be mindful. The decor definitely had that western and cowboy feel. They are known for their Wafflini, which is a waffle made with pastry dough and pressed like a panini, and they have multiple types. We had to get one and it was phenomenal. We started with a popover and ate it so fast, I didn't even get a picture!


Red Onion was recommended to me by someone from the area. They told me, the sandwiches sound weird but go with it. It was quite an interesting little spot on Church Street (main area for shops/restaurants). I ordered the Red Onion sandwich, which consisted of turkey, vt cheddar, red onion, granny smith apple slices, and sun-dried tomato mayo on honey oat bread. The bread was like an inch thick! Nichole got the spinach melt. This consisted of a TON of fresh baby spinach, mushrooms, red onions, sharp cheddar, and garlic mayo on honey oat. They were both delicious. If you need a quick bite, I definitely would suggest the Red Onion.

There is surprisingly a fair amount of Mexican dishes and restaurants in Burlington. For that reason we were craving Mexican and chose El Cortijo Taqueria Y Cantina as it was the closest with the best ratings. And, they were a sister company of the Farmhouse Tap & Grill. This is a very small location. Luckily, we got seated right away but the dinner crowd hit and the front of the restaurant was overly crowded and flowed near the tables. It was a bit uncomfortable eating with people on top of you waiting to be called. And, the food was just ok. Nichole enjoyed her margarita but the rest was less memorable.
And you know we hit up Ben & Jerry's for dessert.

Monarch and the Milkweed was another great breakfast find. This was a quaint, trendy shop in the town center that fits maybe 15-20 people. One of the reasons I chose there was because they make donuts, mini but I don't discriminate. The donuts were ehh but the breakfast was awesome. I had the fried chicken sandwich with gruyère cheese, red onions, and some aoli that reminded me of Big Mac sauce. Nichole had the pancake stack and they were really good and cooked perfectly.
Fortunately, on the way home, we made a surprising delicious stop, only 20 minutes outside of Burlington. We mentioned to some people we met along the way, we were going to Fiddlehead Brewing. Every person said you have to go to the pizza place next door, and that was Folino's Wood Fire Pizza. No one has to twist my arm to have some pizza. This place gets really packed from the Fiddlehead crowd. You will be seated by someone but you have to do everything else, get your own plates, order at the cashier, etc. Aside from that tidbit, the pizza was awesome. Maybe the best buffalo chicken pizza I have ever had. Everything just worked. Make this part of your to-do list.
The Breweries
On the way up from CT, our first beer stop was at Burlington Beer Company. This was only 20 minutes or so outside of Burlington. This was in a cool industrial location. The inside was cool and trendy. They had old school video game systems. They offer a lengthy list of beers, including IPAs, Porters, and Stouts. The beer was good. A little hoppier for my taste but I see why they are popular. They fit into the craft beer scene perfectly.
Switchback Brewery was first on the list of our brewery crawl and the furthest, 2 mile walk but it actually wasn't bad. I have been before and really like their beers. Their Connector IPA is my favorite. The inside is pretty nice and feels inviting. And, the world's largest filing cabinet is on the way! Seriously, it exists.


Queen City Brewery was our favorite brewery. I don't recall seeing it last time I was here. It was tucked away behind a local printing business. It is close to Zero Gravity. They had a big wall of beers and there was an old truck on the the very top of the bar once inside. They had 13 beers to choose from and I liked most of them. My favorite was a tripel Belgian named Monk of Underhill. This isn't a place if you want hoppy beers. They had mostly porters, stouts, and lagers. I am not even a porter guy and I enjoyed their version of that. The bartender was really nice and it was just a good atmosphere.


This isn't a brewery but a cidery counts. Citizen Cider is one of my favorite ciders. Last time I came here, I had a blast. They had quite a bit of options as usual to try out. I really like what they do with their ciders. They aren' t just sweet and one taste. Definitely a staple to visit when in Burlington.


Ah, the new popular guy. Foam Brewery wasn't opened last time I was here. Since then, I have heard a lot about this brewery from friends. We made our way there as the last stop and the location is great. It is right off the water. In warmer weather, it must be even more busy than it was. However, they do not have flights of beers as an option and the beer was pricier than other breweries. And, the beer was super hoppy...almost too much. Again, that is not for me. I preferred other breweries.
The weekend of breweries was not quite over yet. The last stop on the ride home was Fiddlehead Brewery. I had their beers before and really enjoyed them. I had to stop in and check it out. At this location in Shelburne, VT, you can only buy beer that is canned, sample what they have available that day and get growlers. It is very small and can get crowded quick. We went as it opened and the lot quickly filled up and cars were coming and going. I liked what they had on tap and I ended up getting a growler and buying cans. We did make a few other stops for beverages.
Vermont Pub & Brewery was pretty average. It is really big and they have basic food options to please the generic eater. Seems like the place all tourists go when other places are busy. And, the beer wasn't great. They are a bit behind the other breweries in the beer department. The other bar we did go to was Archives. This was a bar filled with arcade games and a pretty good beer, cocktails, and wine menu. If you are into old video games like pacman, street fighter, pin ball, and other oldies, this is the spot for you.
Bonus: A Winery?
Not only did Fiddlehead Brewery have an awesome pizza spot next door but there was also a Winery across the street! By far, the happiest Nichole was all weekend as she likes wine way more than beer. Of course, we kept the ball rollin' at Shelburne Winery and did a tasting. This consisted of 10 wines and they were not shy with the pours. I also liked they gave a list of the wine with a marker so you could keep track of what you liked and they had a funny comment & description about each wine. I do not like wine that much but I did like a few of the white wines and a red that had chocolate in it. Nichole ended up buying two bottles. This was a great way to the end the trip. Beer, wine, & pizza. We accomplished a lot and I think we did a good job finding some good go to spots. I hope you enjoyed reading and will try out some of my suggestions. Cheers to beers & delicious food!


HIKING FOR DONUTS
A blog for the outdoors foodie enthusiast
Hi, I’m Mark. I live in Connecticut. I take new trips every chance I get. A good trip has a great hike, great food, and something fun to do. My goal is to search out new trips and share them to inspire others to try something new and exciting.
If you are looking for posts in a particular place, search by city or state here.
EXPLORE OTHER POSTS IN THE ARCHIVE
RECOMMENDED POSTS
MOST RECENT POSTS
See where I have been recently on Instagram. Follow @HIKINGFORDONUTS
Exploring Iceland, Part 1
Iceland is one of the more popular destinations for travel right now. Back in 2014, my college friends and I explored 10 days and 1400 miles. It was the most adventurous trip I have ever been on. Here are some of the sights and destinations of that trip.
Iceland is one of my favorite travel destinations. My trip consisted of 10 days of nonstop adventure. This was before it was the "cool thing to do". Iceland travel is everywhere on social media right now. I come across one person a month who has gone or is going. And, rightly so. Iceland is a great country and there is so much exploring. Back in 2014, my friend, Corey, brought up the idea of Iceland. I thought he was a bit whacky and told him to give me more details. As per usual, Corey was able to persuade myself and our other traveling friend, Nancy. This would be the first big exploration in another country. Corey spent over 3 months vehemently planning and creating the ultimate itinerary. And, he succeeded. I just sat back and looked at pictures for months. As the time came close, I was really excited. We had plans of driving all over the country, lots of hiking, hot spring swimming, eating different food, and taking in the culture. This post will focus on some areas of the trip. I will post the hikes separately because they were so awesome. I want to provide a small peek of what Iceland can offer. A new country can be daunting but the risk is worth the reward.
Raufarholshellir Lava Tube Cave
We flew into Reykjavík, picked up our tiny rental car and packed it to the brim. Seriously, the smallest rental I have had and it needed to fit 3 people plus 6 bags. Side note, the best decision we made was renting a car. We drove over 1400 miles and it was amazing. As I digress….we arrived 1am their time and went right to bed. Our trip was in June and it is light 24 hours a day during that time frame. Needless to say, we didn’t sleep much. In addition, we were welcomed with wind and rain that morning but that didn’t stop us from our exploration of Iceland. The objective of this day was to find a lava tube cave, explore, and save $200 not using a guide. Lava tubes are formed by flowing lava which moves beneath the hardened surface of a lava flow. Some are active and will drain lava from a volcano. Some are extinct where the lava flow has stopped, cooled the rock, and left behind a long cave. We were definitely looking for an extinct one. Corey did quite a bit of research to even find information on where to locate one. This info is kept under wraps as most tour guides will not give this out in order to charge for the services. However, we are bad asses. We brought our own helmets and lighting. After driving up and down roads, we eventually found the Raufarholshellir lava cave, which ranks as the third largest in the country at 1360 meters long. Parking was located in a big, rocky lava field. Ironically, the only other vehicle in the lot was an Extreme Iceland tour van.
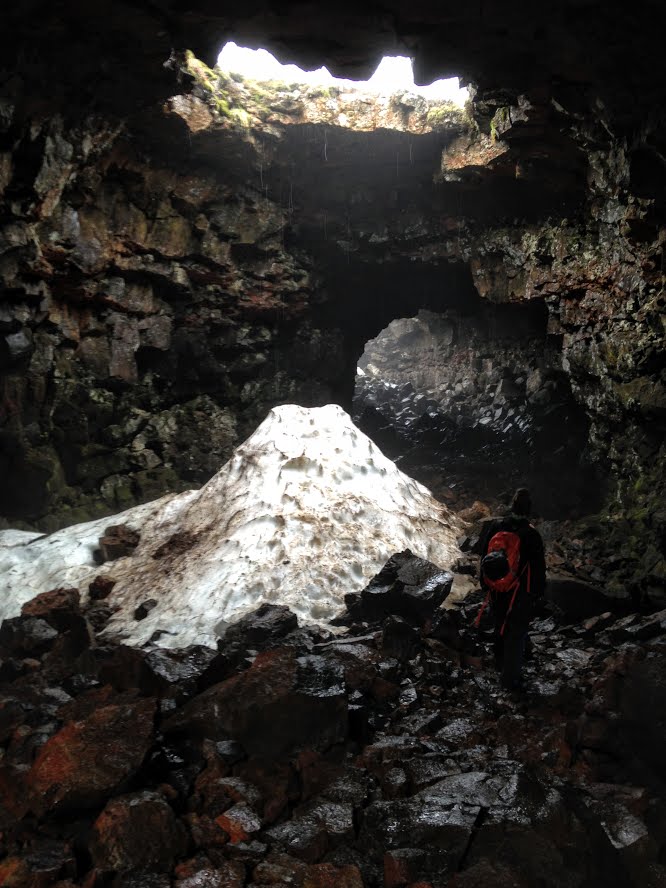
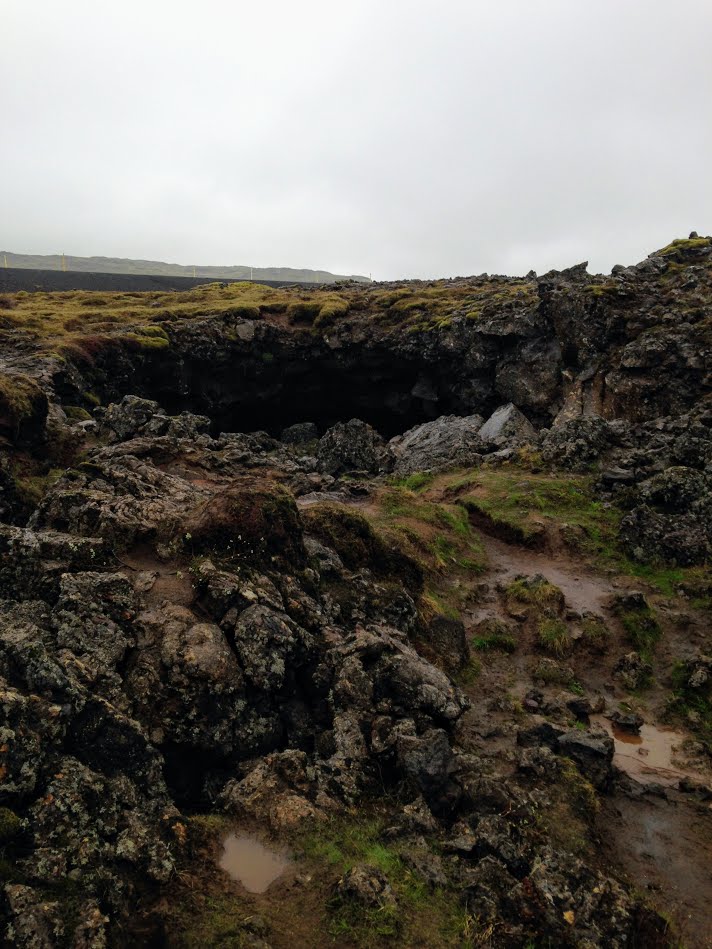
The beginning of the cave was pretty open with large spotlights where the roof had collapsed. As we descended down, it became more cave like. The ceiling was dripping water as the rain was able to get through. We eventually cross paths with the tour group and the tour guide reassured us of our path. As we went further, it got darker and darker. At one point, we all decided to turn our lights off. It was the darkest setting I have ever been in. It was surreal.
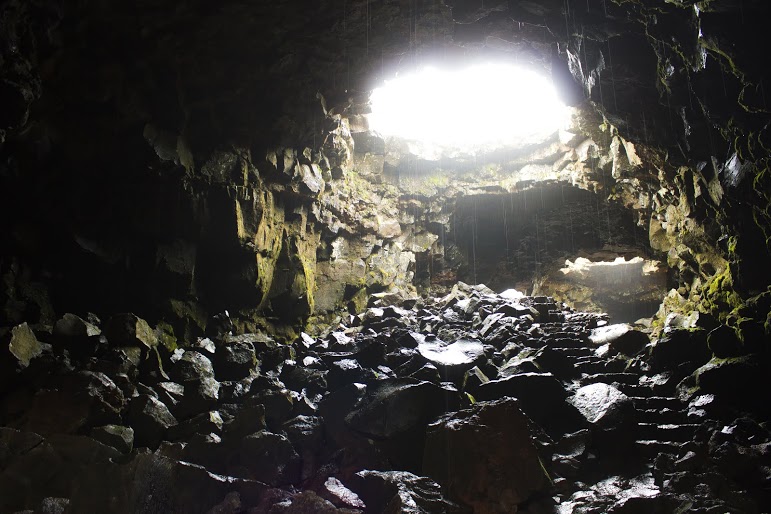
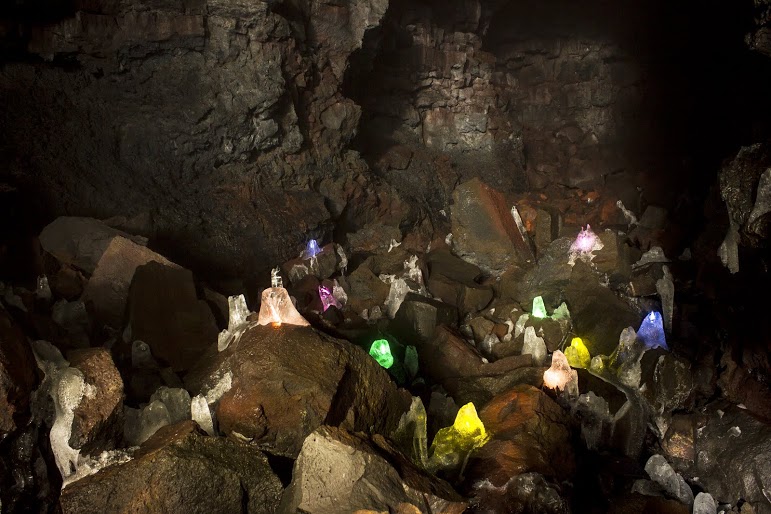

The terrain got more difficult as we reached the end of the tunnel. There was supposed to be a waterfall at the end but it was more of a fossilized cliff of the lava rock near the hole of the ceiling. We made our way back but not without a little scare. There were two tunnels to go down. We only went down one?!?!? I am horrible with directions. Nancy…is Nancy. That left Corey to make the decision. Even though we were concerned as some features seemed different, he made the right decision and we survived. Close call. Always be mindful of your surroundings, especially in a cave.
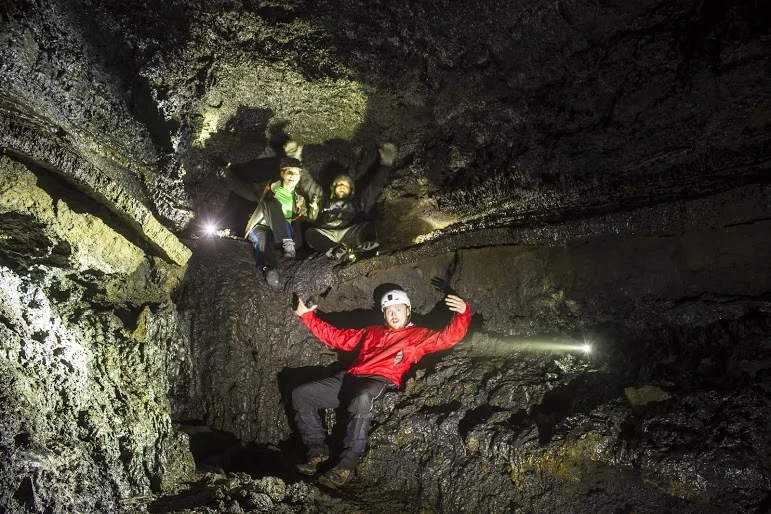
United States Navy plane crash
Our next adventure was a real surprise. Corey planned everything for the trip. I just handed over money and got on a plane. He took us to the middle of nowhere looking at map coordinates only. We parked the car on the side of the road, packed up our bags, and he said just walk this way. I had no idea where were going. After an hour had passed, we continued to walk through the black sand and I could barely see our car. I saw 4x4 tire tracks so I knew we were close to our destination. I saw the ocean. Then out of nowhere, there was an empty wrecked plane that had crashed resting in the black sand. There were other tourists groups there taking photos and touring the plane.


This was the remains of United States Navy plane. The Douglas Super DC-3 made a crash landing on November 24, 1973. The crew survived and left the wreckage behind and was abandoned. I know this tidbit now. Of course, I ran toward the scene with excitement and accidentally ruined the tourist’s pictures. We ended up taking pictures and exploring the inside for about an hour before we made our trek back to the car. This was an awesome experience and never did I anticipate it would happen in Iceland.


Seljalandsfoss
We did our best hitting every attraction and destination we could fit in our schedule through 10 days from Höfn to Grundarfjördur. I felt like I was in a different country each day. We went from gray volcano ash scenery to beautiful bright green landscape to clear blue water and beaches to mountains and glaciers.What an amazing country. And, if you like waterfalls, Iceland is the place for you. I imagine I seen more in 10 days than my entire life. The first one we came across was Seljalandsfoss. This waterfall was awesome from the road and even more amazing up close. This was the biggest waterfall I have seen. And, you can walk under the waterfall into a small cave.


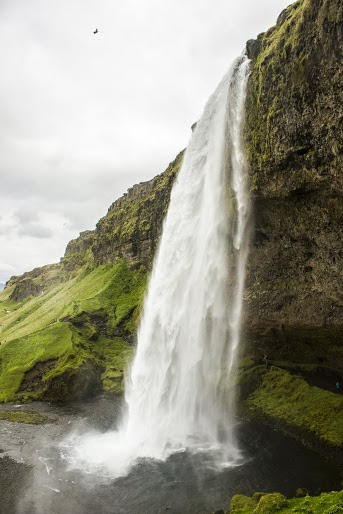
Skógafoss
The next waterfall we came across was Skógafoss, one of the biggest waterfalls in the country. This waterfall is notorious for the visibility of rainbows on sunny days.

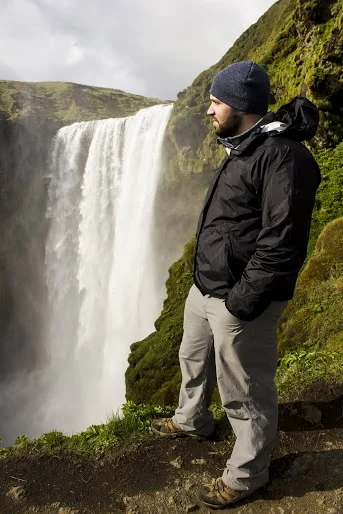
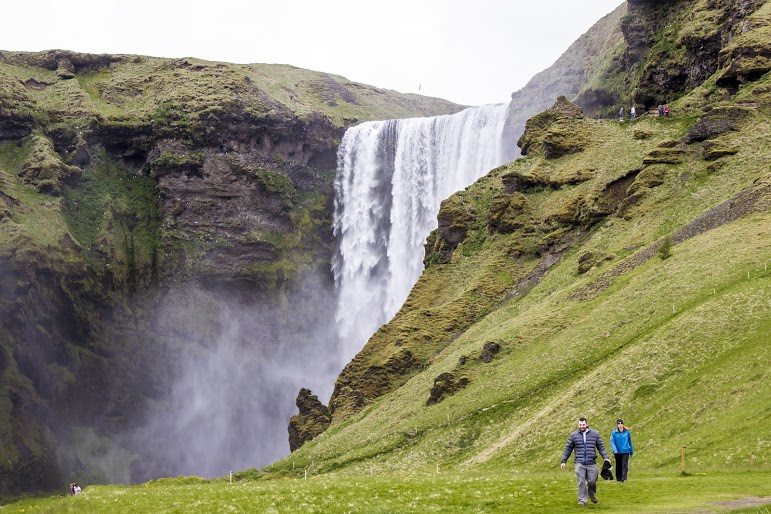
Reynisdrangar
The first black sand beach we visited was Reynisdrangar. I couldn't believe this existed in Iceland. I continued to be awestruck over the landscape of the country. And, this is barely 1/4 of the trip. More to come soon....#Icelandisawesome.
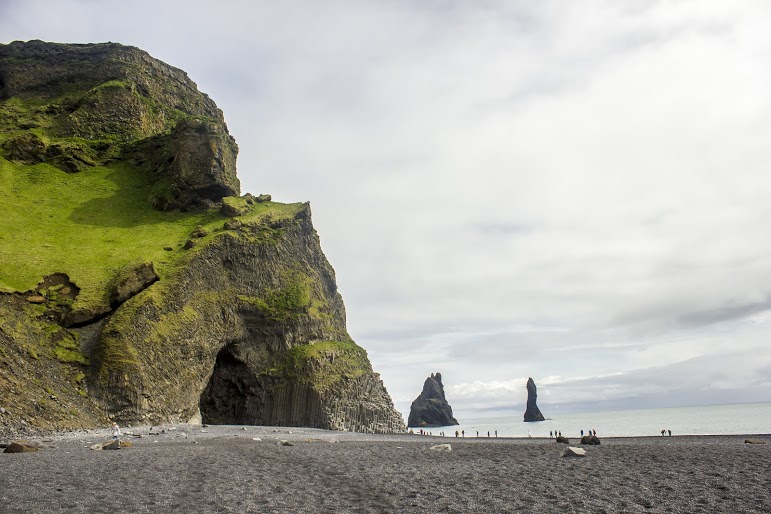
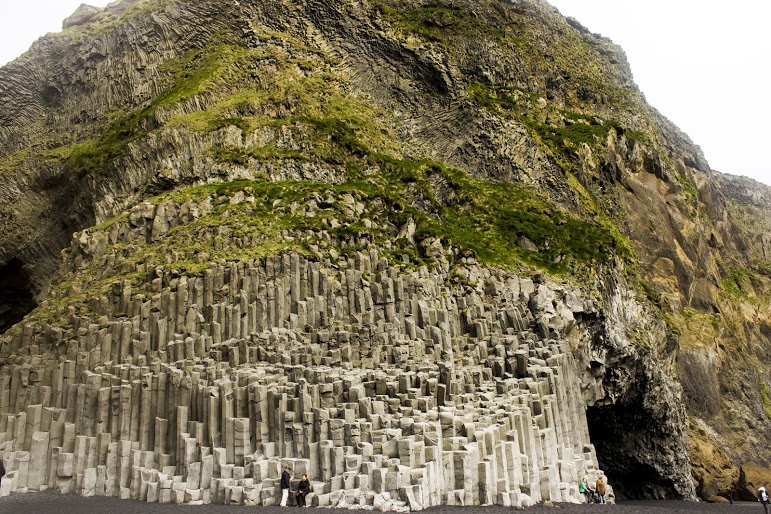


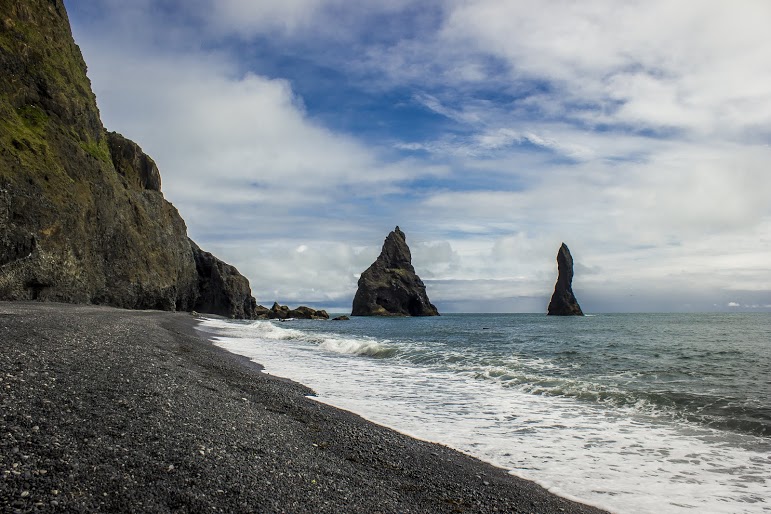


HIKING FOR DONUTS
A blog for the outdoors foodie enthusiast
Hi, I’m Mark. I live in Connecticut. I take new trips every chance I get. A good trip has a great hike, great food, and something fun to do. My goal is to search out new trips and share them to inspire others to try something new and exciting.
If you are looking for posts in a particular place, search by city or state here.
EXPLORE OTHER POSTS IN THE ARCHIVE
RECOMMENDED POSTS
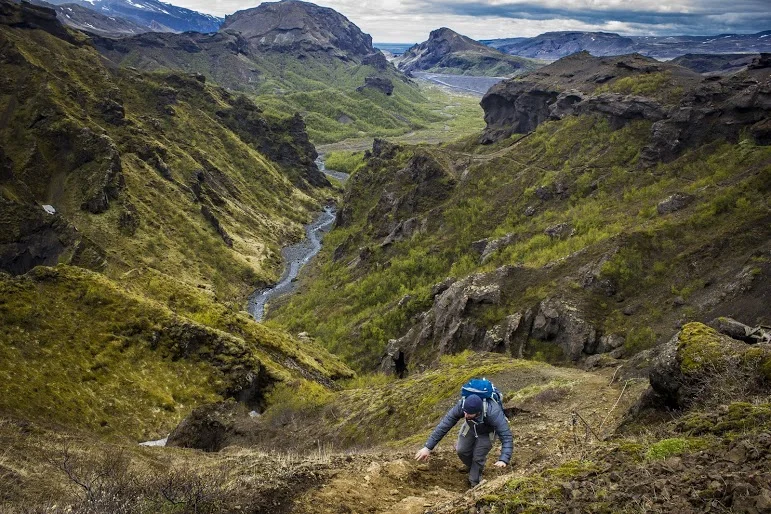
MOST RECENT POSTS
See where I have been recently on Instagram. Follow @HIKINGFORDONUTS
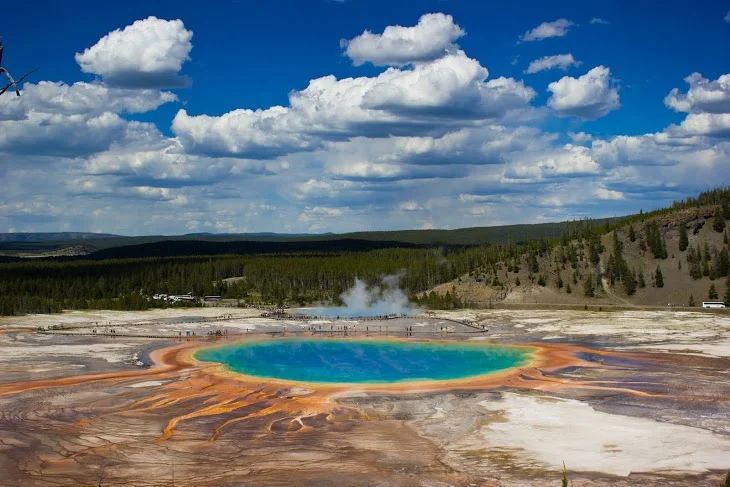
Grand Prismatic Springs & Geysers, Yellowstone National Park
Yellowstone National Park is one of the most popular national parks in the U.S. There is so much to explore. This post will focus on some of the sights such as Old Faithful and Grand Prismatic Springs. A must visit.

In the summer of 2013, my best friends from college, Nancy and Corey, and myself decided to take our adventures out West and visit Yellowstone National Park. This was one of 3 national park we visited on this particular trip. We gave ourselves 3 days to explore Yellowstone. Once we arrived, we knew were going to see lots of wildlife. Buffaloes are everywhere! But don’t be that person who stops every 5 minutes to take a picture. You will have many chances, don’t start traffic. Before we got more familiar with the park and tested our luck with the animals, we got the more touristy stops out of the way. Old Faithful, Grand Prismatic Springs, and the Geyser basins are pretty cool and must visits. Mammoth Hot Springs was another great spot if you want to see more hot springs.

Old Faithful
If you want to see geysers, go to the Old Faithful Visitor Center. You can tour the Geyser basins and watch Old Faithful geyser erupt. Once you get there is a schedule when Old Faithful will erupt, which is between every 60-90 minutes. It’s one of those things you have to see but it was mostly anti climatic. This was by far the most crowded area of the park.
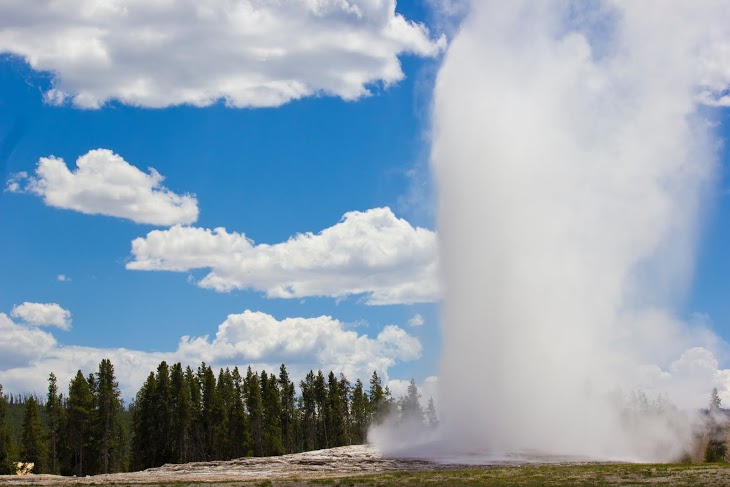
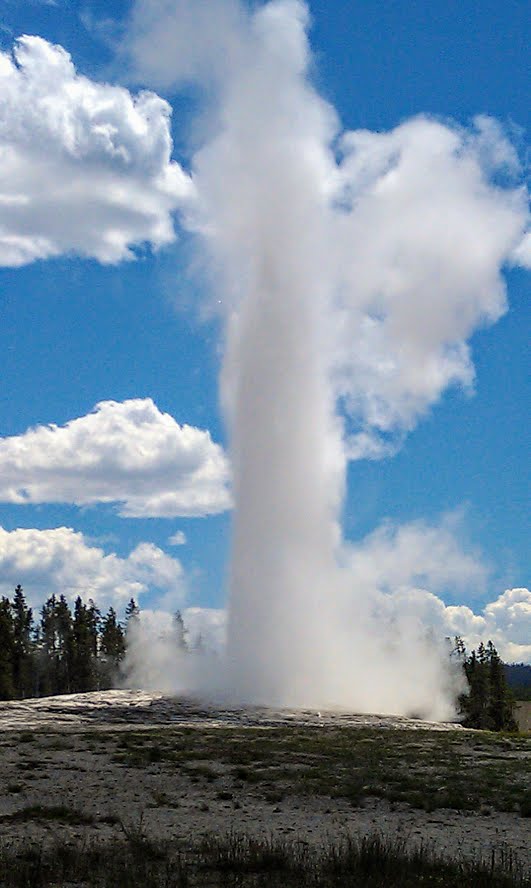
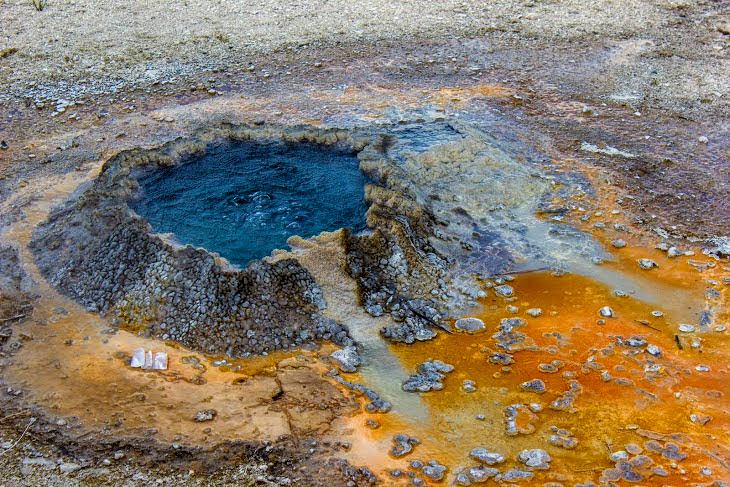
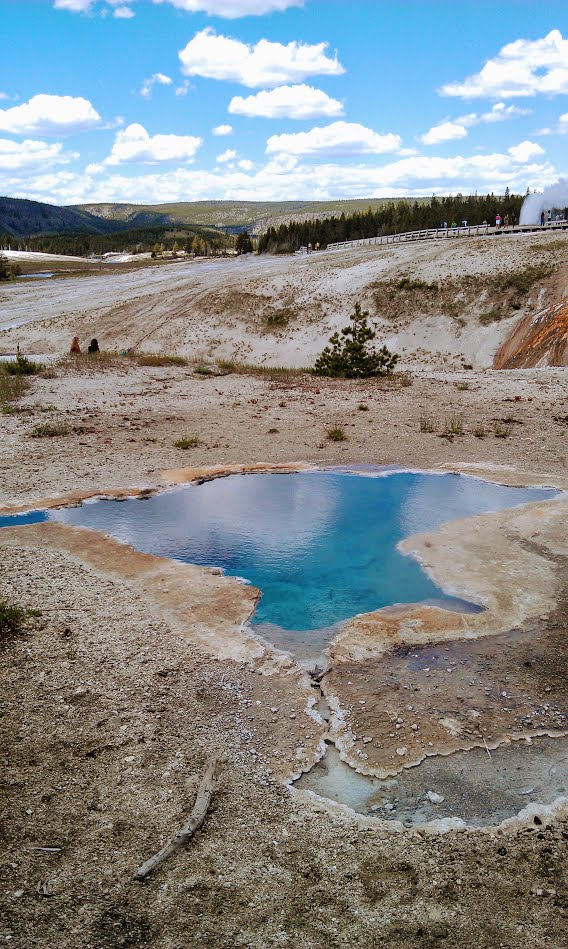
Grand Prismatic Spring
Geysers and hot springs can get old quick, but Grand Prismatic Springs is absolutely beautiful. This is the largest hot spring in the U.S located at Midway Geyser Basin. The colors are fascinating. It is one of those visuals you see online or on TV and once you get there, it actually lives up to your expectations and more.


Mammoth Hot Springs
As if we couldn’t see anymore hot springs, the last stop was Mammoth Hot Springs. These hot springs were different than all the rest. You walk up a few flights of stairs that bring you to boardwalks above the steaming hydrothermal springs. The views were very different as the hot springs were located on a hill of a travertine.


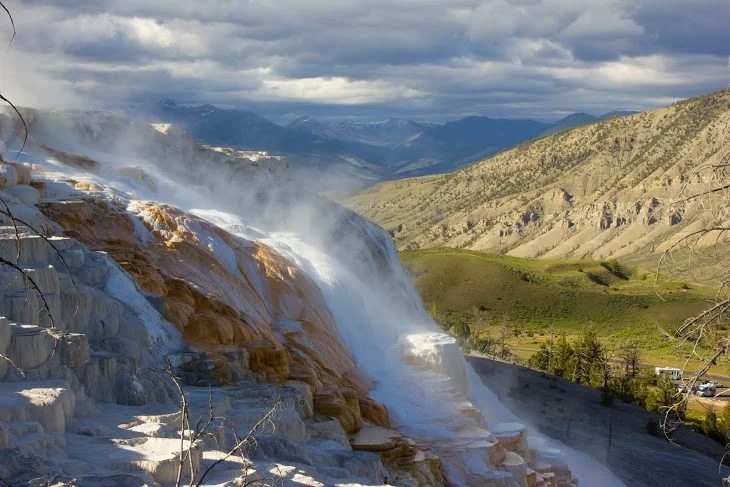


HIKING FOR DONUTS
A blog for the outdoors foodie enthusiast
Hi, I’m Mark. I live in Connecticut. I take new trips every chance I get. A good trip has a great hike, great food, and something fun to do. My goal is to search out new trips and share them to inspire others to try something new and exciting.
If you are looking for posts in a particular place, search by city or state here.
EXPLORE OTHER POSTS IN THE ARCHIVE
RECOMMENDED POSTS
MOST RECENT POSTS
See where I have been recently on Instagram. Follow @HIKINGFORDONUTS
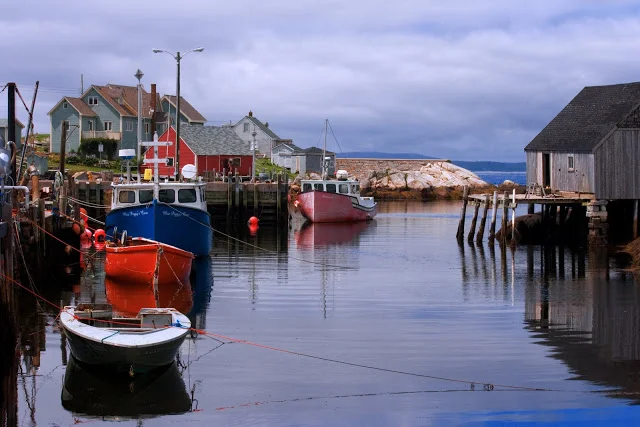
Canada is underrated
My first real hiking trip took place in Canada of all places. Me and my buddy jumped in a car and drove up to very unique areas of Canada. We some saw great sights and hiked unfamiliar terrain. Take a read and you will learn some of what Canada has to offer. And.....it's awesome.
Back in 2011, I have never really been anywhere. I was in my mid 20s and I haven’t experienced much outside of the Northeast. I went on a cruise in college but cruises aren’t that adventurous. My best friend, Corey, would try his best talking me into hikes and trips. Generally, my response was “hell no”. He knew he could eventually wear me down and had to say just enough to intrigue me, which will continue to be a theme the next few years of my life. The idea presented to me was a road to trip to Canada but nowhere near Montreal, the only area I knew of back then. This also included camping and hiking. The camping part did not interest me but the idea of going to a unique part of Canada and driving peaked my interest. I really had no idea what I was in for but I have never been to Canada and trusted Corey’s planning and outdoorsy knowledge. The main destinations of the trip involved the Bay of Fundy, Nova Scotia, and New Brunswick. Yeah, completely random. Leaving from Massachusetts we made our way up through the tippy top Northwest of Maine to the boarder. I have never been this far up. It was wild. Once we got close, towns in Maine no longer had names, they were just route numbers. I remember clear as day, for like 100 miles, I saw 2 blueberry stands, a gun shop, and a truck bed shop. Where the heck was I??? 8 ½ hours later, we crossed the border. A simple car ride took us to another country. I couldn’t believe it. Everything looked so different. I was in for a life altering experience.
Our first stop was Saint John, New Brunswick. We started and ended the trip there. We were greeted with very rainy, foggy weather the entire trip. We checked into our hotel and walked around the city the first night. We were right off the water and we could see the cruise ship lines taking off. There was quite a bit to do here for food and drinks. There were lots of Americanized spots and unfortunately we ate at one. It wasn’t good. It is almost better to be more adventurous eating in other countries. The language barrier wasn’t an issue as this was a very tourist area of Canada. We were noob travelers and paid with our credit cards. And, we didn’t have time to exchange at the banks. I would suggest to handle that prior to your trip. With that said, this was a beautiful city. At the time, I wasn’t a big photographer but Corey was. Here is a cool photo he took.

The next few days consisted of exploring the Bay of Fundy. This bay has the highest tidal range in the world, meaning the low tide and high tide difference are dramatic. When we were there, the tide was in. It was crazy how far out it was and where I was standing. Just to think that when high tide comes, you would be in over your head. We visited Fundy National Park and camped in Alma, New Brunswick. One of the more popular attractions in the Bay of Fundy is the Hopewell Rocks. Here is where I realized what a tourist environment looked like. Sooo many people. Too many. We didn’t see many others until this point. I truly like taking in my environment and enjoy what I am seeing. It was tough because people were almost on top of each other. Could have been the fact we went during the busy season. There is an entry fee and there is a trail leading you down to the rocks, which is about a mile. With that said, Hopewell Rocks is pretty awesome. The rocks stand 40-70 feet tall. At that time, definitely something I had seen in my life.


After spending some time outdoors, we made our way to Halifax, Nova Scotia. Now, I really felt in another country. Most people here spoke French. The city was a really good experience. There were tourists here but not as many as the other areas. This felt true to the country. I remember having a phenomenal meal at this pub and we sat outdoors just taking in our surroundings. The best part of Nova Scotia was taking a ride to Peggy’s Cove. This was a small community on the eastern shore of St. Margaret’s Bay. This is also a massive tourist attraction to the popular lighthouse and the scenic area of the village. This was brutal with the amount of people but it was just too beautiful not to enjoy. There were many old fishing huts and houses. Definitely a fisherman village. However, all buses and tourist stuff like ice cream shops took away from the old fishermen village vibe. And, yeah I totally had ice cream. We explored around the lighthouse for a little bit, which is the biggest attraction. I was in awe of the ocean views. We decided to take a hike off a beaten path two minutes down the road recommended by a guide at the visitor center. Parked on the side of the road and prayed for the best following the trail toward the bay. The terrain was different than anything I seen. We hiked with boulder to climb over and cliffs to scale along the coast. I got stuck in bushes. I was crapping my pants dangling over rocks above the ocean. I had sneakers on and a crappy book bag. I pretty angry with Corey how far we kept going. We were not prepared nor a clue where we were going but this ended up being a pivotal moment for me. We just kept exploring. This would be one of my first real hikes and first taste of exploration. I was glad to have this experience. If you have the chance, visit Peggy’s Cove.


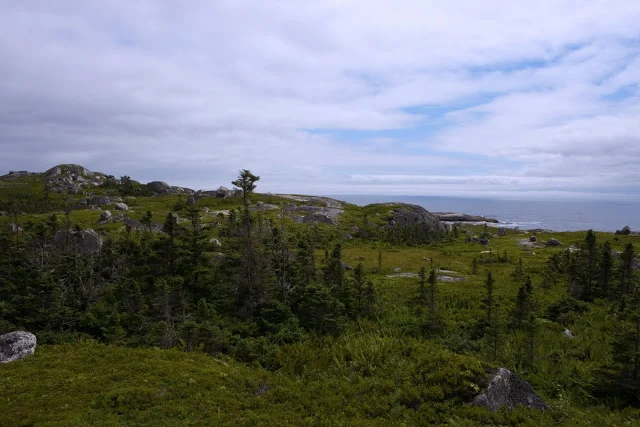
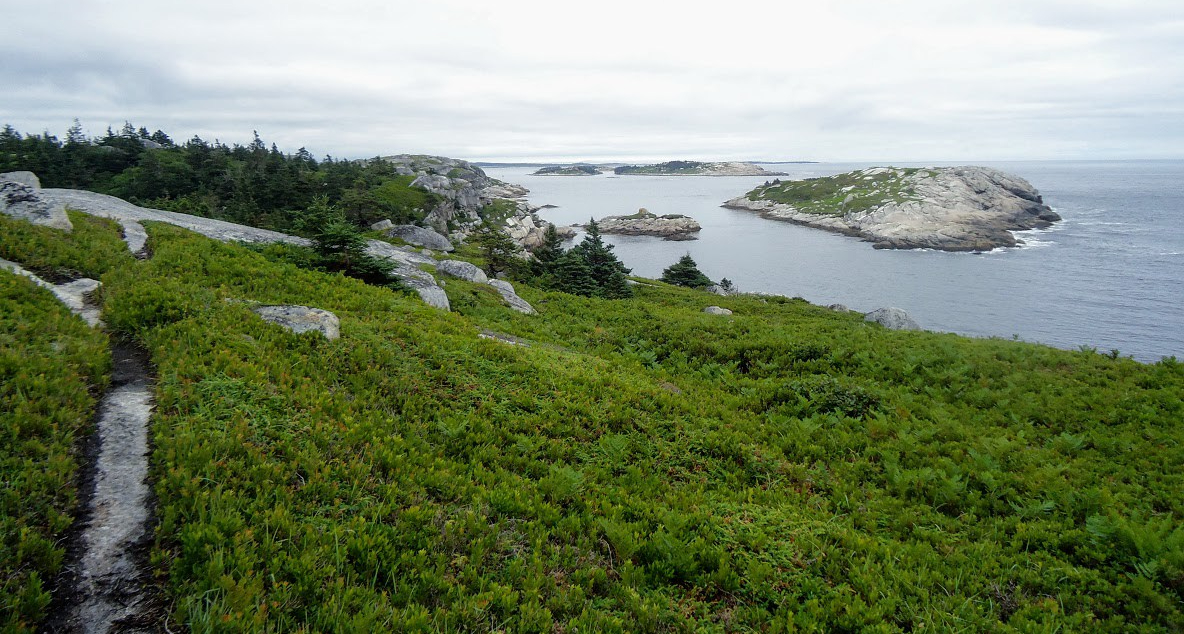
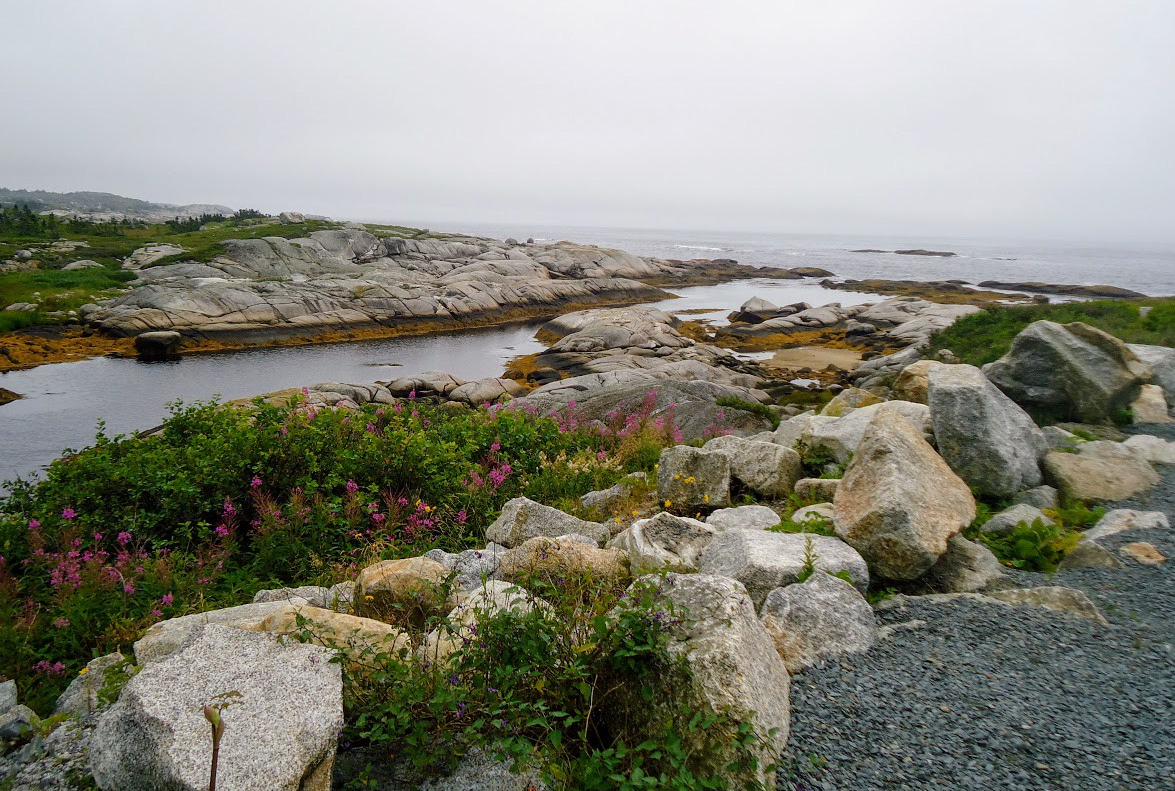

In conclusion, Canada is friggin awesome. Go to Canada. There are so many cool things to do including hikes, sights, food, and beers. Road tripping through Canada and seeing all the different landscape. Experiencing a completely different culture. I would do it all over again and probably 10x better. This was first big time trip involving outdoors & nature. I was completely hooked! As will you see, as you hopefully continue reading the blog, this has been just the beginning.
HIKING FOR DONUTS
A blog for the outdoors foodie enthusiast
Hi, I’m Mark. I live in Connecticut. I take new trips every chance I get. A good trip has a great hike, great food, and something fun to do. My goal is to search out new trips and share them to inspire others to try something new and exciting.
If you are looking for posts in a particular place, search by city or state here.
EXPLORE OTHER POSTS IN THE ARCHIVE
RECOMMENDED POSTS
MOST RECENT POSTS
See where I have been recently on Instagram. Follow @HIKINGFORDONUTS
Day Trip to New York City
NYC has so much to do. And, sooo much more to eat. Here is what a day in NYC looks like for me. I was able to get around quite a bit and stuff my face the entire way! Do you agree with my foodie picks?
I haven’t visited New York City much in my life until recently. New York City can be so crowded and overwhelming. However, there are so many great places to visit, see, and eat. I went this past May and I became more intrigued to go back. Nichole and myself wanted to go during the holiday season but time did not permit until after Christmas. We hoped it would be less crowded and would still be able to enjoy the holiday décor. Even with the temperatures in the teens, we made our way to the train station and hopped on to Grand Central. We had a lot of sights in mind, but let’s be honest this trip was more for the food.
Once we got off the train, we went to Rockerfeller Center first and went to look at the Christmas tree. Most people go to the city just for that purpose. I took one obligatory picture and I was set. I was more into all the buildings and other décor around that area. Since we were close by, we walked over to Times Square to get some more sightseeing in and checked out the Hershey's store. It’s cool to see the massive candy bars but that place is way overpriced.
From there, we went to the Bryant Park Winter Village which includes 176 vendors, an ice skating rink and merry-go-round. Many popular restaurants and food trucks set up shop for the holiday season, bring lots of deliciousness to one spot! The scenery is surreal with the feel of a small village in the middle of one of the busiest cities in the world. This was my type of spot to say the least,


First up, Wafels & Dinges. Their specialty was Belgian waffles with various toppings and flavors to choose from. So many decisions but we went with the S’mores waffle which consisted of marshmallows, speculoos spread and Belgian chocolate fudge. This was a splendid first treat/breakfast.
Once we got breakfast in our bellies, we walked around Bryant Park a bit more and Nichole found our next must have...mini donuts! I can’t pass up on some mini donuts. Doughtnuttery was on my donut list for NYC. They have pretty intriguing flavors. Each donut was tossed in sugary goodness. While the flavors didn’t really taste like what they said, they were still pretty good. The flavors we got consisted of vanilla, lavender, & pistachio and rosemary, roasted cornmeal, & fig.


The Flatiron District was our main destination for the afternoon. After ubering around, I was ready for more donuts. Number one on my donut research was Dough. Fortunately, they did have a location in the Flatiron District. Needless to say, Dough was phenomenal. Some of the best donuts I have had. Definitely blog worthy. If you want see more, check out my previous blog post, here.
The buildings and skyscrapers in NYC are breathtaking. The Flatiron Building is a triangular 22 story steel-framed building in Manhattan. My hands were frozen, my phone kept shutting off, I couldn’t stop taking pictures. You don’t see buildings like that every day. If you get a chance, go see it!
A late lunch was in store as the donuts wore off. Eataly was our food destination of choice. This large marketplace consisted of a variety of restaurants, bakeries, retail shops to buy fresh pasta & cheese, Nutella cafe, and even a cooking school. Everything Italian. You name it, they had it. You could get yourself a fresh cannoli, a lean cut of meat, or a drink at the bar.


Prior to the trip, we noticed there was a pop up restaurant on the 14th floor of Eataly, called Baita. This was an Italian Alps themed restaurant. I was sold on that. Once we were seated, I noticed the retractable roof and the intricate heaters throughout to keep that cozy vibe. There was a view of the city skyline depending where you sat. A lot of the décor resembled what you would find in a ski lodge. I liked the idea behind it. However, the menu wasn’t the best. And, the food was really pricey. I saw the portion sizes people were eating and they were pretty small. Ordering just appetizers was our best bet. Polenta was a popular item on the menu so we tried their “Zucca” which consisted of polenta, squash, thyme & parmesan reggiano. The other intriguing items we ordered were wagyu beef skewers seasoned in olive oil and the beer battered fried piave cheese. The beef skewers were awesome. The Polenta was just okay and the fried cheese was pretty greasy so I stopped eating them not to get sick. In hindsight, we should have just had a drink at the bar. The atmosphere wasn’t worth the disappointing meal. We were still hungry!


The great part about NYC is that food is literally everywhere. The bad meal didn’t hold us down. I had to find a can’t miss bite. Who doesn’t like grilled cheese!?!?! There was a Melt Shop nearby and this hit the spot. Me and Nichole shared a pepper jack buffalo chicken grilled cheese and a wonderful milkshake. We couldn’t decide what flavor so the server just combined both for us, Nutella and Oreo. Absolute heaven.


For the cherry on top, you can’t leave New York City without a slice of pizza. Before we hopped back on the train at Grand Central, we stopped at Previti’s Pizza. The reviews were not lying. Great slice of pizza. That was a nice way to end our adventurous and gluttonous day in the city. And, our last trip of 2017. I can’t wait for more adventures and exploration in 2018.

HIKING FOR DONUTS
A blog for the outdoors foodie enthusiast
Hi, I’m Mark. I live in Connecticut. I take new trips every chance I get. A good trip has a great hike, great food, and something fun to do. My goal is to search out new trips and share them to inspire others to try something new and exciting.
If you are looking for posts in a particular place, search by city or state here.
EXPLORE OTHER POSTS IN THE ARCHIVE
RECOMMENDED POSTS
MOST RECENT POSTS
See where I have been recently on Instagram. Follow @HIKINGFORDONUTS