

Haystack Mountain Trail, Connecticut: Fire Tower Hike With Epic Views
Haystack Mountain State Park Trail Guide (Norfolk, CT)
Haystack Mountain State Park might be one of Connecticut's best "bang for your buck" hikes. Less than a mile round trip gets you to a stone fire tower with sweeping views across four states.
Haystack Mountain State Park in Norfolk, Connecticut is one of the best short hikes in New England. This quick out-and-back trail leads to a historic stone fire tower with sweeping 360-degree views into Connecticut, Massachusetts, New York, and Vermont.
At less than a mile round trip from the upper parking area, this is an excellent beginner-friendly hike with a huge scenic payoff. If you’re looking for an easy Connecticut hike with mountain views, this trail deserves a spot on your list.
Trail Description: Haystack Mountain Trail contains an impressive stone fire tower with stunning views of the mountains in Connecticut, Massachusetts, New York, and Vermont.
Trail Info:
Location: Norfolk, CT (See link below)
Distance: 0.8 mile (30-45 min) Round Trip
Difficulty: Moderate
Trail Type: Out and Back
Highlights: Views, Mountains, Valley, Fire Tower, Panoramic Views
Dog Friendly: Yes
Best Season: Fall, Spring, Summer
How to get there:
Haystack Mountain State Park - On Rte. 272 Norfolk, CT 06058
Trailhead parking location here.
Easy to find off Route 272. The road goes halfway up Haystack Mountain to a parking lot, where the shortest trail starts. The parking lot can hold about 10 cars.
Hiking Tips
Download park map, click here.
Cell phone service is spotty. Hike carefully.
There can be seasonal closures of the park.
Nearby Things to Do:
Yellow Trail: Longer 1.8 Mile Hike (starts at the beginning of park road at the gate entrance)
Nearby Hikes: Litchfield County area has some great short hikes you could pair with this one.
Post Hike Brews: NorBrook Farm Local Brewery

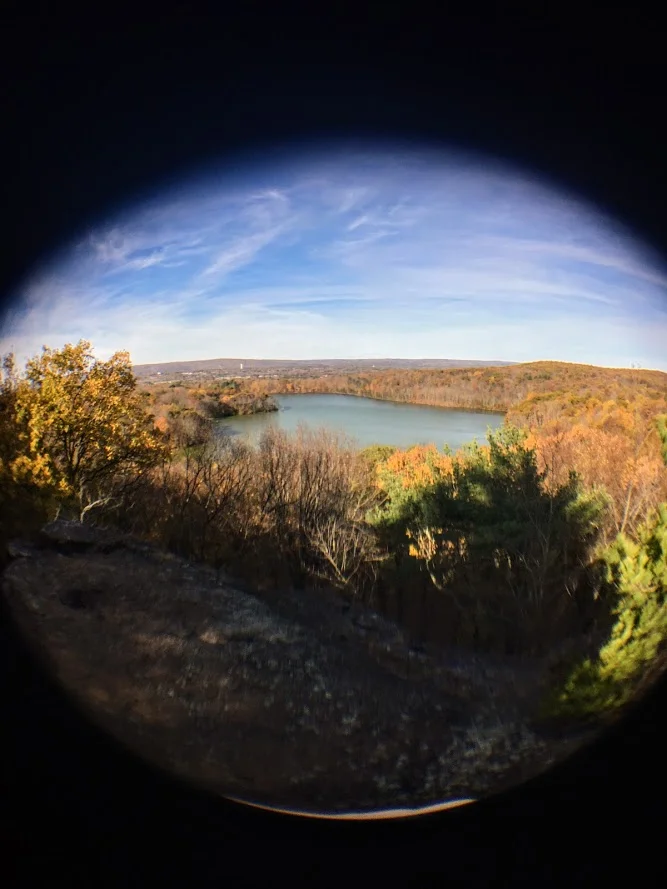
Panoramic Views
Haystack Mountain Trail Guide
Haystack Mountain State Park in Norfolk, Connecticut is one of the best short hikes in New England.
At less than a mile round trip from the upper parking area, this is an excellent beginner-friendly hike with a huge scenic payoff. If you’re looking for an easy Connecticut hike with mountain views, this trail deserves a spot on your list.
This guide will be for the shortest trail route at 0.8 miles from the top parking lot of Haystack Mountain. These days my time is a bit limited and the best bang for your buck is what is more appealing. If you want to make it a longer hike, there is the Yellow Trail that starts near the beginning of park road at the gate entrance. This will be 1.8 miles, out and back. Both of these options will be great hikes to get to the main attraction, the amazing tower views.
Trail Overview

Haystack Mountain Trailhead
Parking Information
Once you have parked at the top parking, which is about a mile once you enter the park, the trail is to the left to begin the summit.

Haystack Mountain Trail
The Hike to the Fire Tower
This trail is fairly straightforward. It is well-maintained and clearly marked. The first 0.2 miles are flat and easy breezy. The next 0.2 miles will get your heart pumping as the trail bends to the left and starts a quick incline with 200 feet of elevation. Those quads might be on fire but it is all worth it once you see the bad ass tower at the top.
Check out my Instagram reel for a video walkthrough of the Haystack Mountain Trail and the fire tower views here.

Haystack Mountain Trail Incline
Now, it’s time to climb the 34 foot stone tower up to the top for the 360 views at 1,683 feet of elevation.
Tower Views and What You’ll See

Haystack Mountain Fire Tower
Best Time to Visit
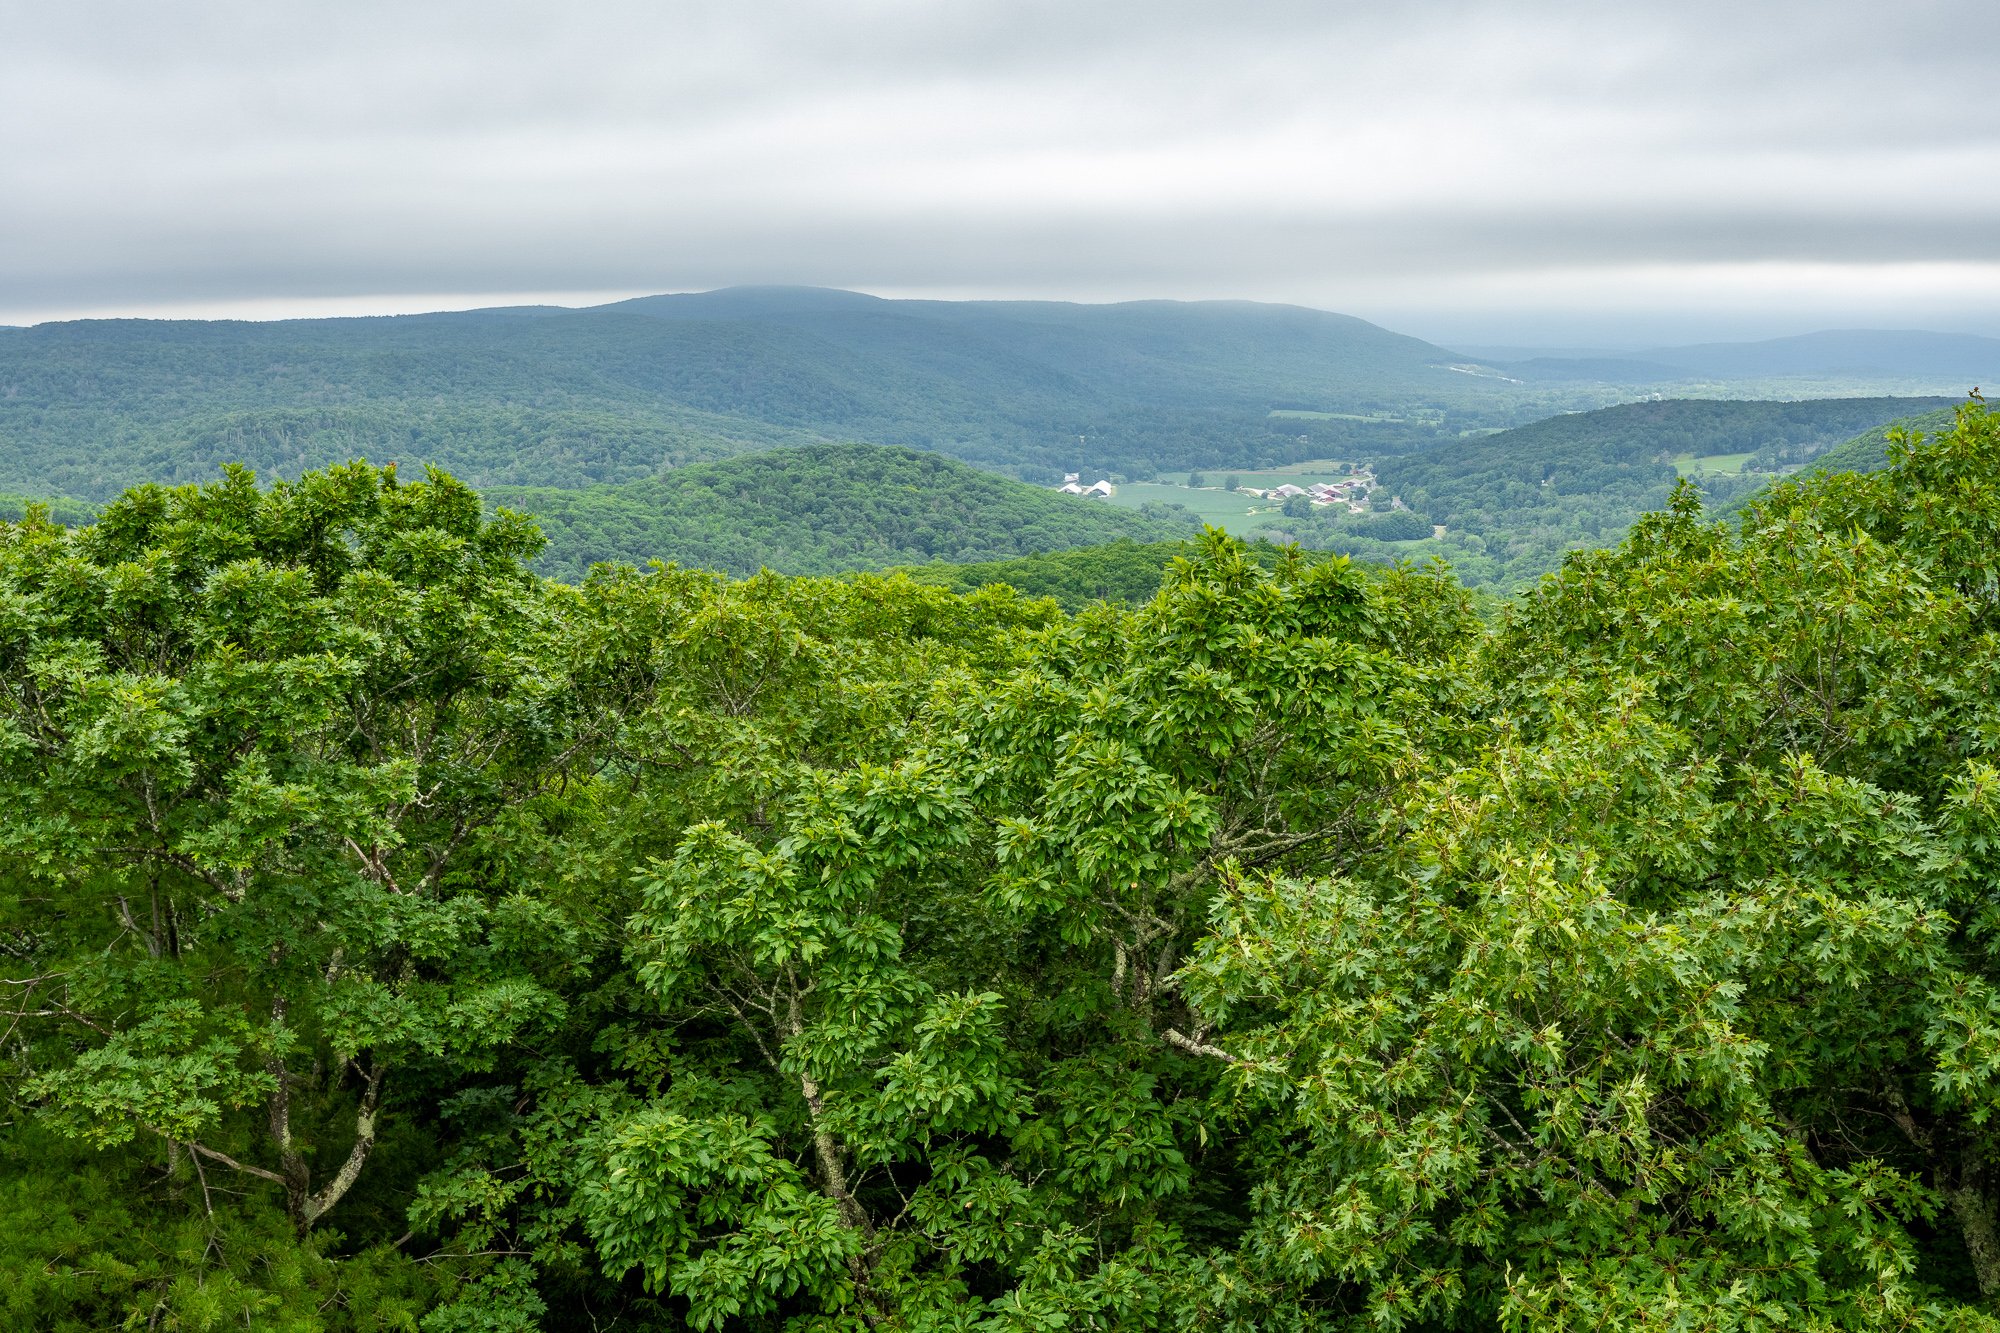
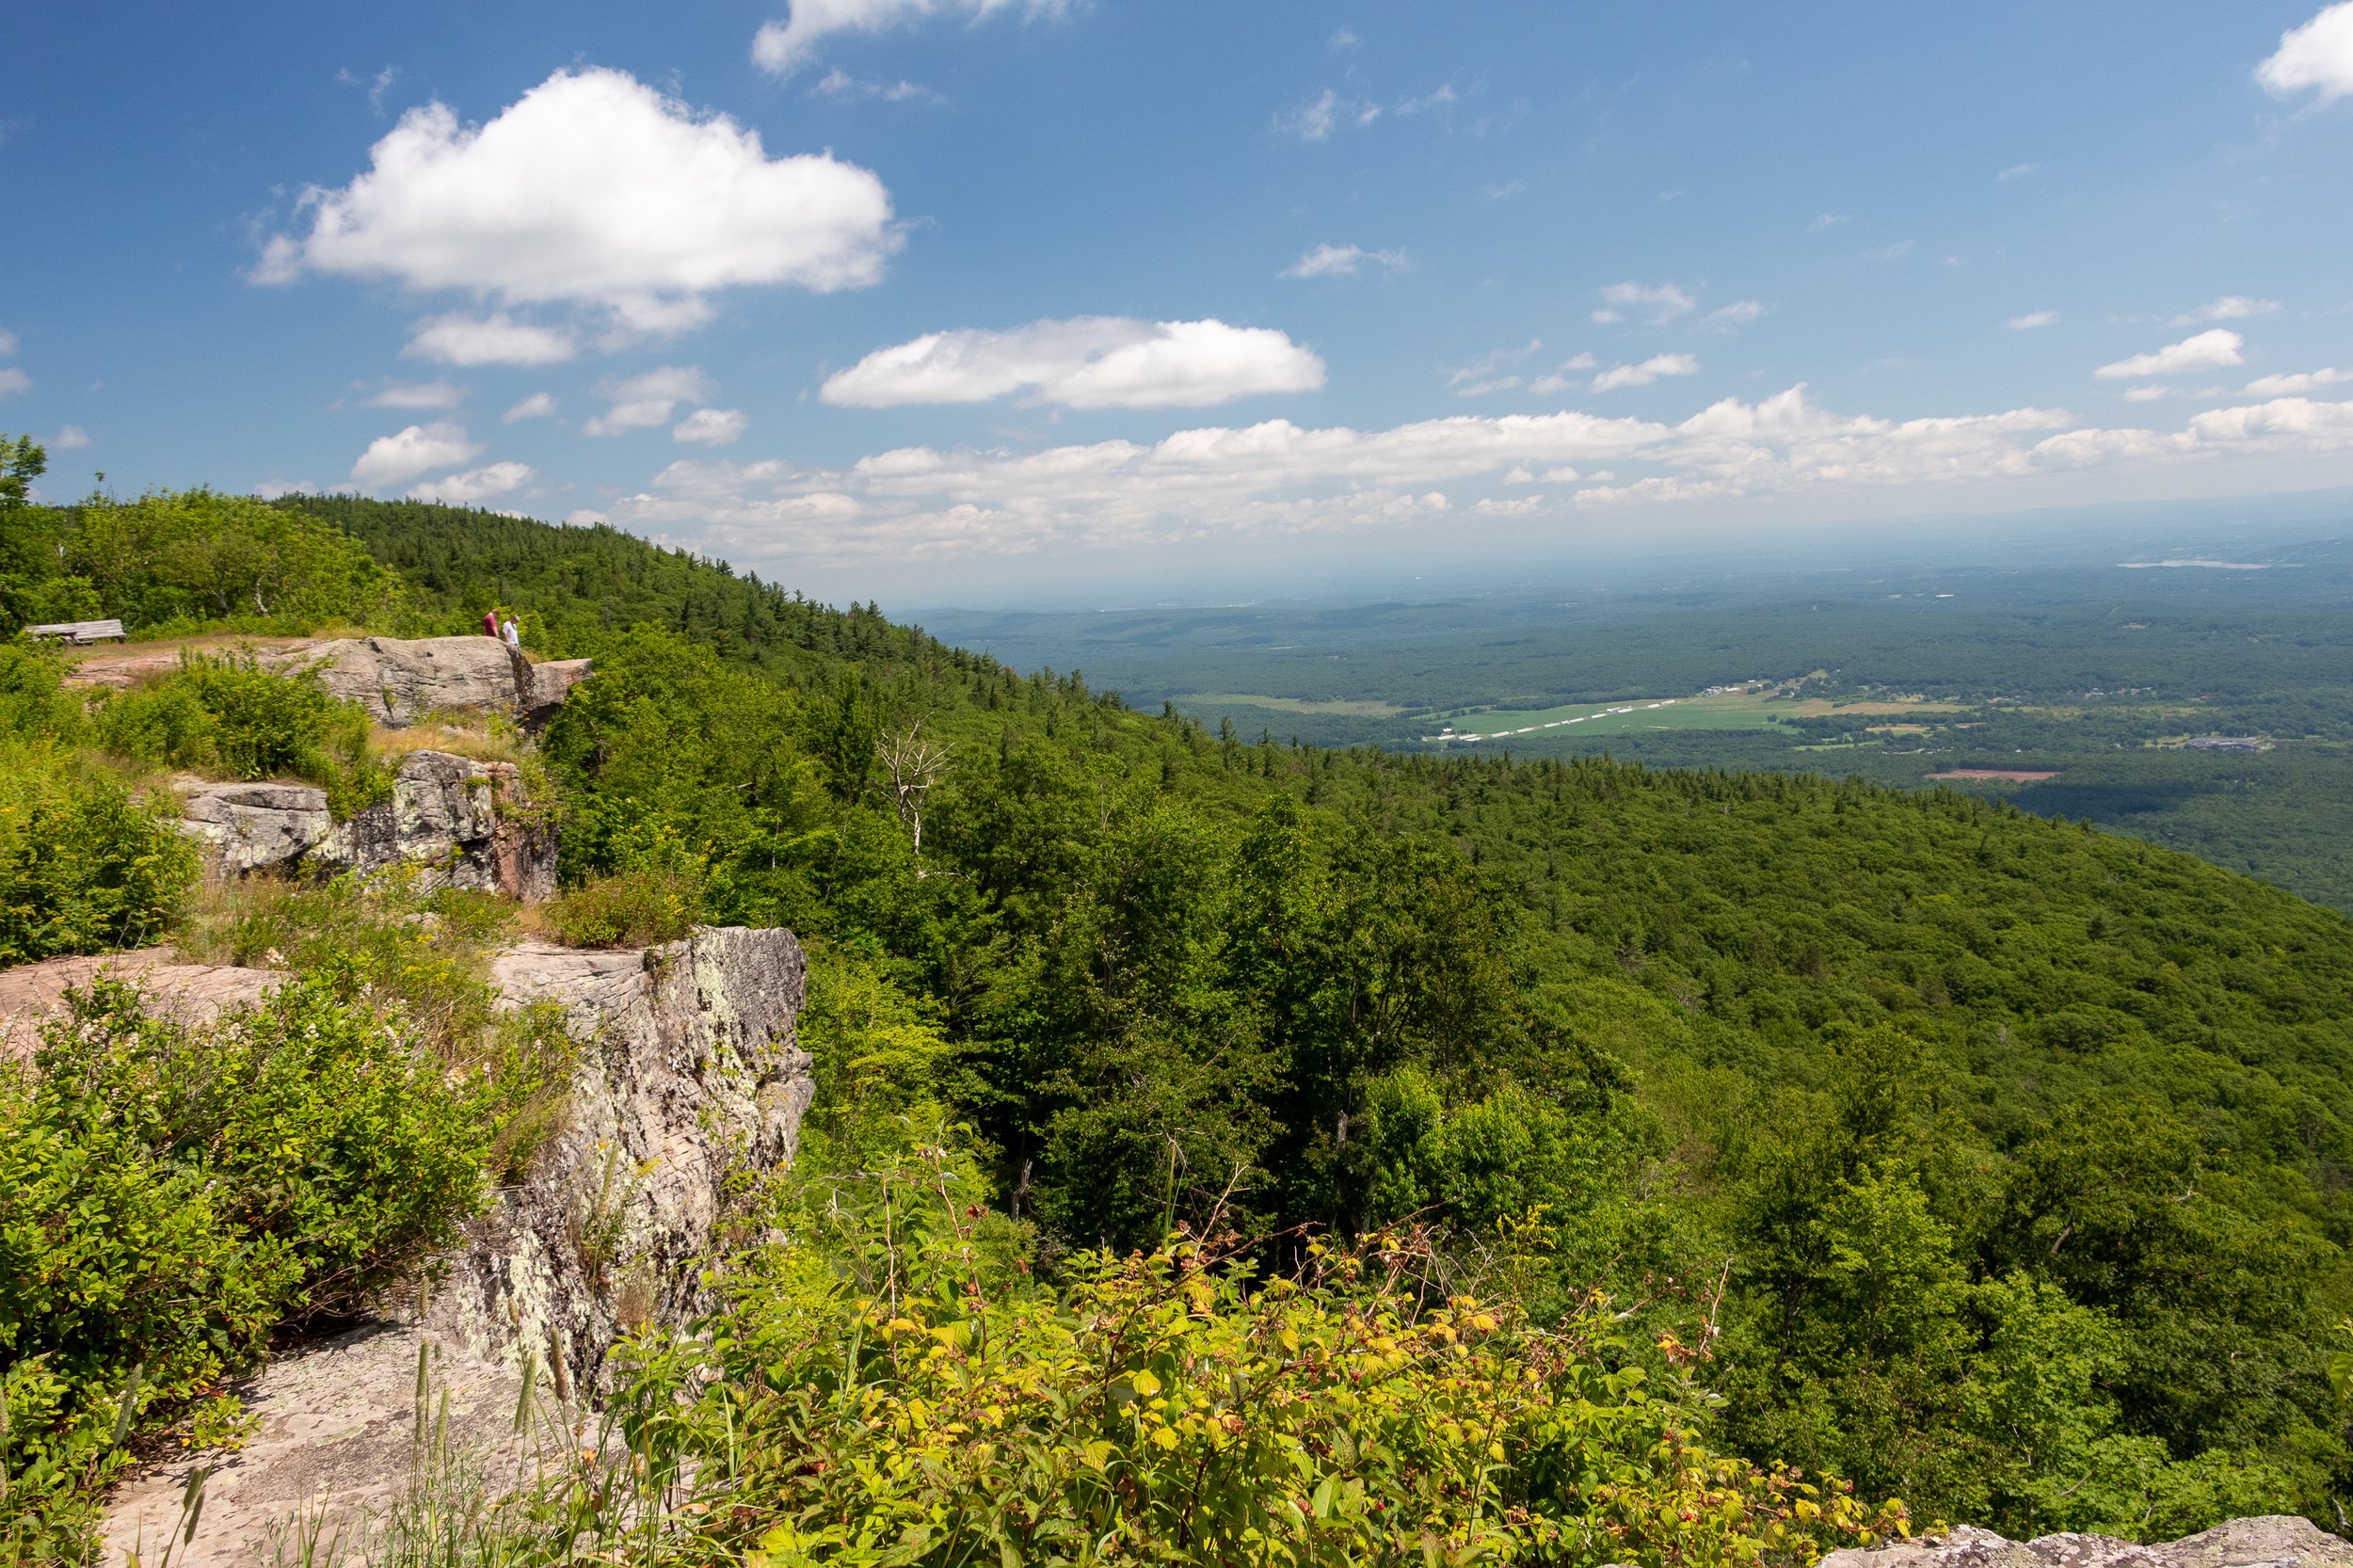
Definitely some of the best views you will have in Connecticut. It was a bit overcast and cloudy for me, but still impressive views nonetheless. On a clear day, there is visibility of the Riga Plateau in Northwest Connecticut, the Berkshires in Massachusetts, the Catskills in New York, and the Green Mountains of Vermont. That is quite a combination of views.

View at the Top

Haystack Mountain Trail Views

Nearby Breweries and Things to Do
This would be great to pair with some other short hikes in the Litchfield County area. In addition, there are great local breweries as well such as NorBrook Farm for post hike brews.
Things to Do Nearby:
Yellow Trail: Longer 1.8 Mile Hike (starts at the beginning of park road at the gate entrance)
Nearby Hikes: Litchfield County area has some great short hikes you could pair with this one.
Post Hike Brews: NorBrook Farm Local Brewery
Other Connecticut Hikes Nearby
Looking for more scenic Connecticut hikes? Check out these links to other trail guides for hikes in Litchfield County:
Follow Hiking For Donuts on Instagram for more New England hiking adventures.

HIKING FOR DONUTS
Hi, I’m Mark. I live in Connecticut. I take new trips every chance I get. A good trip has a great hike, great food, and something fun to do. My goal is to search out new trips and share them to inspire others to try something new and exciting.
If you are looking for posts in a particular place, search City or State here.
SEE OTHER POSTS IN ARCHIVE
RECOMMENDED POSTS

RECENT POSTS


See the latest on Instagram and follow @HIKINGFORDONUTS

Enders Falls, Granby, CT
Trail Description: Enders Falls is a quick out and back trail with multiple picturesque waterfalls.
Trail Info:
Where: Granby, CT Distance: 1 mile (30-45 min) Difficulty: Easy Trail Type: Out & Back Features: Views, Waterfalls, Water, Brook
How to get there:
Enders State Forest Granby, CT 06035
Click here for coordinates from GoogleMaps.
Hiking Tips
Bring bug spray for the applicable season.
There are a few trails off from the parking lot heading down to Enders Brook that will converge.
The Hike
Waterfalls can be hit or miss for me. Sometimes they all just feel the same. Generally, my first inclination is to find a hike with cool summit views. However, things done changed, and that can’t always be the case. I have a toddler and many toddler nieces/nephews. I want to still get out in nature and show them all how awesome it is. And, waterfalls are a great hiking option for this. There are many in Connecticut that are accessible. I am behind on my CT waterfall game but that will likely change.
Enders Falls is an easy trail with 4-5 visible waterfalls that vary in size and look. The trail is very popular but we picked a great day and had the trail to ourselves. My wife had my daughter in a carrier and I had my nephew in my backpack carrier. And on we went to enjoy a day of nature.
From the parking lot, I definitely did not take the best course of action but we got back on track easily enough. The best start would be starting at the gravel in the far right corner by the porta potty.
There will be Purple markers (look pink to me) on the gravel trail and follow downstream to the staircase along the ravine. It seems this has been updated recently with steps of granite, fortified railings, and wooden fencing for safety purposes. It appears there were some accidents but it is very safe and well constructed. And, you can still get great views on some of the falls.

There is a good view of the 2nd waterfall and cliff area from the small viewing platform.

At the end of the staircase, there are stone steps that lead back to the gravel trail back to the parking lot for about a half mile.

HIKING FOR DONUTS
Hi, I’m Mark. I live in Connecticut. I take new trips every chance I get. A good trip has a great hike, great food, and something fun to do. My goal is to search out new trips and share them to inspire others to try something new and exciting.
If you are looking for posts in a particular place, search City or State here.
SEE OTHER POSTS IN ARCHIVE
RECOMMENDED POSTS
RECENT POSTS
See the latest on Instagram and follow @HIKINGFORDONUTS

Hiking Mount Agamenticus, York, Maine
Trail Description: The Mount Agamenticus Conservation Region is located in Southern Maine. The Mount Agamenticus Loop is a popular trail that provides 360 degree views at the summit of the surrounding mountains in the distance.
Trail Info:
Where: York, ME Distance: 1.8m (1 hour) Difficulty: Easy toModerate Trail Type: Loop Features: Views, Mountains, Valley
How to get there:
Typing the location “Mount Agamenticus Trailhead” into Google Maps will take you to the parking lot. You can’t miss it. There is a lot of parking. It’s $2/hr to park and there is a barcode to scan for the app to use to pay. It was easy peasy in my opinion. And, worth the money based on how well they keep up with everything.
Coordinates: 43.21720438450835, -70.69198787482621
Link to google maps location here.
Hiking Tips
I suggest caution if it rained days prior. The trails in the forest are mostly roots and rock. Dry it’s no biggie but wet I don’t think it would be as enjoyable.
Download a copy of the trail map here.
There are multiple trail options. This guide is for the loop via Blueberry Bluff, Witch Hazel, and Ring Trail. The Big A trail has separate parking and is a 1 mile loop that’s mostly gravel & an easier option (stroller and wheelchair friendly).
The trail and parking lots are well maintained and great facilities. Nicest outhouse bathrooms I ever been in!

The Hike
Once parked at the Mountain Road parking lot, the beginning of the trail head is visible with markers at end of the parking lot.

There will be trail signs promptly upon starting the hike at a fork. Stay right and hop on the Ring Trail, which is the white marked trail.

As stated prior, the trail is very well marked. However, the trail is mostly rocks and roots. I saw some reviews mentioning that it was muddy and unpleasant after a rainstorm. And, I totally understand what they meant. The rocks and roots could be slippery. For us, it was dry and there were no issues.

There isn’t much of an elevation gain, only about 340 feet. But there is a small incline as you make your way to the top. Hiking along the Ring Trail, at almost 0.7m, there will be a small foot bridge with a path to the left at the end. This is the Witch Hazel trail. I did not see signs but based on the trail map, this was the way to go.

The Witch Hazel trail is brief. Only a few minutes to reach the Big A Trail. There will also be a small foot bridge.

And following the Big A trail at the top is where the first lookout platform is to take in all the views.

There is another lookout platform with stairs where you can see even higher out into the valley. There is also a fire tower, but it is fenced out and cannot be climbed.


Follow the Big A Trail out until it connects to the Blueberry Bluff, which is marked red. There is also an additional viewpoint here before the Blueberry Bluff.

Continue down the Blueberry Bluff back to the Ring Trail. Take a left at the sign back to the parking lot. You will cross the road at the end to get back to your car.

Southern Maine is tracking to be one of our favorite areas to visit and this was a great first hike in the area. Good hike to get the heart going and see some cool views. The platforms are a cool feature for viewing on the summit. And, the trails and parking lots are so well maintained. I cannot speak highly enough on that. I was not able to find a great guide with details for this hike so I am hopeful this will be helpful for others. It’s also good to see directions/steps before you go to get comfortability. Not a hard hike to follow but I understand where folks can get tripped up. I still do it many times. Luckily, my wife is always the voice of direction.
POST HIKE ACTIVITIES: The fun doesn’t have to stop here. Lots to do in the area. We stopped by the 90s themed brewery, Odd by Nature Brewing, for some post hike beers and nosh, which is about 8 minutes from the trailhead. And, the Nubble Lighthouse is roughly 15 minutes or so away. Definitely a trip to view. Cape Neddick is really cool. Many restaurants in the area as well. No matter what you decide to do, there is a lot to plan for a great weekend or day trip.

HIKING FOR DONUTS
Hi, I’m Mark. I live in Connecticut. I take new trips every chance I get. A good trip has a great hike, great food, and something fun to do. My goal is to search out new trips and share them to inspire others to try something new and exciting.
If you are looking for posts in a particular place, search City or State here.
SEE OTHER POSTS IN ARCHIVE
RECOMMENDED POSTS

RECENT POSTS
See the latest on Instagram and follow @HIKINGFORDONUTS

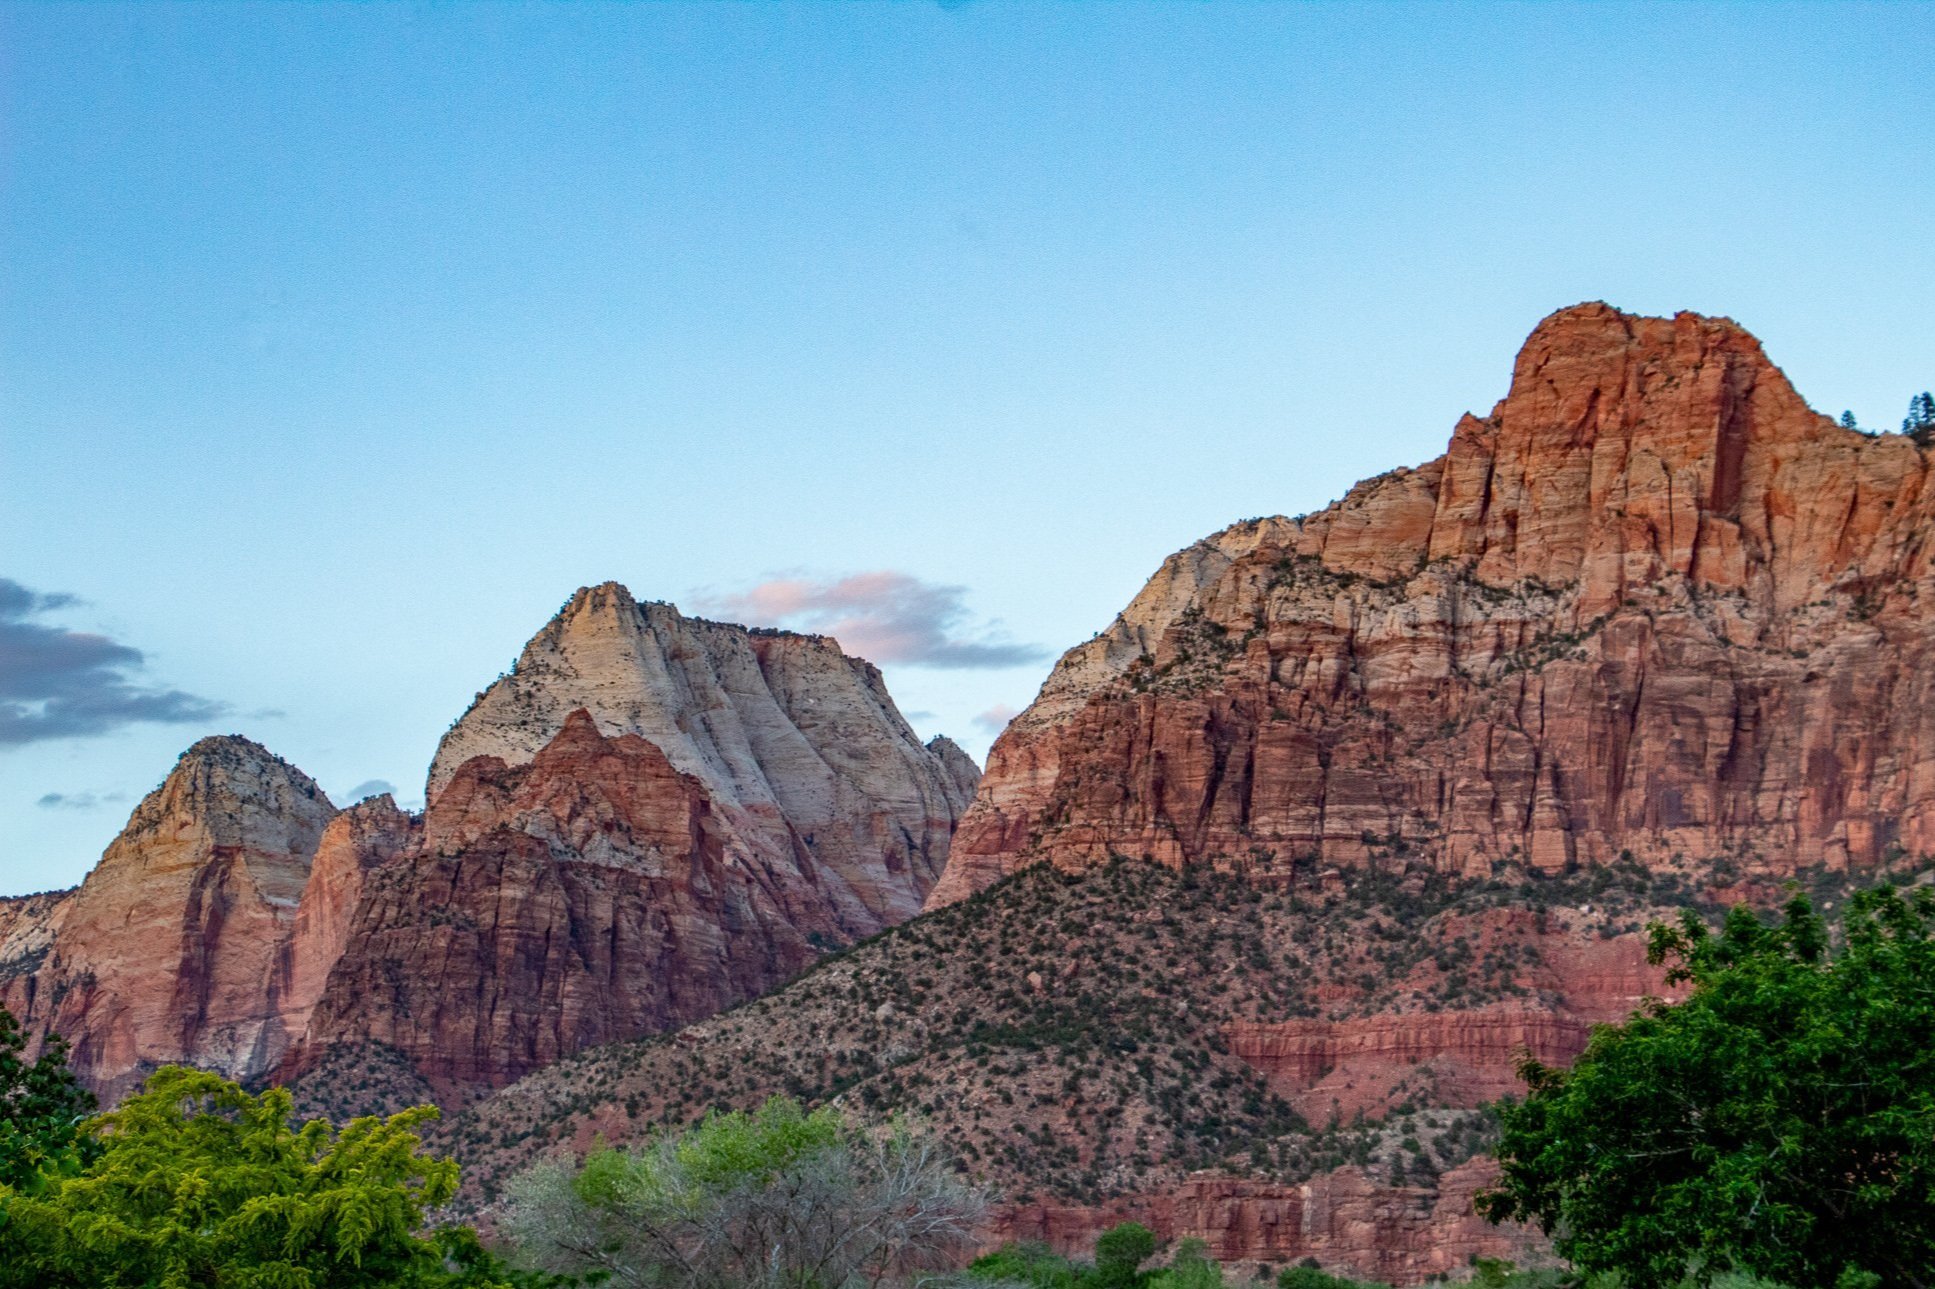
Zion National Park Travel Guide - Plan Your Trip
Located in Southern Utah, Zion National Park is one of the most popular National Parks. It has been in the top 3 most visited parks in the US over the past few years and I do not see that changing. Zion is a smaller national park but packs a punch with numerous thrilling hikes and breathtaking views. Lots of easy to moderate day hikes mixed in with some overnight backpacking adventures. Zion is home to many iconic trails such as the Narrows and Angel’s Landing. You don’t even have to hike to see Zion’s beauty. Just driving through the park is amazing. There is really a lot to do in Zion and there is something for all park visitors.
However, like most National Parks, it takes a lot of planning and research to maximize your trip and enjoy all the park has to offer in the allotted time available. There’s a shuttle bus to consider, weather, river flow rates, permits and reservations. In this guide, I hope to provide you with all the best information to have an incredible trip in Zion National Park.
About Zion National Park
Zion National Park is located in Southern Utah with the closest airport approximately 2.5 hours away in Las Vegas. And, the next closest is 4.5 hours away in Salt Lake City. You can either do this as a standalone trip and or make it a road trip for more Utah national parks. My trip included Zion, Bryce Canyon, and Capital Reef from Las Vegas. You will need to rent a car from whichever airport you choose.
Travel Tip: Zion has limited parking. If you have an oversized vehicle, most parking lots are not accommodating. Parking in Springdale and hopping on their free shuttle or Zion Canyon Visitor Center would be my suggestion.
Zion National Park shuttle
The Zion Canyon Shuttle is in operation most of the year, typically mid-February/March to November. During the time frame, cars are not permitted to drive in the Park along the Zion Canyon Scenic Drive. Fortunately, the shuttle operated by the Park Service is free, fast, and easy. You do not need to reserve shuttle tickets. The shuttle drops off at all major trailheads in the park and operates 7 days a week beginning mid-March. For more info on the full schedule and hours of operation, check out Zion's website, https://www.nps.gov/zion/planyourvisit/zion-canyon-shuttle-system.htm.
The Park shuttle departs from the Visitors Center in short intervals. Just hop on and get off at your convenience. Make sure you know the correct shuttle stop for your hike. Lines start building up rather quickly mid-morning to board the shuttle. Sometimes over an hour wait during peak season and holiday weekends.
Travel Tip: Try to get in the shuttle line by 8-9am to avoid long waits for the shuttle, especially if you are doing the Narrows or Angels Landing hikes. Also, make sure to check when the last shuttle time for that before you hike. Shuttle start and end times vary depending on the season. Don’t miss the last shuttle. Or else it is another 4 mile walk to the Zion Lodge and then you need to figure out how to get back to the Visitor Center!
If there is no parking at the Visitors Center, there is a second shuttle system in town, the Springdale Shuttle. This connects the hotels in Springdale with the main entrance of Zion in the case there is no parking.
When to Visit Zion National Park
The best time to visit Zion National Park is in the Spring and Fall. The park’s mild weather is best for hiking. And, the crowds are not as bad. April/May and September/October would be ideal. Both times I went were in mid to late May, where the weather was great and crowds feasible for most of the park.
Summer is the peak visitation of the park where crowds can be excessive. Popular hikes can be unpleasant due to the amount of people on the trail. Also, temperatures can often reach over 100 degrees.
Zion National Park is open all year-round, which allows you to hike in the off-season. The park doesn’t see heavy snow in the winter, but it is not ideal conditions to hike the park due to some trails being icy and requiring traction equipment.
With that said, everyone goes to hike the Narrows. This requires more thought. The trail is typically closed in the March to May timeframe when water levels are high. The weather is cooler and the water is much colder. Same conditions apply for the fall. With that said, my last visit was in the middle of May with air temperatures mostly in the mid to high 80s. The water was cold, about 45-50 degrees,but it was not bad at all since the air temperature was so high. No issues with water levels but always check the weather and prepare to rearrange your trip if needed. Summer is a great time to hike the Narrows because the weather is excellent with high temperatures. The days are longer, shuttles run all the way to 9pm, and the water in the river is at its warmest. However, the monsoon season creates the highest risk of flash floods during this time. This can be done in the Winter but the temperatures, air & water, are much colder. The shuttle bus does not run often, only on certain days. And, snowfall can potentially close the trail.

Best Things to do in Zion National Park
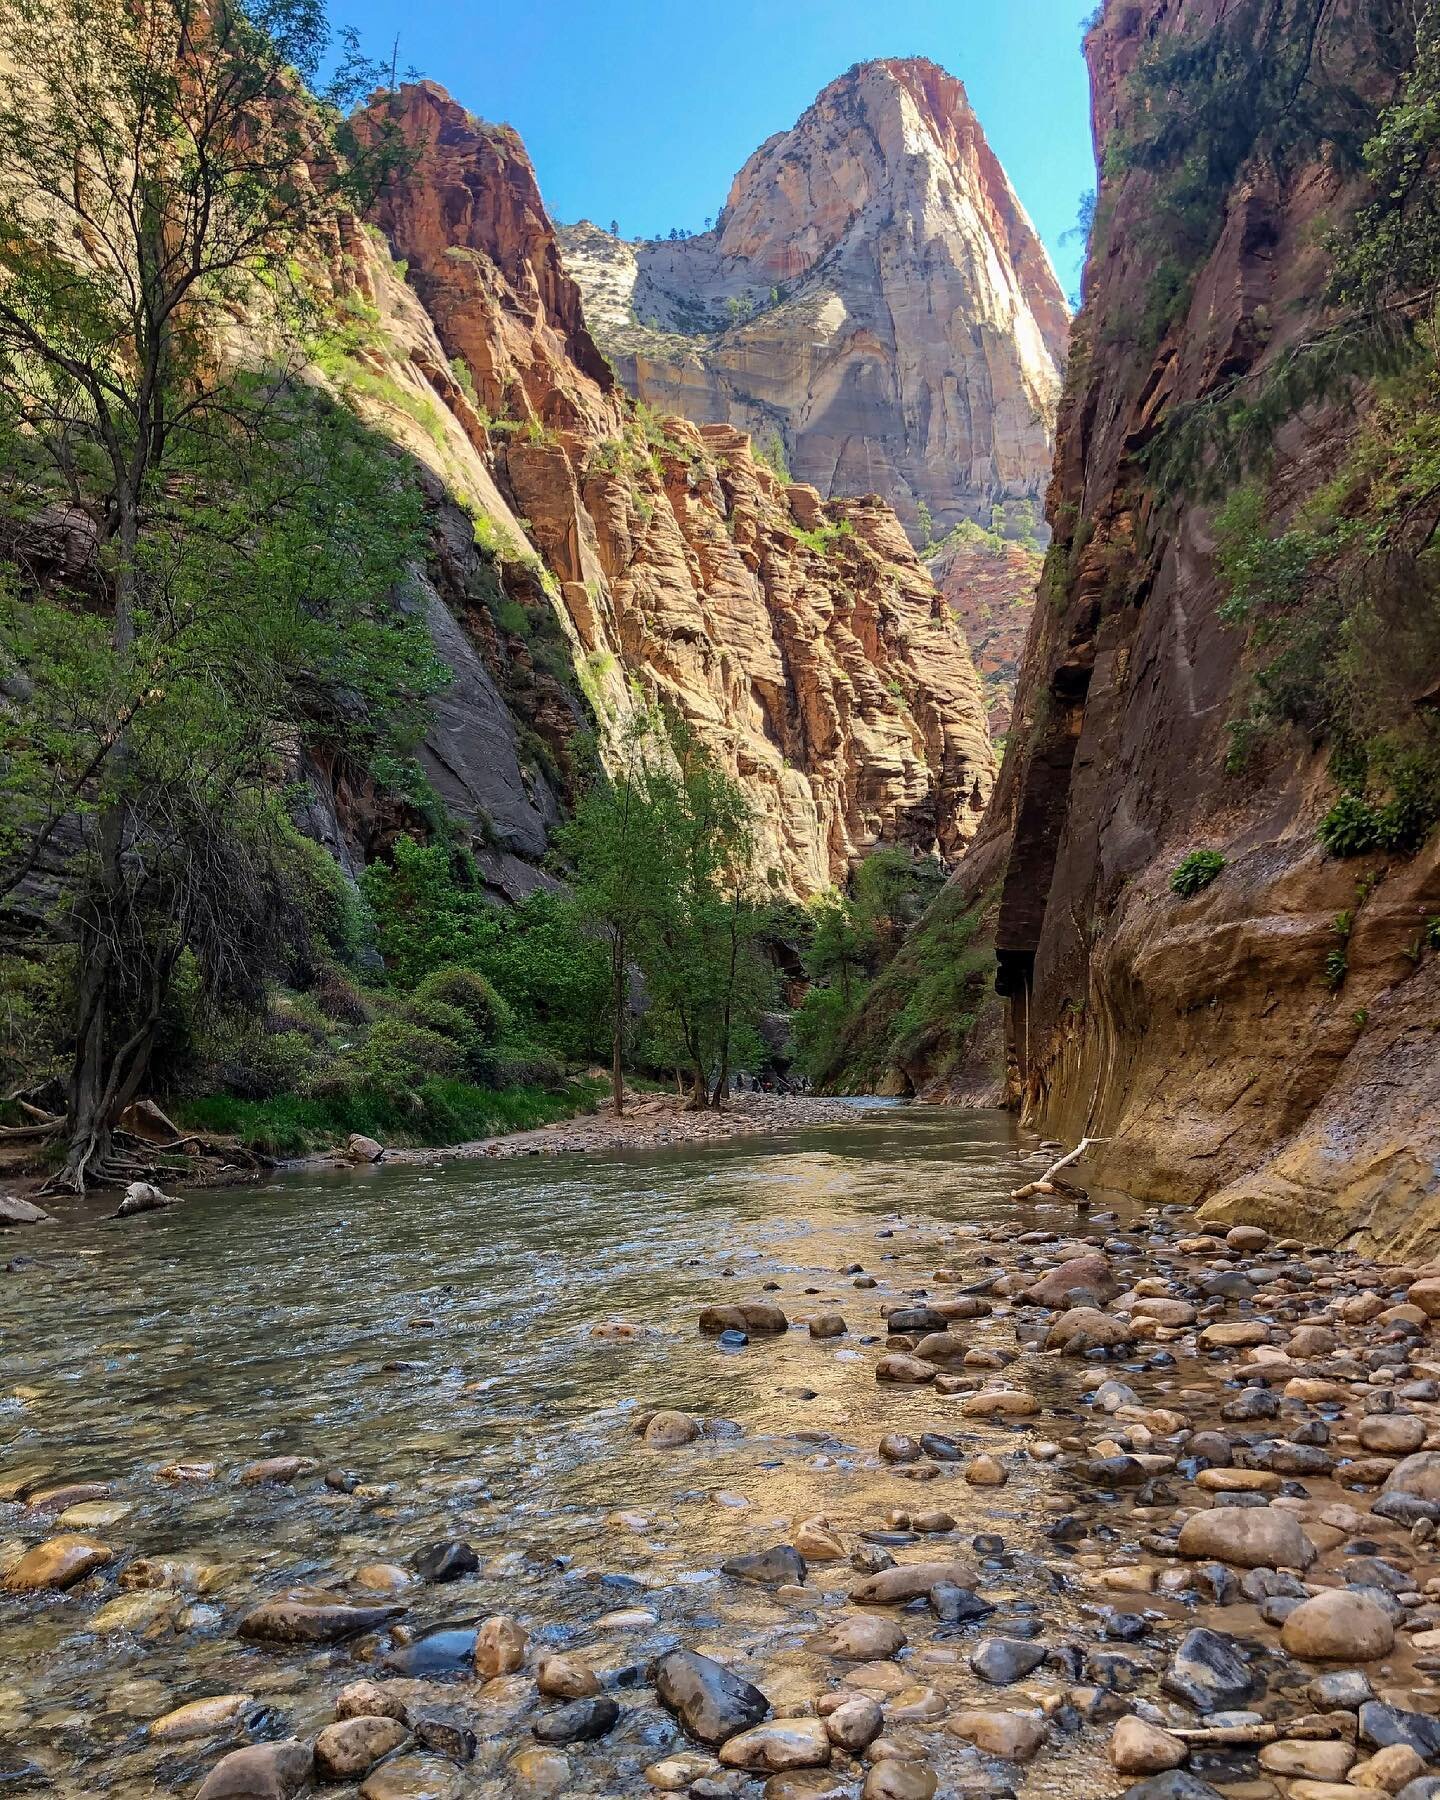
Hike the Narrows
The Narrows leads you through Zion Canyon and the Virgin River with twists and turns through the stunning slot canyon less than 20 feet wide in some areas stretching 15 miles. The “trail” is one of the most popular in the park. There are 2 ways to do this hike, bottom up or top down. Bottom up starts at the Riverside Walk at the Temple of Sinawava trailhead. The hike will continue upstream and the farthest you can go without a permit is Big Springs. This is the route most hikers take. However, for a more adventurous thrill, you can hike the full Narrows top down and a permit will be required. This journey will be 16 miles long and could span over 2 days.
Travel Tip: Catch the Zion Shuttle early. Make sure you watch the weather and bring proper gear for this hike. Do your research!
For more detailed info, including the trail, equipment and more helpful tips, check out my full guide on hiking the Narrows, click here.

Hike Angels Landing
Angels Landing is the most popular hike in the park. Thousands of visitors each year, mostly in the summer, seek out this hike. The trailhead is The Grotto (stop #6 on the Zion Shuttle). This hike is strenuous coming at about 5.4 miles round trip. The elevation gain is 1500 feet. The popularity of the trail due to not only the picturesque view but the thrilling journey to the top. The hike consists of chain-assisted rock scrambling sections and uphill switchbacks. With the final climb scaling a narrow ridge high above the valley floor. This is not for the faint of heart. If you have a fear of heights, this one may not be for you. At the time of my visit, there were no permits and the trail was pretty packed where people were literally on top of each other so I chose to skip. I did not feel comfortable or compelled enough to attempt the\is hike with hikers on my heels the entire time. Since that time, permits are now required via a lottery system. Both seasonally and the day before your planned hike. It costs $6 to enter an application and if you are one of the lottery winners, you will pay $3 per person.
Hike to Observation Point
For some of the best views in the park, the entire hike to Observation Point is stunning. However, the hike is extremely challenging at 8 miles long and 2300 feet of climbing. The climb is steady until the final viewpoint. The trailhead is Weeping Rock (stop #7 on the Zion Shuttle).
More Hiking
Zion National Park is full of so many great hikes. Everyone focuses on the Narrows and Angels Landing but there are others that offer a great hike and amazing views. The hike we were suggested to do by the ranger was The Watchman Trail. I don’t see too much mention of this hike on other guides and I don’t understand why. I felt every bit like I was immersed into Zion as the others do. The trail starts at the Visitor center and slowly climbs with switchbacks and moderate inclines. The total round trip is 3.3 miles. There is a small ¼ mile loop at the end of top of the one way that takes right under the Watchman.
If you have read my guides before, I like to get the best bang for my buck sometimes hiking. They don’t all need to be 8 milers to get the wow effect. The Canyon Overlook Trail is a 1 mile out and back that offers one of the best views in Zion. This trailhead is located on the opposite side of Zion Mt. Carmel Tunnel on Highway 9. You will need a car as the shuttles do not run on this side of the park. This trail starts with climbing a series of steps before walking beside the steep drop-offs of the Pine Creek slot canyon. Eventually, this will lead you to the amazing view at the summit.
Travel tip: Go early or go later in the day for the Canyon Overlook Trail. There is not a lot of parking here.
Looking for something less intense, flat, and has views, the Pa’Rus Trail is for you. The paved trail connects the Zion Canyon Visitor Center and Canyon Junction. The trailhead starts near the Watchman Campground and follows the river for just under 2 miles and ends at the Canyon Junction tram stop. It is accessible for wheelchairs, pets on leashes, and bicycles. The trail crosses the river a few times and wanders through the marvelous landscape of Zion Canyon. This trail should not be overlooked.
Other hiking options include Emerald Pools, Weeping Rock, Riverside Walk, Hidden Canyon, West Rim Trail (full day hike), and The Subway (permit required). As always, check Zion’s website for any closures before planning your trip.
Drive the Zion-Mount Carmel Highway
From the Canyon Junction to the East Entrance, this winding scenic drive is amazing. Along the switchbacks between Canyon Junction and the tunnel you have great views of Zion National Park and ample opportunities to pull over for impressive views. There is a $15 fee for oversized vehicles to drive through the tunnel. An oversized vehicle is any vehicle that is 11 feet 4 inches or higher and 7 feet 10 inches wide or wider. If your vehicle is taller than 13 feet 1 inch you cannot pass through the tunnel.
Explore Kolob Canyons
Kolob Canyons is the less visited area of the park in a smaller section that sits to the north of Zion Canyon Scenic Drive. There is another visitor center here and there are a few hiking trails.
Other activities include horseback riding, canyoneering, biking down Zion Canyon, and a jeep tour.

Where to Stay
There is only one lodging option to stay inside Zion National Park, that is Zion Lodge. This includes cabins, hotel rooms, and suites, plus an on-site restaurant and cafe. Also, the shuttle services the lodges multiple times a day. If you are looking to stay here, this will need to be booked far in advance. Reservations open up 12 months or more in advance! In addition, guests of Zion Lodge are allowed to drive their car through the park to reach the lodge, unlike the other visitors at Zion.
The more common choice is to stay in Springdale, which is outside of the park’s Southern entrance. Springdale offers a wide range of lodging, from motels to luxury resort-style rooms. The small town is very welcoming for all the tourists and has a lively scene including many restaurants, breweries, and bars. In my opinion, it is one of the best National Park towns. Due to the proximity of the park, rooms fill up rather quickly. I would book as far in advance as possible. For more affordable options, the Driftwood Lodge is a great option. If you want more luxury, the Cliffrose Lodge and Cable Mountain Lodge are walking distance to the park’s entrance. My last stay was at Cable Mountain Lodge so I can speak to that personally. It was amazing, super convenient, and had nice views. It was cool to enjoy the pool at night under the red rocks. It was a little more pricey than most but we walked to the entrance most days (5 minute walk) and did not have to worry about parking. You will still need a car to explore other areas of the park/hikes, but not always. Also, the lot across the hotel had a grocery store, brewery, and Zion Narrow rentals. All things of need!
If you like to camp, I may not be the guy but here’s some brief info. Zion National Park has 3 in-park campgrounds: Lava Point, South, and Watchman. The South And Watchman campgrounds are less than 1/2 a mile from the Visitors Center at the entrance of the park. Hence, the most popular. Sites are $20 for tent camping or $30 for a site with an electric hookup. All sites have picnic tables, a fire pit, and access to potable water, bathrooms, and trash containers. No showers are available at the campsites. The Watchman campground has 190 campsites and reservations open 6 months in advance. South Campground offers 117 campsites and reservations open 14 days in advance. Both reservations can be made at https://www.recreation.gov/camping/gateways/2994, or calling the reservation line at 877-444-6777. Lava Point Campground is typically open May through September, weather permitting. This campground is located in the Kolob Canyons part of the park, roughly 1.5 hours away from the main visitor center. There are 6 primitive campsites available to reserve. For more info on all camping, Zion’s website is very helpful and detailed and up to date on closings, https://www.nps.gov/zion/planyourvisit/campgrounds-in-zion.htm.
Where to Eat
After adventuring and hiking all day, this guy needs a good meal. Sometimes it is hard to find when visiting a National Park. However, Springdale offers many options and varieties for restaurants. And, I would venture to say some of the best food spots near a National Park. Depending where you stay on the lodging strip, you could walk or it is a very short drive generally. There is a Thai restaurant near the South Entrance called Thai Sipa, which is pretty good. After some early hiking and needing a late lunch, we went to MeMe’s Cafe. This is a quaint cafe offering options such as burgers, bbq sandwiches, & crepes for breakfast. I recall having a pulled pork sandwich with a slice of pineapple, cheddar cheese, and teriyaki sauce. It was called MeMe’s Hawaiian Sandwich. My favorite spot was Whiptail Grill. This is a Mexican cantina that is very unassuming as this is a converted gas station. I had my favorite meal here. The Whiptail Burrito was one of my favorite burritos I have had. In addition, the Southwest Taco Salad is insanely good. The salad is served in a grilled flour tortilla with mixed greens, black beans, and rice. Topped with house-made vinaigrette, pico, queso fresco and crispy tortilla strips. Highly recommend it.
If you are a coffee fanatic, coffee shops are all over. If you are looking for some baked goods or ice cream, they have it. There is something for everyone, which is rare for a town next to a National Park. Other good options to dine include: Oscar’s Cafe, Kings Landing Bistro, Spotted Dog, Park House Cafe, Zion Canyon Brew Pub, Bit & Spur, Zion Pizza and Noodle Co., and Switchback Grille.
HIKING FOR DONUTS
Hi, I’m Mark. I live in Connecticut. I take new trips every chance I get. A good trip has a great hike, great food, and something fun to do. My goal is to search out new trips and share them to inspire others to try something new and exciting.
If you are looking for posts in a particular place, search City or State here.
SEE OTHER POSTS IN ARCHIVE
RECOMMENDED POSTS

RECENT POSTS
See the latest on Instagram and follow @HIKINGFORDONUTS

Zion Narrows Hiking Guide for Beginners, Zion National Park
The Zion Narrows is not an everyday hike. The hiking is different, the planning is different. Without question, this is one of the most popular hikes in Zion National Park, if not all of the National Parks. And, one of my personal bucket list hiking adventures. I wanted to put together a guide of knowledge that I thought was helpful for me before I attempted this hike. There will be lots of items below that may seem intimidating. But I am telling you, this hike is something that you will remember forever. One of the best experiences I have had hiking and I hope the same for anyone else who takes on this adventure. For more on Zion National Park, check out my full park guide to plan your next trip, click here.
About the Zion Narrows
The Narrows is a popular “trail” that leads you through Zion Canyon and the Virgin River with twists and turns through the stunning slot canyon less than 20 feet wide in some areas stretching 15 miles. Red canyon walls tower thousands of feet above, catching sunlight that lights up the otherwise dark passageway. Most of the journey you’ll be ankle-deep in water, but depending on the river’s flow that day there may be some chest-deep or even swimming sections. Proper planning and gear is important for this hike.
The Narrows hike stretches 16 miles from start to finish. However, depending on your route you can hike up to what you are comfortable with. There are 2 ways to do this hike, Bottom-Up or Top-Down. Bottom-Up is the most popular and can be a day hike, as you can turn around when you want. Top-Down could be a very long and challenging day hike or most likely an overnight, two day backpacking trip.
This hike is unlike any other. It is a full on adventure. For instance, there is a lot more to think about hiking the Zions Narrows: water flow rates, flash floods, gear, permits (if applicable), and walking miles on rocks in a river. This may sound daunting but I assure you this experience can be enjoyed by all levels of hikers. I cover all of this in my guide so you can feel comfortable and knowledgeable for the best experience.
HOW TO GET THERE
For the Bottom-Up route of this hike, the roads to the Narrows trailhead are closed to the public and only buses are permitted. Hence, you will need to take a shuttle to get to The Temple of Sinawava trailhead. You will have to park at the Visitor Center, which is near the West Entrance of the park closest to the town of Springdale. The Visitor Center is located inside the park and has its own parking lot. If that parking lot is full, you can try to park in a lot outside of the park and walk over.
At the Visitor Center, the Zion Canyon Shuttle to The Temple of Sinawava trailhead is available free of charge. This is a first come, first serve shuttle. Once on the shuttle, get off on shuttle stop #9, which is the last stop. The shuttle ride from the Visitor Center to the trailhead is approximately 45 minutes.
Hiking Tip: You want to get on this early in order to spend ample time on the hike. Depending on the day/season, this could be overwhelmingly busy. I recommend getting on the shuttle by 8-9am in order to start the hike no later than 9-10am.
If it is a busy time and the wait is cutting too much into your hiking time, another option is to book through an outside shuttle company like Zion Guru, who are permitted to enter the road to the trailhead of the Narrows. This option will cost you more as a roundtrip ticket will cost about $40 per person, but it’s a solid option to avoid potential busy lines for the Zion Canyon Shuttle.
The Top-Down trailhead starts at Chamberlain’s Ranch. This requires a second vehicle or paid shuttle. It takes one hour and 30 minutes to drive from Springdale to Chamberlain’s Ranch.
Hiking Tip: Don’t miss the last shuttle. Or else it is another 4 mile walk to the Zion Lodge and then you need to figure out how to get back to the Visitor Center!
Best Time to Hike the Zion Narrows
In the Spring, the trail is typically closed in the March to May timeframe when flow rates are high from the snow melting and spring run-off. This could vary based on the winter weather conditions. Also, the weather is cooler and the water is much colder. And, yes flow rates are yet another thing to worry about prior to hiking. When the water flow is low, hiking is easier. The flow rate of the Virgin River is measured by Cubic Feet Per Second (CFS). The river is open with flow rates 0-150 CFS, which is considered to be safe hiking rates for bottom up hikers. For top down hikers, flow rates of 0-120 CFS is considered safe. Under 50 CFS is considered easy and over 70 CFS makes the hike a lot more challenging with the faster current and higher water levels. The park’s website will have this info daily as well.
Summer is a great time to hike the Narrows. The weather is excellent with high temperatures. The days are longer, shuttles run all the way to 9pm, and the water in the river is at its warmest. However, the park is crowded this time of year and the weather can be scorching. In addition, the monsoon season creates the highest risk of flash floods during this time.
Fall is another great time to hike the Narrows. The crowds start to diminish and the flow is at his lowest in the river. However, the air temperature goes down as does the water temperature. On September 30, the last shuttle pick-up time of the day is 7:15 pm, cutting your adventure by 2 hours.
This can be done in the Winter but the temperatures, air & water, are much colder. The shuttle bus does not run often, only on certain days. And, snowfall can potentially close the trail.
Personally, me and my wife went in the second week of May and everything worked out great. It was high 70s to mid 80s, which to me felt like 100 degrees! The temperature of the water was cold, roughly 45 degrees, but the gear we chose helped us not even notice how cold it was.
Before you go: Flash Floods
Monitoring the forecast for rain is one of those extra items to worry about if you are looking to hike the Zion Narrows. With rain, the potential of a flash flood in Zion Canyon is very possible. However, Zion National Park does a great job providing info on their website and issuing flash flood warnings. Even with a clear blue sky, the Narrows can close due to a rain forecast nearby.
There are sections of the Narrows with no high ground. Water levels rise very fast when a flash flood occurs in the canyon. There have been deaths with hikers being caught during a flash flood. I do not think this should deter but always proceed with caution. Always check the weather and the flash flood potential before planning your hike.

Can Beginners Hike the Narrows?
In short, of course! A lot of the information and what you read may sound frightening compared to most hikes, but the key to this hike is preparation. I couldn’t wait to hike this but my wife did not have that same sentiment. We just made sure to check all of the boxes that made us both comfortable. If that didn’t happen, we would probably haven’t done it. We researched the gear, watched the weather, spoke with Rangers on the flow rate and we were good to go.
To be honest, the trickiest part is your footing on the rocks in the water and any current that comes along. There is no elevation to worry about. Tons of hikers of all levels, children with families and older people. At any time, you can just turn around and head back.
It’s simple, if all the boxes don’t check, don’t go. But if they do, I highly recommend the time of your life and a memorable experience you will not forget.
WHAT GEAR DO I NEED?
At this point of my life, sometimes it is better to take the easy route. I researched and researched all the gear needed for the Narrows hike. And, it was a lot. Lugging that around on the plane and then spending the extra money on items I don’t have and would possibly never use again. My very smart wife said, stop being stubborn and let’s just rent it. That’s what we did and I have zero regrets. We would have enjoyed our hike less without all the gear I may not have purchased myself. No stress, just enjoyment.
There are quite a few rental equipment companies near the park. Our hotel was a 5 minute walk to the South Entrance and there was a Zion Outfitters across from the hotel, where we saw countless hikers each day go and rent for the Narrows. What they suggest to use, I would say is 100% needed. There are multiple rental options. What we went with was the Dry Bib package, which costs $55 per person that includes: Dry bibs (waders), Adidas Hydro Lace Canyoneering Boot, 5mm Neoprene Socks, and a Wooden Hiking Stick.
The Narrows bottom-up is quite the unique challenge in comparison to most hikes. You will be hiking in a river. Proper footwear, accessories, and clothing are essential.
Shoes - It’s all about grip and traction on the rocks. Canyoneering boots are waterproof and designed for the slippery conditions of this hike. I could not see myself getting by without them. You could use anything you want, but these are optimal for beginners in my opinion.
Neoprene Socks - These socks are very tight, waterproof socks that protect your feet and keep water from entering your boot. This will help prevent blisters. And, depending on the water temperature, keep your feet from getting cold.
Clothing - During the colder months, dry pants will help keep you warm and dry. Hence, we went with the full waders through the rental company. Quick dry, light clothing will be helpful as you go further and the water rises up or if you end up falling in. Bring extra layers as the canyon can get chilly, such as a light jacket, even in summer months.
Walking Stick - The rocks are darn slippery. The hiking stick helped me not fall flat on my face and keep my balance.. If you have your own hiking poles, make sure they are very sturdy.
Dry Pack or Waterproof Bag - This will be everything carrying necessary items such as water, snacks, extra clothes, and sun protection. Snacks and water are necessary if you will be hiking most of the day.
Waterproof Cell Phone Case - This was helpful so I could take pictures without fear of dropping my phone. I did not have it in me to bring my camera along for the trek with concerns of the water. But I did not see a few brave hikers with expensive cameras willing to risk it all.
2 WAYS TO HIKE
From the Bottom Up: This is the route most people will take. By far, the more popular of the two. No permit required. Taking the Zion Shuttle to The Temple of Sinawava trailhead, start at the Riverside Walk. This will lead you upriver for several miles. When you have taken in all the scenery, simply turn around and go back the same way you came. The farthest you can go without a permit is Big Springs, which will make your journey roundtrip 9-10 miles.
From the Top Down: This is for the adventurous hiker. A permit is required for this route. This is a 16 mile trek one way from Chamberlain’s Ranch to The Temple of Sinawava. If you make this a two day hike, you will reserve your campsite when you reserve your permit. For permit details and other info on this hiking route, I suggest doing a quick google. Lots of info out there by some good bloggers/websites. I did not take this route so I can’t speak in depth.
THE HIKE BOTTOM-UP
Trail Info: Distance: up to 9+ miles (1-8 hours) Difficulty: Moderate to Strenuous (depending on water flow/distance) Trail Type: Out & Back Permit required: No Elevation: Mostly flat
The Zion Shuttle will drop you off at the last stop, the Temple of Sinawava, where the trail begins. The first mile will be paved on Riverside Walk along the Virgin River. After one mile, there is a drop off and it’s time to enter the river. This can be a crowded start as all the other hikers on the bus will be right with you. Take your time. The water is cold and the rocks are slippery immediately. Acclimate yourself to the rocks before you increase your pace. I almost fell a few times. Unfortunately for my wife, she took a fall right in catching herself enough to keep her face dry. Her upper body was pretty cold after that.
Sometimes you will walk on small rocks and other areas in the hike will be larger rocks. It is flat but the terrain does change. Then add in the water levels. Sometimes it is ankle deep, knee deep, or even waist deep. Sometimes it’s deeper or more shallow depending on the time of the year. There are even areas where you can swim, but we did not reach that far into the canyon. We went in May and it got up to my thighs and my wife’s waist at its highest. Given, we are shorter people.
The further you go into the canyon, the more narrow it gets. The beginning is the most crowded part of the hike for the first mile or two. The farther you go, there will be less crowds. The first landmark you will come across is Mystery Falls. This is a very small waterfall that flows down the canyon walls into the Virgin River about a half mile into the river. I mean small, you could easily miss it.
The next section is Wall Street, the most popular and well-known part of the hike. This is also the most narrow section of the hike, just after the Orderville Canyon junction. The canyon walls are only 22 feet apart. There is no land to go on, just water so be cautious about flooding here. This is about 2 miles into the water, 3 miles total from the trailhead. Most hikers reach this point and turn around.
The last known landmark is Big Springs, about 3.5 miles into the water. This the furthest you can go on the Bottom-Up route of the Narrows. A permit is required to proceed past this.
You can turn around any time. If it feels too difficult or not safe, just head back to the trailhead. Even hiking the shortest amount in the water will give you amazing views that other hikes do not offer.
ADDITIONAL TIPS
Before you go, always check Zion National Park’s website for conditions and closings, https://www.nps.gov/zion/planyourvisit/index.htm.
The shuttle season is typically from March to November.
Use the bathrooms at the Temple of Sinawava before you start. There are no bathrooms or privacy once you are in the river.
Be prepared to get wet. Your feet and parts of your lower body will be submerged in water, or your whole body if you fall in! Dress appropriately as the water can be very cold. And, bring spare clothing and shoes for after the hike.
Leave no trace! Please ensure to clean up after yourself.
HIKING FOR DONUTS
Hi, I’m Mark. I live in Connecticut. I take new trips every chance I get. A good trip has a great hike, great food, and something fun to do. My goal is to search out new trips and share them to inspire others to try something new and exciting.
If you are looking for posts in a particular place, search City or State here.
SEE OTHER POSTS IN ARCHIVE
RECOMMENDED POSTS
RECENT POSTS
See the latest on Instagram and follow @HIKINGFORDONUTS

Garden of the Gods Hiking Guide
Garden of the Gods can be explained in one word: majestic. Colorado is one of my favorite states to travel to and explore. At one time, I visited 3 times out of 4 years. Mostly spending time in Denver, Boulder, and Rocky Mountain National Park. I wanted to see more of the state and my research came across Garden of the Gods. I had to go. And, I immediately included it on my next trip. The park is filled with red rock formations, big and small, overlooking Pike’s Peak and the southern Front Range of the Rockies. It is one of those parks, you have to step your foot in and explore all its beauty. It is 100% percent worth planning your trip around visiting.
About Garden of the Gods
The stunning rock formations throughout the park were created during a geological disruption millions of years ago. The look of the rock you see today is due to subsequent erosion and glaciation. Adding to the park’s distinctiveness, it is also one of the only places in Colorado where you can find red sandstone and Pikes Peak granite together.
Garden of the Gods can be explored by foot, car, or biking with hiking trails and bike lanes throughout the park. There are some wheelchair accessible trails. There are 16 hiking trails that range from 0.25 miles to 6 miles. Most of the trails are relatively easy, but there are a few trails with rockier terrains. And, they connect pretty easily. Rock climbing is another popular activity here as well. There is truly something for everyone at the park.
The visitor center is across from the park itself and is worth a visit to speak to rangers, grab a map, and check out displays and history of the park.
Best of all, the park is FREE. The original owner of the park land, Charles Perkins, wanted to share the experience with everyone. After his passing, his family donated the park to the city to fulfill his wishes. The park is open from dawn until dusk. Check their website for specific hours for the time you are visiting.
How to Get to Garden of the gods
Garden of the Gods is located in Colorado Springs, CO. It is only about 5-10 minutes from the Interstate highway and close to downtown, hotels, shopping, and dining. Traveling from the popular city of Denver will only take just over an hour, which would also make for a great day trip visit. For most out of state explorers, flying into Denver is the best bet and then driving to the park. It is pretty easy to find using your gps.
When to Visit Garden of the gods
The beautiful rock formations and visuals of this park really make any time of the year a feasible time to visit. I went in early May and it was snowing! It was not as warm as expected but the snow made everything look pretty cool. As one would expect, the summer is the busiest time of the year. There is a decent amount of parking but I could see that being filled up by afternoon in the summer/fall time.
Park Entrance
Hiking trails at the Garden of the Gods
There are many hiking trails in the Garden of the Gods. You can’t go wrong with the paths you choose. The park may seem small but you can spend an entire day hiking in the park. The trail system totals up to 15 miles. Here are some of the more popular hikes that offer great sights.
1) The Perkins Central Garden Trail is an easy, 1.5 mile round trip path with minimal elevation. This trail is in the heart of the Park at the base of the highest rock formations. This trail is right near the North Main Parking lot.

Perkins Central Garden path
2) The Ridge Trail is a moderate, 1/2 mile loop with less than a 100 feet in elevation. This trail starts at South Garden Parking Lot and head towards the Sleeping Giant formation to hop on the trail.
3) The Siamese Twins Trail is an easy 1-mile round trip, with less than 150 feet in elevation. On a clear day, there is a fascinating view of Pikes Peak through the natural window of the Siamese Twins. This can be found near the southwest entrance of the park.
Siamese Twins
No views of Pike Peak on this day!
4) The Scotsman/Buckskin Charlie Trail are moderate trails located in the Central Valley of the park that loop through the park. There is a small parking lot to join the Scotsman Loop. It is best to start hiking from the main parking lot and connect to this trail. This area is more open and you can see distant views of the Central Garden formations.
5) The Palmer Trail is a rocky trail that runs along the north and west sides of the park from the North Main Parking Lot to the middle of the Siamese Twins hiking trail. On this trail, there will be more greenery to see and elevated views overlooking Gateway Rock. This is one of the longer hiking trails in the park.
Views from Palmer Trail
6) Choose multiple trails and make your own hiking adventure. It is very easy to connect trails at the park. When I arrived at the park, I went to the visitor center, spoke with a ranger, and grabbed a map. The ranger said the most popular hike in the park to get as many views as possible was taking the 2.7 mile loop starting on the Palmer Trail behind the North Main Parking Lot. From here, you will reach the Siamese Twins Trail and explore this area. Then cross Juniper Way at the Scotsman Picnic Area and hop on the Scotsman Trail. This will lead to the Perkins Central Garden Trail to finish the loop up to the North Main Parking Lot. That is what I did on my visit and I was able to see all the popular rock formations. And, it was a fun and awesome experience exploring amidst all the rock formations.
Hiking Tips: Due the elevation, bring lots of water and keep hydrated to avoid any affects. On those sunny days, be sure to bring sunscreen as there is no shade here. Lastly, as you would expect, come early to visit the park or try the off-season.


Bonus: Post Hike Donuts
It’s called Hiking for Donuts, so it would be a disservice if I did not include a post hike donut shop to visit after the hike. Fortunately, there is a fantastic donut shop in Colorado Springs about 20 minutes from the park called Amy’s Donuts. No exaggeration, they had over 40 different flavors/topping to choose from, which is a very tough decision to make. Flavors from Butterfinger to Fluffer Nutter to Nutella Crumb to all the standard donuts. And, the jelly donuts are filled fresh to order! Great donut shop find.
HIKING FOR DONUTS
Hi, I’m Mark. I live in Connecticut. I take new trips every chance I get. A good trip has a great hike, great food, and something fun to do. My goal is to search out new trips and share them to inspire others to try something new and exciting.
If you are looking for posts in a particular place, search City or State here.
SEE OTHER POSTS IN ARCHIVE
RECOMMENDED POSTS


RECENT POSTS
RECENT POSTS
See the latest on Instagram and follow @HIKINGFORDONUTS

Horse Guard State Park, Avon, CT
Trail Description: Horse Guard State Park has one trail that is relatively quick to hike that is easy for the most part until the climb up the side of rocks that leads to stunning views of mostly trees and the Northwest hills. Fall offers a spectacular colorful viewpoint.
Trail Info:
Where: Avon, CT Distance: 1.2 miles (1 hour) Difficulty: Moderate Trail Type: Out & Back Features: Views, Mountains, Valley, Rock Scramble
How to get there:
245 W Avon Rd, Avon, CT 06001
Drive slow as you approach, the lot will come up suddenly. Depending what route you are taking, you will see a big red house, the Derrin House, right before the parking lot. The parking lot can fit maybe 8-10 cars.
Hiking Tips
I would suggest hiking boots due to the muddy section and rock scramble climb. Maybe some hiking poles for the way down if not comfortable going down on the rocks.
Follow the white trail. If you see two trail markers, one slightly higher on the left it means make a left turn. If you see two trail markers, one slightly higher on the right, it means make a right turn.
It is a small park, there are no bathrooms. Close by to popular areas for post hike activities such as food and drink.
Trail Map here.
The Hike
There is only one way to go so this guide will be a quick one. The white marked trail is the only trail at Horse Guard State Park.


Once parked, it is pretty clear where to hop on the trail and there is a trail map right before the trail begins.


The white trail is well-marked and easy to identify. Also, the trails are very wide.
It is an easy hike up until the rock scramble. There is a section that will be quite muddy but you can go around it if you choose wisely. I did not the first time and my foot definitely submerged into the mud.
This is such a beautiful park in the fall just walking through the forest.
At about 0.4 miles, you will start approaching the rock scramble portion of the hike. This will be 0.2 miles of about 500 feet elevation. This is what makes the hike a moderate one to me. The rock scramble is short, but like a straight up ascent. It definitely gets the blood going and is not easy. Coming down was way harder. There may be markings for the proper direction to go up but I just went for it.
At the top of the rock scramble, there will be a small narrow trail to the left to take. After a short walk, you reach two lookouts. The first one is an appetizer.
The next lookout is literally a few steps over and that is just….boom. Fall colors to the face! Just an unbelievable view of the open forest covered by trees everywhere and rolling hills in the background.
Most people stop here but I saw some hikers continue on a very narrow and not clear trail. This short walk actually led to another view where you can see the Heublein Tower on Talcott Mountain in the distance. Also, it appears you are on a cliff above someone’s house. I prefer the other views but this was a bonus. From here, just return the way you came and down the rock scramble to the parking lot.
As mentioned above, this is close to a popular area in Avon, CT. There is a brewery about 5 min or so close by, Hopmeadow Brewing Company. My wife and I stopped there for some post hike beers and there was a delicious food truck there as well. The beers were great, I highly recommend visiting.


HIKING FOR DONUTS
Hi, I’m Mark. I live in Connecticut. I take new trips every chance I get. A good trip has a great hike, great food, and something fun to do. My goal is to search out new trips and share them to inspire others to try something new and exciting.
If you are looking for posts in a particular place, search City or State here.
SEE OTHER POSTS IN ARCHIVE
RECOMMENDED POSTS

RECENT POSTS
RECENT POSTS
See the latest on Instagram and follow @HIKINGFORDONUTS

North-South Lake, North Point, The Catskills, NY
Trail Description: This great day hike in the Catskills at North-South Lake utilizing multiple trails offers stunning views such as Artists Rock, Sunset Rock, Newmans Ledge, and North Point. Also, some popular features such as Ashley Falls, Badmans Cave, and more.
Trail Info:
Where: Haines Falls, NY Distance: 7.0m (4-5 hours) Difficulty: Difficult Trail Type: Loop Features: Views, Mountains, Valley, Lake, Water, Cave, Catksills, Hudson Valley
How to get there:
93 North Lake Road, Haines Falls, NY 12436
https://goo.gl/maps/9rUFAjK3PieRJY7U9
Put the address above in your GPS. You will need to drive through the state park to find the trail. As you get closer, you will pass Scutt Road on the right, then go past the guardhouse. Turn right onto the first fork around the lakes heading south. Follow this road passing a big parking lot on the left until you reach another big parking lot at a dead end, past the pavilions. Park in this area and the trail will start in the back corner.
Hiking Tips
Not great phone service, so make sure to screenshot a map. Or my guide!
Lots of signage throughout trail, but keep an eye on the trail markers.
The Hike
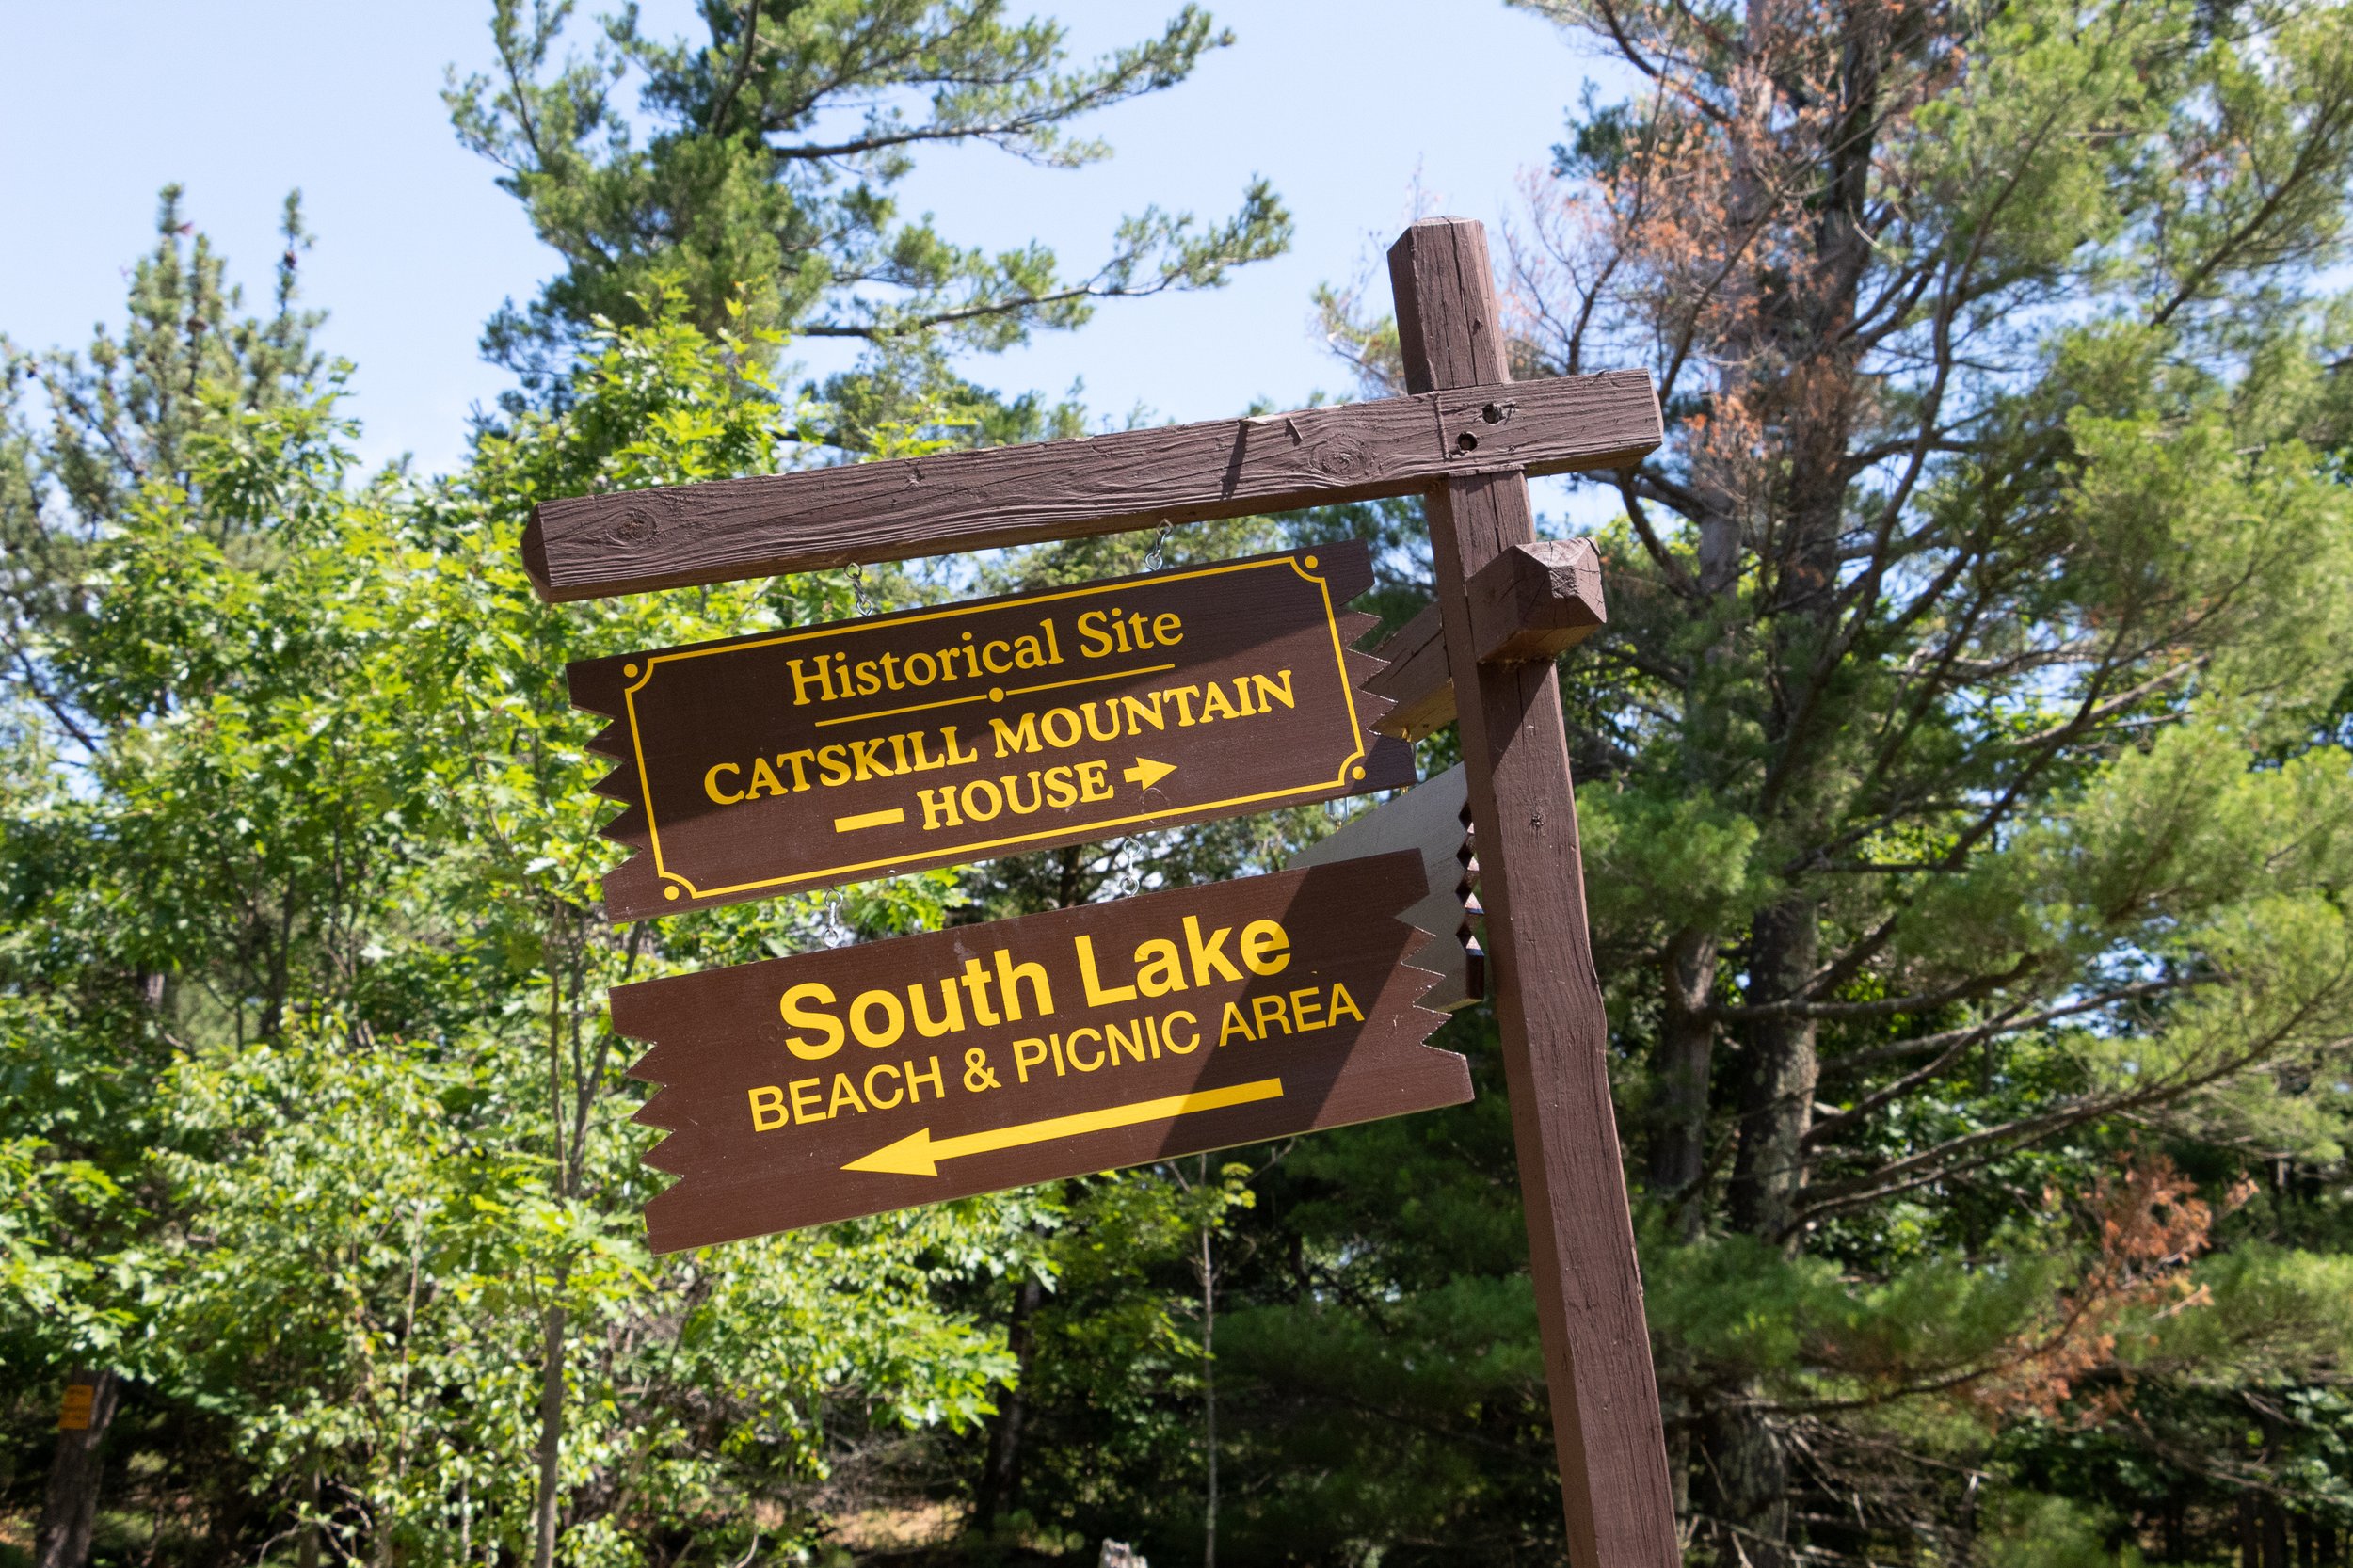
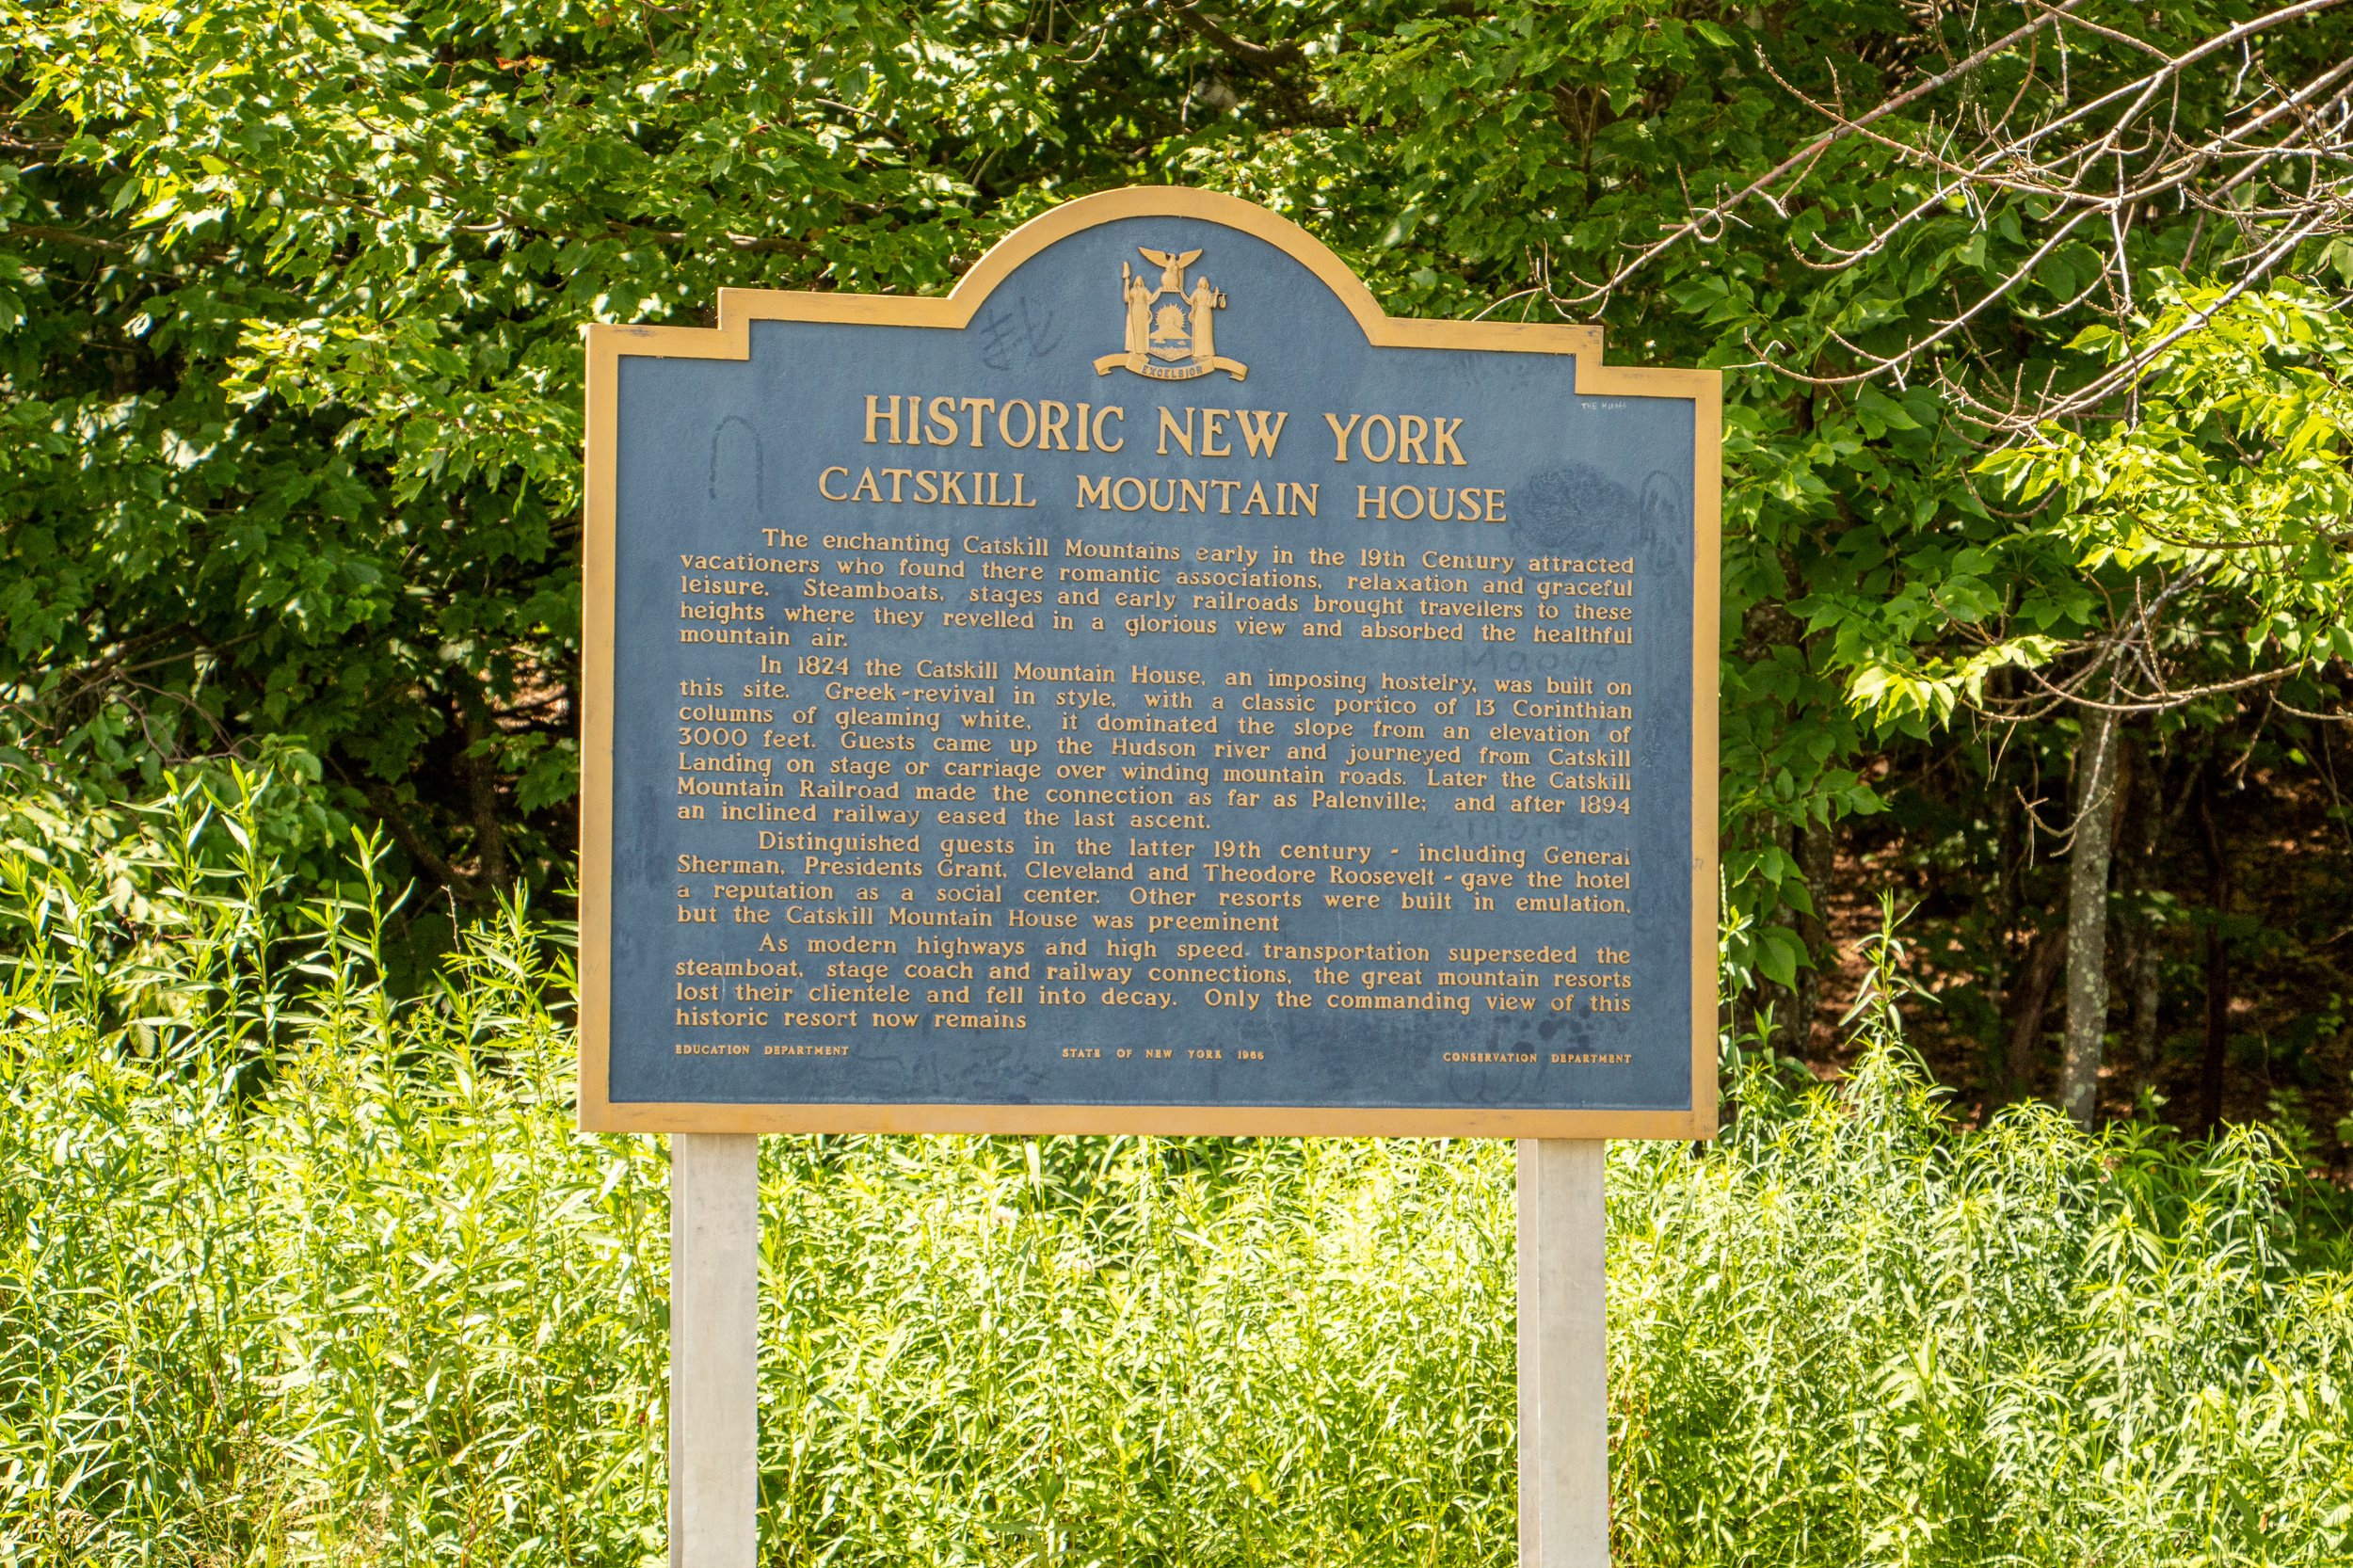
This is a long one folks. Make sure you have all the snacks and hydration necessary on this hike. Once you are ready to go, head to the back right corner of the parking lot for the start of the trail, away from the picnic pavilion and lake area. There will be a gate with a stop sign. Go around the gate and start your trek on the yellow trail toward the old Catskill Mountain House, the first of many sites and views on this hike.


There will be a junction with the blue trail. Continue to walk straight across the field at the area of the old Catskill Mountain House. Off the ledge of the field will be the first view of the hike overlooking the Hudson Valley.
Turn around and head back toward the junction across the field. Stick to the right and continue following the blue trail until you see the North Lake signage. Past the guardrail with a stop sign, cross another parking lot to re-enter the woods & head straight across to find the blue trail. I did not see a sign (could have missed it) but just keep an eye for the blue markers.
Pass the picnic tables and this will lead to walking along a chain link fence to the right. At the end of the fence, there is a view off a porch ledge. Keeping straight on blue, the next item to pass is a registration box.


From here, the hike will begin to have an incline. In about 10 minutes will be the first viewpoint, Artist’s Rock. The first of many views on this hike.
Continue on the blue trail as the trail gets steeper toward the next viewpoint, Sunset Rock. There will be a set of cliffs above on the right. Sunset Rock viewpoint sits above these cliffs. The trail will eventually get you there. There will be a sign to hop on the yellow trail for Sunset Rock in 0.2 miles.

Keep a lookout for the markers, then turn right onto the yellow trail. The views will just open up and another incredible view will be had. But this isn’t Sunset Rock quite yet. Keep along the yellow trail and in a few minutes there will be a big rock to the right. I was actually too enamored with the view, I did not take a picture of the rock! But it will be pretty obvious & there is a sign. This area will have the best views of the hike. There will be views of North-South Lake with the Catskills in the background. Pretty jaw dropping in my opinion.
From here, retrace your steps from the yellow trail back to the blue trail. Turn right at the blue/yellow junction to rejoin the blue trail. There will be signage for Newman’s Ledge, 0.2 miles away, and North Point, 1.6 miles away. The trail will get steeper but in minutes you will reach more awesome views off of Newman’s Ledge.
In about 0.6 miles the next point of interest is Badman's Cave following the blue trail.
Continue on the blue trail as it becomes steep then levels out in an open area before re-entering the woods. In 0.6 miles there will be a junction with the red marked Mary Glen’s Trail. The red trail will need to be used but for now continue on the blue trail toward North Point. There will be a sign showing only 0.3 miles to North Point. The ascend for the next 0.3 miles is one of toughest in the hike. There will be a sign for North Point. The views will be beautiful as the Catskills will be right in your sight.
After you soak in the last of the amazing views, begin to head back toward the junction with the red trail. Take a right to hop on the red trail. This will be a rocky, steady decline as you eventually reach the sign for the North Lake Campsite, which will be another 0.6 miles. This will lead around the lakes onto the paved roads of the campsite. Continue to follow the red trail as you cross a footbridge over a stream. There will be a sign for Ashley Falls off the yellow trail if you wanted to take a look, it was very short but no waterfalls on this hot day in the middle of the summer.


Continue on the red and take a left on the road by the campsites. Then it will be almost a mile until you get back to the parking lot. At least it is a flat surface to end! Whew, what a hike. Tough but so many views.


HIKING FOR DONUTS
Hi, I’m Mark. I live in Connecticut. I take new trips every chance I get. A good trip has a great hike, great food, and something fun to do. My goal is to search out new trips and share them to inspire others to try something new and exciting.
If you are looking for posts in a particular place, search City or State here.
SEE OTHER POSTS IN ARCHIVE
RECOMMENDED POSTS

RECENT POSTS
See the latest on Instagram and follow @HIKINGFORDONUTS

3 Easy Hikes in Mount Rainier National Park
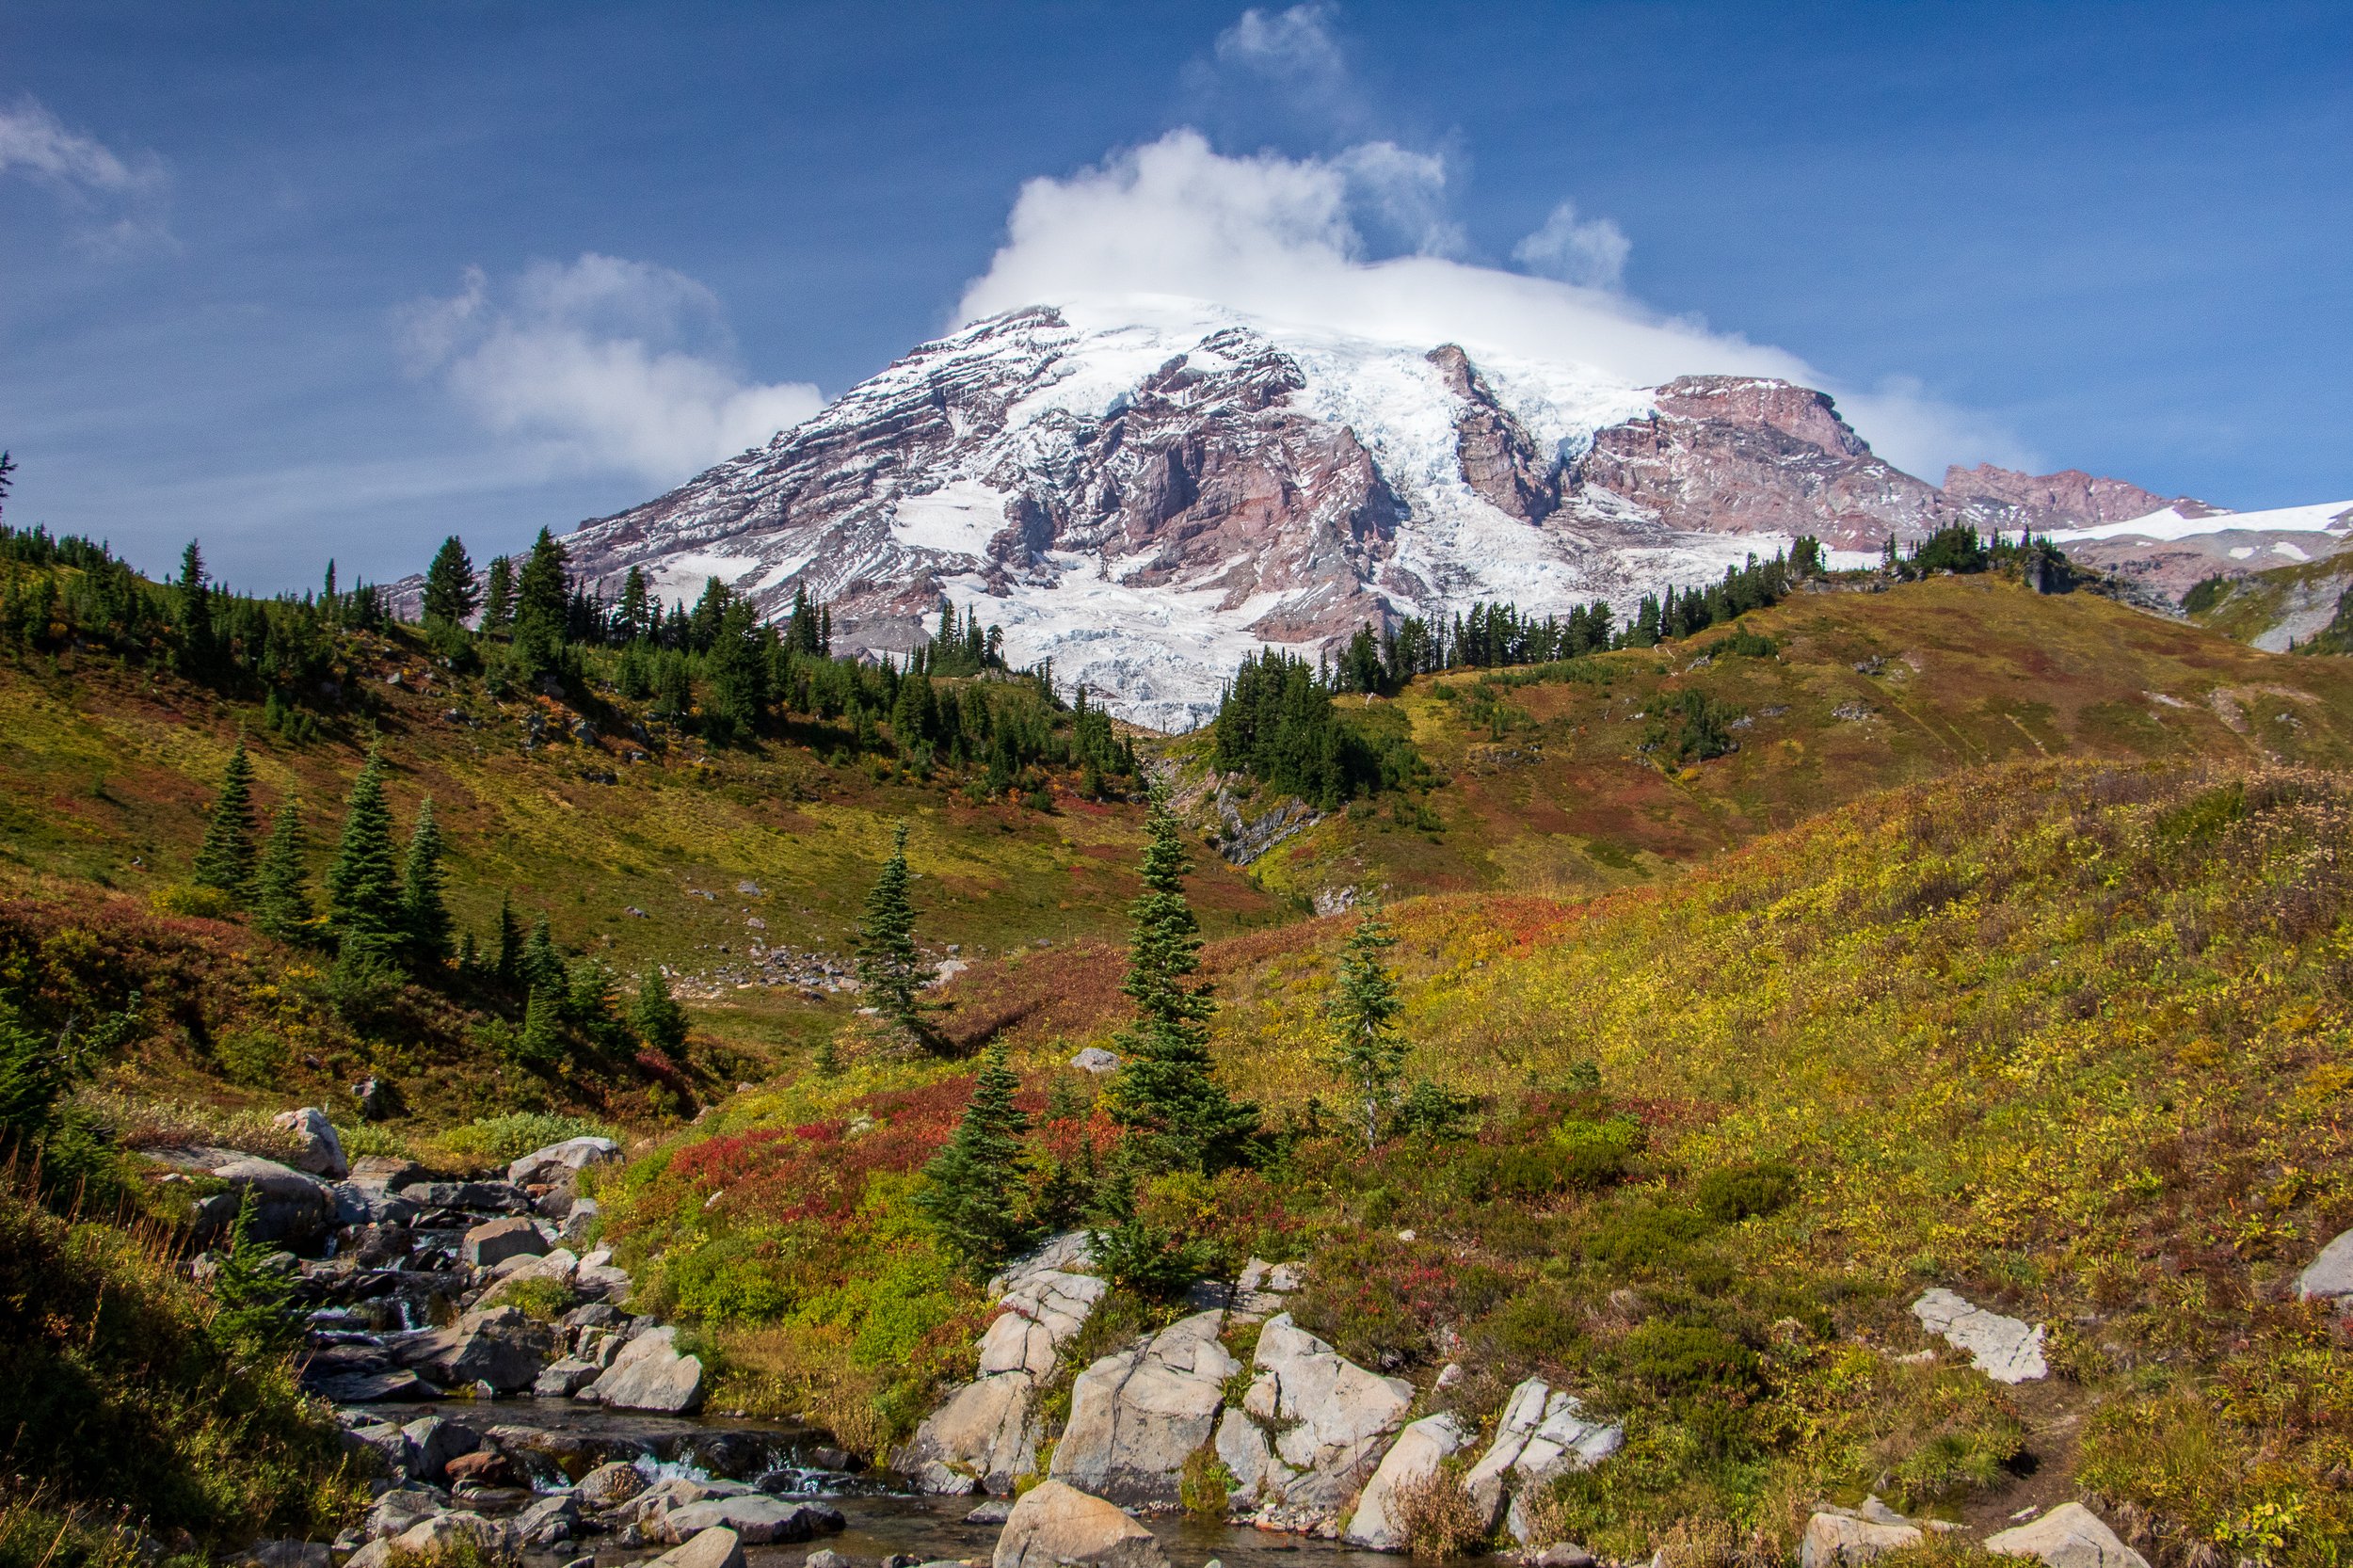
Mount Rainier National Park is one of the most beautiful parks in the United States. It’s got mountain views, rivers, waterfalls, old-growth forests, and meadows of wildflowers in the summer months. To say I was ecstatic to visit for the first time would be an understatement. However, this turned out to be a very interesting trip to plan and taught me some valuable lessons. One month before the trip, my wife tore her ACL hiking. I spent so many hours planning and like that, I had to shift plans. Credit to my amazing wife, she still wanted to go to Mount Rainier as planned and make the best out of it. Would I like this to be a full blown guide of the park? Of course. But stuff happens and guess what? Trips always work out. Our trip consisted of lots of driving through the park over 3 days and as many easy walks as possible as my wife was still able to put some pressure on her leg (she had surgery the week we came back). And, we still had an absolutely amazing time. The park is so big that we barely covered it. Sticking to the easier things to do in the park, I realized not every trip has to be insanely packed and hiking crazy to enjoy it. National Parks are for everyone. You don’t need to even hike too much if at all to enjoy it. I saw so many families and many elderly enjoying the park. For me, that is what it is about and I hope to be in my 70s-80s enjoying National Parks still. With that said, we were able to find some easier hikes with amazing views.
Some brief info on the park. Mount Rainier National Park is about 2-3 hours from Seattle based on the entrance you choose and a good 3 hours from Portland, OR. The best time to go to the park would likely be July to October. I would lean toward August or September but it really is a gamble. It was only clear and sunny one day when I visited and the other 2 days were cloudy, rainy, & foggy, and Mount Rainier was covered by the clouds. The park is huge and has 5 main sections: Longmire, Paradise, Ohanapecosh, Sunrise, and Carbon River/Mowich. Paradise is the most common and has the main park visitor center. Always make sure to check for closures and weather. For instance, one of the hikes I will be recommending, Grove of the Patriarchs, is currently closed for the rest of 2022.
As stated above, the Nationals Parks are really built for everyone these days. There is so much to see and you don’t need to do long or difficult hikes to get incredible views. If you want to get the best experience out of Mount Rainier National, here are 3 easy hikes that will be quick and fulfilling. Plus, a bonus viewpoint that may be one of the coolest areas to photograph in the park.
Myrtle Falls via Skyline Trail
Distance: 0.8 miles Trail Type: Out & Back
Getting to Myrtle Falls is a simple out & back from the Paradise parking area. Starting at the Skyline Trail on the paved portion heading east for about 0.4 miles and then crossing a small footbridge over Edith Creek Basin. Take a left off the path for the Myrtle Falls viewpoint. This is one of the popular waterfalls in the park standing at 60 feet with Mount Rainier standing tall in the background. This short hike is mostly all paved with little incline so this is for all ages and families looking to get amazing views.

Nisqually Vista Trail
Distance: 1.1 miles Trail Type: Loop
The Nisqually Vista Trail, located in the lower Paradise parking lot by the Henry Jackson Visitor Center, offers stunning mountain views and the trail is filled with wildflowers. There are several lookouts to view Mount Rainier, the Nisqually River, and potentially the lower reaches of the Nisqually Glacier. There is not much elevation to this trail and is one of the only paved trails in the park. This is another family friendly option and strollers are welcome starting from the upper Paradise parking lot, which has ramps to access trails.


Grove of the Patriarchs Trail
Distance: 1.1 miles Trail Type: Out & Back
The one word I felt walking along the Grove of the Patriarchs Trail was enchanted. Walking through the forest, the bright green color everywhere, all the moss, and of course the massive trees! This short hike is located on the Southeast section of Mount Rainier National Park. The trail meanders along the Ohanapecosh River that takes you to a suspension bridge to a small island destination. Here you will be surrounded by Douglas-firs, silver fir, hemlock, and Western red cedar trees. Some of the large trees can be 40-50 feet in diameter and over 300 feet tall. A very unique and breathtaking trail that is very flat for all ages to explore in the park.


Bonus: Reflection Lake
Another easy to access destination with amazing views is Reflection Lake. Located off Steven Canyon Rd, a few miles from the Paradise turnoff, just a short walk from the car is a perfect photography opportunity of Mount Rainier reflecting in the water. A great spot for sunset or sunrise. There are connecting hiking trails around the lake but all is needed is a view off the road. Definitely a bucket list stop in Mount Rainier National Park. My personal favorite of my trip even with the cloudy weather.

HIKING FOR DONUTS
Hi, I’m Mark. I live in Connecticut. I take new trips every chance I get. A good trip has a great hike, great food, and something fun to do. My goal is to search out new trips and share them to inspire others to try something new and exciting.
If you are looking for posts in a particular place, search City or State here.
SEE OTHER POSTS IN ARCHIVE
RECOMMENDED POSTS
RECENT POSTS
See the latest on Instagram and follow @HIKINGFORDONUTS

Meeker Trail, Macricostas Preserve, New Preston, CT
Trail Description: The Meeker Trail is the most popular hiking trail in the Macricostas Preserve that includes views from the Macricostas Lookout and eventually stunning vistas at Waramaug’s Rock summit.
Trail Info:
Where: New Preston, CT Distance: 3.2m (2 hours) Difficulty: Moderate Trail Type: Out & Back Features: Views, Mountains, Valley, Lake, Water
How to get there:
124 Christian St, New Preston, CT 06777
https://goo.gl/maps/bL3cHowWumEohJn26
Once you get to Christian Street, look for the red house and the trailhead is behind this house. There are markers and the lot is visible from the street.
Hiking Tips
Bring bug spray!
Download a copy of the trail maphere. Cell service can be spotty or non-existent.
There are multiple trail options at this preserve. This guide is for the out & back using the yellow trail. You can add the orange trail to make it a loop.
One of the better marked trails in CT but keep an eye out to make sure to follow the color markers.
The Hike
From the parking lot, the Kiosk for the start of the trail is visible past the boardwalk. Follow the yellow trail on the right. The Meeker Trail is 1.6 miles to Waramaug’s Rock summit.


The trail starts easily crossing a bridge and footbridge through the meadow (pretty buggy here).

This will lead to the trail marker to take a left onto yellow and continue walking along the hayfield.


Proceed to follow the yellow trail markers as the Meeker Trail turns left through Meeker Swamp on wooden planks crossing another bridge and continues along the planks.


In roughly 0.2 miles, the trail comes to an intersection with the orange marked Ridgeline Trail. Stick to the right to resume on the Meeker Trail following the yellow trail.
At this point, the trail ascends gradually then becomes steeper along some switchbacks. There is a junction that passes the white trail but continue to follow the yellow trail.


The first viewpoint will be the Macricrostas Lookout at 1,092 feet elevation with views of the hayfield below and surrounding area.

From here, continue on the yellow trail as the ascend to Waramaug’s Rock becomes much steeper.
After about 0.4 miles, the trail reaches a rock slab to climb to the summit of Waramaug’s Rock.
Waramaug’s Rock reaches an elevation of 1,280 feet with an amazing panoramic view of Lake Waramaug and the surrounding valley. There is the one dead on center view but do some exploring at the summit to see all the views to the left (southwest) as well.

After all the views are soaked in, head back the same way down the yellow trail. At 0.4 miles, there is a junction to continue on the yellow trail going the same way or hop on the orange trail to do a loop back down to the parking lot. This will add 0.7 miles to the hike. It was pretty hot and beers were calling my name at Kent Falls Brewing so I decided to just do an out and back.
HIKING FOR DONUTS
Hi, I’m Mark. I live in Connecticut. I take new trips every chance I get. A good trip has a great hike, great food, and something fun to do. My goal is to search out new trips and share them to inspire others to try something new and exciting.
If you are looking for posts in a particular place, search City or State here.
SEE OTHER POSTS IN ARCHIVE
RECOMMENDED POSTS
RECENT POSTS
See the latest on Instagram and follow @HIKINGFORDONUTS

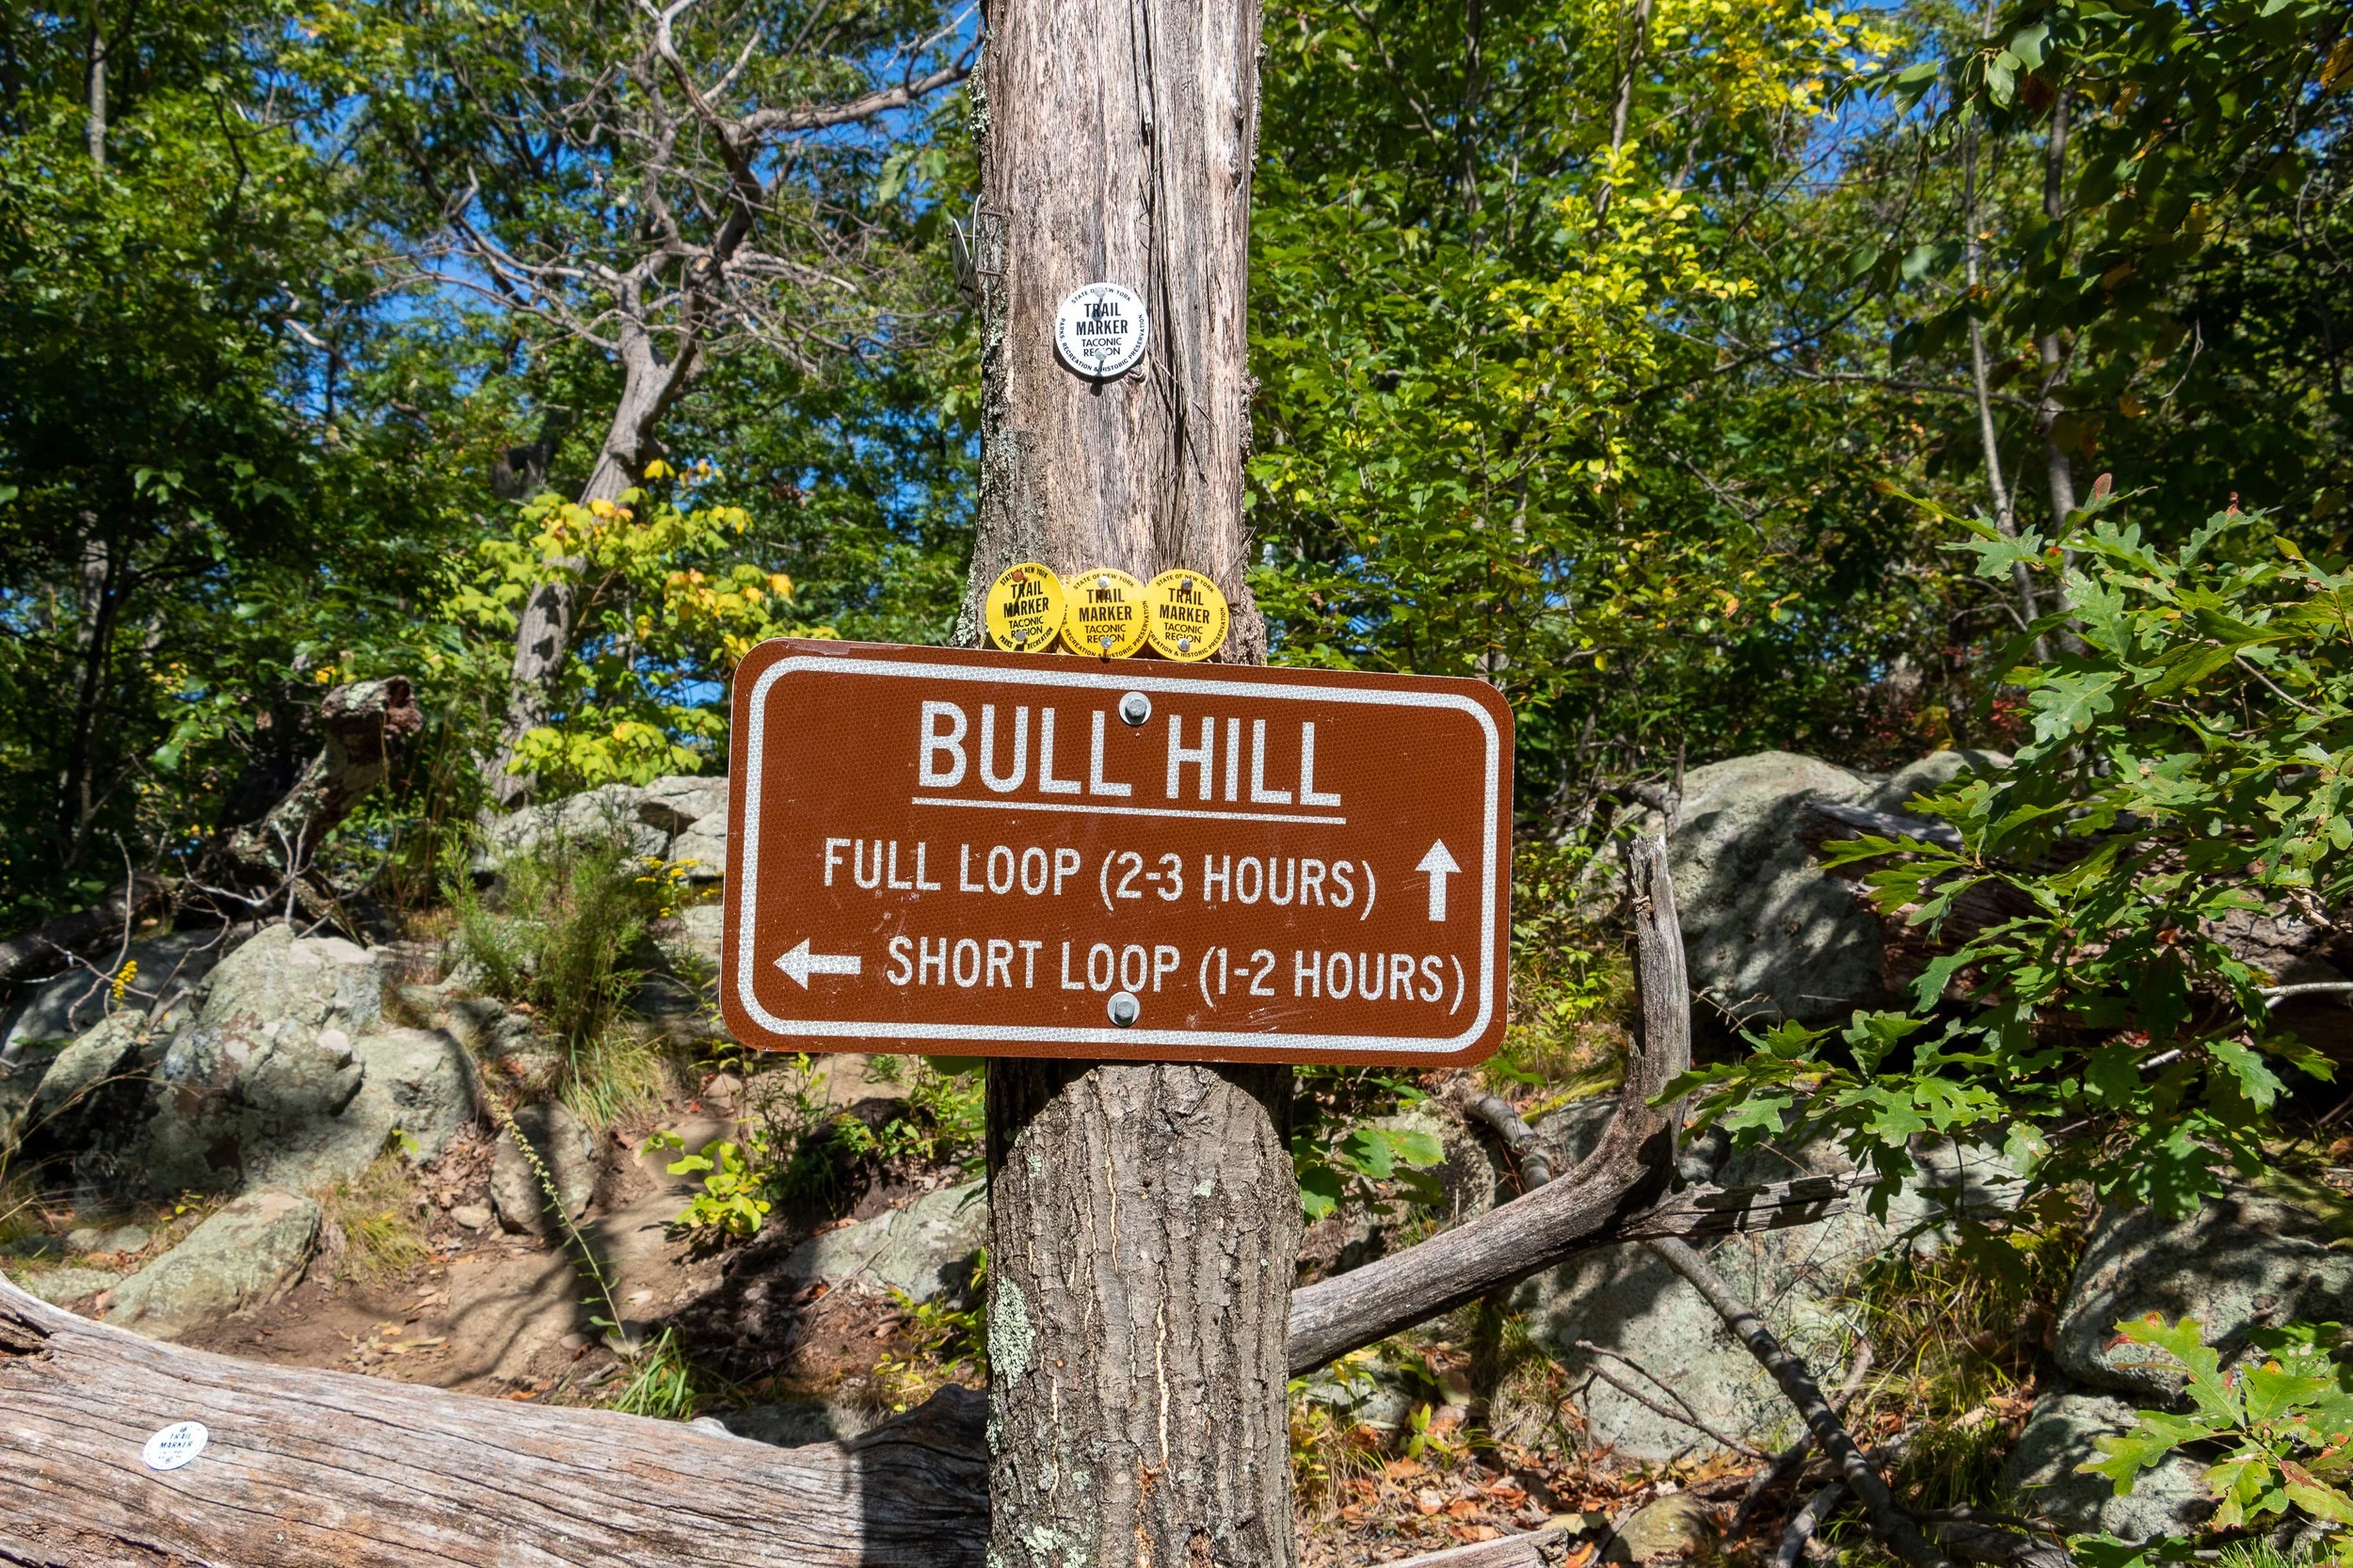
Bull Hill (Mt Taurus) Hike, Cold Spring, NY
Trail Description: Bull Hill (Mt Taurus) is a loop trail that offers amazing views of the Hudson River and surrounding mountains in the Hudson Highlands such as Storm King and Breakneck Ridge.
Trail Info:
Where: Cold Spring, NY Distance: 5.4m (3-4 hours) Difficulty: Moderate to Difficult Trail Type: Loop Features: Views, Mountains, Valley, River, Ruins
How to get there:
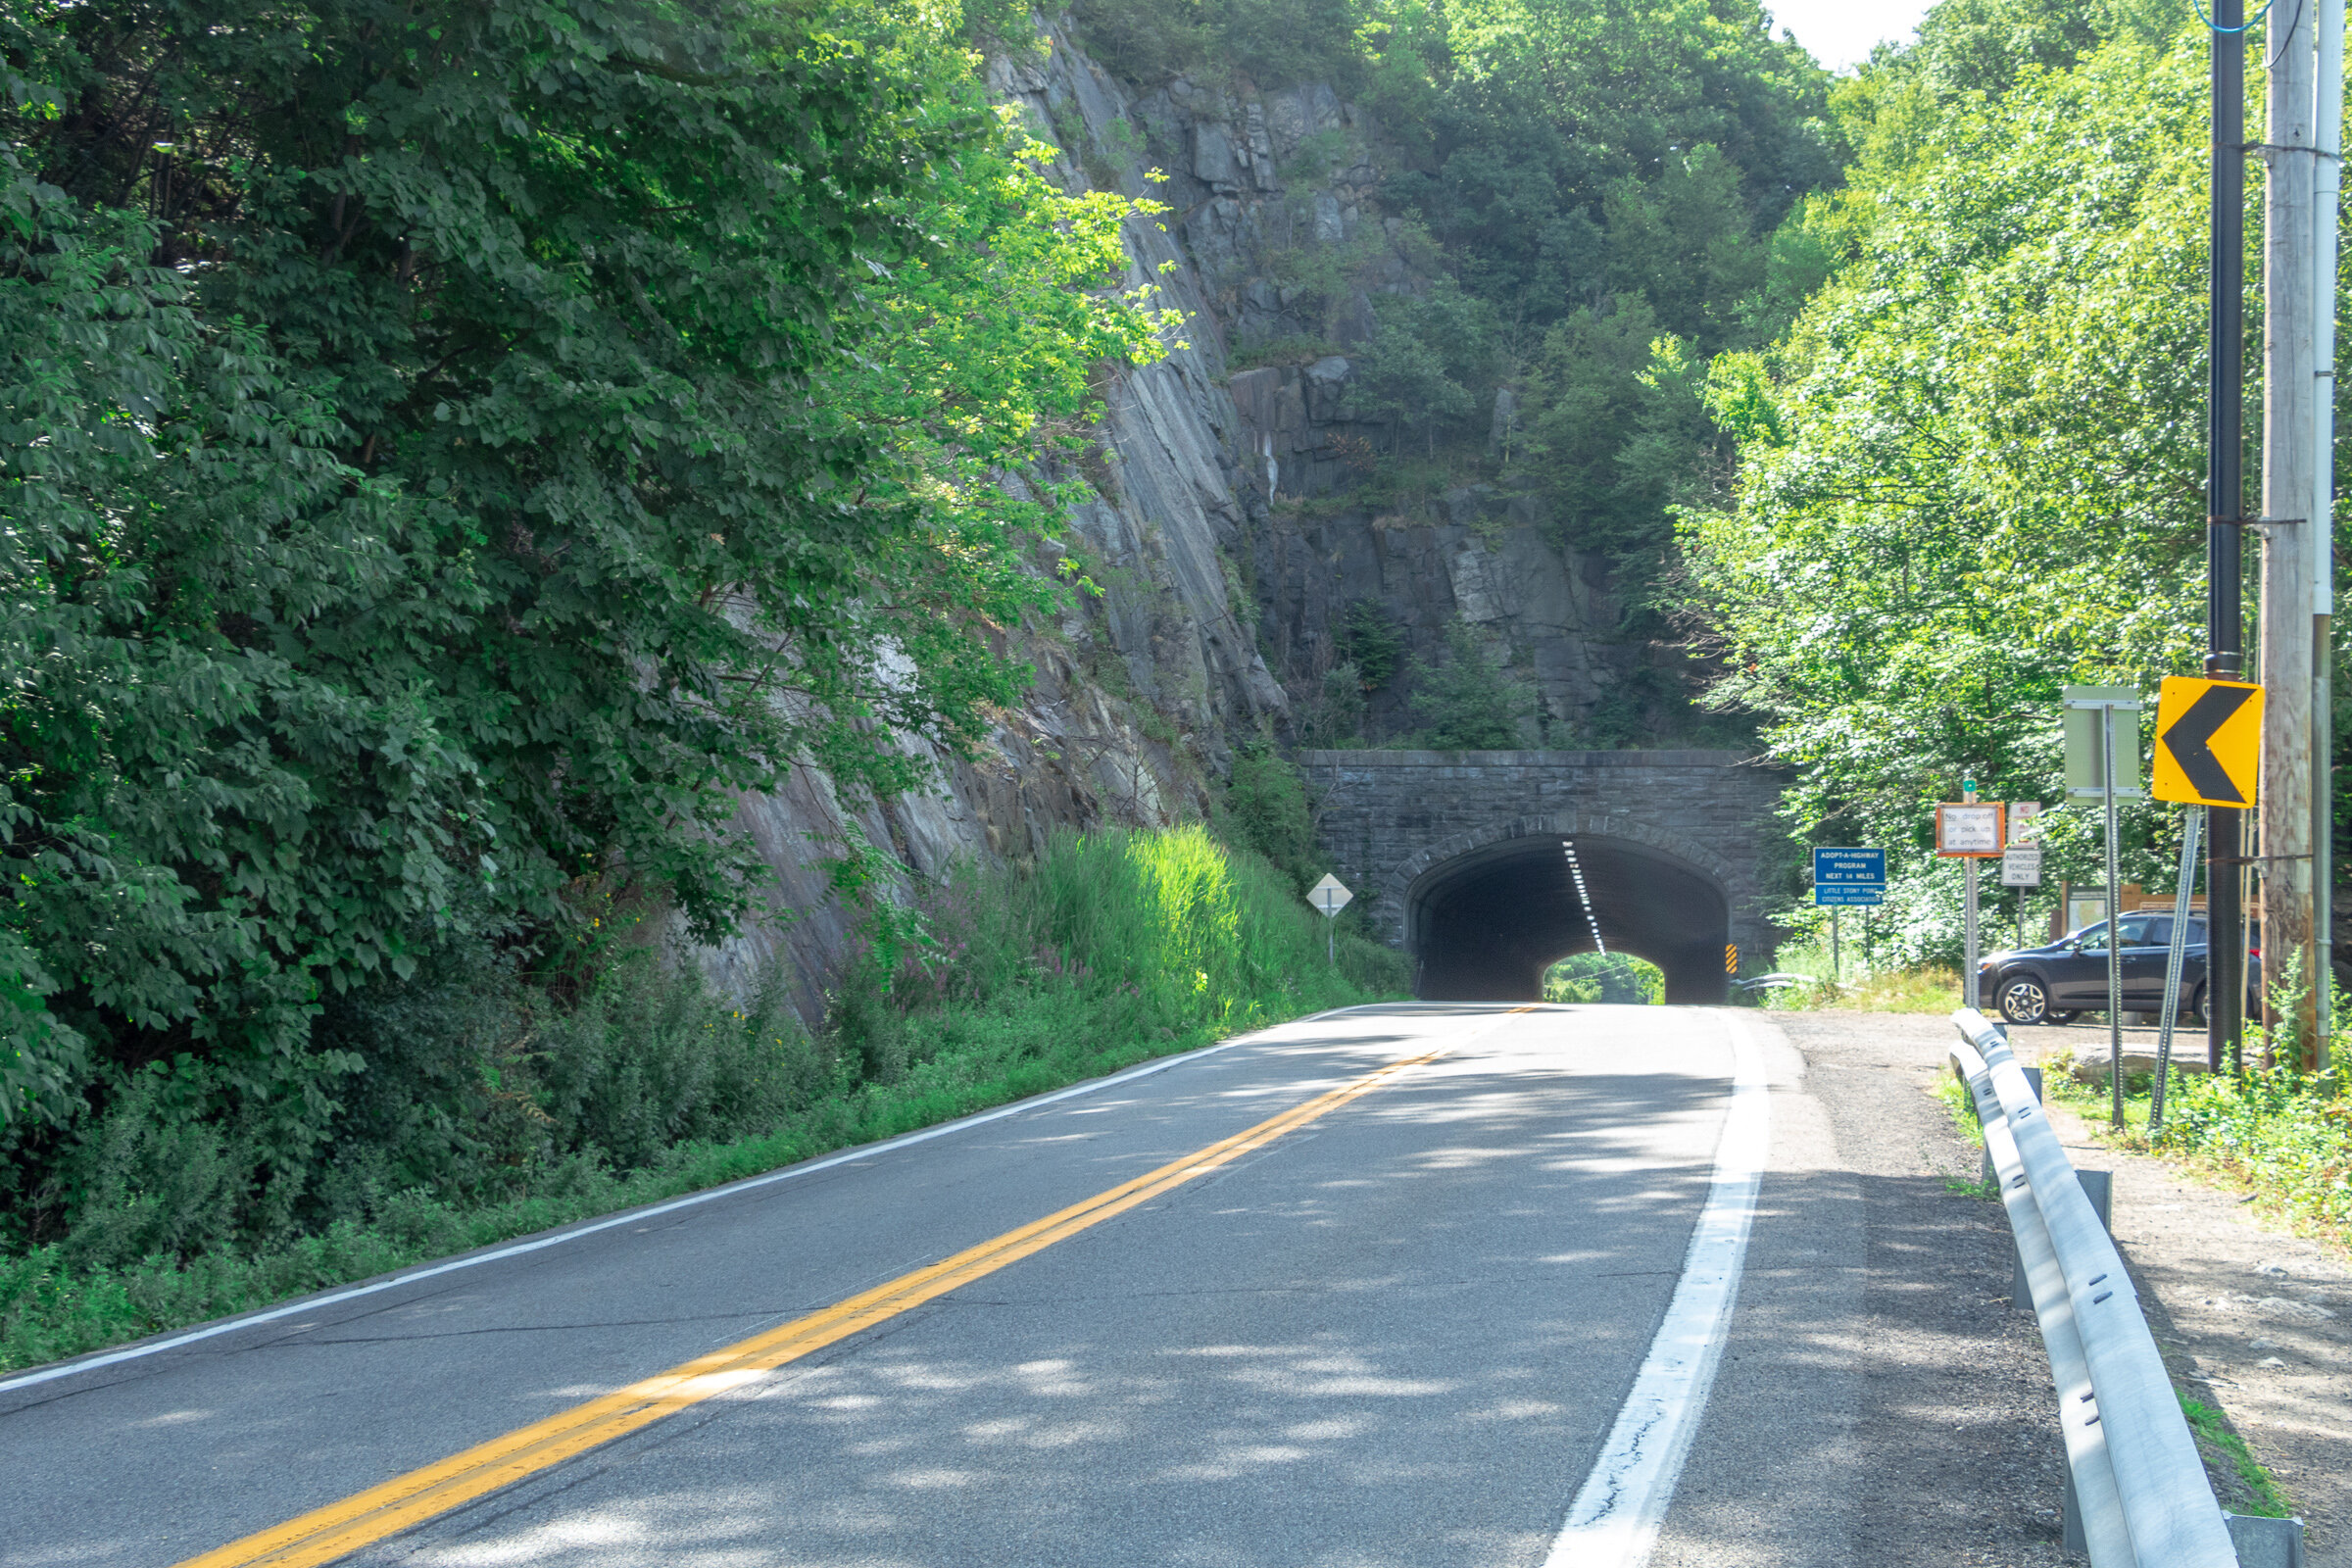
The trailhead is north of Cold Spring village along Route 9D by about a mile. The parking is shared with Little Stony Point. The location you may see searching on google map will be the Washburn Trail, which is where the hike begins.
Click here for parking lot coordinates
Hiking Tips
There are multiple trails, can choose short or long route.
Stick to a loop trail and connecting to other trails to get back. The terrain is steep going up, probably not fun going down…unless that is your thing!
Parking lot is small, fills up very quick on weekends!

The Hike
Starting at the parking area, you have a decision. How long do you want to hike? To be completely honest, my intention was to take the short route but I ended up hiking about the same as the full loop somehow. So, this is the short loop with a little twist. To begin, start trekking on the right to the white marked trail, the Washburn Trail.

The trail follows through the woods along a road at first with a gradual incline. This will lead to an open area with a sign to take a sharp right to continue on the trail.


This is a well marked trail and there are many signs for all the viewpoints.

The first few miles are pretty steep before you reach some viewpoints.

The first viewpoint will be a view of the Hudson River with Breakneck & Storm King Mountain in the background. Shortly after, the second viewpoint provides views of Cold Spring & West Point in the distance.


Continue along the white trail markers as the trail incline increases. There will be more views to take in. Eventually, the trail reaches an intersection. The short loop will be to your left following the yellow marker and the full loop is straight ahead following the white trail. I wanted to reach the summit view of Mt Taurus so I went straight here. Continue on this trail and you will notice some rocks with the word “View” painted with arrows pointing up. This will lead to the astonishing views from Bull Hill (Mt Taurus).

From here, I retraced my steps back down to the intersection and hopped on the yellow marked trail (Short Loop). You could continue on the long loop as well.


Once on the yellow marked trail, there continues to be awesome views such a clear shot of Storm King Mountain.

Follow the yellow marked trail until reaching signage for the red marked trail to connect to. There will be a stream to your right and a bridge to pass. Follow that and the blue marked trail will connect quickly and this will lead you all the way to the parking lot. There will be gradual decline in switchbacks and will become flat pavement for the last mile or so. Along the blue trail, the ruins of the Cornish Estate can be explored as well but this was a very crowded day so I decided to skip that.


This is a fun hike with so many viewpoints and exploration. It is certainly not easy with a lot of steep inclines the first few miles but the views are nonstop you won’t even notice the difficulty. This is definitely one of the better marked trails and there are many trail options to make the hike your own. Fantastic day hike!
HIKING FOR DONUTS
Hi, I’m Mark. I live in Connecticut. I take new trips every chance I get. A good trip has a great hike, great food, and something fun to do. My goal is to search out new trips and share them to inspire others to try something new and exciting.
If you are looking for posts in a particular place, search City or State here.
SEE OTHER POSTS IN ARCHIVE
RECOMMENDED POSTS

RECENT POSTS
See the latest on Instagram and follow @HIKINGFORDONUTS


Ferncliff Forest Fire Tower, Rhinebeck, NY
Trail Description: This is a short hike that brings you to a fire tower with stunning panoramic views of the Catskill Mountains.
Trail Info:
Where: Rhinebeck, NY Distance: 1.4 miles (1 hour) Difficulty: Easy Trail Type: Out & Back Features: Views, Mountains, Water, Pond, River, Fire Tower
How to get there:
68 Mt. Rutsen Road Rhinebeck, NY 12572
https://goo.gl/maps/cXzcj8ZLTL8BxYBh7
Hiking Tips
A busy spot for nice weather and fall foliage.
There are multiple hiking trails in this park, plan your route.

The Hike
From the parking lot, there is a kiosk where you can view the trail map. The yellow-blazed trail starts past the gate. Proceed with the yellow-blazed trail as it inclines gradually along the gravel road. The signage is pretty good on this trail and there are signs to the fire tower.

In about 5 minutes, the trail reaches a pond and there will be a cabin with a sign marked “TOWER” .


And, once you pass the cabin, there is a lean-to that points to the right to continue on the yellow-blazed trail marked “TOWER”. That is the trail you want to be on.

The path continues to climb slowly. There will be another lean-to on the trail and at about another 0.6 miles, the fire tower will be on the left. There are multiple paths that lead to the tower. This is the shortest route. Once my wife and I arrived, there was already a line to go up to the tower. Only 10 people can fit at a time and even that is a stretch. Only family and friend groups were going up.

Once we got up to the top, the panoramic views were amazing! Views of the Hudson River, Catskills, and the Kingston-Rhinecliff Bridge. The fall colors were really popping. This is a great spot for sunset or sunrise. We didn’t get to spend as much time as we wanted up top as we wanted to be considerate to others waiting in line. We returned the same way we came but you could get back to the parking lot a different way.


HIKING FOR DONUTS
Hi, I’m Mark. I live in Connecticut. I take new trips every chance I get. A good trip has a great hike, great food, and something fun to do. My goal is to search out new trips and share them to inspire others to try something new and exciting.
If you are looking for posts in a particular place, search City or State here.
SEE OTHER POSTS IN ARCHIVE
RECOMMENDED POSTS
RECENT POSTS
See the latest on Instagram and follow @HIKINGFORDONUTS

Hiking the Breakneck Ridge Trail, New York
Trail Description: The Breakneck Ridge hike is one of the most challenging trails in the Hudson Valley. The mountain is known for rocky terrain, steep rock scrambling, and beautiful views of the Hudson Valley. This trail is immensely popular due to its easy access.
Trail Info:
Where: Cold Spring, NY Distance: 3.7 miles (3.5-4.5 hours) Difficulty: Strenuous Trail Type: Loop Features: Views, River, Mountains, Rock Scrambling
How to get there:
Typing the location “Breakneck Ridge Trailhead” into Google Maps will take you near the parking areas. There are multiple parking spots along State Road 9D, just park where you can north of the tunnel. There is a small lot near the trailhead and a larger lot further down.
For those concerned about parking/driving, this hike is accessible via train. There is a MTA to the Breakneck Ridge train station that is within walking distance to the trail on weekends only.
Hiking Tips
Go on a weekday to avoid the crowds, if possible. Go early on weekends.
Be prepared to rock scramble & use your hands to scale the cliff.
Not dog friendly (unless small dog that you can carry or your dog is a mountain climber)
The Hike
After parking, make sure you are walking along the right hand side of the road. The trailhead starts to the right of the tunnel, where there is trail signage and maps.
There are 3 trail route options for Breakneck Ridge. There is a sign explaining this at the beginning of the trail. The options consist of the short loop (2 hours) ,the regular/classic loop (3 hours), or the trail back to Cold Spring (4 hours). This guide will be the option we took which is the full classic loop.
There is a set of rock stairs that will bring you to the sharp ascent. Follow the white trail markers and start climbing! The terrain on the trail is pretty hard right away. There is a very steep ascent and I needed my hands and knees to get me through this portion of the hike. If you did bring hiking poles, I would suggest securing the poles to your backpack here as they will not be helpful. Depending on your level of climbing up, this can be anywhere from 30 minutes to an hour.

Keep climbing until you reach the flagpole. You will see Pollepel Island with Bannerman’s Castle to your right, along with views of Storm King Mountain straight ahead across the river.


After taking in the views and enjoying a break, continue to follow the white markers as the incline continues. This part is less intense but still some rock scrambling. There is an area in the trail where you can choose to go steeper or take the easier ascent marked with X with an arrow pointing left & right. The easier route was definitely welcomed after the steep climb.

Continue to climb higher and there is another viewpoint with the flagpole far in the distance from above.


Keep climbing until there are no more bluffs and cannot continue further.This is where you head into the forest. The next few miles are much, much easier. You could go back down the way you came but it’s a tough way down and you will be greeted with a traffic jam of many hikers ascending up.

Continue on white markers & ignore the yellow marked trail for now.
There will be a fork eventually. Look for a turn off to the red marked trail (tough to miss red marking on rock). Follow red trail down a gradual descent through woods.

Depending on your pace, the red trail will dead end in about 30-60 minutes where you take left onto yellow trail (Wilkinson Memorial Trail) and keep going downhill and follow all the way to the parking area.


HIKING FOR DONUTS
Hi, I’m Mark. I live in Connecticut. I take new trips every chance I get. A good trip has a great hike, great food, and something fun to do. My goal is to search out new trips and share them to inspire others to try something new and exciting.
If you are looking for posts in a particular place, search City or State here.
SEE OTHER POSTS IN ARCHIVE
RECOMMENDED POSTS


RECENT POSTS
See the latest on Instagram and follow @HIKINGFORDONUTS

Acadia National Park Guide - Best Things to do
Acadia National Park is located along the rocky coastline of Maine and is the only major national park in the northeast. The beauty of the rugged coastline along with the variety of ponds, lakes, forests, and granite peaks are home to some stunning visuals. And, of course, a hiker’s dream with unique and exciting hiking trails that offer breathtaking views or easy strolls along the coastal paths. I can’t believe I waited so long to visit. My national park philosophy is the closer it is, the more opportunities I would have to visit. Thus, I put off Acadia. It took a major life change from a global pandemic for me to make the time to drive up to Acadia. My wife and I decided to take a long weekend trip and visit last October to check out some of the fall foliage. With only a few days to explore, we had an action packed itinerary and were able to enjoy lots of what Acadia National Park has to offer. This guide is based on what we did. However, there is additional info that will give you the tools you need to plan a short or long trip along with some practical tips.
Beehive Trail Summit views
About Acadia National Park
Acadia National Park comprises 3 regions: Mount Desert Island (MDI), Schoodic Peninsula, and Isle au Haut. The majority of the park is located on Mount Desert Island and is the easiest to access from Bar Harbor, the main town where tourists stay. Schoodic Peninsula is the area to visit if you want to get away from the crowds and is about an hour ride from Bar Harbor. Isle au Haut is a remote island only accessible by ferry. It takes a full day to visit Isle au Haut from Mount Desert Island.
The park costs are $30 per car, $25 per motorbike, and $15 per individual coming in on foot, valid for 7 days. Acadia National Park is open year round, however, roads and visitor centers close from late fall to spring.
Travel tip: Stop at the visitor center and get a map. Talk to some rangers to get info on hikes or destinations within the park.
How to Get to Acadia National Park
Acadia National Park is found in Maine’s Mount Desert Island, off the east coast of Maine. The closest city to Acadia National Park is Bar Harbor.
Car: This is the most convenient way to get to the park. And, in my opinion, the best way to travel so you can go wherever you want within the park at your leisure. It is approximately a five-hour drive from Boston, Massachusetts, a three-hour drive from Portland, Maine, and an eight-hour drive from New York City.
Flying: The closest airports to Acadia are as follows:
Hancock County/Bar Harbor Airport (BHB)- 8 miles
Bangor International Airport (BGR)- 50 miles
Portland International Jetport (PWM)- 173 miles
Boston Logan International Airport (BOS)- 274 miles
Travel Tip: If you can not find parking or do not want to have a car, there is a park shuttle that runs during peak season. The shuttle includes stops in Bar Harbor, Hulls Cove Visitor Center, and various places in the park.
When to Visit Acadia National Park
The best time to visit Acadia National Park is in the fall, specifically September and October. This is when the park's gorgeous fall foliage is at full display. This is also one of the busiest times to visit but it is well worth the views and leaf peeping experience.
Summer is a good time to visit but this is the peak season. In addition, there is a higher volume of mosquitoes and ticks. Spring is another good option. Be wary, the weather can change quickly any time due to the park’s far north, coastal location. This can range from rainy to extreme fog to super hot or very cold. Winter is the least favorable option due to shorter days, road closures, facility closings and it’s very cold.
Travel Tip: Currently, during the covid pandemic, this has caused a huge spike in visitors to the U.S. national parks, especially Acadia. Expect the park to be busy, with the exception of winter, as this is the place to go if you are within 8-10 hours driving distance.
Foggy fall foliage at Jordan Pond
Best Things to do in Acadia National Park
Acadia National Park is full of many options for casual tourists, hikers, bikers, climbers, and photographers while visiting. Planning all you want to do can be hard but also the fun part. Here are some recommendations from our long weekend trip.
Views of the The Bowl from Champlain Mountain Trail
Watch the Sunrise or Sunset at Cadillac Mountain
Cadillac Mountain is the first place in the US to view the sunrise and the highest peak on Mount Desert Island. The sunrise over the Atlantic Ocean was a bucket list item for myself but even if you are only able to catch the sunset, the view is breathtaking. This was definitely worth the 3:30am wake up call.
Cadillac Mountain Sunrise
By far, this is the most popular area of the park. Parking is very limited so I recommend getting there at least an hour before sunrise. Once you drive to the top and park, you can just walk around the summit and look for a place to watch. No hiking is involved. However, there is a 0.3 miles trail at the top if you choose to do so. The weather can impact your experience. We dealt with quite a bit of fog all weekend. Due to the higher elevation, fog could block the views. However, the weather decided to cooperate and the skies were clear. And, we were able to see an amazing sunrise.
**IMPORTANT INFO**: This area of the park, you will now need reservations. The National Park Service has implemented a reservation system late-May through mid-October to cut down on traffic on Cadillac Mountain Summit Road. You can find details here on how to make a reservation.
Travel Tip: The top of Cadillac Mountain can be very windy and temperatures are much colder. Pack layers to stay warm and hand warmers, if applicable. Also, we brought head lamps to find a spot to watch since it was dark.
Go Hiking
The hiking trails in Acadia National Park can vary in difficulty, length, and elevation. There is something for all levels of hikers.
Some of the appeal to the hikes in Acadia is the excitement and thrill. There are a large number of trails with ladders and metal rungs. Similar to a via ferrata, you can hike along narrow ledges and climb up sheer rock faces with the help of metal rungs. Hikes that feature iron rungs and cliff walks include the Precipice Trail, the Beehive Trail, the Jordan Cliffs Trail, and the Beech Cliff Ladder Trail. However, if this is not for you, there are plenty of other hikes to choose from.
Starting with the easier hikes in the park, we did the Jordan Pond Loop, which is a 3.4 mile stroll around the Jordan Pond. Combining this with the Bubbles hike is an option. Check out my guide here on the Jordan Pond Loop Trail here.
Jordan Pond and the Bubbles
Other easier hiking trails include: Ocean Path (up to 4 miles or less), South Bubble (1.5m), & Cadillac Mountain Summit Loop (0.3m).
The Gorham Mountain Trail is a good option for a moderate hike. About 1.8 miles with some steep sections. Unfortunately, we were met with nothing but fog at the top. It was a fun hike but no views to show for.
Other moderately strenuous hikes include: Pemetic Mountain (6m), Penobscot and Sargent Mountains (5m) and North Bubble and Conners Nubble (3.5m).
Let’s get crazy. Of course, we had to do the Beehive Trail. Aside from Cadillac Mountain, this is probably the next popular attraction and the most popular hike. This thrilling hike heads up to a steep mountain that features a section with narrow cliff edges, iron rungs to climb up and several handrails for exposed rock scrambling. This spectacular peak overlooks Sand Beach from the northwest. This hike can be very crowded and there can be a log jam using the iron rungs to climb. This hike is very dangerous so please take your time. If you have a fear of heights, this is not for you.
Hiking the Beehive
Due to the shorter time we had to explore, we included The Bowl and Champlain Mountain summit to this hike as well. They can be done separately but make sense to include. Adding these additional trails brought the hike to about 5 miles. The views were amazing. For more specific info on hiking directions, check out my guide here.
Views from the Champlain Mountain Summit
Additional intense hikes to be deemed as difficult options include: Precipice Trail, the Jordan Cliffs Trail, and the Beech Cliff Ladder Trail.
Travel Tip #1: Weather can shift your plans. Be prepared with additional activities or hikes. It might be too foggy for views or the rain might make hiking dangerous. For instance, any hike with iron rungs, I would not suggest to attempt on a rainy day.
Travel Tip #2: If attempting the Beehive Trail, get there early for parking. The Sand Beach parking lot is where you park and fills up very fast.
Drive along Park Loop Road
Park Loop Road is a 27 mile loop that takes you to all the popular destinations in the park. The loop starts at the Hulls Cove Visitor Center. This scenic drive is a great start to an Acadia trip with some viewpoints and turnouts. Some sections can be very narrow and mostly one-way. The most notable stops along the way include:
Sand Beach
Thunder Hole
Otter Cliff
Jordan Pond
Cadillac Mountain (reservation needed)
Travel Tip: Be sure to grab a park map to plan your stops. Since the majority of the road is one way, you can not turn around if you miss something.
Sand Beach
Located on Park Loop Road, it is worth the time to stop at Sand Beach. From here you can hop on the Ocean Path Trail that is an easy walk along the eastern coastline. The trail is 2 miles round trip to Thunder Hole and 4 miles round trip to Otter Point. How far you go is up to you. You could stroll along like us and make some detours to the rocks & turn around.

Travel Tip: The main parking lot to Sand Beach is the biggest in the park. However, this is parking for all the trails listed for Sand Beach and located right across from the start of the Beehive Trail. We found parking around 8am. And, by 9-10am, the lot was full. Getting to popular parking earlier is always the best bet.
Thunder Hole
Thunder Hole is a natural inlet where you can watch waves come crashing against the rocks, creating a thunderous sound. These thunderous crashes are very dependent on the tide. Calm waves or low tide may offer an anticlimactic experience. We are able to hear the crashing noises but nothing too crazy as far as the water height.

Travel Tip: If possible, per research online, the best time to go is about two hours before high tide. Check out the tide charts here.
Jordan Pond House
The Jordan Pond House has been open since the 1890s and is famous for their delicious popovers. We stopped for lunch and other items on the menu as well were delicious. Get the blueberry lemonade, you won’t regret it.

Famous popover and Blueberry Lemonade
Not only is there great food, but there are great views as well. This restaurant is located at the shore of Jordan Pond, where you can take in the views of the North and South Bubbles in the distance. Also, this is where the Jordan Pond Loop Trail can be accessed.
Travel Tip: Parking is tough midday here. There is a small lot at the restaurant and then another bigger lot down the road. However, it is still not enough. We found better success after the lunch crowd after 2pm to enjoy a late lunch post hike. Also, their hours change by season so I would research before you go.
Bass Harbor Head Lighthouse
On the west side of the park, the most popular destination is the Bar Harbor Head Lighthouse. The amazing views of the rocky coastline along with the lighthouse is about as Maine as it gets. And, this setting is what brings so many tourists and photographers to visit. Upon arriving, there is a very, tiny parking lot. Sunset is the best time to come but the absolute busiest time. You will need to get there a few hours before sunset to get a spot. There is a path to the right where you can walk right up to the lighthouse. However, if you want that coastal view, there is a path to the left at the end of the parking lot that takes you down to the rocks.

Sunset at Bass Harbor Head Lighthouse
Travel Tip: Based on my experience, it was about as busy as going to Costco on a Saturday afternoon on a holiday weekend. We got there an hour or so before sunset on a Saturday. Cars were lined up on the narrow road in a log jam and park rangers were turning cars away. I did see people parking even down the road up to almost a mile and walking to it. My wife stayed in the car & I ran down to the path. When I got down to the rocks, there were so many people, it was hard to get a good view. I had to leap rock to rock and ask for people to move out the way to get a picture (politely of course because there was some yelling going on over pictures!). I would suggest going off peak hours or on a weekday if possible.
Schoodic Peninsula and Isle au Haut
We did not get a chance to visit but I would have looked into these other areas of the park if we had more time. Schoodic Point is another great area to see beautiful views of the coastline, with far less of crowds. And remember, Isle Au Haut is only accessible by ferry. Please note that they limit the number of visitors allowed in the Isle au Haut section to protect the environment, so I would suggest stopping by the Hulls Cove Visitor Center to plan ahead.
Carriage Roads
There are 45 miles of car-free carriage roads that run through the park. Here you will find hikers, bikers, and horses along the crushed rock surfaces. There are multiple access points and just another option to enjoy nature in the park.
Explore Bar Harbor
The town of Bar Harbor may be the one of the most exciting towns in the U.S near a National Park. There is so much to do here. This small town is full of great restaurants, bars, and unique shops. Everything is within walking distance and a very safe environment. Also, there are spectacular views of the harbor.
Where to Stay
There are numerous accommodations to stay near Acadia National Park. Airbnbs, bed & breakfasts, and hotels are plenty on Mount Desert Island. Bar Harbor is the closest town with the most going on. If you want to stay a bit farther away from the crowds, there are options in the Northeast Harbor, Bass Harbor, or Southwest Harbor. And, there are campgrounds as well such as: Blackwoods, Seawall, Schoodic Woods, and Duck Harbor Campgrounds.
We stayed at the Island Place, which was affordable and convenient. Walking distance to food and 15 minute ride to the park. Some other options include the Bar Harbor Quality Inn, Bar Harbor Grand Hotel, Bar Harbor Inn & Spa, Shore Path Cottage, and The Elmhurst Inn.
Where to Eat
If you follow this website, you know it’s about travel, hiking, and food. All about finding the good spots to eat and you know I found where to get donuts. With that said, we actually only ate out a few times and packed snacks & lunch (Hannaford’s is right in the center of town in Bar Harbor). We went to Side Street Cafe for dinner, which is very popular. The wait was pretty long but it was an excellent meal. If you want lobster, this is the place. We actually got lobster stew and it was fantastic. For breakfast, we stopped at 2 Cats for some baked goods, breakfast sandwiches, and donuts! Also, they have pretty funny cat puns at all their signs.
Other recommendations based on research to try include: Havana, Atlantic Brewing Company, Jeanine’s Great Maine Breakfast, Docksider, Rosalie’s Pizza, Mount Desert Island Ice Cream, C-Ray Lobster, & Rose Eden Lobster.
If you have any further questions about planning your trip to Acadia National Park, please post in the comment box below.
HIKING FOR DONUTS
Hi, I’m Mark. I live in Connecticut. I take new trips every chance I get. A good trip has a great hike, great food, and something fun to do. My goal is to search out new trips and share them to inspire others to try something new and exciting.
If you are looking for posts in a particular place, search City or State here.
SEE OTHER POSTS IN ARCHIVE
RECOMMENDED POSTS


RECENT POSTS
See the latest on Instagram and follow @HIKINGFORDONUTS

How to Hike The Beehive Trail, The Bowl, & Champlain Mountain, Acadia National Park
Trail Description: This hike climbs The Beehive via cliffs and iron rungs that leads to The Bowl (a pond), and then climbs up to the summit of Champlain Mountain. There are amazing views from the summits and various spots on the trail.
Trail Info:
Where: Bar Harbor, ME, Acadia National Park Distance: 4.9 miles (5-6 hours) Difficulty: Strenuous Trail Type: Loop Features: Views, Mountains, Water, Pond, Cliffs, Summit
How to get there:
Sand Beach Parking lot in Acadia National Park. There are restrooms here. In addition, there is beach access and other hiking trails.
Hiking Tips
If you have a fear of heights, the Beehive Trail is not recommended for you.
If it has rained recently and the trail is very wet, I would recommend not including the steep climb portion of the Beehive Trail on that day.
Be sure to take this loop trail counter-clockwise. You do not want to climb down the irons rungs nor clog up traffic.
This is the one of the most popular hikes. It will be very busy, start early!
The Hike
The Beehive loop hike at Acadia National Park is probably #1 on most tourists' itinerary. This is a short and steep hike with some exhilarating but dangerous sections using iron rungs to climb up the side of the mountain. The hike is not for the faint of heart. The experience alone makes this a bucket list adventure. So, of course, it was one of my top priorities visiting Acadia for the first time. My wife and I went for a few days last fall. Due to time constraints, I needed to ensure I got the best bang for my buck. Luckily, The Beehive trail intersects with the Bowl which connects to the trail that summits Champlain Mountain. Now, you could do all 3 of these separately but this was a no brainer. This allowed my wife and I to see more amazing views in the allotted time we had.
The trailhead is located on the opposite side of the street, about 100 yards across from the Sand Beach parking lot. From the parking lot, start heading on the gravel path to the right of the parking lot entrance as you walk up to Park Loop Road. Cross the road and the trailhead for the Bowl Trail will be right there. Just follow the crowd! The trail is flat but rocky to start. After 0.2m turn right onto the Beehive Trail where Bowl Trail goes straight. Follow the blue blazed trail.
This is where the climbing begins. First are the short staircases. Then, there are a few narrow ledges with sheer drops. Followed by climbing iron rungs used to assist in the ascent up the vertical rocks. All completely exposed. You have some options here if you are not comfortable going up the Beehive Trail using the iron rungs. There is an option to access The Beehive from the backside or skip it entirely and choose to head to The Bowl. I enjoyed this as it was challenging and thrilling. And, the views were awesome. However, it is not to be taken lightly. It is dangerous. Take your time and be thoughtful to your fellow hikers. This part of the hike is relatively short.


At around 0.6m, we reached the summit of the Beehive Trail and enjoyed some amazing views of Sand Beach and Great Head. The hard work is worth it!
Continuing on the blue blazed trail, go straight through an intersection where a connecting trail leaves left. At 0.9m, this is where we reached the shore of a pond, known as The Bowl.
Follow the path with the wooden boards on the left along the shoreline for 0.1m to split in the trail. The Bowl goes left and Champlain South Ridge Trail will veer to the right. Take the right and follow Champlain South Ridge Trail. The sign indicates 1.6m to Champlain Mountain from here. There is an amazing view of The Bowl as you hike higher up the mountain.
Be weary of the blue markings along the trail and follow the cairns. There are more spectacular views at the summit of Champlain Mountain. This summit is less hectic than the Beehive so this is a good spot to have a snack and relax.


After soaking in the views, retrace your steps down to The Bowl. There are four paths leaving the summit, ensure you are heading the direction you came up. Once you get down to The Bowl intersection, bear right away from the pond and take the rest of the trail back to Park Loop Road for about 0.8m. You will pass two trails on the right leading up to Gorham Mountain and two trails on the left heading to the Beehive. Just keep going straight at all intersections.

This will lead you back to where you started. As mentioned above, we decided to combine all three trails so we can see more. I would highly recommend this particular loop in this fashion. Lots of great views. Amazing hike. The Beehive hype is real. Bucket list checked off.
HIKING FOR DONUTS
Hi, I’m Mark. I live in Connecticut. I take new trips every chance I get. A good trip has a great hike, great food, and something fun to do. My goal is to search out new trips and share them to inspire others to try something new and exciting.
If you are looking for posts in a particular place, search City or State here.
SEE OTHER POSTS IN ARCHIVE
RECOMMENDED POSTS
RECENT POSTS
See the latest on Instagram and follow @HIKINGFORDONUTS

Lovers Leap State Park, New Milford, CT
Trail Description: Lovers Leap State Park has multiple hiking trails with views of the Housatonic River and other structural landmarks such as the popular Lovers Leap Bridge.
Trail Info:
Where: New Milford, CT Distance: 1.8 miles (1.5 hours) Difficulty: Moderate Trail Type: Loop Features: Views, Valley, Bridge, Lake, River
How to get there:
178 Short Woods Rd, New Milford, CT 06776
https://goo.gl/maps/4FUFjzSinExpgzHfA
Hiking Tips
Be cautious switching trails. If markers cannot be found, turn back to retrace steps. Also, the blue trail appears to have a fake marking on top of the hill toward the wrong direction.
Don’t just hike up to the popular scenic view & leave. There is another cool view from the East on the Blue trail.
The Hike
Lovers Leap State Park is pretty easy to find. The parking lot is pretty big as this does seem like a busy hike. The wife and I caught a good time of day as the lot was almost empty. From the parking lot, we headed towards Lovers Leap Bridge. The bridge will appear pretty immediately. The structure is interesting. The lighting was spotty with shadows so I did not successfully get the best picture for the insta. Darn it!

We crossed the bridge and got the first view of the Housatonic River. Taking a right off the bridge took us down a gravel road, also known as the Lovers Leap Trail. Within 0.3 miles of some incline, the money shot picture awaits. This scenic view offers the best one in the park overlooking Lake Lillinonah. From here, you could take your donut and go home, but there is some more hiking to be had at this park.
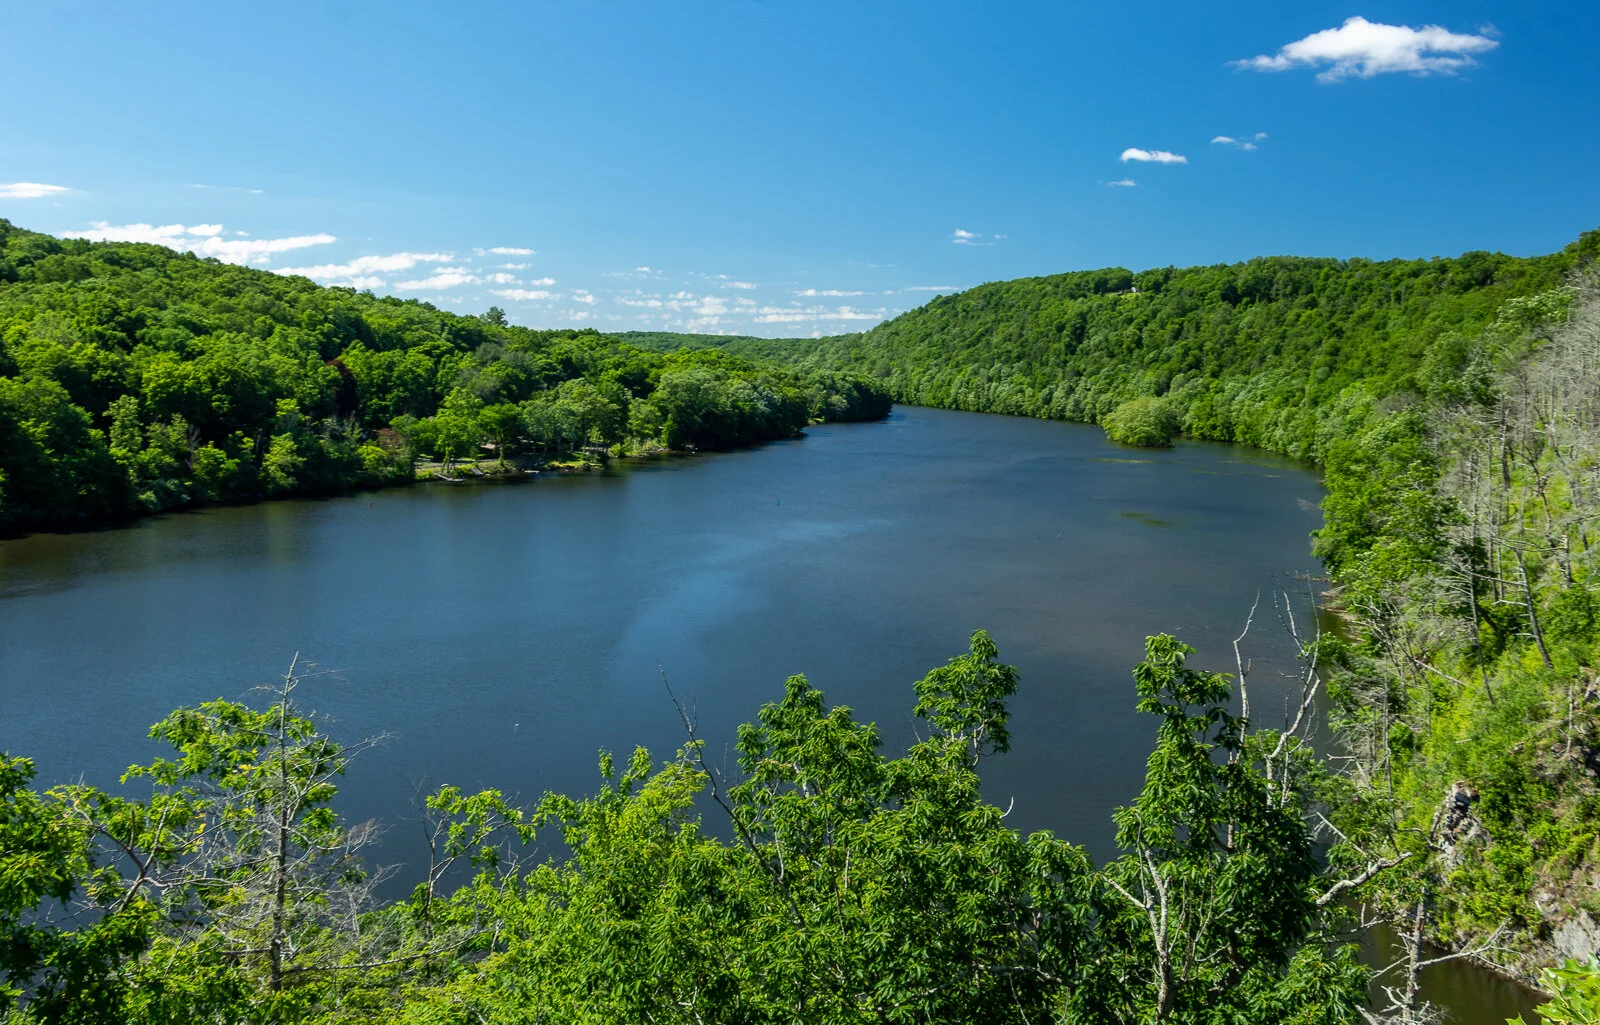
There are some interesting features and landmarks on some of the other trails. We decided to trace back our footsteps on the gravel road until we noticed the red markers for the Castle Trail on the right. Have a map handy, we had an issue finding. Pretty sure we did not go the way intended but it worked. The red blazed was a pretty good incline. Got my lungs working. Within a short distance, we came upon the castle ruin, which was just its foundation and a tall chimney. And, across from this was a castle-like turret. As I try to sit here explaining it, here’s a picture. If you must know more, I suggest the google machine.


In between the castle features, there is a trail we took that connects the red blazed trail to the blue blazed trail, known as the Falls Mountain Trail. We took a right from the red to the blue. This took us up a steeper hill.
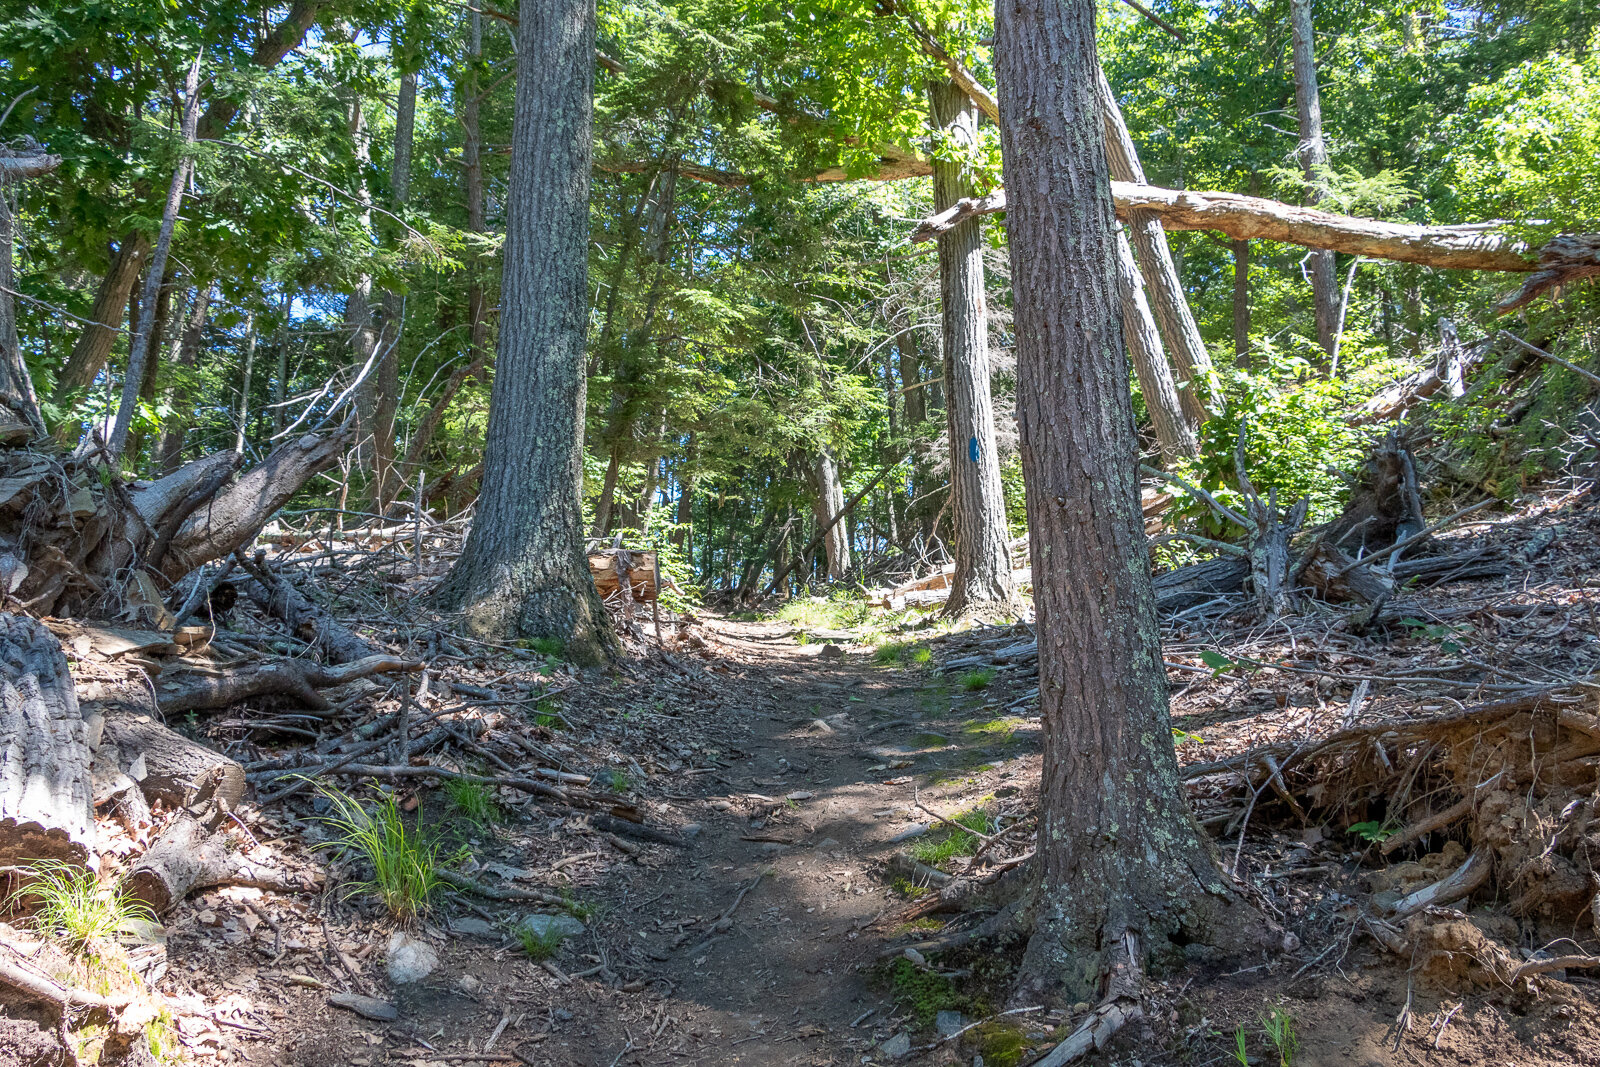
Once we reached the top of the hill, we saw a blue marker to the left but that was not correct. We met just bushes and the end of a ledge. It appears that it was painted incorrectly as a joke perhaps. That could be very dangerous if you are not paying attention. This is why we can’t have nice things. That person sucks who did that. Fortunately, we found other lost hikers and we noticed the view was behind us and we needed to retrace our steps and keep going straight and the ridge is on the right. From the ridge line, there is an open area view from the east that is pretty nice. From here, we retraced our steps down the blue to the red trail back to the gravel road.

Bonus Foodie Find:
After hiking, the post meal is important. Not all hikes are near donut shops unfortunately. However, other great food spots can be found. This hike is close to the downtown area of New Milford, CT. We stopped at Johana’s Restaurant for a brunchy meal. Great menu. I got the English Scramble - eggs, bacon, scallions, cheddar cheese in a skillet with home fries. Hell yes. And, my wife got the corn cheddar pancakes. That’s how we get down. Everything was delicious. Also, if you go in the warmer months, check out the farmers market. There’s an awesome bread company there.


HIKING FOR DONUTS
Hi, I’m Mark. I live in Connecticut. I take new trips every chance I get. A good trip has a great hike, great food, and something fun to do. My goal is to search out new trips and share them to inspire others to try something new and exciting.
If you are looking for posts in a particular place, search City or State here.
SEE OTHER POSTS IN ARCHIVE
RECOMMENDED POSTS
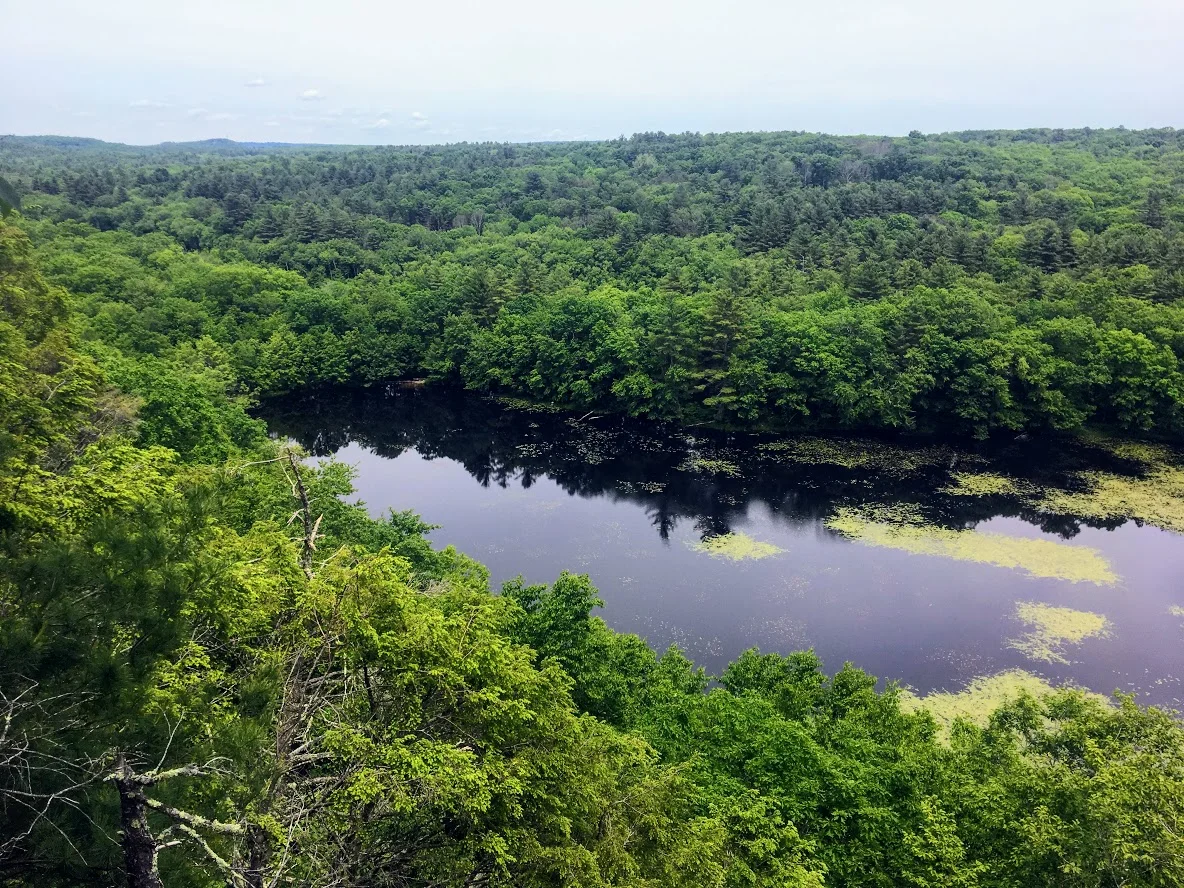
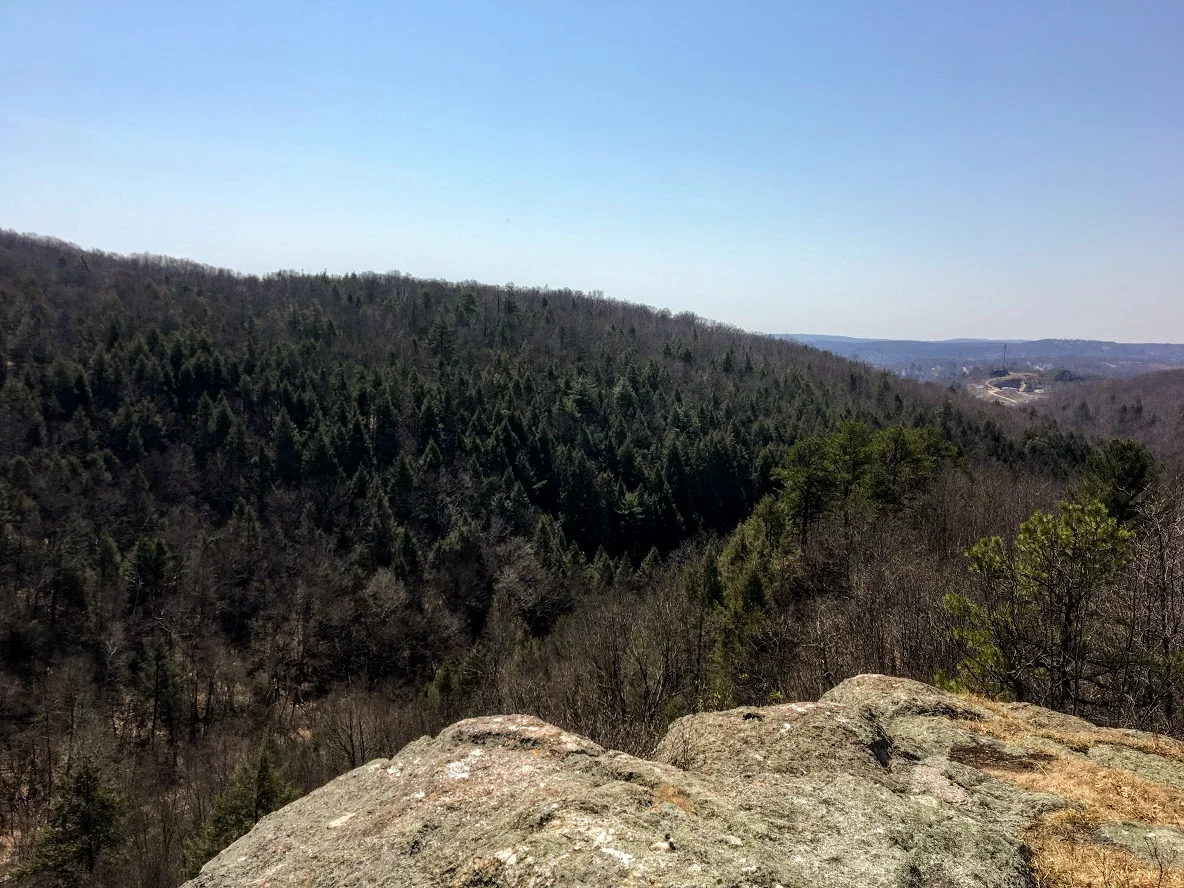
RECENT POSTS
See the latest on Instagram and follow @HIKINGFORDONUTS

Hidden Valley Preserve, Washington Depot, CT
Trail Description: The Bee Brook Loop is one of many trails in the Hidden Valley Preserve. This hike is an easy stroll along the Shepaug River. The Thoreau Bridge is the biggest attraction.
Trail Info:
Where: Washington Depot, CT Distance: 2.2m (1-1.5 hours) Difficulty: Easy Trail Type: Loop Features: Bridge, River, Water
How to get there:
198 Bee Brook Rd, Washington Depot, CT 06794
Parking lot can fit about 10-12 vehicles.
https://goo.gl/maps/Y1RQqqrmAjda6dcUA
Hiking Tips
Taking the fork to the right will bring you to the Thoreau Bridge within minutes.
There are other parking areas for different trails.
Trail map: Click Here!
The Hike
Apparently, the Washington, CT area is the mecca of public preserves in Connecticut. By mecca, I mean there’s three in a short distance of each other, which is pretty cool for nature buffs and hikers. Hidden Valley Preserve is one of three public preserves in the area owned by Steep Rock Association, along with Steep Rock Preserve and Macricostas Preserve. Hidden Valley Preserve offers 17 miles of trails consisting of various terrains and points of interest. The yellow blazed trail, known as Van Sinderen Loop Trail, will lead to the Quartz Mine and the “Lookout”, providing scenic views of the valley to the west. The Pinnacle Trail, blue blazed, also offers scenic valley views. The white blazed trail is the Bee Brook Loop, which is the quickest way to get to the Thoreau Bridge. That is the trail in this guide.
From the parking lot, there is a small footbridge that passes a small creek. This will lead to the start of the trail. There is a fork to choose your direction and we chose to go right following the White Trail for the Bee Brook Loop. Within minutes we arrived at the main attraction of the hike (for most), the Thoreau Bridge. This is a 134 foot suspension bridge hanging above the Shepaug River named in tribute to Henry David Thoreau. He was a philosopher, nature enthusiast, and advocate of hiking in the 1860s. Typically, this doesn’t do much for me nor do I get into details of history but the bridge contained many of his quotes along the railings that spoke to me.
The bridge was definitely the most busy part of this hike. It is a cool point of interest and really easy to get to. Now, I understand why it’s such a big instagram photo spot. From here, you can cross the bridge and continue onto another trail but we stayed on the White Trail hiking along the river.
Eventually, there is another wooden bridge that crosses the river on the right. This will connect you to the Yellow Trail if you want to jump on that. We just continued on the white blazed rail to finish the loop where we started. The hike was a pretty easy loop with some scenic river views. That was all I was looking for that day. Just a bit of time with nature.
HIKING FOR DONUTS
Hi, I’m Mark. I live in Connecticut. I take new trips every chance I get. A good trip has a great hike, great food, and something fun to do. My goal is to search out new trips and share them to inspire others to try something new and exciting.
If you are looking for posts in a particular place, search City or State here.
SEE OTHER POSTS IN ARCHIVE
RECOMMENDED POSTS
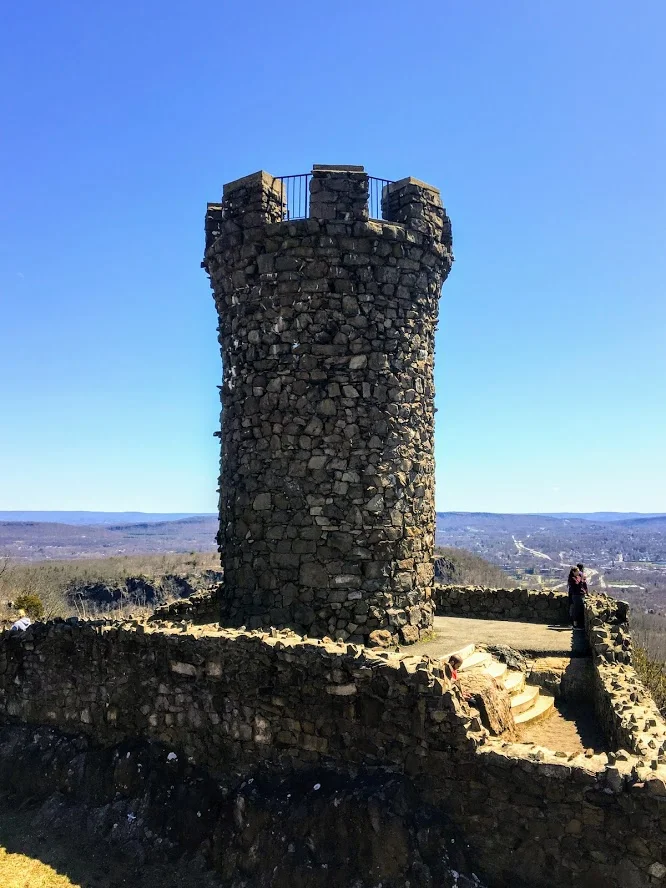
RECENT POSTS
See the latest on Instagram and follow @HIKINGFORDONUTS

Poets’ Walk Park, Red Hook, NY
Trail Description: Poets’ Walk Park is an easy jaunt through scenic meadows that offers wonderful views of the Hudson River and Catskills.
Trail Info:
Where: Red Hook, NY Distance: 2.4m (1.5 hours) Difficulty: Easy Trail Type: Loop Features: Views, Mountains, Water, River, Bridge
How to get there:
776 River Road, (County Road 103) Red Hook, NY
https://goo.gl/maps/y9V6GaXcWxRzqd6P9
Hiking Tips
Walk the entire loop. Many see the views of the bridge initially and turn around.
Not great phone service, so make sure to screenshot a map. Or my guide!
For trail map, click HERE.
The Hike
As I continue to look for the best bang for your buck views, I really don’t think it gets better than taking a stroll through Poets’ Walk Park in the fall. The Hudson Valley is full of amazing landscape and mountainous views. Most of those views require challenging hiking. However, a leisurely stroll in Poets’ Walk Park offers stunning views of the Catskills and the Kingston-Rhinecliff Bridge.
From the parking lot, begin walking on the gravel road by the trail signage. Continuing straight through the open field will lead you to a gazebo structure. Walking through the gazebo, there is the first “oh snap” view of the Kingston-Rhinecliff Bridge with the Catskills looming in the background. There is a neat little wooden bench to take a seat and enjoy the views.
The trail will split from here, where the loop begins. Either direction will bring you back to this spot. We chose left heading toward the river. Some great views of Catskills to the right and a closer view of the bridge to the left. The loop will begin on the right and suddenly you will find myself thwarted into the woods. There will be a few bridges to cross. If you need a moment of solitude, the Summerhouse gazebo area is a good spot to take a seat and look out into the mountains above the river.
From the Summerhouse structure, just retrace your steps back to the trail split and head on back to the parking lot. Easy peasy. The skies cleared on our the way back and the fall colors really popped. Just incredible views.
Depending on how long you choose to explore, take pictures, and enjoy the benches, this shouldn’t take more than an hour and half, give or take. Definitely one of those places I considered keeping to myself but the place was crazy packed. There is no secret here. It’s a spectacular park to visit for stunning views.
HIKING FOR DONUTS
Hi, I’m Mark. I live in Connecticut. I take new trips every chance I get. A good trip has a great hike, great food, and something fun to do. My goal is to search out new trips and share them to inspire others to try something new and exciting.
If you are looking for posts in a particular place, search City or State here.
SEE OTHER POSTS IN ARCHIVE
RECOMMENDED POSTS
RECENT POSTS
See the latest on Instagram and follow @HIKINGFORDONUTS
Jordan Pond Loop Trail, Acadia National Park
Trail Description: The trail is an easy hike that circles Jordan Pond with many opportunities to explore the shore and observe wonderful views.
Trail Info:
Where: Mount Desert, ME Distance: 3.4m (1.5-2 hours) Difficulty: Easy Trail Type: Loop Features: Views, Mountains, Pond, Water
How to get there:
The Jordan Pond North Parking Lot is located on the left side of Park Loop Rd at the Jordan Pond House. There is another lot next to the restaurant for additional parking as the lot fills up quickly.
https://goo.gl/maps/oQGDyrrCaNHjccsb8
Hiking Tips
Weekends are super crowded. Beware! Parking can be tough.
Post hike, eat at the Jordan Pond House. Get a popover & blueberry lemonade!
The Hike
One of the more iconic landscapes you will see at Acadia National Park is Jordan Pond. If you find yourself in Acadia, this has to be added to your list of things to check out. The shoreline of the pond has amazing views of The Bubbles, two glacially sculpted mountains at the northern end of Jordan Pond. The views are great all times of day, especially sunset and stargazing at night. Not only are the views spectacular, but the rewards of delicious food at the Jordan Pond House is almost worth the visit alone.
This was my very first trip to Acadia. I was not a happy camper to show up to nothing but fog. However, as I am learning, planning trips for national parks is impossible. You take what you can get from mother nature. Even though it was foggy, my wife and I decided to circle Jordan Pond as intended. We did have a few moments where the fog began to lift for some cool views on the pond and a tease of that fall foliage we drove 6.5 hours for! But that dissipated rather quickly. Even so, the eerie look was pretty cool.
The beginning of the trail can be found at the end of the field at the Jordan Pond House. The trail will be split as you approach. We chose to head right to stroll along the east side first. This section of the trail is more level. There are some bridges to cross over the streams that flow into the pond. As we made our way to the left side, there is a dirt trail, boulders, and a wooden plank path through the wetlands. The last 0.5m of the hike was on elevated boards, which I thought was a really cool way to protect the ecosystem. There are various points on the trail where you can hop off and explore the pond's shores. Other than that, the trail is well-marked and pretty self-explanatory.
The other great thing is that you do not need to really hike that entire trail to see some amazing views. The Jordan Pond House practically overlooks the pond. We did not get a chance to eat there the first day so we came back the next day and the weather was beautiful. I walked around the east side again briefly and I was able to see the stunning views I came here for.
Make no mistake, the views are as advertised. BUT do not, at any circumstance, miss out on a popover from the Jordan Pond House. By far, the best meal I have ever had in a national park. That popover with the jam and butter and you have to get the blueberry lemonade, magnifico! We actually tried the bison meatloaf sandwich too. Pretty damn good.
For views like this in a national park, this is as easy as it gets for a hike, or leisurely stroll. The trail is for everyone including children & dogs. It’s a great starter hike to get blood flowing or cool down after some more treacherous trails. This is a classic Acadia hike that should be added to your National Park bucket list. The view of the water with the curves of The Bubbles in the background is quite memorable. And, when you finish, it’s time for a popover!
HIKING FOR DONUTS
Hi, I’m Mark. I live in Connecticut. I take new trips every change I get. A good trip has a great hike, great food, and something fun to do. My goal is to search out new trips and share them to inspire others to try something new and exciting.
If you are looking for posts in a particular place, search City or State here.
SEE OTHER POSTS IN ARCHIVE
RECOMMENDED POSTS
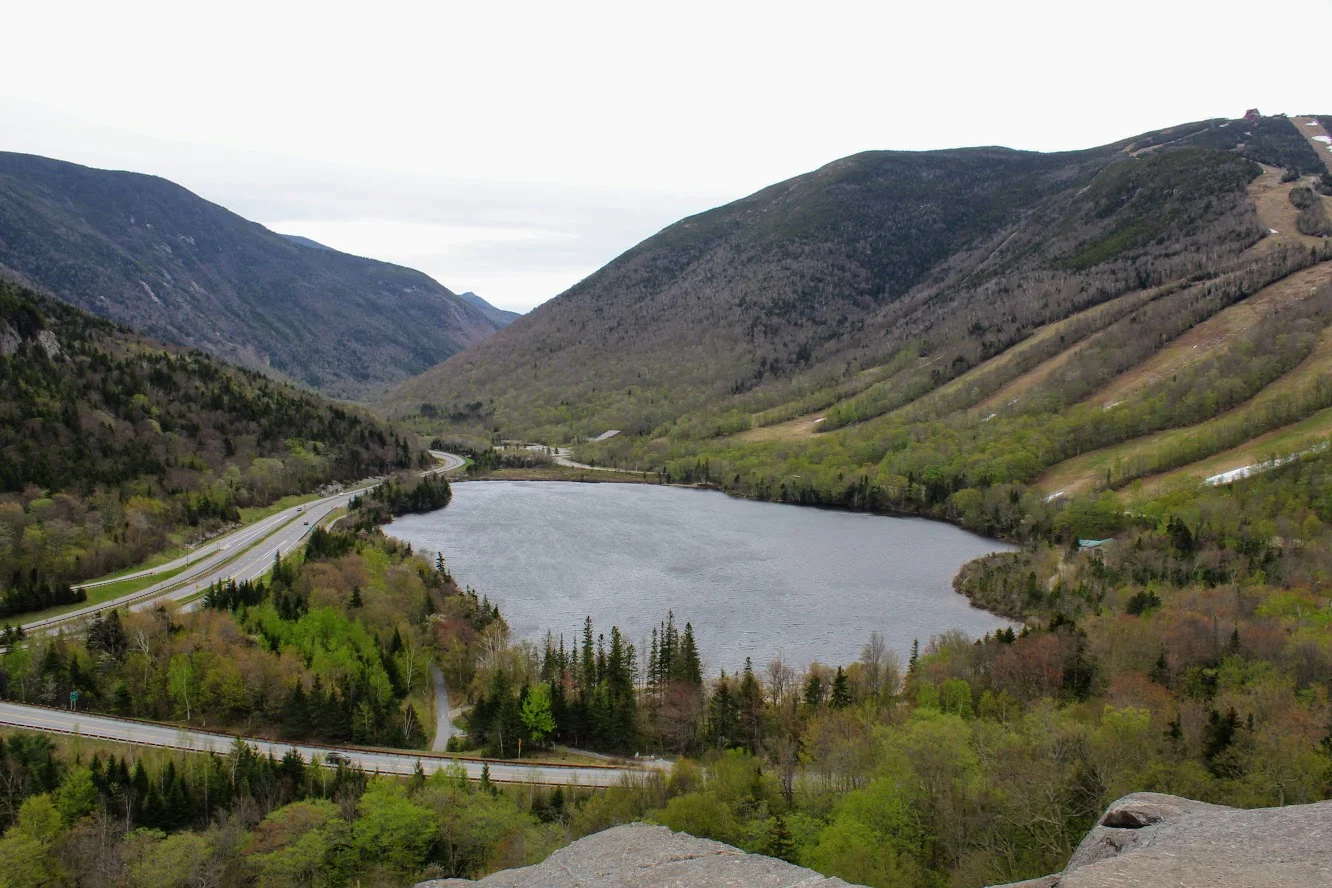

RECENT POSTS
See the latest on Instagram and follow @HIKINGFORDONUTS

Jones Mountain Preserve, New Hartford, CT
Trail Description: The Vista Trail is a red-blazed loop that circles the Jones Mountain Preserve. Most of the trail is an old carriage road that leads to summit views overlooking New Hartford and the Farming River to the north.
Trail Info:
Where: New Hartford, CT Distance: 2.5m (1.5 hours) Difficulty: Easy Trail Type: Loop Features: Views, Mountains, Valley
How to get there:
161 Steele Rd, New Hartford, CT 06057
You will see the parking lot located on the right coming from Route US-44W.
Hiking Tips
For trail map, click HERE.
Stay on the trails. Lots of hunting areas surrounding.
The Hike
Once entering the nature preserve from the parking lot, there is a footbridge crossing. There will be a fork for the start of the red blazed trail. This is the Vista Trail that loops around the preserve. Going right will lead you to the summit view. After about 0.3m there is a sign with an arrow toward the peak to follow.
This part of the hike is the most difficult. There is a gradual incline with an elevation gain of 367 feet as you make your way toward the carriage road. This will last for 15 minutes or so. Reaching the carriage road will occur at about 0.5m and it is fairly easy from here. At 0.9m there is another footbridge crossing.
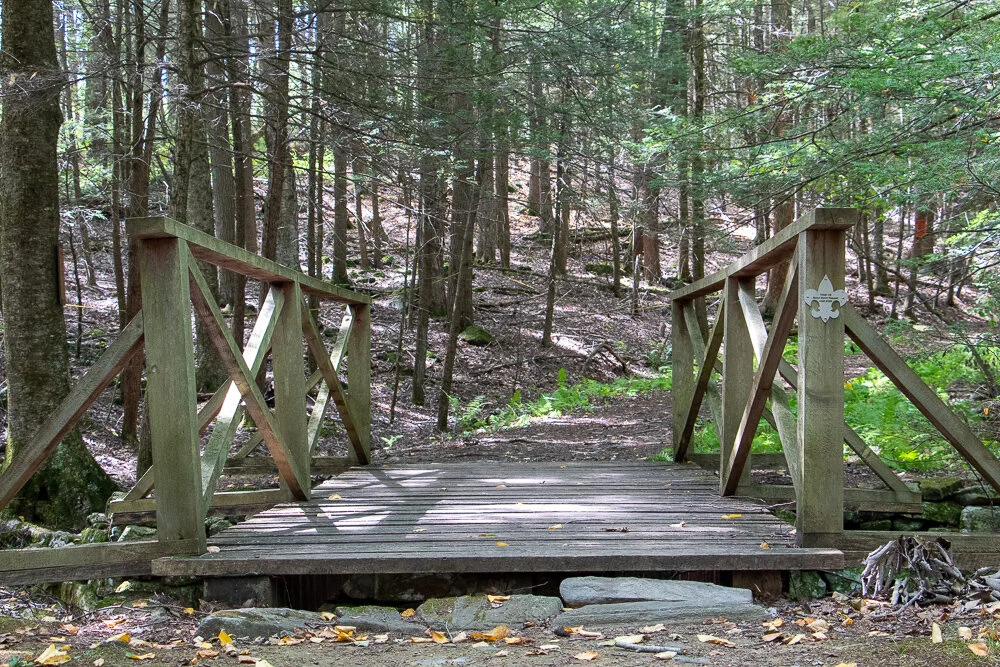

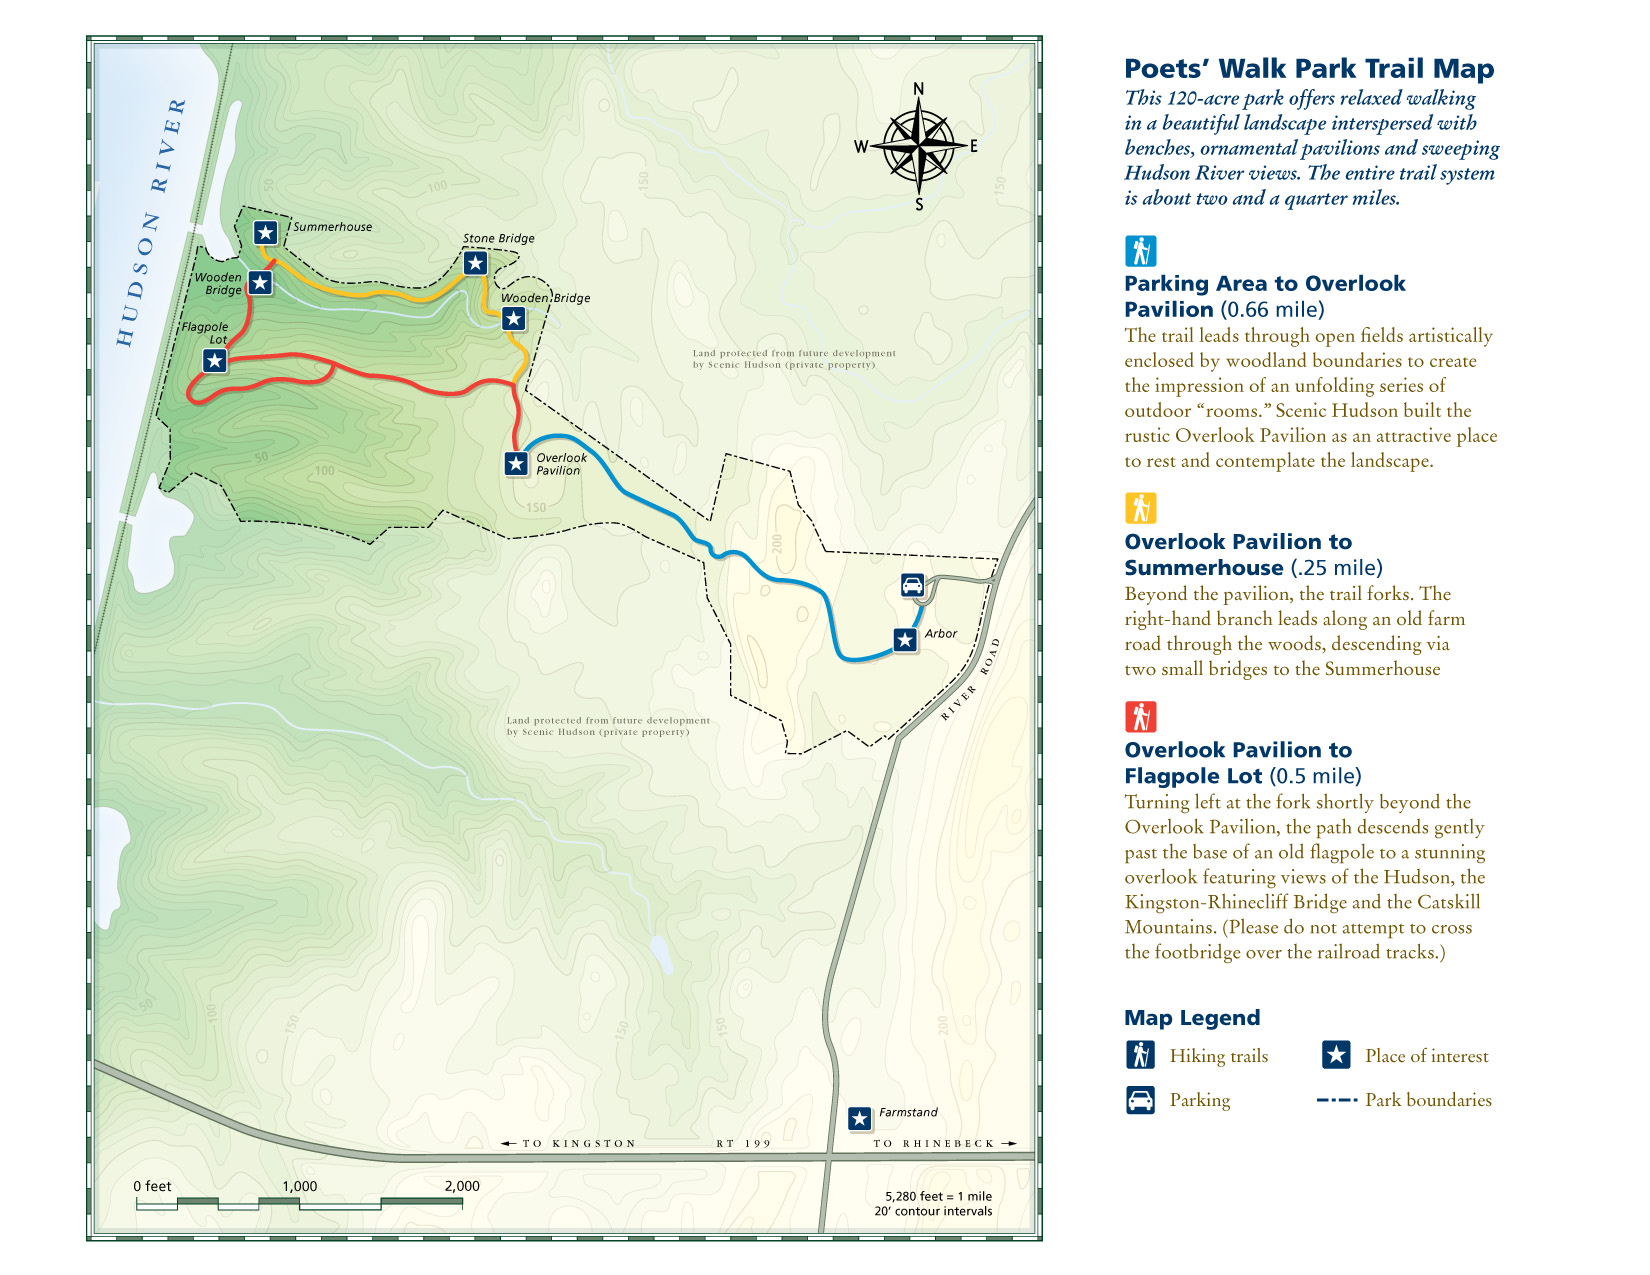
This will bring you to the summit of Jones Mountain at 1.5m. The lookout is a splendid view of the Farmington Valley West to New Hartford.
Continue on the red loop for the rest of the trail. Due to storms, there is a road closure at the time of our hike. This forces you to hop onto the white trail inside the preserve. The white will lead back to the red and right to the parking lot.
Based on what I saw online, there are some monuments and mill ruins along other trails in the preserve if that interests anyone reading this. We chose to just tackle the summit view.
I am enjoying finding new hiking trails in Connecticut. This trail is fairly easy, has a good view, and will get your heart pumping a little bit. Any one looking to get into hiking or just need a break from a strenuous trail, I would suggest this. Fall is officially here as I write this post. This would be a good fall hike as well once the leaves change. Get hiking!
HIKING FOR DONUTS
Hi, I’m Mark. I live in Connecticut. I take new trips every change I get. A good trip has a great hike, great food, and something fun to do. My goal is to search out new trips and share them to inspire others to try something new and exciting.
If you are looking for posts in a particular place, search City or State here.
SEE OTHER POSTS IN ARCHIVE
RECOMMENDED POSTS
RECENT POSTS
See the latest on Instagram and follow @HIKINGFORDONUTS