


Zion National Park Travel Guide - Plan Your Trip
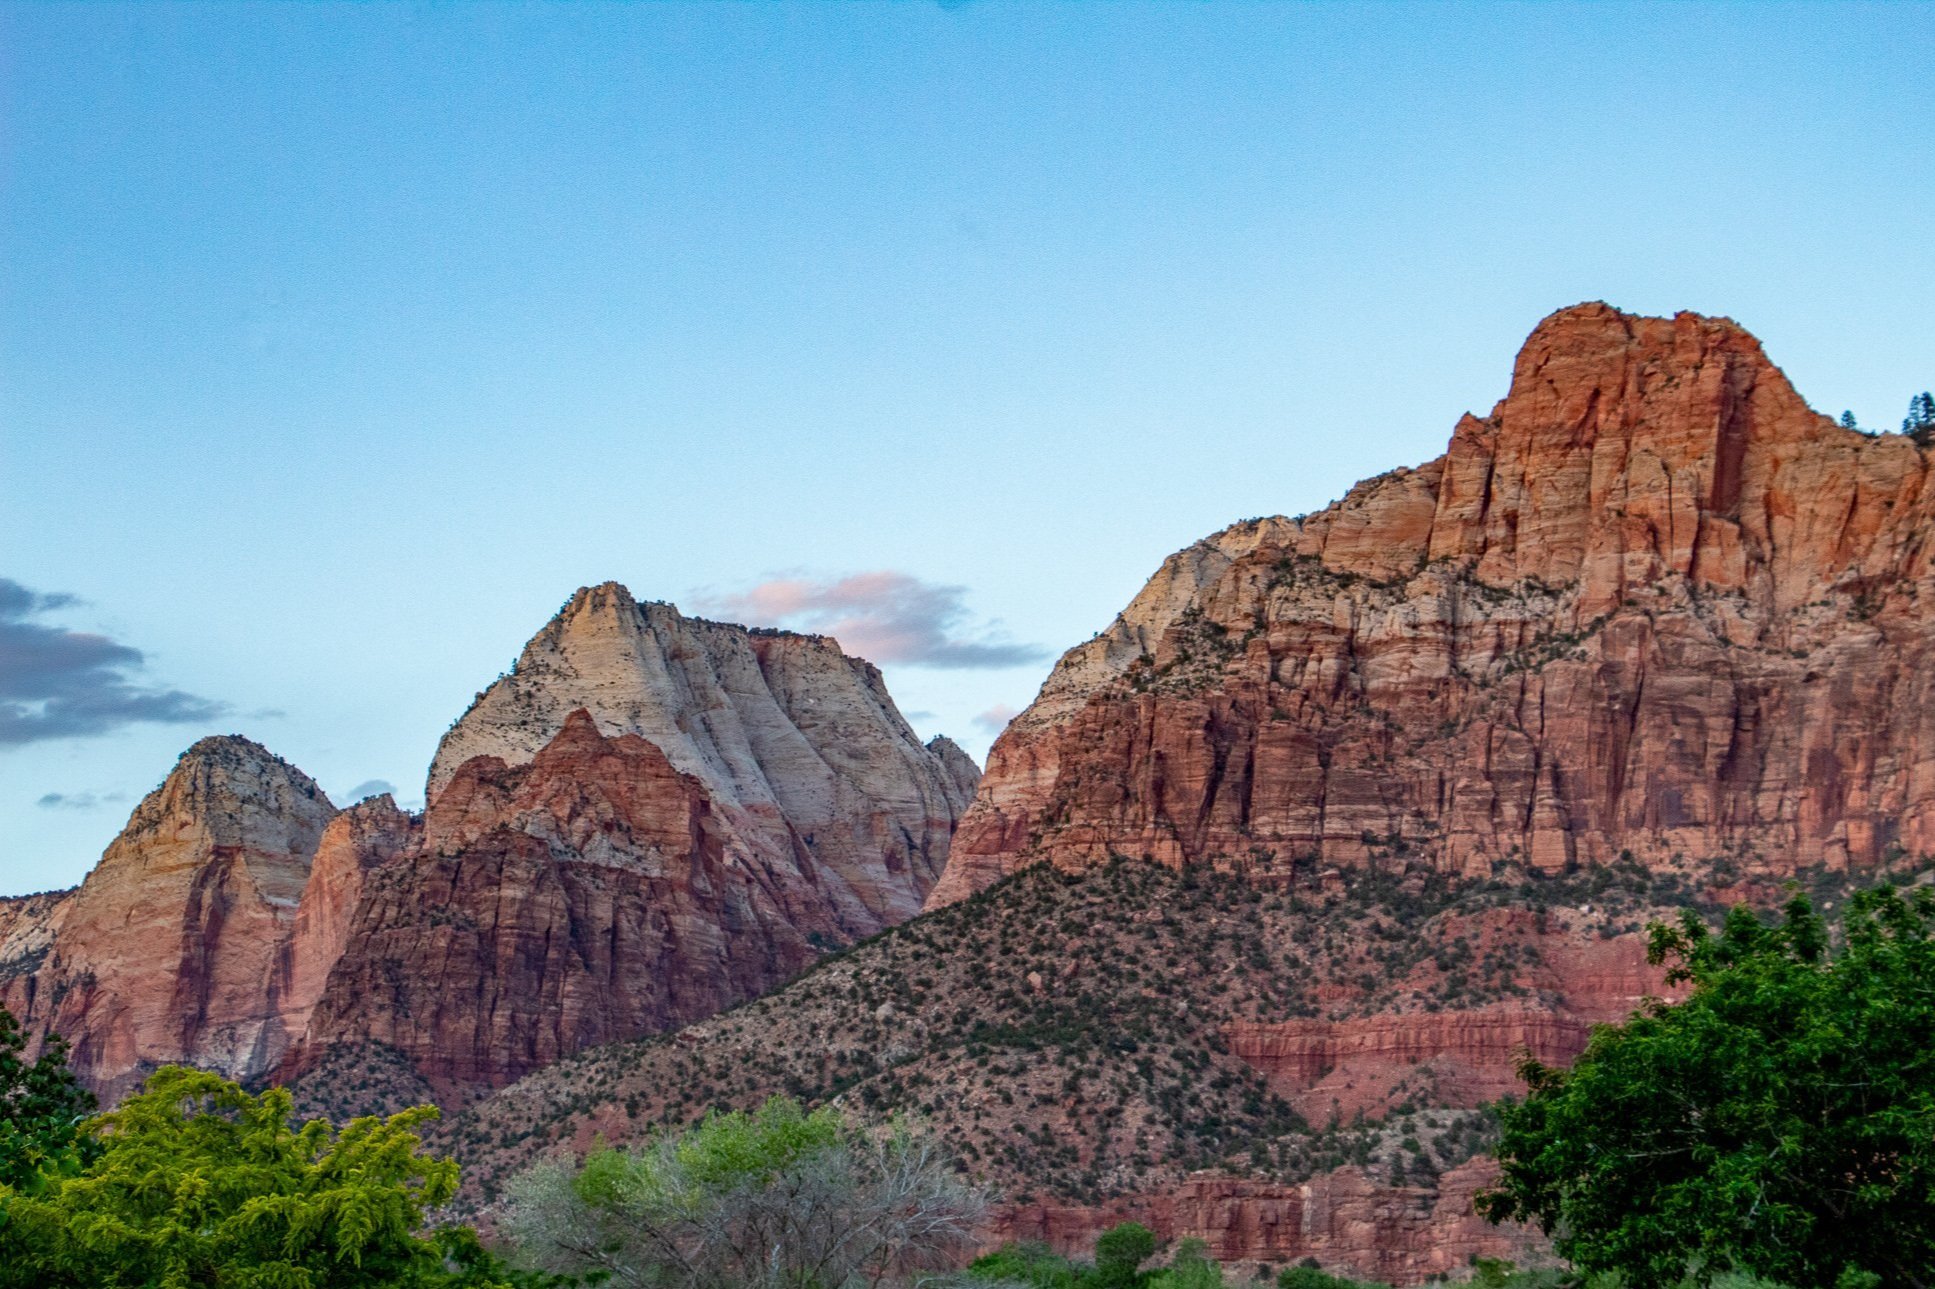
Located in Southern Utah, Zion National Park is one of the most popular National Parks. It has been in the top 3 most visited parks in the US over the past few years and I do not see that changing. Zion is a smaller national park but packs a punch with numerous thrilling hikes and breathtaking views. Lots of easy to moderate day hikes mixed in with some overnight backpacking adventures. Zion is home to many iconic trails such as the Narrows and Angel’s Landing. You don’t even have to hike to see Zion’s beauty. Just driving through the park is amazing. There is really a lot to do in Zion and there is something for all park visitors.
However, like most National Parks, it takes a lot of planning and research to maximize your trip and enjoy all the park has to offer in the allotted time available. There’s a shuttle bus to consider, weather, river flow rates, permits and reservations. In this guide, I hope to provide you with all the best information to have an incredible trip in Zion National Park.
About Zion National Park
Zion National Park is located in Southern Utah with the closest airport approximately 2.5 hours away in Las Vegas. And, the next closest is 4.5 hours away in Salt Lake City. You can either do this as a standalone trip and or make it a road trip for more Utah national parks. My trip included Zion, Bryce Canyon, and Capital Reef from Las Vegas. You will need to rent a car from whichever airport you choose.
Travel Tip: Zion has limited parking. If you have an oversized vehicle, most parking lots are not accommodating. Parking in Springdale and hopping on their free shuttle or Zion Canyon Visitor Center would be my suggestion.
Zion National Park shuttle
The Zion Canyon Shuttle is in operation most of the year, typically mid-February/March to November. During the time frame, cars are not permitted to drive in the Park along the Zion Canyon Scenic Drive. Fortunately, the shuttle operated by the Park Service is free, fast, and easy. You do not need to reserve shuttle tickets. The shuttle drops off at all major trailheads in the park and operates 7 days a week beginning mid-March. For more info on the full schedule and hours of operation, check out Zion's website, https://www.nps.gov/zion/planyourvisit/zion-canyon-shuttle-system.htm.
The Park shuttle departs from the Visitors Center in short intervals. Just hop on and get off at your convenience. Make sure you know the correct shuttle stop for your hike. Lines start building up rather quickly mid-morning to board the shuttle. Sometimes over an hour wait during peak season and holiday weekends.
Travel Tip: Try to get in the shuttle line by 8-9am to avoid long waits for the shuttle, especially if you are doing the Narrows or Angels Landing hikes. Also, make sure to check when the last shuttle time for that before you hike. Shuttle start and end times vary depending on the season. Don’t miss the last shuttle. Or else it is another 4 mile walk to the Zion Lodge and then you need to figure out how to get back to the Visitor Center!
If there is no parking at the Visitors Center, there is a second shuttle system in town, the Springdale Shuttle. This connects the hotels in Springdale with the main entrance of Zion in the case there is no parking.
When to Visit Zion National Park
The best time to visit Zion National Park is in the Spring and Fall. The park’s mild weather is best for hiking. And, the crowds are not as bad. April/May and September/October would be ideal. Both times I went were in mid to late May, where the weather was great and crowds feasible for most of the park.
Summer is the peak visitation of the park where crowds can be excessive. Popular hikes can be unpleasant due to the amount of people on the trail. Also, temperatures can often reach over 100 degrees.
Zion National Park is open all year-round, which allows you to hike in the off-season. The park doesn’t see heavy snow in the winter, but it is not ideal conditions to hike the park due to some trails being icy and requiring traction equipment.
With that said, everyone goes to hike the Narrows. This requires more thought. The trail is typically closed in the March to May timeframe when water levels are high. The weather is cooler and the water is much colder. Same conditions apply for the fall. With that said, my last visit was in the middle of May with air temperatures mostly in the mid to high 80s. The water was cold, about 45-50 degrees,but it was not bad at all since the air temperature was so high. No issues with water levels but always check the weather and prepare to rearrange your trip if needed. Summer is a great time to hike the Narrows because the weather is excellent with high temperatures. The days are longer, shuttles run all the way to 9pm, and the water in the river is at its warmest. However, the monsoon season creates the highest risk of flash floods during this time. This can be done in the Winter but the temperatures, air & water, are much colder. The shuttle bus does not run often, only on certain days. And, snowfall can potentially close the trail.

Best Things to do in Zion National Park
Hike the Narrows
The Narrows leads you through Zion Canyon and the Virgin River with twists and turns through the stunning slot canyon less than 20 feet wide in some areas stretching 15 miles. The “trail” is one of the most popular in the park. There are 2 ways to do this hike, bottom up or top down. Bottom up starts at the Riverside Walk at the Temple of Sinawava trailhead. The hike will continue upstream and the farthest you can go without a permit is Big Springs. This is the route most hikers take. However, for a more adventurous thrill, you can hike the full Narrows top down and a permit will be required. This journey will be 16 miles long and could span over 2 days.
Travel Tip: Catch the Zion Shuttle early. Make sure you watch the weather and bring proper gear for this hike. Do your research!
For more detailed info, including the trail, equipment and more helpful tips, check out my full guide on hiking the Narrows, click here.

Hike Angels Landing
Angels Landing is the most popular hike in the park. Thousands of visitors each year, mostly in the summer, seek out this hike. The trailhead is The Grotto (stop #6 on the Zion Shuttle). This hike is strenuous coming at about 5.4 miles round trip. The elevation gain is 1500 feet. The popularity of the trail due to not only the picturesque view but the thrilling journey to the top. The hike consists of chain-assisted rock scrambling sections and uphill switchbacks. With the final climb scaling a narrow ridge high above the valley floor. This is not for the faint of heart. If you have a fear of heights, this one may not be for you. At the time of my visit, there were no permits and the trail was pretty packed where people were literally on top of each other so I chose to skip. I did not feel comfortable or compelled enough to attempt the\is hike with hikers on my heels the entire time. Since that time, permits are now required via a lottery system. Both seasonally and the day before your planned hike. It costs $6 to enter an application and if you are one of the lottery winners, you will pay $3 per person.
Hike to Observation Point
For some of the best views in the park, the entire hike to Observation Point is stunning. However, the hike is extremely challenging at 8 miles long and 2300 feet of climbing. The climb is steady until the final viewpoint. The trailhead is Weeping Rock (stop #7 on the Zion Shuttle).
More Hiking
Zion National Park is full of so many great hikes. Everyone focuses on the Narrows and Angels Landing but there are others that offer a great hike and amazing views. The hike we were suggested to do by the ranger was The Watchman Trail. I don’t see too much mention of this hike on other guides and I don’t understand why. I felt every bit like I was immersed into Zion as the others do. The trail starts at the Visitor center and slowly climbs with switchbacks and moderate inclines. The total round trip is 3.3 miles. There is a small ¼ mile loop at the end of top of the one way that takes right under the Watchman.
If you have read my guides before, I like to get the best bang for my buck sometimes hiking. They don’t all need to be 8 milers to get the wow effect. The Canyon Overlook Trail is a 1 mile out and back that offers one of the best views in Zion. This trailhead is located on the opposite side of Zion Mt. Carmel Tunnel on Highway 9. You will need a car as the shuttles do not run on this side of the park. This trail starts with climbing a series of steps before walking beside the steep drop-offs of the Pine Creek slot canyon. Eventually, this will lead you to the amazing view at the summit.
Travel tip: Go early or go later in the day for the Canyon Overlook Trail. There is not a lot of parking here.
Looking for something less intense, flat, and has views, the Pa’Rus Trail is for you. The paved trail connects the Zion Canyon Visitor Center and Canyon Junction. The trailhead starts near the Watchman Campground and follows the river for just under 2 miles and ends at the Canyon Junction tram stop. It is accessible for wheelchairs, pets on leashes, and bicycles. The trail crosses the river a few times and wanders through the marvelous landscape of Zion Canyon. This trail should not be overlooked.
Other hiking options include Emerald Pools, Weeping Rock, Riverside Walk, Hidden Canyon, West Rim Trail (full day hike), and The Subway (permit required). As always, check Zion’s website for any closures before planning your trip.
Drive the Zion-Mount Carmel Highway
From the Canyon Junction to the East Entrance, this winding scenic drive is amazing. Along the switchbacks between Canyon Junction and the tunnel you have great views of Zion National Park and ample opportunities to pull over for impressive views. There is a $15 fee for oversized vehicles to drive through the tunnel. An oversized vehicle is any vehicle that is 11 feet 4 inches or higher and 7 feet 10 inches wide or wider. If your vehicle is taller than 13 feet 1 inch you cannot pass through the tunnel.
Explore Kolob Canyons
Kolob Canyons is the less visited area of the park in a smaller section that sits to the north of Zion Canyon Scenic Drive. There is another visitor center here and there are a few hiking trails.
Other activities include horseback riding, canyoneering, biking down Zion Canyon, and a jeep tour.

Where to Stay
There is only one lodging option to stay inside Zion National Park, that is Zion Lodge. This includes cabins, hotel rooms, and suites, plus an on-site restaurant and cafe. Also, the shuttle services the lodges multiple times a day. If you are looking to stay here, this will need to be booked far in advance. Reservations open up 12 months or more in advance! In addition, guests of Zion Lodge are allowed to drive their car through the park to reach the lodge, unlike the other visitors at Zion.
The more common choice is to stay in Springdale, which is outside of the park’s Southern entrance. Springdale offers a wide range of lodging, from motels to luxury resort-style rooms. The small town is very welcoming for all the tourists and has a lively scene including many restaurants, breweries, and bars. In my opinion, it is one of the best National Park towns. Due to the proximity of the park, rooms fill up rather quickly. I would book as far in advance as possible. For more affordable options, the Driftwood Lodge is a great option. If you want more luxury, the Cliffrose Lodge and Cable Mountain Lodge are walking distance to the park’s entrance. My last stay was at Cable Mountain Lodge so I can speak to that personally. It was amazing, super convenient, and had nice views. It was cool to enjoy the pool at night under the red rocks. It was a little more pricey than most but we walked to the entrance most days (5 minute walk) and did not have to worry about parking. You will still need a car to explore other areas of the park/hikes, but not always. Also, the lot across the hotel had a grocery store, brewery, and Zion Narrow rentals. All things of need!
If you like to camp, I may not be the guy but here’s some brief info. Zion National Park has 3 in-park campgrounds: Lava Point, South, and Watchman. The South And Watchman campgrounds are less than 1/2 a mile from the Visitors Center at the entrance of the park. Hence, the most popular. Sites are $20 for tent camping or $30 for a site with an electric hookup. All sites have picnic tables, a fire pit, and access to potable water, bathrooms, and trash containers. No showers are available at the campsites. The Watchman campground has 190 campsites and reservations open 6 months in advance. South Campground offers 117 campsites and reservations open 14 days in advance. Both reservations can be made at https://www.recreation.gov/camping/gateways/2994, or calling the reservation line at 877-444-6777. Lava Point Campground is typically open May through September, weather permitting. This campground is located in the Kolob Canyons part of the park, roughly 1.5 hours away from the main visitor center. There are 6 primitive campsites available to reserve. For more info on all camping, Zion’s website is very helpful and detailed and up to date on closings, https://www.nps.gov/zion/planyourvisit/campgrounds-in-zion.htm.
Where to Eat
After adventuring and hiking all day, this guy needs a good meal. Sometimes it is hard to find when visiting a National Park. However, Springdale offers many options and varieties for restaurants. And, I would venture to say some of the best food spots near a National Park. Depending where you stay on the lodging strip, you could walk or it is a very short drive generally. There is a Thai restaurant near the South Entrance called Thai Sipa, which is pretty good. After some early hiking and needing a late lunch, we went to MeMe’s Cafe. This is a quaint cafe offering options such as burgers, bbq sandwiches, & crepes for breakfast. I recall having a pulled pork sandwich with a slice of pineapple, cheddar cheese, and teriyaki sauce. It was called MeMe’s Hawaiian Sandwich. My favorite spot was Whiptail Grill. This is a Mexican cantina that is very unassuming as this is a converted gas station. I had my favorite meal here. The Whiptail Burrito was one of my favorite burritos I have had. In addition, the Southwest Taco Salad is insanely good. The salad is served in a grilled flour tortilla with mixed greens, black beans, and rice. Topped with house-made vinaigrette, pico, queso fresco and crispy tortilla strips. Highly recommend it.
If you are a coffee fanatic, coffee shops are all over. If you are looking for some baked goods or ice cream, they have it. There is something for everyone, which is rare for a town next to a National Park. Other good options to dine include: Oscar’s Cafe, Kings Landing Bistro, Spotted Dog, Park House Cafe, Zion Canyon Brew Pub, Bit & Spur, Zion Pizza and Noodle Co., and Switchback Grille.

HIKING FOR DONUTS
Hi, I’m Mark. I live in Connecticut. I take new trips every chance I get. A good trip has a great hike, great food, and something fun to do. My goal is to search out new trips and share them to inspire others to try something new and exciting.
If you are looking for posts in a particular place, search City or State here.
SEE OTHER POSTS IN ARCHIVE
Archive
RECOMMENDED POSTS


RECENT POSTS


See the latest on Instagram and follow @HIKINGFORDONUTS

Zion Narrows Hiking Guide for Beginners, Zion National Park
The Zion Narrows is not an everyday hike. The hiking is different, the planning is different. Without question, this is one of the most popular hikes in Zion National Park, if not all of the National Parks. And, one of my personal bucket list hiking adventures. I wanted to put together a guide of knowledge that I thought was helpful for me before I attempted this hike. There will be lots of items below that may seem intimidating. But I am telling you, this hike is something that you will remember forever. One of the best experiences I have had hiking and I hope the same for anyone else who takes on this adventure. For more on Zion National Park, check out my full park guide to plan your next trip, click here.
About the Zion Narrows
The Narrows is a popular “trail” that leads you through Zion Canyon and the Virgin River with twists and turns through the stunning slot canyon less than 20 feet wide in some areas stretching 15 miles. Red canyon walls tower thousands of feet above, catching sunlight that lights up the otherwise dark passageway. Most of the journey you’ll be ankle-deep in water, but depending on the river’s flow that day there may be some chest-deep or even swimming sections. Proper planning and gear is important for this hike.
The Narrows hike stretches 16 miles from start to finish. However, depending on your route you can hike up to what you are comfortable with. There are 2 ways to do this hike, Bottom-Up or Top-Down. Bottom-Up is the most popular and can be a day hike, as you can turn around when you want. Top-Down could be a very long and challenging day hike or most likely an overnight, two day backpacking trip.
This hike is unlike any other. It is a full on adventure. For instance, there is a lot more to think about hiking the Zions Narrows: water flow rates, flash floods, gear, permits (if applicable), and walking miles on rocks in a river. This may sound daunting but I assure you this experience can be enjoyed by all levels of hikers. I cover all of this in my guide so you can feel comfortable and knowledgeable for the best experience.
HOW TO GET THERE
For the Bottom-Up route of this hike, the roads to the Narrows trailhead are closed to the public and only buses are permitted. Hence, you will need to take a shuttle to get to The Temple of Sinawava trailhead. You will have to park at the Visitor Center, which is near the West Entrance of the park closest to the town of Springdale. The Visitor Center is located inside the park and has its own parking lot. If that parking lot is full, you can try to park in a lot outside of the park and walk over.
At the Visitor Center, the Zion Canyon Shuttle to The Temple of Sinawava trailhead is available free of charge. This is a first come, first serve shuttle. Once on the shuttle, get off on shuttle stop #9, which is the last stop. The shuttle ride from the Visitor Center to the trailhead is approximately 45 minutes.
Hiking Tip: You want to get on this early in order to spend ample time on the hike. Depending on the day/season, this could be overwhelmingly busy. I recommend getting on the shuttle by 8-9am in order to start the hike no later than 9-10am.
If it is a busy time and the wait is cutting too much into your hiking time, another option is to book through an outside shuttle company like Zion Guru, who are permitted to enter the road to the trailhead of the Narrows. This option will cost you more as a roundtrip ticket will cost about $40 per person, but it’s a solid option to avoid potential busy lines for the Zion Canyon Shuttle.
The Top-Down trailhead starts at Chamberlain’s Ranch. This requires a second vehicle or paid shuttle. It takes one hour and 30 minutes to drive from Springdale to Chamberlain’s Ranch.
Hiking Tip: Don’t miss the last shuttle. Or else it is another 4 mile walk to the Zion Lodge and then you need to figure out how to get back to the Visitor Center!
Best Time to Hike the Zion Narrows
In the Spring, the trail is typically closed in the March to May timeframe when flow rates are high from the snow melting and spring run-off. This could vary based on the winter weather conditions. Also, the weather is cooler and the water is much colder. And, yes flow rates are yet another thing to worry about prior to hiking. When the water flow is low, hiking is easier. The flow rate of the Virgin River is measured by Cubic Feet Per Second (CFS). The river is open with flow rates 0-150 CFS, which is considered to be safe hiking rates for bottom up hikers. For top down hikers, flow rates of 0-120 CFS is considered safe. Under 50 CFS is considered easy and over 70 CFS makes the hike a lot more challenging with the faster current and higher water levels. The park’s website will have this info daily as well.
Summer is a great time to hike the Narrows. The weather is excellent with high temperatures. The days are longer, shuttles run all the way to 9pm, and the water in the river is at its warmest. However, the park is crowded this time of year and the weather can be scorching. In addition, the monsoon season creates the highest risk of flash floods during this time.
Fall is another great time to hike the Narrows. The crowds start to diminish and the flow is at his lowest in the river. However, the air temperature goes down as does the water temperature. On September 30, the last shuttle pick-up time of the day is 7:15 pm, cutting your adventure by 2 hours.
This can be done in the Winter but the temperatures, air & water, are much colder. The shuttle bus does not run often, only on certain days. And, snowfall can potentially close the trail.
Personally, me and my wife went in the second week of May and everything worked out great. It was high 70s to mid 80s, which to me felt like 100 degrees! The temperature of the water was cold, roughly 45 degrees, but the gear we chose helped us not even notice how cold it was.
Before you go: Flash Floods
Monitoring the forecast for rain is one of those extra items to worry about if you are looking to hike the Zion Narrows. With rain, the potential of a flash flood in Zion Canyon is very possible. However, Zion National Park does a great job providing info on their website and issuing flash flood warnings. Even with a clear blue sky, the Narrows can close due to a rain forecast nearby.
There are sections of the Narrows with no high ground. Water levels rise very fast when a flash flood occurs in the canyon. There have been deaths with hikers being caught during a flash flood. I do not think this should deter but always proceed with caution. Always check the weather and the flash flood potential before planning your hike.

Can Beginners Hike the Narrows?
In short, of course! A lot of the information and what you read may sound frightening compared to most hikes, but the key to this hike is preparation. I couldn’t wait to hike this but my wife did not have that same sentiment. We just made sure to check all of the boxes that made us both comfortable. If that didn’t happen, we would probably haven’t done it. We researched the gear, watched the weather, spoke with Rangers on the flow rate and we were good to go.
To be honest, the trickiest part is your footing on the rocks in the water and any current that comes along. There is no elevation to worry about. Tons of hikers of all levels, children with families and older people. At any time, you can just turn around and head back.
It’s simple, if all the boxes don’t check, don’t go. But if they do, I highly recommend the time of your life and a memorable experience you will not forget.
WHAT GEAR DO I NEED?
At this point of my life, sometimes it is better to take the easy route. I researched and researched all the gear needed for the Narrows hike. And, it was a lot. Lugging that around on the plane and then spending the extra money on items I don’t have and would possibly never use again. My very smart wife said, stop being stubborn and let’s just rent it. That’s what we did and I have zero regrets. We would have enjoyed our hike less without all the gear I may not have purchased myself. No stress, just enjoyment.
There are quite a few rental equipment companies near the park. Our hotel was a 5 minute walk to the South Entrance and there was a Zion Outfitters across from the hotel, where we saw countless hikers each day go and rent for the Narrows. What they suggest to use, I would say is 100% needed. There are multiple rental options. What we went with was the Dry Bib package, which costs $55 per person that includes: Dry bibs (waders), Adidas Hydro Lace Canyoneering Boot, 5mm Neoprene Socks, and a Wooden Hiking Stick.
The Narrows bottom-up is quite the unique challenge in comparison to most hikes. You will be hiking in a river. Proper footwear, accessories, and clothing are essential.
Shoes - It’s all about grip and traction on the rocks. Canyoneering boots are waterproof and designed for the slippery conditions of this hike. I could not see myself getting by without them. You could use anything you want, but these are optimal for beginners in my opinion.
Neoprene Socks - These socks are very tight, waterproof socks that protect your feet and keep water from entering your boot. This will help prevent blisters. And, depending on the water temperature, keep your feet from getting cold.
Clothing - During the colder months, dry pants will help keep you warm and dry. Hence, we went with the full waders through the rental company. Quick dry, light clothing will be helpful as you go further and the water rises up or if you end up falling in. Bring extra layers as the canyon can get chilly, such as a light jacket, even in summer months.
Walking Stick - The rocks are darn slippery. The hiking stick helped me not fall flat on my face and keep my balance.. If you have your own hiking poles, make sure they are very sturdy.
Dry Pack or Waterproof Bag - This will be everything carrying necessary items such as water, snacks, extra clothes, and sun protection. Snacks and water are necessary if you will be hiking most of the day.
Waterproof Cell Phone Case - This was helpful so I could take pictures without fear of dropping my phone. I did not have it in me to bring my camera along for the trek with concerns of the water. But I did not see a few brave hikers with expensive cameras willing to risk it all.
2 WAYS TO HIKE
From the Bottom Up: This is the route most people will take. By far, the more popular of the two. No permit required. Taking the Zion Shuttle to The Temple of Sinawava trailhead, start at the Riverside Walk. This will lead you upriver for several miles. When you have taken in all the scenery, simply turn around and go back the same way you came. The farthest you can go without a permit is Big Springs, which will make your journey roundtrip 9-10 miles.
From the Top Down: This is for the adventurous hiker. A permit is required for this route. This is a 16 mile trek one way from Chamberlain’s Ranch to The Temple of Sinawava. If you make this a two day hike, you will reserve your campsite when you reserve your permit. For permit details and other info on this hiking route, I suggest doing a quick google. Lots of info out there by some good bloggers/websites. I did not take this route so I can’t speak in depth.
THE HIKE BOTTOM-UP
Trail Info: Distance: up to 9+ miles (1-8 hours) Difficulty: Moderate to Strenuous (depending on water flow/distance) Trail Type: Out & Back Permit required: No Elevation: Mostly flat
The Zion Shuttle will drop you off at the last stop, the Temple of Sinawava, where the trail begins. The first mile will be paved on Riverside Walk along the Virgin River. After one mile, there is a drop off and it’s time to enter the river. This can be a crowded start as all the other hikers on the bus will be right with you. Take your time. The water is cold and the rocks are slippery immediately. Acclimate yourself to the rocks before you increase your pace. I almost fell a few times. Unfortunately for my wife, she took a fall right in catching herself enough to keep her face dry. Her upper body was pretty cold after that.
Sometimes you will walk on small rocks and other areas in the hike will be larger rocks. It is flat but the terrain does change. Then add in the water levels. Sometimes it is ankle deep, knee deep, or even waist deep. Sometimes it’s deeper or more shallow depending on the time of the year. There are even areas where you can swim, but we did not reach that far into the canyon. We went in May and it got up to my thighs and my wife’s waist at its highest. Given, we are shorter people.
The further you go into the canyon, the more narrow it gets. The beginning is the most crowded part of the hike for the first mile or two. The farther you go, there will be less crowds. The first landmark you will come across is Mystery Falls. This is a very small waterfall that flows down the canyon walls into the Virgin River about a half mile into the river. I mean small, you could easily miss it.
The next section is Wall Street, the most popular and well-known part of the hike. This is also the most narrow section of the hike, just after the Orderville Canyon junction. The canyon walls are only 22 feet apart. There is no land to go on, just water so be cautious about flooding here. This is about 2 miles into the water, 3 miles total from the trailhead. Most hikers reach this point and turn around.
The last known landmark is Big Springs, about 3.5 miles into the water. This the furthest you can go on the Bottom-Up route of the Narrows. A permit is required to proceed past this.
You can turn around any time. If it feels too difficult or not safe, just head back to the trailhead. Even hiking the shortest amount in the water will give you amazing views that other hikes do not offer.
ADDITIONAL TIPS
Before you go, always check Zion National Park’s website for conditions and closings, https://www.nps.gov/zion/planyourvisit/index.htm.
The shuttle season is typically from March to November.
Use the bathrooms at the Temple of Sinawava before you start. There are no bathrooms or privacy once you are in the river.
Be prepared to get wet. Your feet and parts of your lower body will be submerged in water, or your whole body if you fall in! Dress appropriately as the water can be very cold. And, bring spare clothing and shoes for after the hike.
Leave no trace! Please ensure to clean up after yourself.
HIKING FOR DONUTS
Hi, I’m Mark. I live in Connecticut. I take new trips every chance I get. A good trip has a great hike, great food, and something fun to do. My goal is to search out new trips and share them to inspire others to try something new and exciting.
If you are looking for posts in a particular place, search City or State here.
SEE OTHER POSTS IN ARCHIVE
Archive
RECOMMENDED POSTS

RECENT POSTS
See the latest on Instagram and follow @HIKINGFORDONUTS