


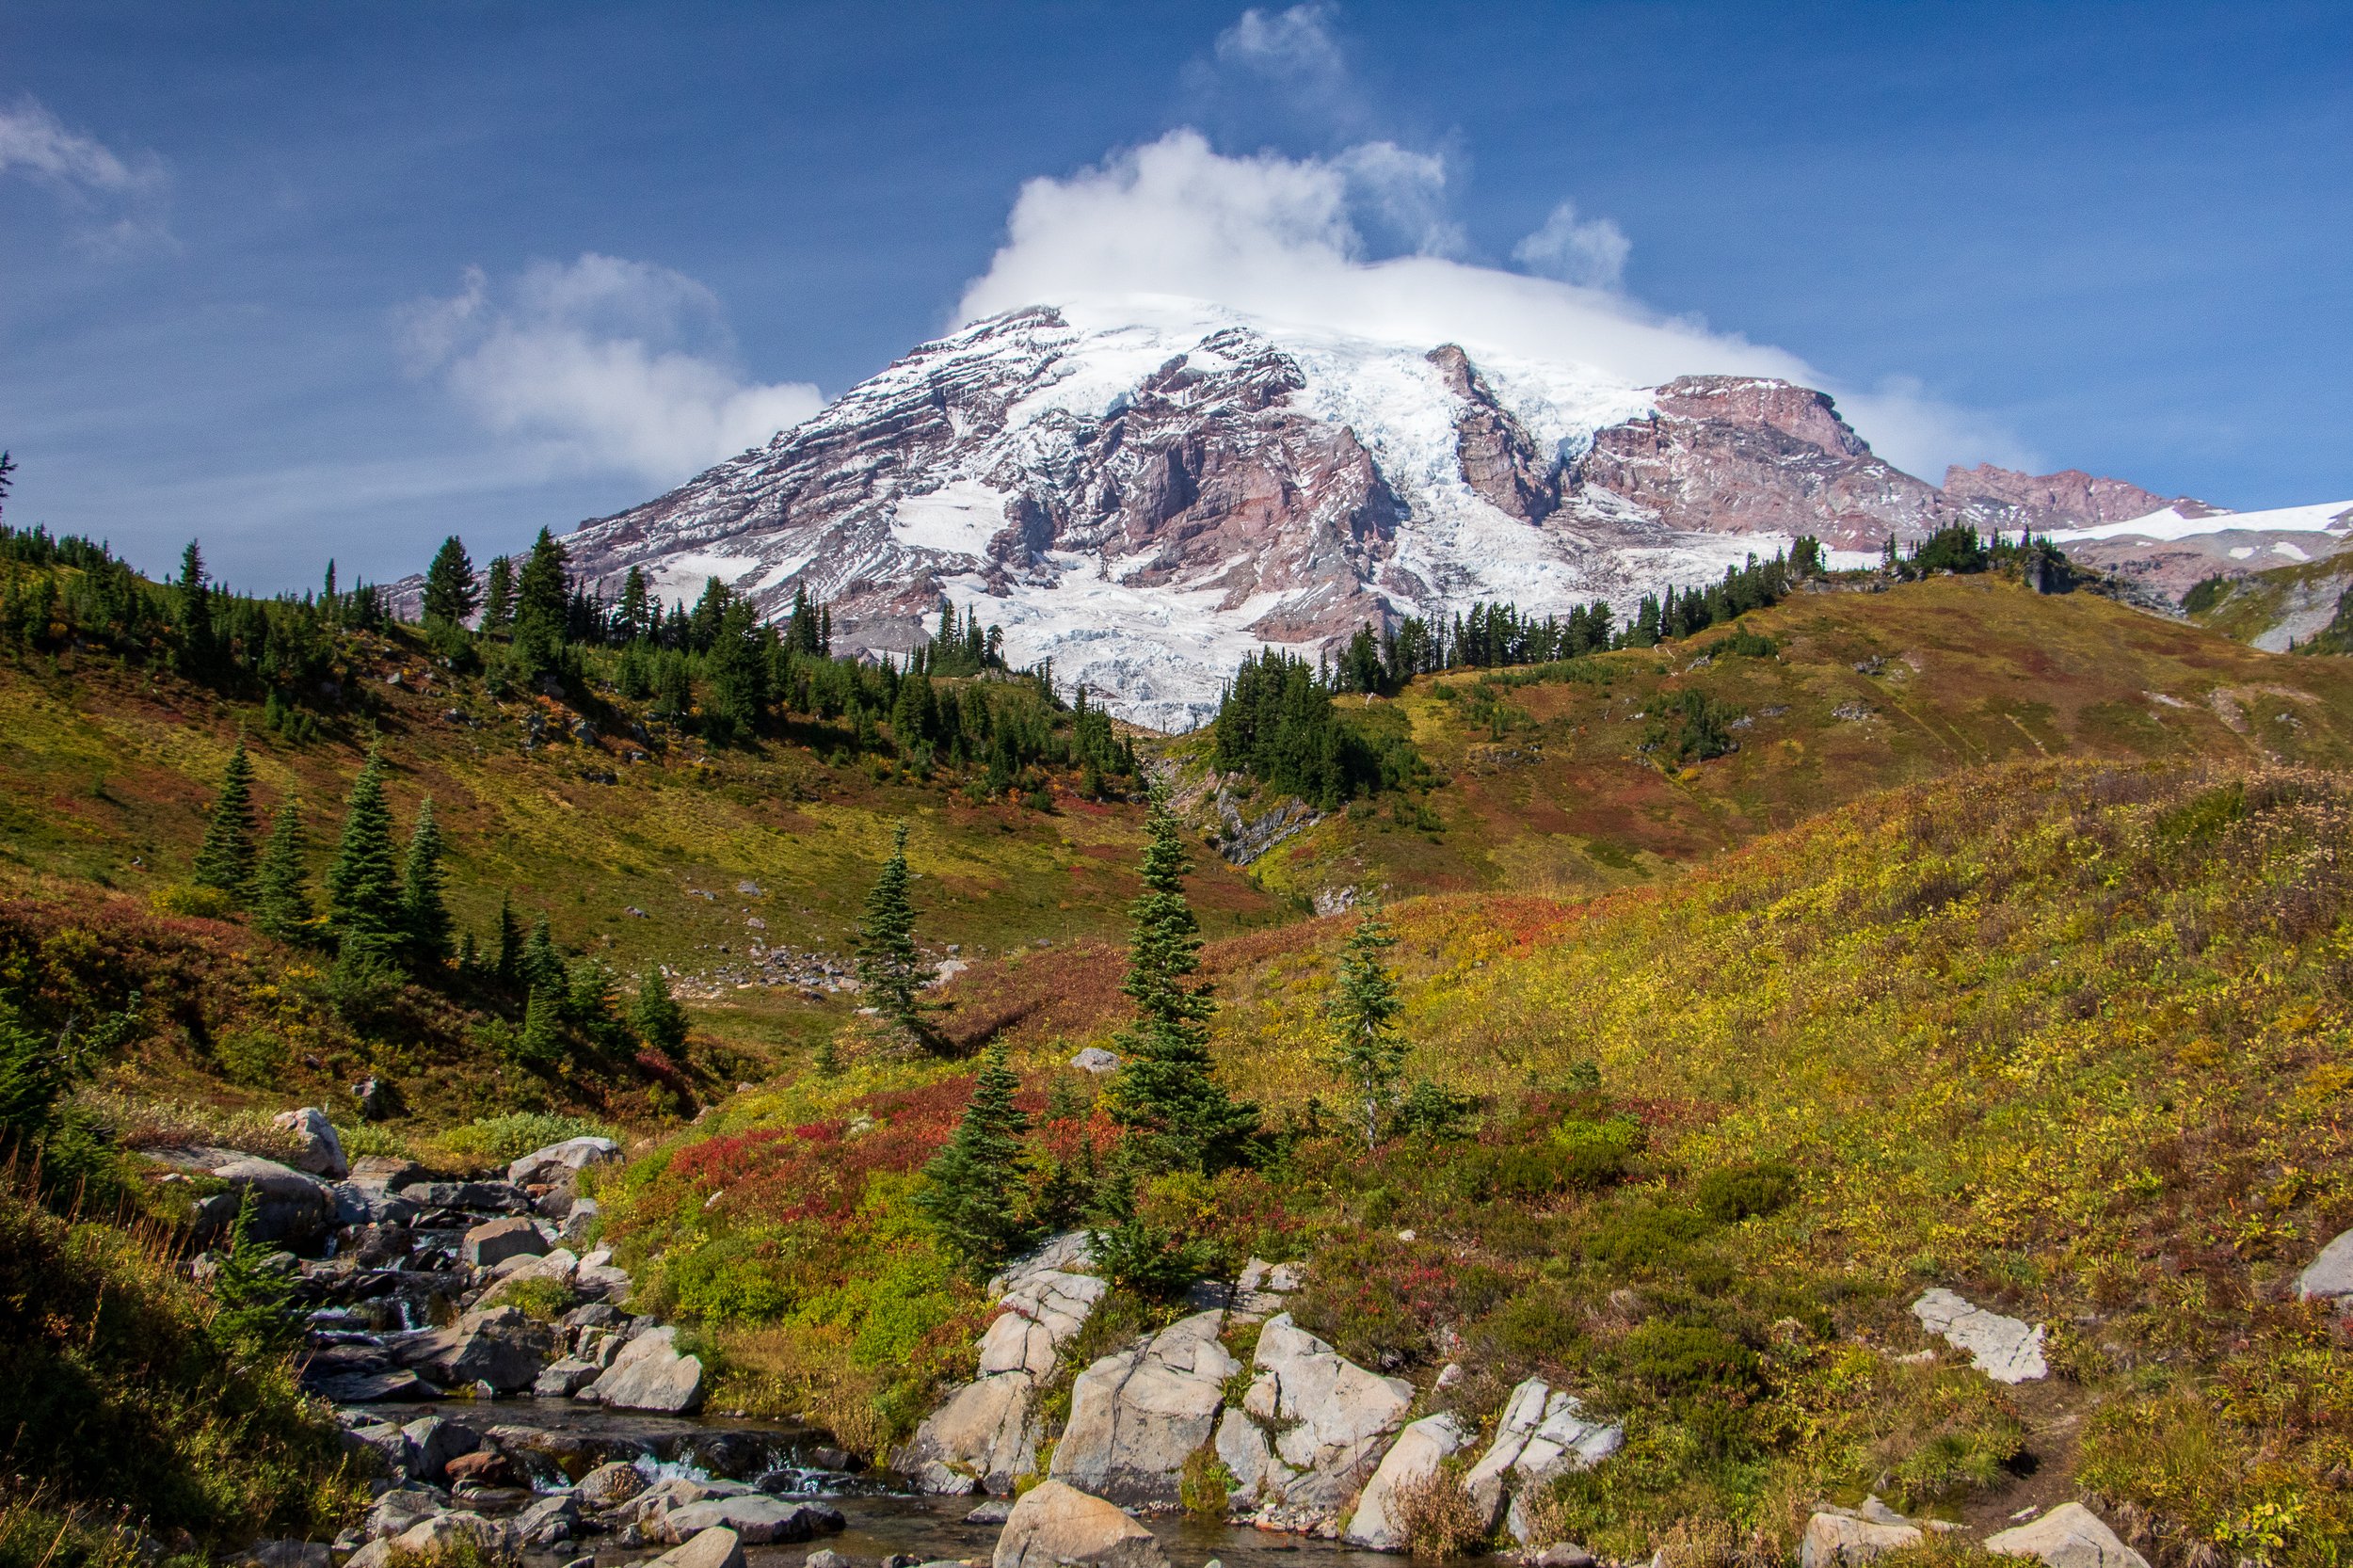
3 Easy Hikes in Mount Rainier National Park
Mount Rainier National Park is one of the most beautiful parks in the United States. It’s got mountain views, rivers, waterfalls, old-growth forests, and meadows of wildflowers in the summer months. To say I was ecstatic to visit for the first time would be an understatement. However, this turned out to be a very interesting trip to plan and taught me some valuable lessons. One month before the trip, my wife tore her ACL hiking. I spent so many hours planning and like that, I had to shift plans. Credit to my amazing wife, she still wanted to go to Mount Rainier as planned and make the best out of it. Would I like this to be a full blown guide of the park? Of course. But stuff happens and guess what? Trips always work out. Our trip consisted of lots of driving through the park over 3 days and as many easy walks as possible as my wife was still able to put some pressure on her leg (she had surgery the week we came back). And, we still had an absolutely amazing time. The park is so big that we barely covered it. Sticking to the easier things to do in the park, I realized not every trip has to be insanely packed and hiking crazy to enjoy it. National Parks are for everyone. You don’t need to even hike too much if at all to enjoy it. I saw so many families and many elderly enjoying the park. For me, that is what it is about and I hope to be in my 70s-80s enjoying National Parks still. With that said, we were able to find some easier hikes with amazing views.
Some brief info on the park. Mount Rainier National Park is about 2-3 hours from Seattle based on the entrance you choose and a good 3 hours from Portland, OR. The best time to go to the park would likely be July to October. I would lean toward August or September but it really is a gamble. It was only clear and sunny one day when I visited and the other 2 days were cloudy, rainy, & foggy, and Mount Rainier was covered by the clouds. The park is huge and has 5 main sections: Longmire, Paradise, Ohanapecosh, Sunrise, and Carbon River/Mowich. Paradise is the most common and has the main park visitor center. Always make sure to check for closures and weather. For instance, one of the hikes I will be recommending, Grove of the Patriarchs, is currently closed for the rest of 2022.
As stated above, the Nationals Parks are really built for everyone these days. There is so much to see and you don’t need to do long or difficult hikes to get incredible views. If you want to get the best experience out of Mount Rainier National, here are 3 easy hikes that will be quick and fulfilling. Plus, a bonus viewpoint that may be one of the coolest areas to photograph in the park.
Myrtle Falls via Skyline Trail
Distance: 0.8 miles Trail Type: Out & Back
Getting to Myrtle Falls is a simple out & back from the Paradise parking area. Starting at the Skyline Trail on the paved portion heading east for about 0.4 miles and then crossing a small footbridge over Edith Creek Basin. Take a left off the path for the Myrtle Falls viewpoint. This is one of the popular waterfalls in the park standing at 60 feet with Mount Rainier standing tall in the background. This short hike is mostly all paved with little incline so this is for all ages and families looking to get amazing views.

Nisqually Vista Trail
Distance: 1.1 miles Trail Type: Loop
The Nisqually Vista Trail, located in the lower Paradise parking lot by the Henry Jackson Visitor Center, offers stunning mountain views and the trail is filled with wildflowers. There are several lookouts to view Mount Rainier, the Nisqually River, and potentially the lower reaches of the Nisqually Glacier. There is not much elevation to this trail and is one of the only paved trails in the park. This is another family friendly option and strollers are welcome starting from the upper Paradise parking lot, which has ramps to access trails.


Grove of the Patriarchs Trail
Distance: 1.1 miles Trail Type: Out & Back
The one word I felt walking along the Grove of the Patriarchs Trail was enchanted. Walking through the forest, the bright green color everywhere, all the moss, and of course the massive trees! This short hike is located on the Southeast section of Mount Rainier National Park. The trail meanders along the Ohanapecosh River that takes you to a suspension bridge to a small island destination. Here you will be surrounded by Douglas-firs, silver fir, hemlock, and Western red cedar trees. Some of the large trees can be 40-50 feet in diameter and over 300 feet tall. A very unique and breathtaking trail that is very flat for all ages to explore in the park.


Bonus: Reflection Lake
Another easy to access destination with amazing views is Reflection Lake. Located off Steven Canyon Rd, a few miles from the Paradise turnoff, just a short walk from the car is a perfect photography opportunity of Mount Rainier reflecting in the water. A great spot for sunset or sunrise. There are connecting hiking trails around the lake but all is needed is a view off the road. Definitely a bucket list stop in Mount Rainier National Park. My personal favorite of my trip even with the cloudy weather.


HIKING FOR DONUTS
Hi, I’m Mark. I live in Connecticut. I take new trips every chance I get. A good trip has a great hike, great food, and something fun to do. My goal is to search out new trips and share them to inspire others to try something new and exciting.
If you are looking for posts in a particular place, search City or State here.
SEE OTHER POSTS IN ARCHIVE
Archive
RECOMMENDED POSTS

RECENT POSTS


See the latest on Instagram and follow @HIKINGFORDONUTS

Acadia National Park Guide - Best Things to do
Acadia National Park is located along the rocky coastline of Maine and is the only major national park in the northeast. The beauty of the rugged coastline along with the variety of ponds, lakes, forests, and granite peaks are home to some stunning visuals. And, of course, a hiker’s dream with unique and exciting hiking trails that offer breathtaking views or easy strolls along the coastal paths. I can’t believe I waited so long to visit. My national park philosophy is the closer it is, the more opportunities I would have to visit. Thus, I put off Acadia. It took a major life change from a global pandemic for me to make the time to drive up to Acadia. My wife and I decided to take a long weekend trip and visit last October to check out some of the fall foliage. With only a few days to explore, we had an action packed itinerary and were able to enjoy lots of what Acadia National Park has to offer. This guide is based on what we did. However, there is additional info that will give you the tools you need to plan a short or long trip along with some practical tips.
Beehive Trail Summit views
About Acadia National Park
Acadia National Park comprises 3 regions: Mount Desert Island (MDI), Schoodic Peninsula, and Isle au Haut. The majority of the park is located on Mount Desert Island and is the easiest to access from Bar Harbor, the main town where tourists stay. Schoodic Peninsula is the area to visit if you want to get away from the crowds and is about an hour ride from Bar Harbor. Isle au Haut is a remote island only accessible by ferry. It takes a full day to visit Isle au Haut from Mount Desert Island.
The park costs are $30 per car, $25 per motorbike, and $15 per individual coming in on foot, valid for 7 days. Acadia National Park is open year round, however, roads and visitor centers close from late fall to spring.
Travel tip: Stop at the visitor center and get a map. Talk to some rangers to get info on hikes or destinations within the park.
How to Get to Acadia National Park
Acadia National Park is found in Maine’s Mount Desert Island, off the east coast of Maine. The closest city to Acadia National Park is Bar Harbor.
Car: This is the most convenient way to get to the park. And, in my opinion, the best way to travel so you can go wherever you want within the park at your leisure. It is approximately a five-hour drive from Boston, Massachusetts, a three-hour drive from Portland, Maine, and an eight-hour drive from New York City.
Flying: The closest airports to Acadia are as follows:
Hancock County/Bar Harbor Airport (BHB)- 8 miles
Bangor International Airport (BGR)- 50 miles
Portland International Jetport (PWM)- 173 miles
Boston Logan International Airport (BOS)- 274 miles
Travel Tip: If you can not find parking or do not want to have a car, there is a park shuttle that runs during peak season. The shuttle includes stops in Bar Harbor, Hulls Cove Visitor Center, and various places in the park.
When to Visit Acadia National Park
The best time to visit Acadia National Park is in the fall, specifically September and October. This is when the park's gorgeous fall foliage is at full display. This is also one of the busiest times to visit but it is well worth the views and leaf peeping experience.
Summer is a good time to visit but this is the peak season. In addition, there is a higher volume of mosquitoes and ticks. Spring is another good option. Be wary, the weather can change quickly any time due to the park’s far north, coastal location. This can range from rainy to extreme fog to super hot or very cold. Winter is the least favorable option due to shorter days, road closures, facility closings and it’s very cold.
Travel Tip: Currently, during the covid pandemic, this has caused a huge spike in visitors to the U.S. national parks, especially Acadia. Expect the park to be busy, with the exception of winter, as this is the place to go if you are within 8-10 hours driving distance.
Foggy fall foliage at Jordan Pond
Best Things to do in Acadia National Park
Acadia National Park is full of many options for casual tourists, hikers, bikers, climbers, and photographers while visiting. Planning all you want to do can be hard but also the fun part. Here are some recommendations from our long weekend trip.
Views of the The Bowl from Champlain Mountain Trail
Watch the Sunrise or Sunset at Cadillac Mountain
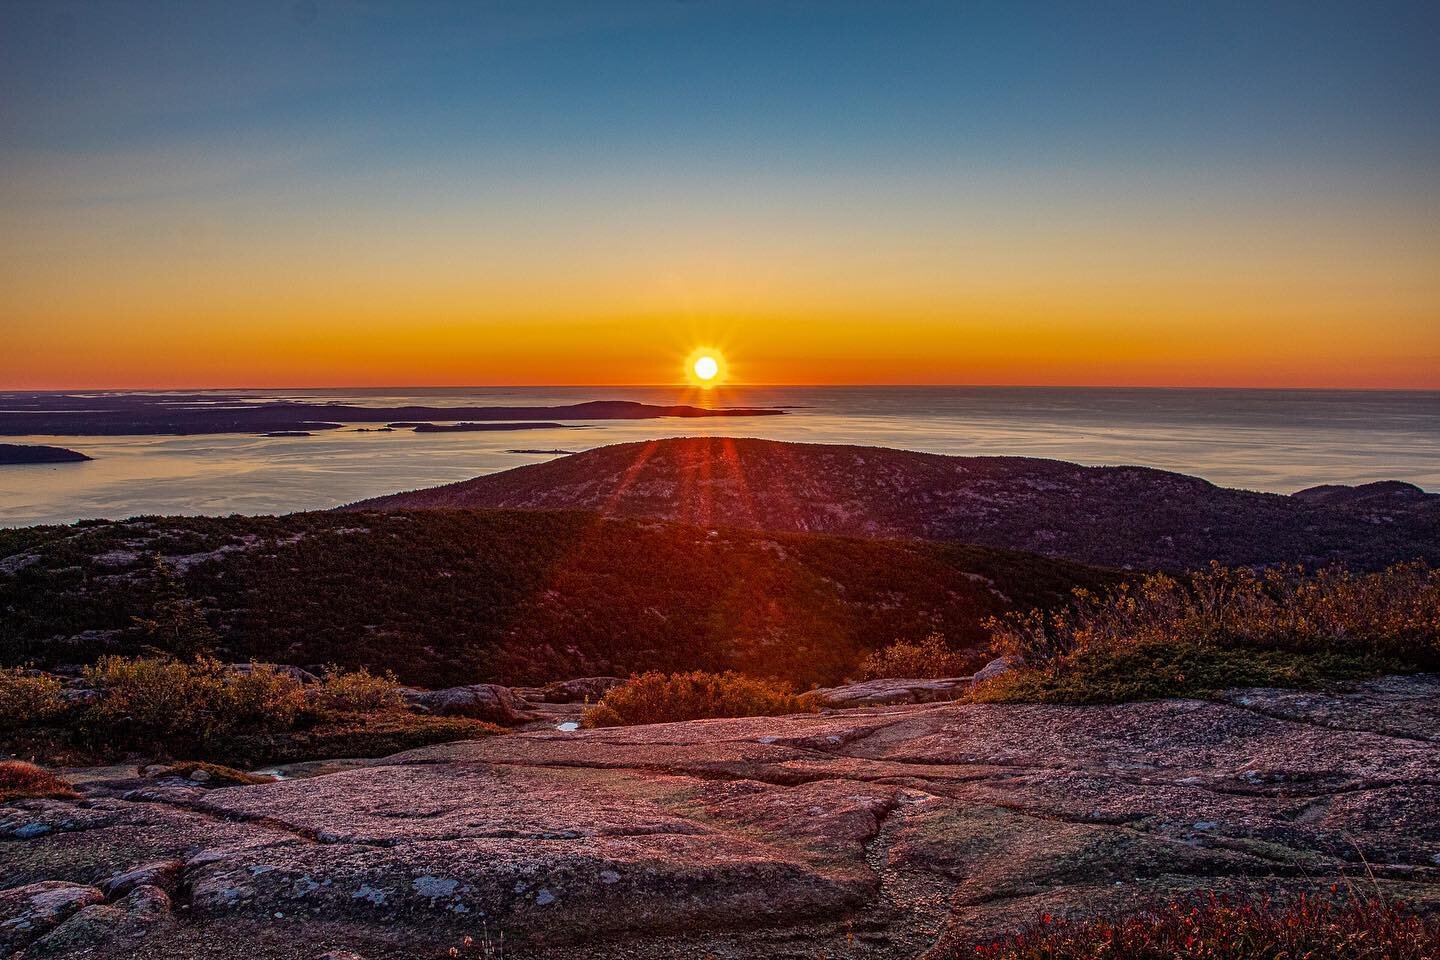
Cadillac Mountain is the first place in the US to view the sunrise and the highest peak on Mount Desert Island. The sunrise over the Atlantic Ocean was a bucket list item for myself but even if you are only able to catch the sunset, the view is breathtaking. This was definitely worth the 3:30am wake up call.
Cadillac Mountain Sunrise
By far, this is the most popular area of the park. Parking is very limited so I recommend getting there at least an hour before sunrise. Once you drive to the top and park, you can just walk around the summit and look for a place to watch. No hiking is involved. However, there is a 0.3 miles trail at the top if you choose to do so. The weather can impact your experience. We dealt with quite a bit of fog all weekend. Due to the higher elevation, fog could block the views. However, the weather decided to cooperate and the skies were clear. And, we were able to see an amazing sunrise.
**IMPORTANT INFO**: This area of the park, you will now need reservations. The National Park Service has implemented a reservation system late-May through mid-October to cut down on traffic on Cadillac Mountain Summit Road. You can find details here on how to make a reservation.
Travel Tip: The top of Cadillac Mountain can be very windy and temperatures are much colder. Pack layers to stay warm and hand warmers, if applicable. Also, we brought head lamps to find a spot to watch since it was dark.
Go Hiking
The hiking trails in Acadia National Park can vary in difficulty, length, and elevation. There is something for all levels of hikers.
Some of the appeal to the hikes in Acadia is the excitement and thrill. There are a large number of trails with ladders and metal rungs. Similar to a via ferrata, you can hike along narrow ledges and climb up sheer rock faces with the help of metal rungs. Hikes that feature iron rungs and cliff walks include the Precipice Trail, the Beehive Trail, the Jordan Cliffs Trail, and the Beech Cliff Ladder Trail. However, if this is not for you, there are plenty of other hikes to choose from.
Starting with the easier hikes in the park, we did the Jordan Pond Loop, which is a 3.4 mile stroll around the Jordan Pond. Combining this with the Bubbles hike is an option. Check out my guide here on the Jordan Pond Loop Trail here.
Jordan Pond and the Bubbles
Other easier hiking trails include: Ocean Path (up to 4 miles or less), South Bubble (1.5m), & Cadillac Mountain Summit Loop (0.3m).
The Gorham Mountain Trail is a good option for a moderate hike. About 1.8 miles with some steep sections. Unfortunately, we were met with nothing but fog at the top. It was a fun hike but no views to show for.
Other moderately strenuous hikes include: Pemetic Mountain (6m), Penobscot and Sargent Mountains (5m) and North Bubble and Conners Nubble (3.5m).
Let’s get crazy. Of course, we had to do the Beehive Trail. Aside from Cadillac Mountain, this is probably the next popular attraction and the most popular hike. This thrilling hike heads up to a steep mountain that features a section with narrow cliff edges, iron rungs to climb up and several handrails for exposed rock scrambling. This spectacular peak overlooks Sand Beach from the northwest. This hike can be very crowded and there can be a log jam using the iron rungs to climb. This hike is very dangerous so please take your time. If you have a fear of heights, this is not for you.
Hiking the Beehive
Due to the shorter time we had to explore, we included The Bowl and Champlain Mountain summit to this hike as well. They can be done separately but make sense to include. Adding these additional trails brought the hike to about 5 miles. The views were amazing. For more specific info on hiking directions, check out my guide here.
Views from the Champlain Mountain Summit
Additional intense hikes to be deemed as difficult options include: Precipice Trail, the Jordan Cliffs Trail, and the Beech Cliff Ladder Trail.
Travel Tip #1: Weather can shift your plans. Be prepared with additional activities or hikes. It might be too foggy for views or the rain might make hiking dangerous. For instance, any hike with iron rungs, I would not suggest to attempt on a rainy day.
Travel Tip #2: If attempting the Beehive Trail, get there early for parking. The Sand Beach parking lot is where you park and fills up very fast.
Drive along Park Loop Road
Park Loop Road is a 27 mile loop that takes you to all the popular destinations in the park. The loop starts at the Hulls Cove Visitor Center. This scenic drive is a great start to an Acadia trip with some viewpoints and turnouts. Some sections can be very narrow and mostly one-way. The most notable stops along the way include:
Sand Beach
Thunder Hole
Otter Cliff
Jordan Pond
Cadillac Mountain (reservation needed)
Travel Tip: Be sure to grab a park map to plan your stops. Since the majority of the road is one way, you can not turn around if you miss something.
Sand Beach
Located on Park Loop Road, it is worth the time to stop at Sand Beach. From here you can hop on the Ocean Path Trail that is an easy walk along the eastern coastline. The trail is 2 miles round trip to Thunder Hole and 4 miles round trip to Otter Point. How far you go is up to you. You could stroll along like us and make some detours to the rocks & turn around.

Travel Tip: The main parking lot to Sand Beach is the biggest in the park. However, this is parking for all the trails listed for Sand Beach and located right across from the start of the Beehive Trail. We found parking around 8am. And, by 9-10am, the lot was full. Getting to popular parking earlier is always the best bet.
Thunder Hole
Thunder Hole is a natural inlet where you can watch waves come crashing against the rocks, creating a thunderous sound. These thunderous crashes are very dependent on the tide. Calm waves or low tide may offer an anticlimactic experience. We are able to hear the crashing noises but nothing too crazy as far as the water height.

Travel Tip: If possible, per research online, the best time to go is about two hours before high tide. Check out the tide charts here.
Jordan Pond House
The Jordan Pond House has been open since the 1890s and is famous for their delicious popovers. We stopped for lunch and other items on the menu as well were delicious. Get the blueberry lemonade, you won’t regret it.

Famous popover and Blueberry Lemonade
Not only is there great food, but there are great views as well. This restaurant is located at the shore of Jordan Pond, where you can take in the views of the North and South Bubbles in the distance. Also, this is where the Jordan Pond Loop Trail can be accessed.
Travel Tip: Parking is tough midday here. There is a small lot at the restaurant and then another bigger lot down the road. However, it is still not enough. We found better success after the lunch crowd after 2pm to enjoy a late lunch post hike. Also, their hours change by season so I would research before you go.
Bass Harbor Head Lighthouse
On the west side of the park, the most popular destination is the Bar Harbor Head Lighthouse. The amazing views of the rocky coastline along with the lighthouse is about as Maine as it gets. And, this setting is what brings so many tourists and photographers to visit. Upon arriving, there is a very, tiny parking lot. Sunset is the best time to come but the absolute busiest time. You will need to get there a few hours before sunset to get a spot. There is a path to the right where you can walk right up to the lighthouse. However, if you want that coastal view, there is a path to the left at the end of the parking lot that takes you down to the rocks.

Sunset at Bass Harbor Head Lighthouse
Travel Tip: Based on my experience, it was about as busy as going to Costco on a Saturday afternoon on a holiday weekend. We got there an hour or so before sunset on a Saturday. Cars were lined up on the narrow road in a log jam and park rangers were turning cars away. I did see people parking even down the road up to almost a mile and walking to it. My wife stayed in the car & I ran down to the path. When I got down to the rocks, there were so many people, it was hard to get a good view. I had to leap rock to rock and ask for people to move out the way to get a picture (politely of course because there was some yelling going on over pictures!). I would suggest going off peak hours or on a weekday if possible.
Schoodic Peninsula and Isle au Haut
We did not get a chance to visit but I would have looked into these other areas of the park if we had more time. Schoodic Point is another great area to see beautiful views of the coastline, with far less of crowds. And remember, Isle Au Haut is only accessible by ferry. Please note that they limit the number of visitors allowed in the Isle au Haut section to protect the environment, so I would suggest stopping by the Hulls Cove Visitor Center to plan ahead.
Carriage Roads
There are 45 miles of car-free carriage roads that run through the park. Here you will find hikers, bikers, and horses along the crushed rock surfaces. There are multiple access points and just another option to enjoy nature in the park.
Explore Bar Harbor
The town of Bar Harbor may be the one of the most exciting towns in the U.S near a National Park. There is so much to do here. This small town is full of great restaurants, bars, and unique shops. Everything is within walking distance and a very safe environment. Also, there are spectacular views of the harbor.
Where to Stay
There are numerous accommodations to stay near Acadia National Park. Airbnbs, bed & breakfasts, and hotels are plenty on Mount Desert Island. Bar Harbor is the closest town with the most going on. If you want to stay a bit farther away from the crowds, there are options in the Northeast Harbor, Bass Harbor, or Southwest Harbor. And, there are campgrounds as well such as: Blackwoods, Seawall, Schoodic Woods, and Duck Harbor Campgrounds.
We stayed at the Island Place, which was affordable and convenient. Walking distance to food and 15 minute ride to the park. Some other options include the Bar Harbor Quality Inn, Bar Harbor Grand Hotel, Bar Harbor Inn & Spa, Shore Path Cottage, and The Elmhurst Inn.
Where to Eat
If you follow this website, you know it’s about travel, hiking, and food. All about finding the good spots to eat and you know I found where to get donuts. With that said, we actually only ate out a few times and packed snacks & lunch (Hannaford’s is right in the center of town in Bar Harbor). We went to Side Street Cafe for dinner, which is very popular. The wait was pretty long but it was an excellent meal. If you want lobster, this is the place. We actually got lobster stew and it was fantastic. For breakfast, we stopped at 2 Cats for some baked goods, breakfast sandwiches, and donuts! Also, they have pretty funny cat puns at all their signs.
Other recommendations based on research to try include: Havana, Atlantic Brewing Company, Jeanine’s Great Maine Breakfast, Docksider, Rosalie’s Pizza, Mount Desert Island Ice Cream, C-Ray Lobster, & Rose Eden Lobster.
If you have any further questions about planning your trip to Acadia National Park, please post in the comment box below.
HIKING FOR DONUTS
Hi, I’m Mark. I live in Connecticut. I take new trips every chance I get. A good trip has a great hike, great food, and something fun to do. My goal is to search out new trips and share them to inspire others to try something new and exciting.
If you are looking for posts in a particular place, search City or State here.
SEE OTHER POSTS IN ARCHIVE
Archive
RECOMMENDED POSTS


RECENT POSTS
See the latest on Instagram and follow @HIKINGFORDONUTS


Kaaterskill Falls Trail, The Catskills, New York
Trail Description: The Kaaterskill Falls Trail is short hike to a stunning waterfall in the Catskills.
Trail Info:
Where: Haines Falls, NY Distance: 2.3m (1.5-2 hours) Difficulty: Moderate Trail Type: Out and Back Features: Views, Mountains, Waterfall
How to get there:
Note, you will lose service as you get closer. I put in my GPS:
103 Laurel House Road, Palenville, NY 12463
Depending which direction you are coming from, you will turn onto N Lake Rd off RT 23A and follow up to Laurel House Road. In roughly 2 miles, turn right on Laurel House Road where you will find the upper trail parking lot.
Hiking Tips
Start at the upper parking lot.
Make sure to check out the views from the platform.
Summer water levels may be low and rainy periods may be muddy.
Be safe. Multiple people have got hurt jumping in the falls, or worst, fallen off the top of the fall and died.
The Hike
A trip to the Catskill Mountains in New York has been on my immediate bucket list. The abundance of hikes and mountain peaks to be seen caught my eye. Since this is not a long drive for my fiancé and me, we picked a weekend, laced our boots, and hiked until we couldn’t any longer. The one obvious choice to hike is the ever popular Kaaterskill Falls Trail. Being mid-July and not much rain, the fall wasn’t going to be as cool as in the rain season. But this was the only weekend we could go and it was still worth the hike. I always do my research ahead of time and noticed there were multiple parking lots. The more popular lot seems to be the lower which looked like a train wreck. We drove by it. The parking is miserable with tons of cars in the highway on a narrow strip parked in the road. I would be concerned walking back to my car. The better option is the upper falls lot off Laurel House Road, where there is a platform you can see the falls from above. As long you can there before 10-11am on the weekend, there should be enough parking. The other thing in my mind was the crowd. I suggest doing this hike very early on weekends or if you can on a weekday. The lower falls are popular for swimming in summers. We started this around 9am and it was pretty crowded, especially at the lower trail.


Once we parked in the lot on Laurel House road, there is a gravel path to the kiosk of trail info where the hike begins. From here, we proceeded to take the Yellow Trail on our left. In short time, the Blue Trail will be on the left. We continued on the Yellow Trail to the right heading to upper platform for views of the falls. This portion of trail was developed and improved in 2016 to make it safer for everyone to hike. While this may be manmade, I think that was essential for this trail. If not for all the new steps and paths, people would get hurt and there is way more to offer on this trail for everyone. And, the platform offers a new perspective with remarkable views of Kaaterskill Falls. I am glad I did not start from the lower trail!
After checking out the platform, we retraced our steps back to find the intersection for the Blue Trail. This will lead to a bridge crossing that will lead to another intersection. From here, turn right toward the Lower Falls. This is where difficulty of the trail increases but not too bad. To proceed along to the Lower Falls, we proceeded to head on the Yellow Trail. There will be more signposts to veer onto other trails if you want to adventure but we just wanted to see the falls. As we descended closer to waterfall, you can hear the crowd of people below as you get closer on this hot summer day. There was a side trail venturing to our right where the falls are up close. You could actually get in the water and take a picture under them.


We returned back to the fork and proceeded to descend down the steps to lower part of the waterfall. Once we reached the bottom, you can see both sections of Kaaterskill Falls. We climbed up on some rocks to get closer. And, of course I hiked with a donut. Hence, obligatory donut and waterfall shot. We stopped at a local donut shop about 10 minutes away from
The crowd was a lot to deal with. We headed back retracing our steps back onto the Yellow Trail until we reached the bridge again. Then take the path toward the parking lot. As I mentioned previously, this was non-rain season so the fall was not as robust. However, it is one of the must hike locations in the Catkskills. I ensured my first trip included Kaaterskill Falls.
HIKING FOR DONUTS
Hi, I’m Mark. I live in Connecticut. I take new trips every change I get. A good trip has a great hike, great food, and something fun to do. My goal is to search out new trips and share them to inspire others to try something new and exciting.
If you are looking for posts in a particular place, search City or State here.
SEE OTHER POSTS IN ARCHIVE
Archive
RECOMMENDED POSTS


RECENT POSTS
See the latest on Instagram and follow @HIKINGFORDONUTS

Colorado Road Trippin’ for Donuts
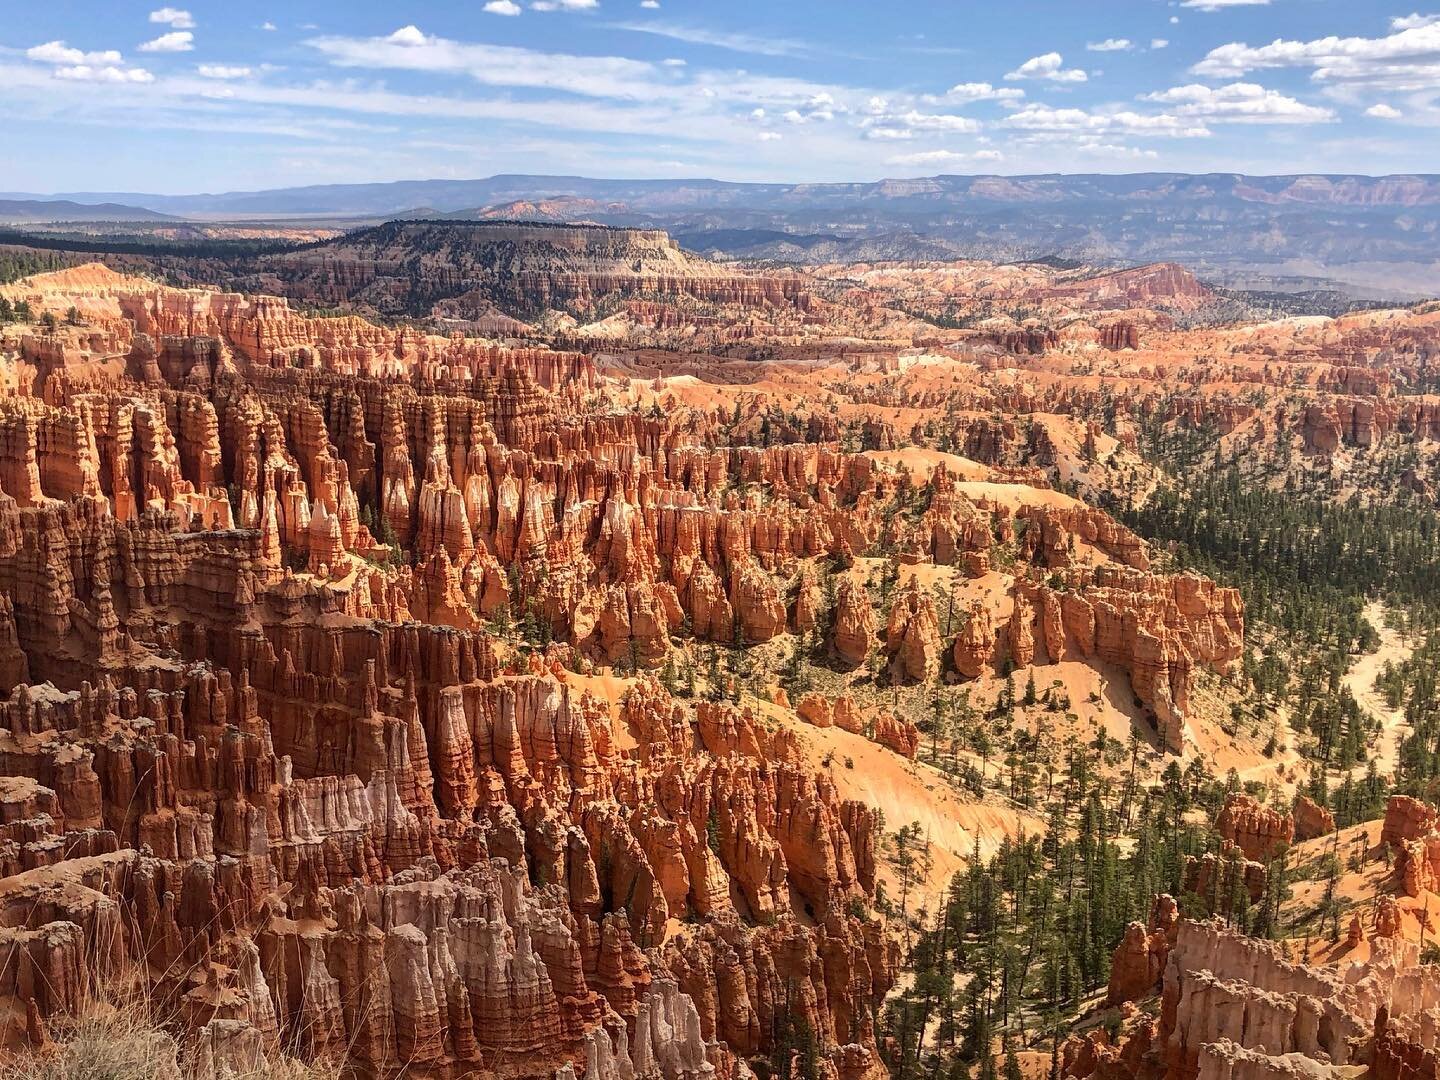
In my years of traveling, Colorado has been my favorite state to visit for the food, the beer, and the outdoors/hiking. I still have barely scrapped the surface. On my third visit this spring, I drove over 1000 miles and visited 7 cities. My prior trips did not consist of too much donut research. Hence, there were many donut shop visits along the way on this trip. This is not a best of list by any means. There are lots of donut shops in Colorado. In this post, I will be sharing my experiences of the donut shops I visited during my trip. SPOILER ALERT, Colorado has some great donuts shops.
Voodoo Donuts Denver, CO
The first stop off the plane was Voodoo Donuts. The popularity of this donut shop makes it a must try. Once you walk in, you see and feel how different this is than a standard donut shop. There is a hip and fun vibe going on. There’s a big selection of unique flavors and types of donuts. They are known for a raspberry filled donut shaped and decorated like a Voodoo Doll and their wittiness. The crazy options I chose were the Chuckles, chocolate frosting dipped in hot chocolate cocoa powder with peanuts and caramel and chocolate drizzle, and the ODB, chocolate frosting with Oreo cookies and peanut butter. In addition, I had to the get the Voodoo Doll, Plain Glazed, Double Chocolate Cake, and Maple Bar.


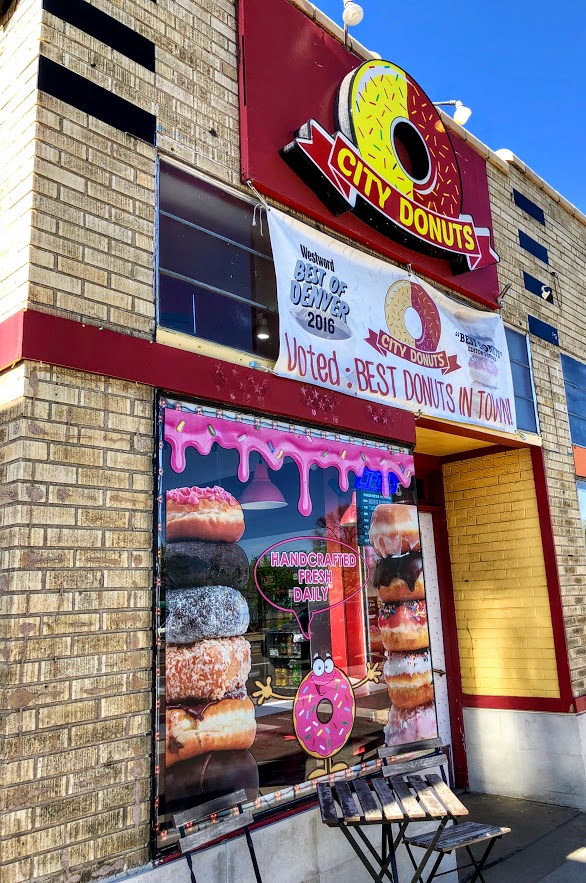
City Donuts, Denver, CO
City Donuts has a few locations spread out through Colorado near the Denver area. This was your standard old school donut shop. The customer service was fantastic. The person working went into detail on how their donuts were made and the history of the company. Appreciated it because it gave me time to decide what I wanted. Unfortunately, I was pretty full from breakfast but I settled on the Maple Glaze and Chocolate Frosted with sprinkles. Super fluffy and tasted homemade. Pretty big sized donut as well. And, they hooked me up with some free donut holes. The bag the donuts came in was a great touch.


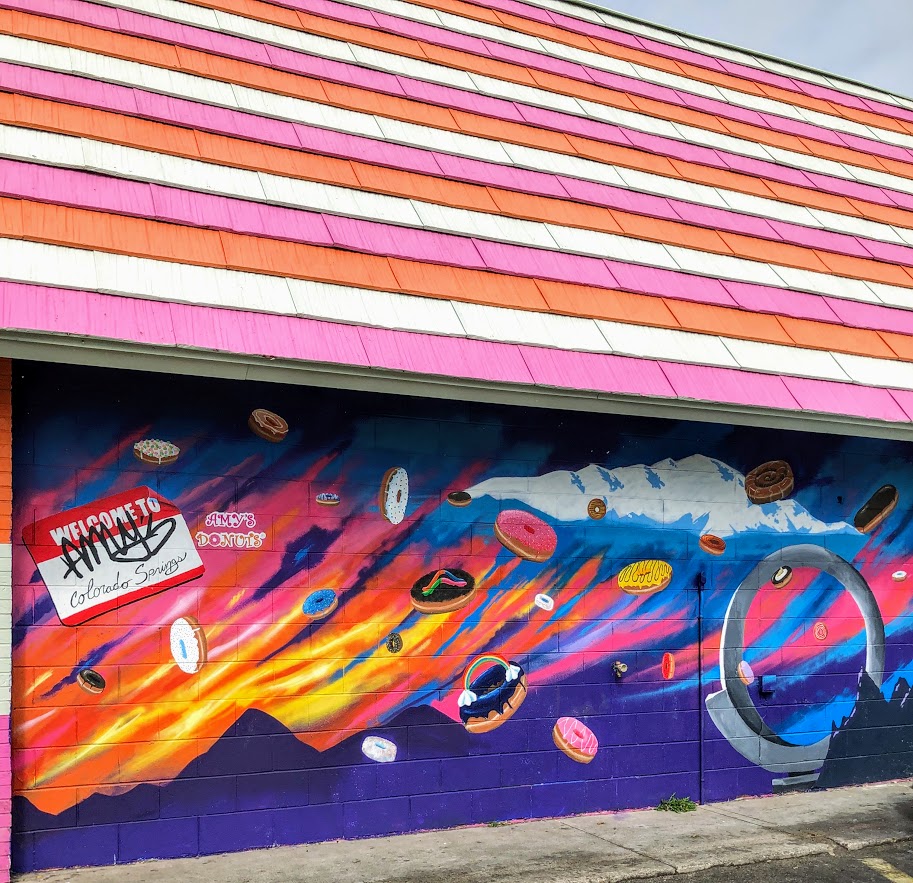
Amy’s Donuts, Colorado Springs, CO
The stand out donut shop in Colorado Springs has to be Amy’s Donuts. This shop had my head on a swivel. Not even over exaggerating, there were over 50 different flavor combinations. To narrow it down was a tough task. They covered the basics but then went over the top with wild toppings and flavor combinations like Almond Banana Caramel, Butterfinger, and Maple Bacon Fudge. The final decision was the Maple Turtle, Reese’s Pieces, Nutella Crumb, Bizmallow Caramel, and S’mores. And, a Raspberry filled glazed bar to complete the spectrum of donuts. They will pipe in the jelly fresh when you order. Big fan of that. The verdict, the Maple Turtle was amazing as it sounds.

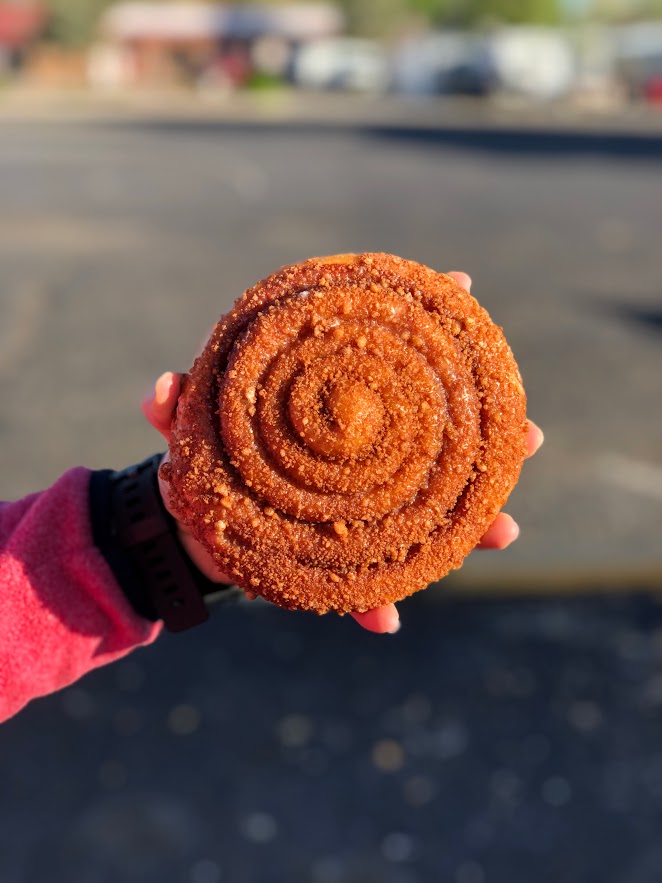
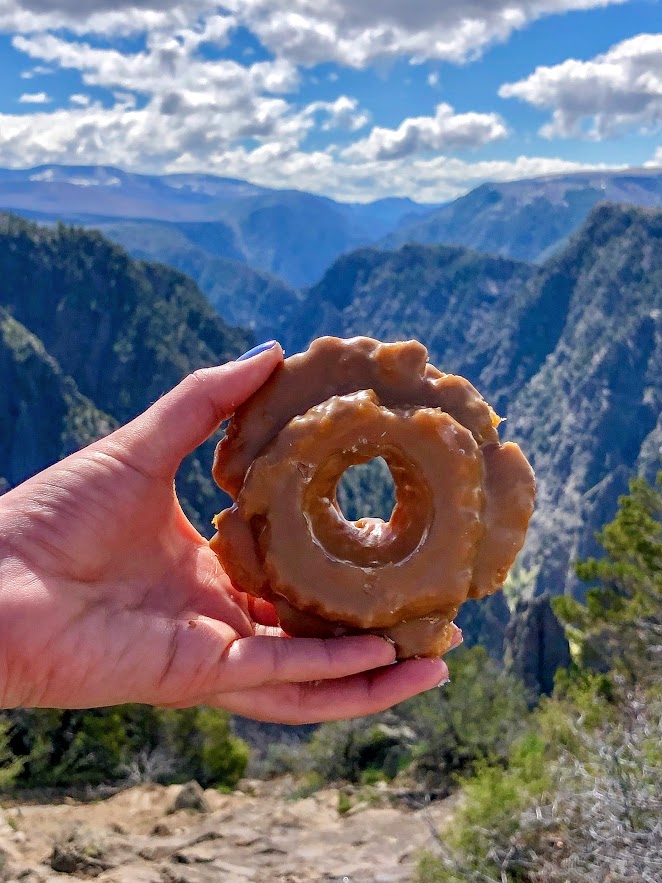
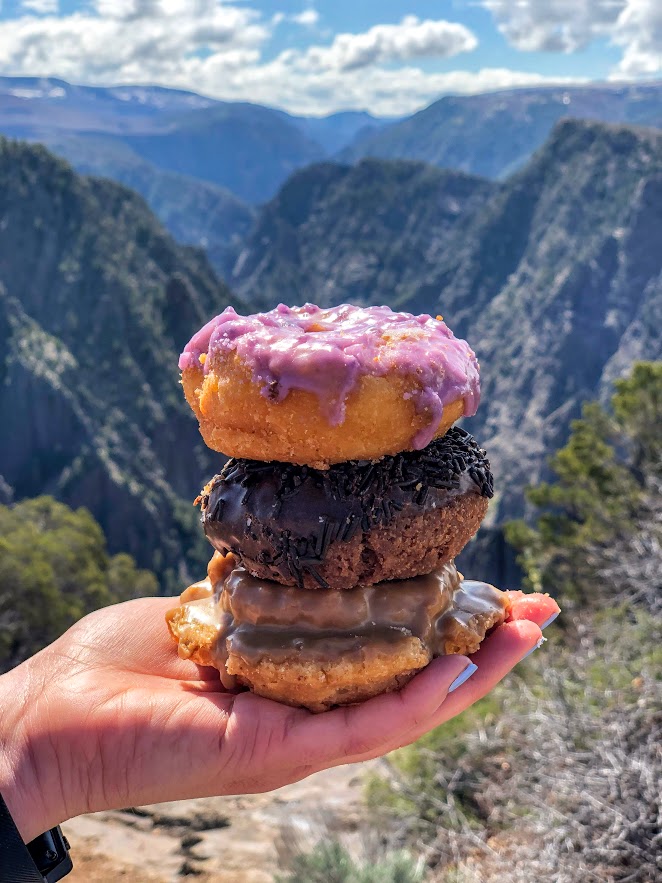
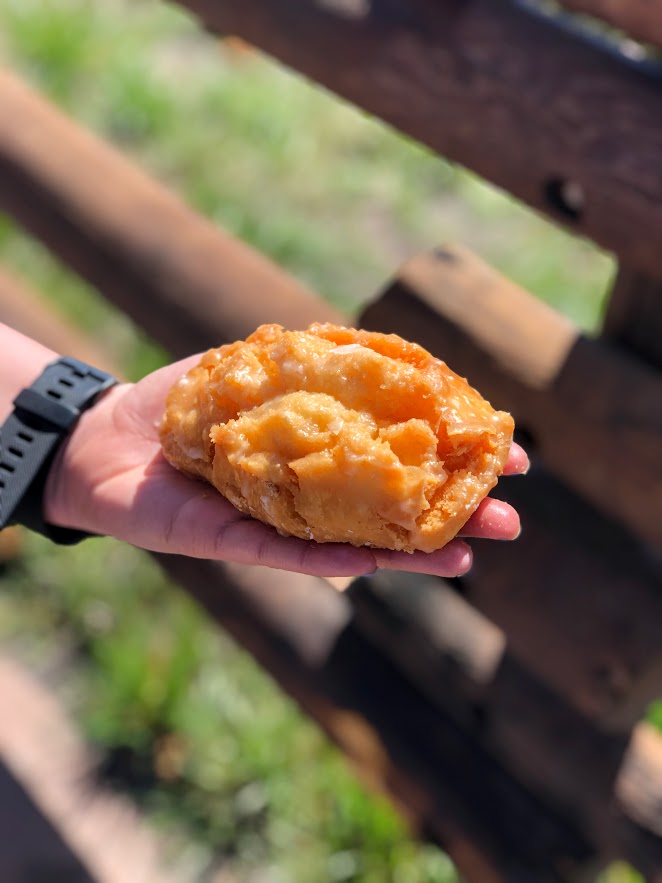
Montrose Donuts and Deli, Montrose, CO
The perfect hiking for donuts location. Located 15 minutes outside of the Black Canyon of the Gunnison National Park, you must visit Montrose Donuts and Deli. When I walked in, I was delighted to see all the options. They had bear claws, old fashion, cake, yeast, cinnamon bun, bow tie, cruller, French cruller, fritter, bars, and filled donuts along with muffins and more baked goods. And, a glazed buttermilk bar. What?!? I had to try this. Best donut of the trip. Tasted like a delicious and sugary glazed biscuit. Along with the glazed buttermilk bar, I also tried the chocolate cake sprinkle, bow tie glazed, blueberry glaze cake, cinnamon crumb, old fashion maple, and cinnamon crumb glaze fritter. The donuts were all pretty delicious. Highly recommend for your hiking for donut needs.
OMG Donuts, Arvada, CO
Located in a small plaza driving through Arvada, I found myself at OMG Donuts. This is another small business, old school shop cranking out the classics. Very friendly. I got there late afternoon and they still had some good options. I went with the Plain Glazed, Double Chocolate Cake, Maple Bar, Chocolate Frosted and Red Velvet. The red velvet cake stood out to me for some reason and that was the best decision I made. One of the best cake donuts I have EVER had. Wow, super moist and the flavor was on point. The chocolate cake was good also, super chocolaty almost like eating a chocolate cake. The yeast donuts were fluffy and light. This was a great donut shop find.


HIKING FOR DONUTS
Hi, I’m Mark. I live in Connecticut. I take new trips every change I get. A good trip has a great hike, great food, and something fun to do. My goal is to search out new trips and share them to inspire others to try something new and exciting.
If you are looking for posts in a particular place, search City or State here.
SEE OTHER POSTS IN ARCHIVE
Archive
RECOMMENDED POSTS

RECENT POSTS
See the latest on Instagram and follow @HIKINGFORDONUTS

24 Hours in the Black Canyon at the Gunnison National Park
The Black Canyon of the Gunnison National Park is one of the least known national parks and that is a travesty. I admit, I wasn’t too familiar with this park myself. Located in western Colorado, the Black Canyon of the Gunnison did not gain National Park status until 1999, making it the second youngest national park in the U.S. The Black Canyon is named so because the walls are often covered in shadows making them appear black. These steep walls were formed over 1.7 billion years ago. Another awesome note on this park is that it contains 12 out of the 48 mile-long canyon of the Gunnison River.
For most national park or outdoors enthusiast, you want to experience as much as possible in your travels. Planning trips can be difficult and offer time restraints. Exploring most national parks you need anywhere from 3 days to two weeks. On my recent Colorado road trip, I planned for one day at the Black Canyon of the Gunnison National Park. There is a North and South Rim. This guide will be for the South Rim only. This rim is more developed and accessible. Can you explore the entire South Rim in 24 hours? The answer is yes. The best time to visit is April to November. We stayed in Montrose, which is about 15 minutes from the park. The downtown is pretty cool. Oh, and there is an amazing donut shop, Montrose Donut and Deli Shop. The best donuts I had in Colorado. Get the biscuit donut. I digress…..
The South Rim is comprised of a modest 7 mile loop with 12 spectacular overlooks. I suggest to stop at each overlook. A lot of the overlooks do require walking a short trail but nothing strenuous. I would not miss out on Painted Wall, Cedar Point and Sunset View. There are multiple hikes on the South Rim. I went out of my way to do them all and to be honest, if you are stressing for time, skip the hikes. If camping is your thing, there are campgrounds here. Lastly, do NOT leave the park without driving down East Portal Road. I cannot recommend that enough. There is no crowd concern at this park. I counted maybe 30 people on a Friday in mid-May. I read the peak of the visitors stroll through in July. There are even less visitors on the North Rim, which is a 3 hour drive from the South Rim. However, the views are even more dramatic from the North Rim. The scenic driving was amazing. This park should be way more popular. The views were ridiculous. One of the best experiences I had in a national park. Here’s my guide to the South Rim of the Black Canyon of the Gunnison.
How to get there
Black Canyon’s South Rim is about 14 miles from Montrose and 63 miles from Gunnison. To get there from Montrose, travel 7 miles north on CO Highway 347 from the intersection with U.S. Highway 50 east of the city.
Viewpoints (South Rim)
The first viewpoint that visitors will see entering the park is Tomichi Point. This is right off the side of the road, no hiking needed. The second viewpoint, Gunnison Point, is located right behind the visitor center. A short path down some steps leads views of the canyon facing northwards. The view is more vivid than Tomichi Point and there is sneak peak of the ravine.


The next viewpoint is about two miles down the road at Pulpit Rock Overlook. There is a 134 yard trail leading to this area. The canyon really opens here with the river in view as it curves around a 90 degree bend. Cross Fissure View offers a different a unique look at the canyon. The river is not visible and most of the canyon is hidden. There is a view of overlapping ridges and crevasses from multiple angles. This viewpoint is a 357 yard walk.


Rock Point is a less traveled path at 294 yards. The longer the path the less visitors you will see. Devils Lookout is the longest path at 607 yards. This path goes right the edge of the rims for great views including the river and the valley. Both this and Rock Point lie above the narrowest part of the entire canyon.


Chasm View is one of those jaw dropping views. This is a very short path off the road above the steepest part of the whole canyon. Painted Wall View is almost adjacent to Chasm View. This may be the most well-known viewpoint. Painted Wall is the highest cliff in Colorado at 2,250 feet and a half mile across.


Every viewpoint from here on is a must see. Cedar Point is a 303 yard path overlooking the lower canyon. This is a spectacular view as you can see 1.5 miles of the river, flowing rapids, and some greenery below. Next up, Dragon Point offers very similar views. The widening ravine enclosing colorful waters of the river. This can be reached by a path of 300 yards.


Sunset View was one of my favorites. This is the westernmost viewpoint along the South Rim road. There is large parking area along with restrooms and picnic tables. This a great place to soak in amazing views of the canyon. This is the longest stretch of V shaped canyon. The last viewpoint is another mile down the road, High Point. There’s not much to this but you have to pass this in order to turn around and head back.


The Hikes (South Rim)
At the end of South Rim road, there is a parking lot where the Warner Point Trail begins. This a 1.5 mile out and back that takes you to the furthest overlook on the South Rim. The trail starts flat with views of green fields 1,000 feet above Bostwick Park. The trail begins to climb slowly then drops and ascends again before reaching the final viewpoint. This overlook offers stunning views of the San Juan Mountains, West Elk Mountains, Uncompahgre Valley, and the canyon. If you choose a hike in the South Rim, this would be the one I suggest.
Warner Point
The Oak Flat Loop begins by the visit center. The trail is narrow and traverses down a steep slope. This offers a peek at the landscape below the canyon’s rim. This is the most challenging hike in the South Rim with steep uphill and downhill portions. In total, the loop is 2 miles.
Rim Rock Nature Trail starts at the visit center or the Campground Loop C entrance. You can even hop on this trail from Tomichi Point. This relatively flat hike takes you along the rim of the canyon for views of the Gunnison River and sheer walls of the gorge below. This can be between 1-2 miles.


East Portal Road River Access
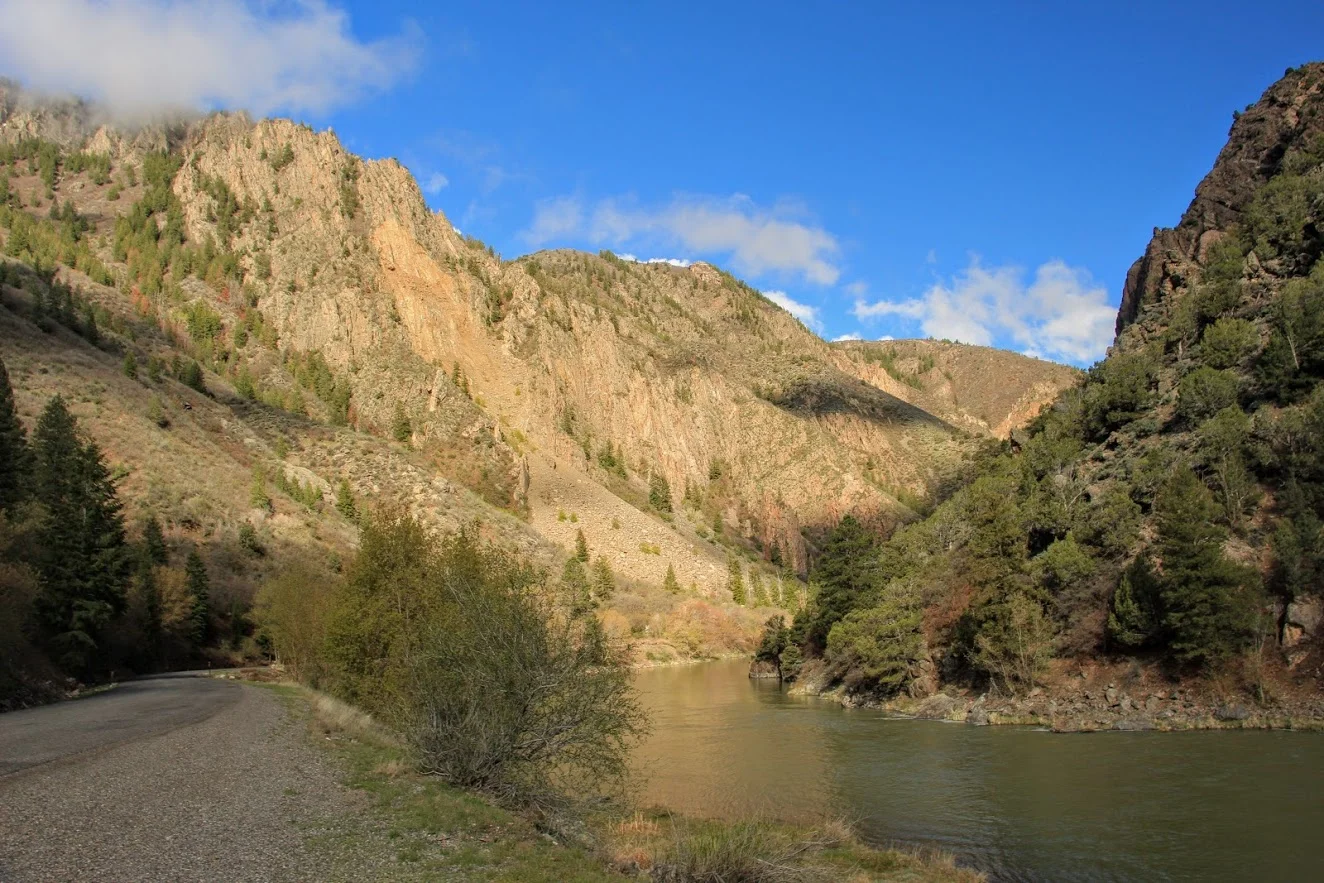
Located right at the entrance/exit to the park, you will see the access for East Portal Road. This is a 5 mile road with a significant decline (16% grade) with hairpin turns taking your car to the base of Black Canyon. This is the only way to get down into the canyon. Once arriving at the bottom, the views from down below are gorgeous. The picturesque surroundings of the beautiful lake and the cliff walls of the canyon from up above are majestic. By far the coolest experience I had in the park. I was just in awe. I read a lot of things online and it made it sound dramatic and dangerous to drive down. Any car/van can handle it. Vehicles with an overall length (including trailer) greater than 22 feet are prohibited. Trailers may be left unhitched and left at a parking area at the campground entrance. This road is closed in the winter. Just be smart about driving down. It took us about 30 minutes. This is a bucket list type event. Don’t chicken out!
The drive down into the canyon.


HIKING FOR DONUTS
Hi, I’m Mark. I live in Connecticut. I take new trips every change I get. A good trip has a great hike, great food, and something fun to do. My goal is to search out new trips and share them to inspire others to try something new and exciting.
If you are looking for posts in a particular place, search City or State here.
SEE OTHER POSTS IN ARCHIVE
Archive
RECOMMENDED POSTS
RECENT POSTS
See the latest on Instagram and follow @HIKINGFORDONUTS

Sam’s Point and Verkeerderkill Falls Trail, New York
Trail Description: Sam’s Point Reserve offers panoramic views of the Shawangunk Ridge along with exploring a 180 foot waterfall.
Trail Info:
Where: Ellenville, NY Distance: 6.2 miles (3-4 hours) Difficulty: Moderate Trail Type: Out and Back Features: Views, Mountains, Valley, Waterfall, Ice Caves (optional)
How to get there:
400 Sams Point Rd Cragsmoor, NY 12420
This will take you right to the parking lot. Parking costs $10. There is a kiosk to pay near the visitor center.
Hiking Tips
Parking lot opens at 9am. If parking lot is full, you have to wait until someone leaves. Plan accordingly as parking is limited.
Did not include the Ice Caves on this day. Would add an additional 1.1 miles to the hike.
Use bug spray for ticks and sunscreen when sun is out. Most of the hike is the open.
The Hike
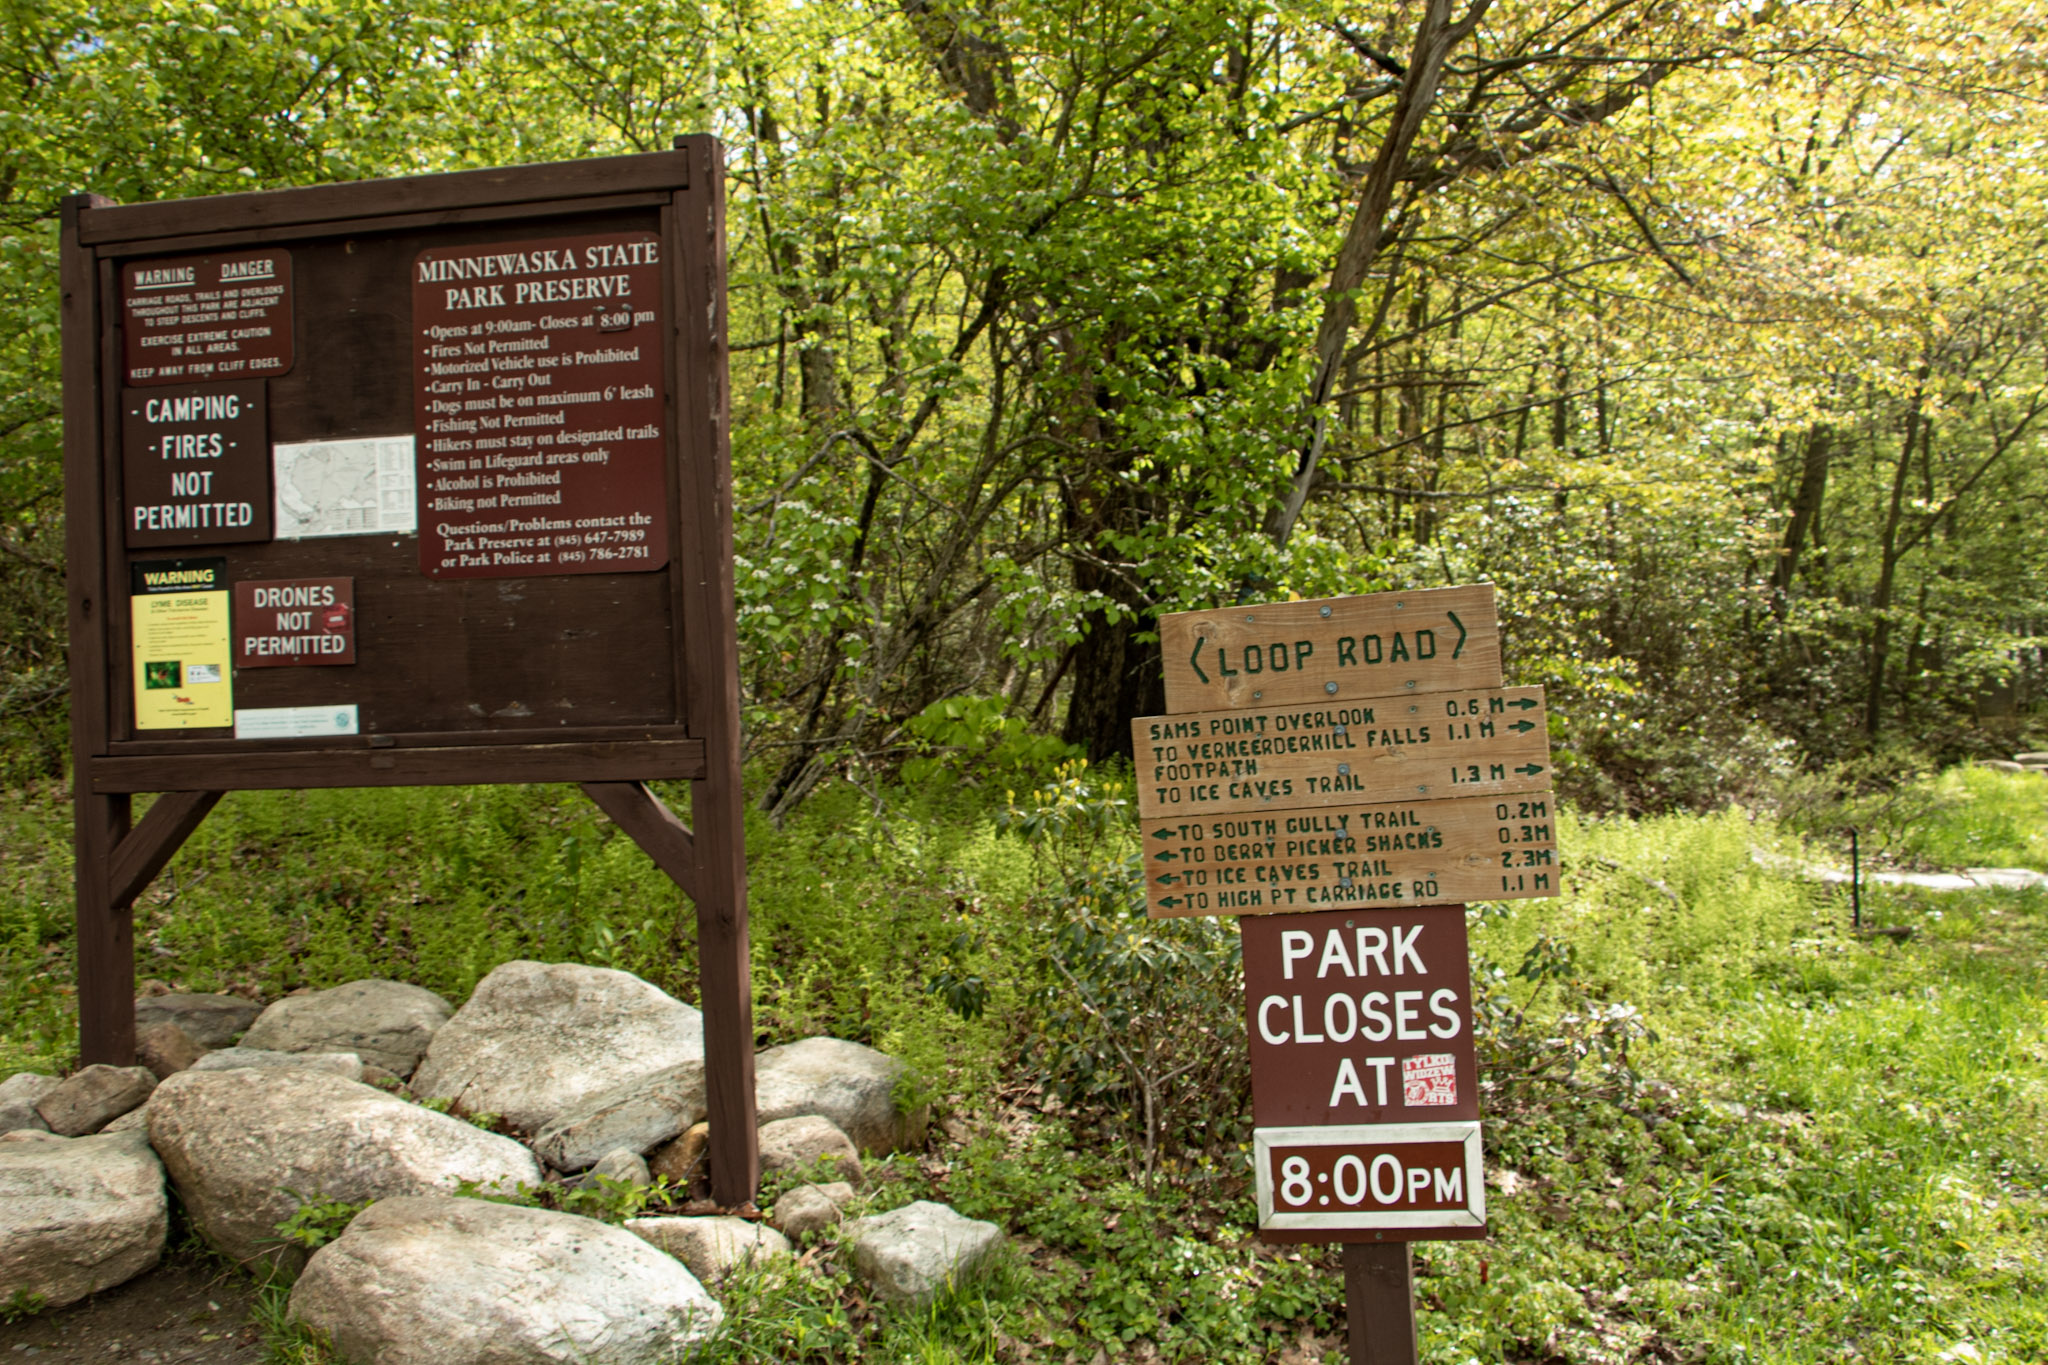
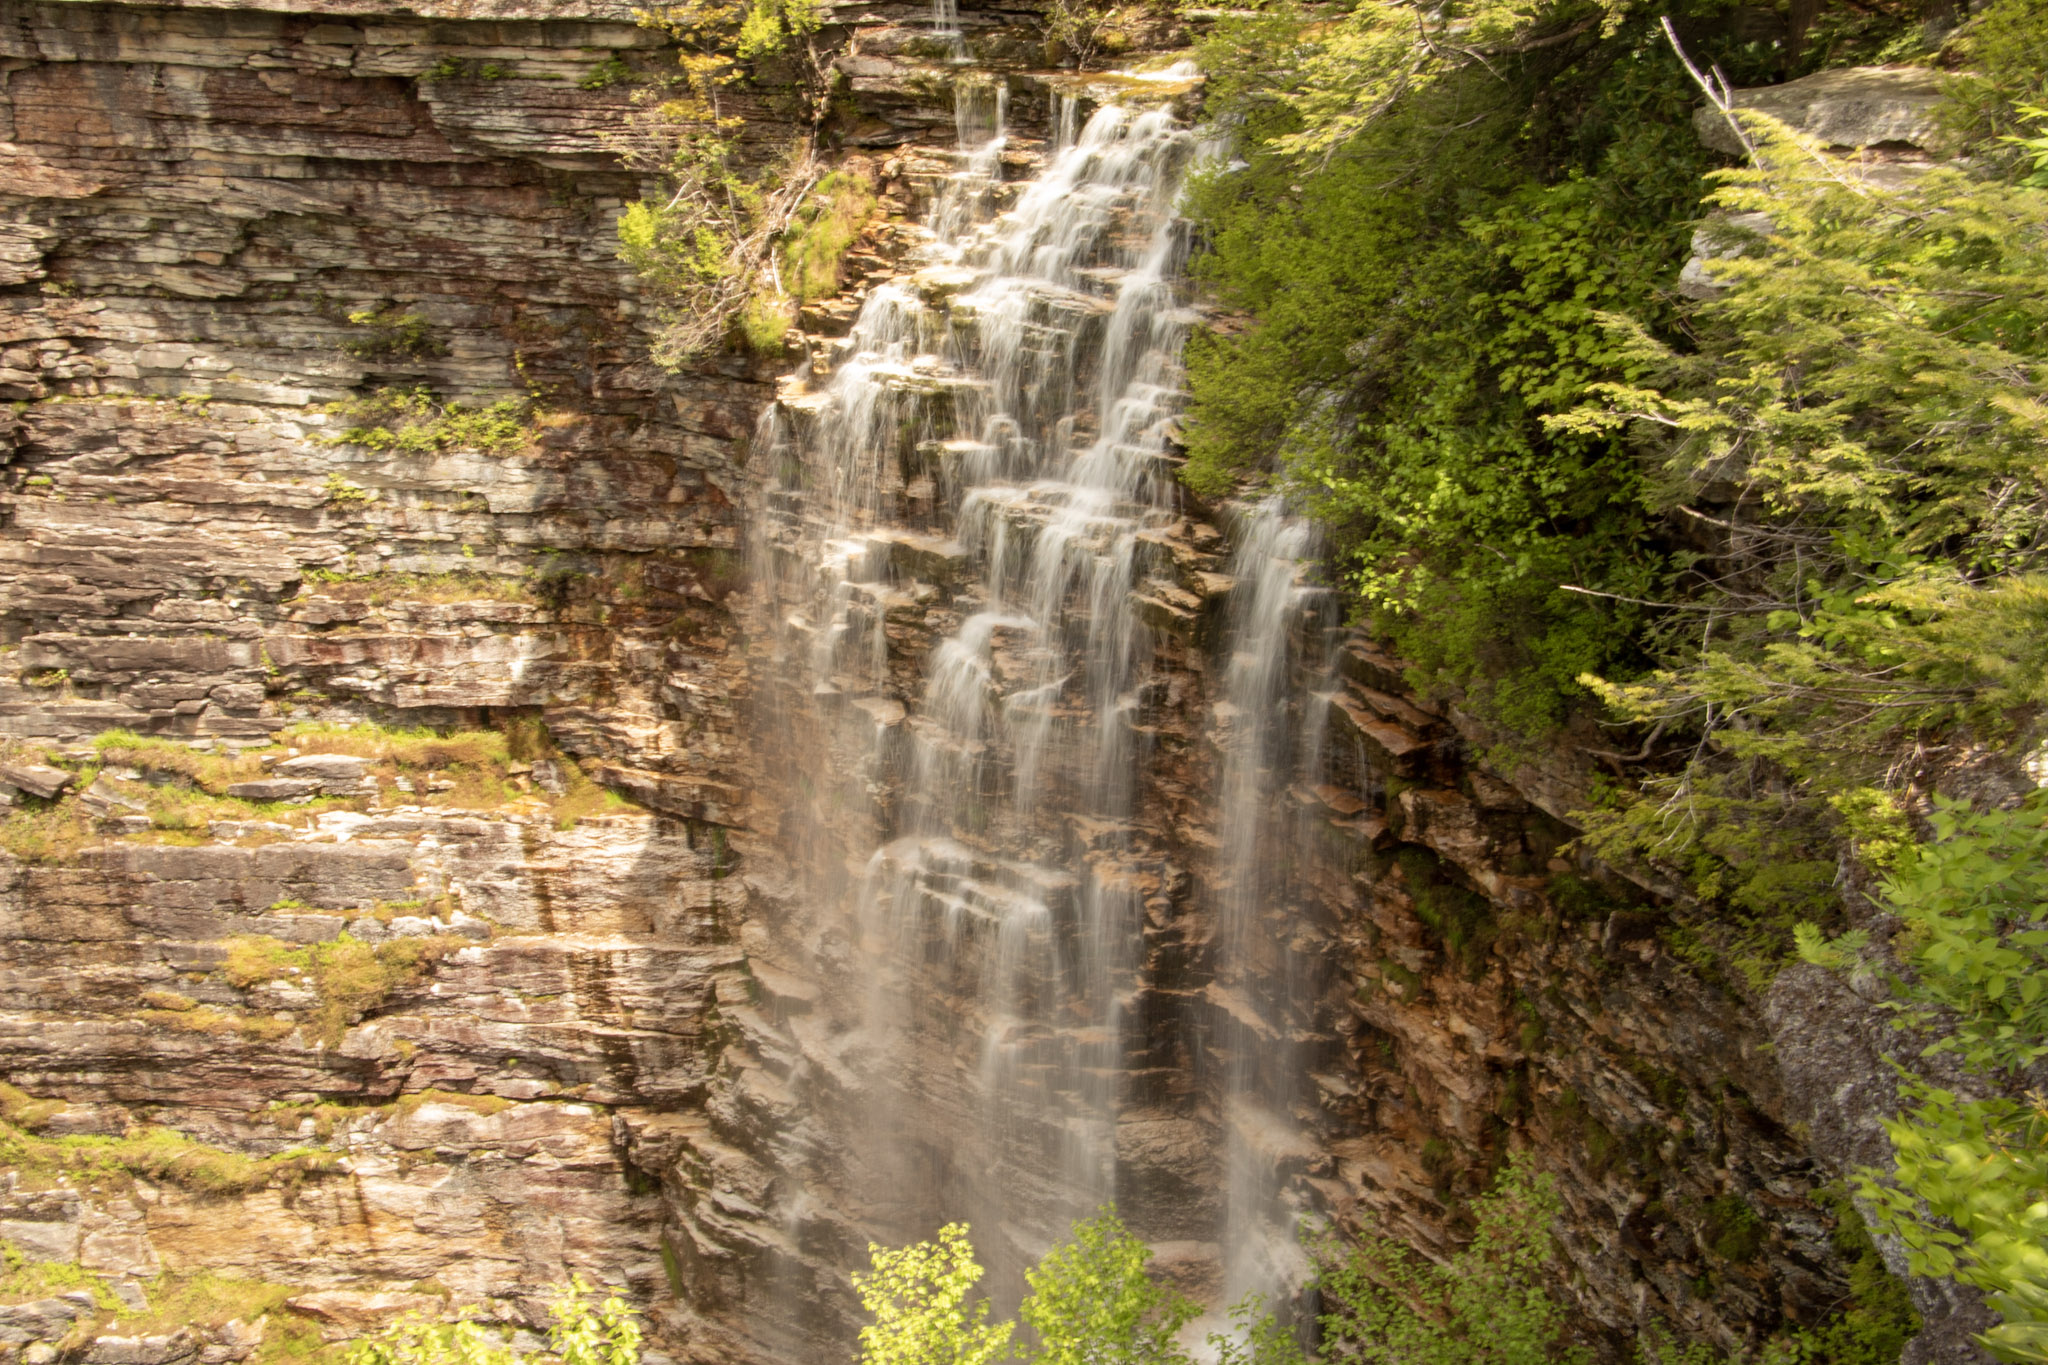
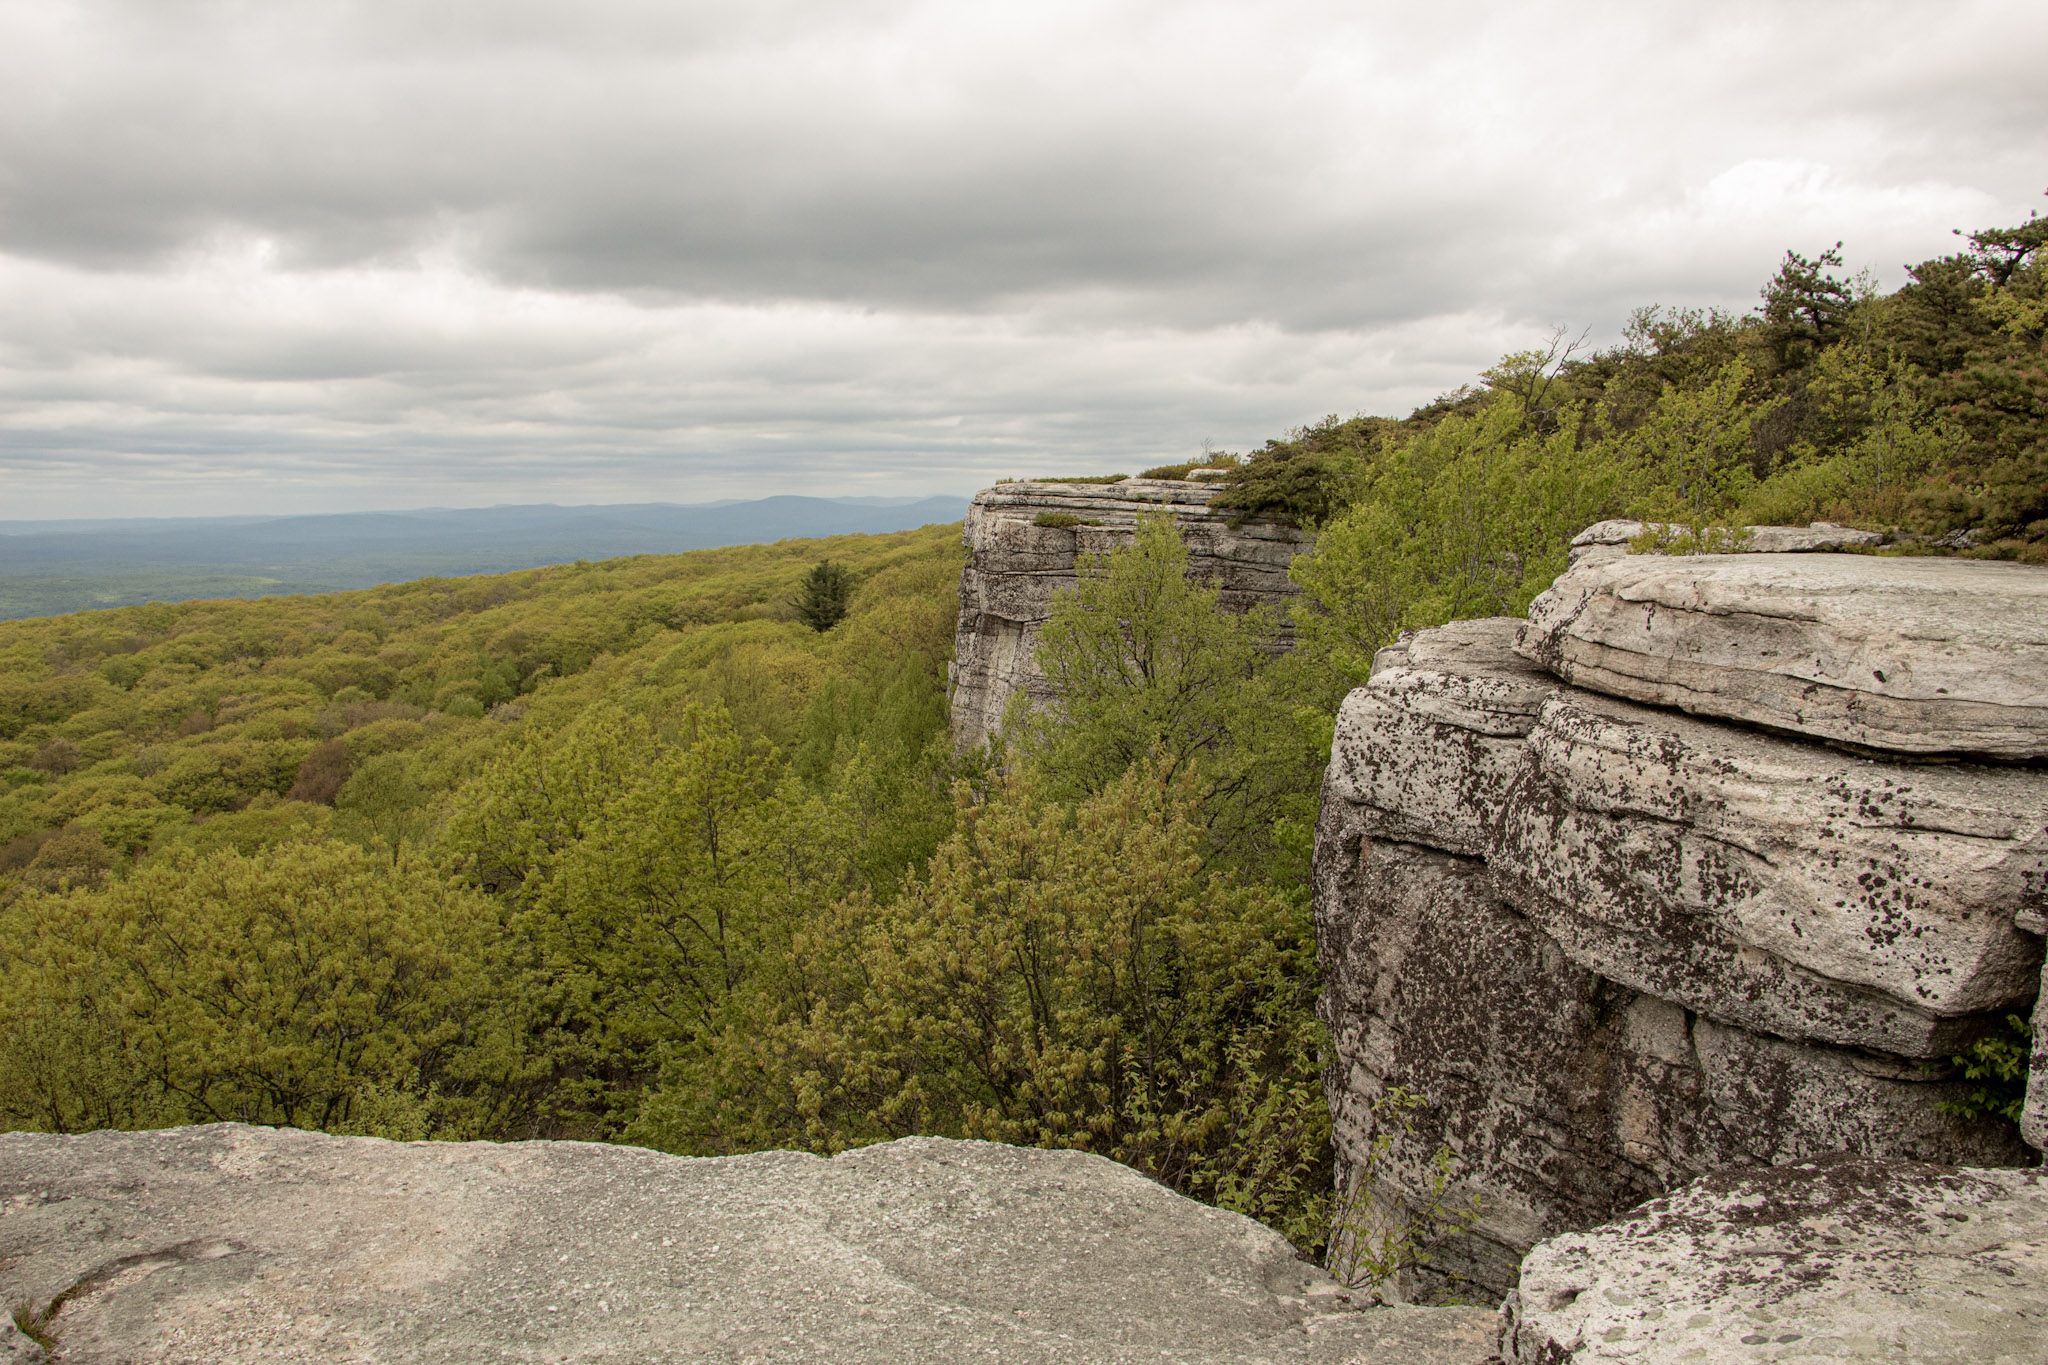
The next hike in the Hudson Valley to check off my list is Sam’s Point. I anticipated great views but there was much more to this hike than I thought. Until I researched recently, I didn’t realize a waterfall was part of the hike. Veerkeerderkill Falls is the tallest waterfall in the Shawangunk Mountains at 180 feet. And, there are even ice caves on this trail. Sam’s Point is part of Minnewaska State Park, but the parking is located at a different location than the park’s entrance. We left early in time to beat the 9am opening and there were already quite a few cars in line. Once parked, there is a kiosk to pay for parking and there is a visitor center at this lot, where there are 2 restrooms.
After packing up our gear, we headed toward the trailhead. Walking around the gate took us on the main trail, Loop Road. There is an intersection almost immediately to choose from, veering right will take you to Sam’s Point. The other option is the Huckleberry Pickers’ shacks. Tempting but we will pass on that. Heading up the fragmented road, there is a slight incline as altitude gains up the switchbacks. In short time, we came up to a massive rock with a cliff above, which we learned later is the top of Sam’s Point. At about a half mile, the first view was on our left on top of a rocky platform.
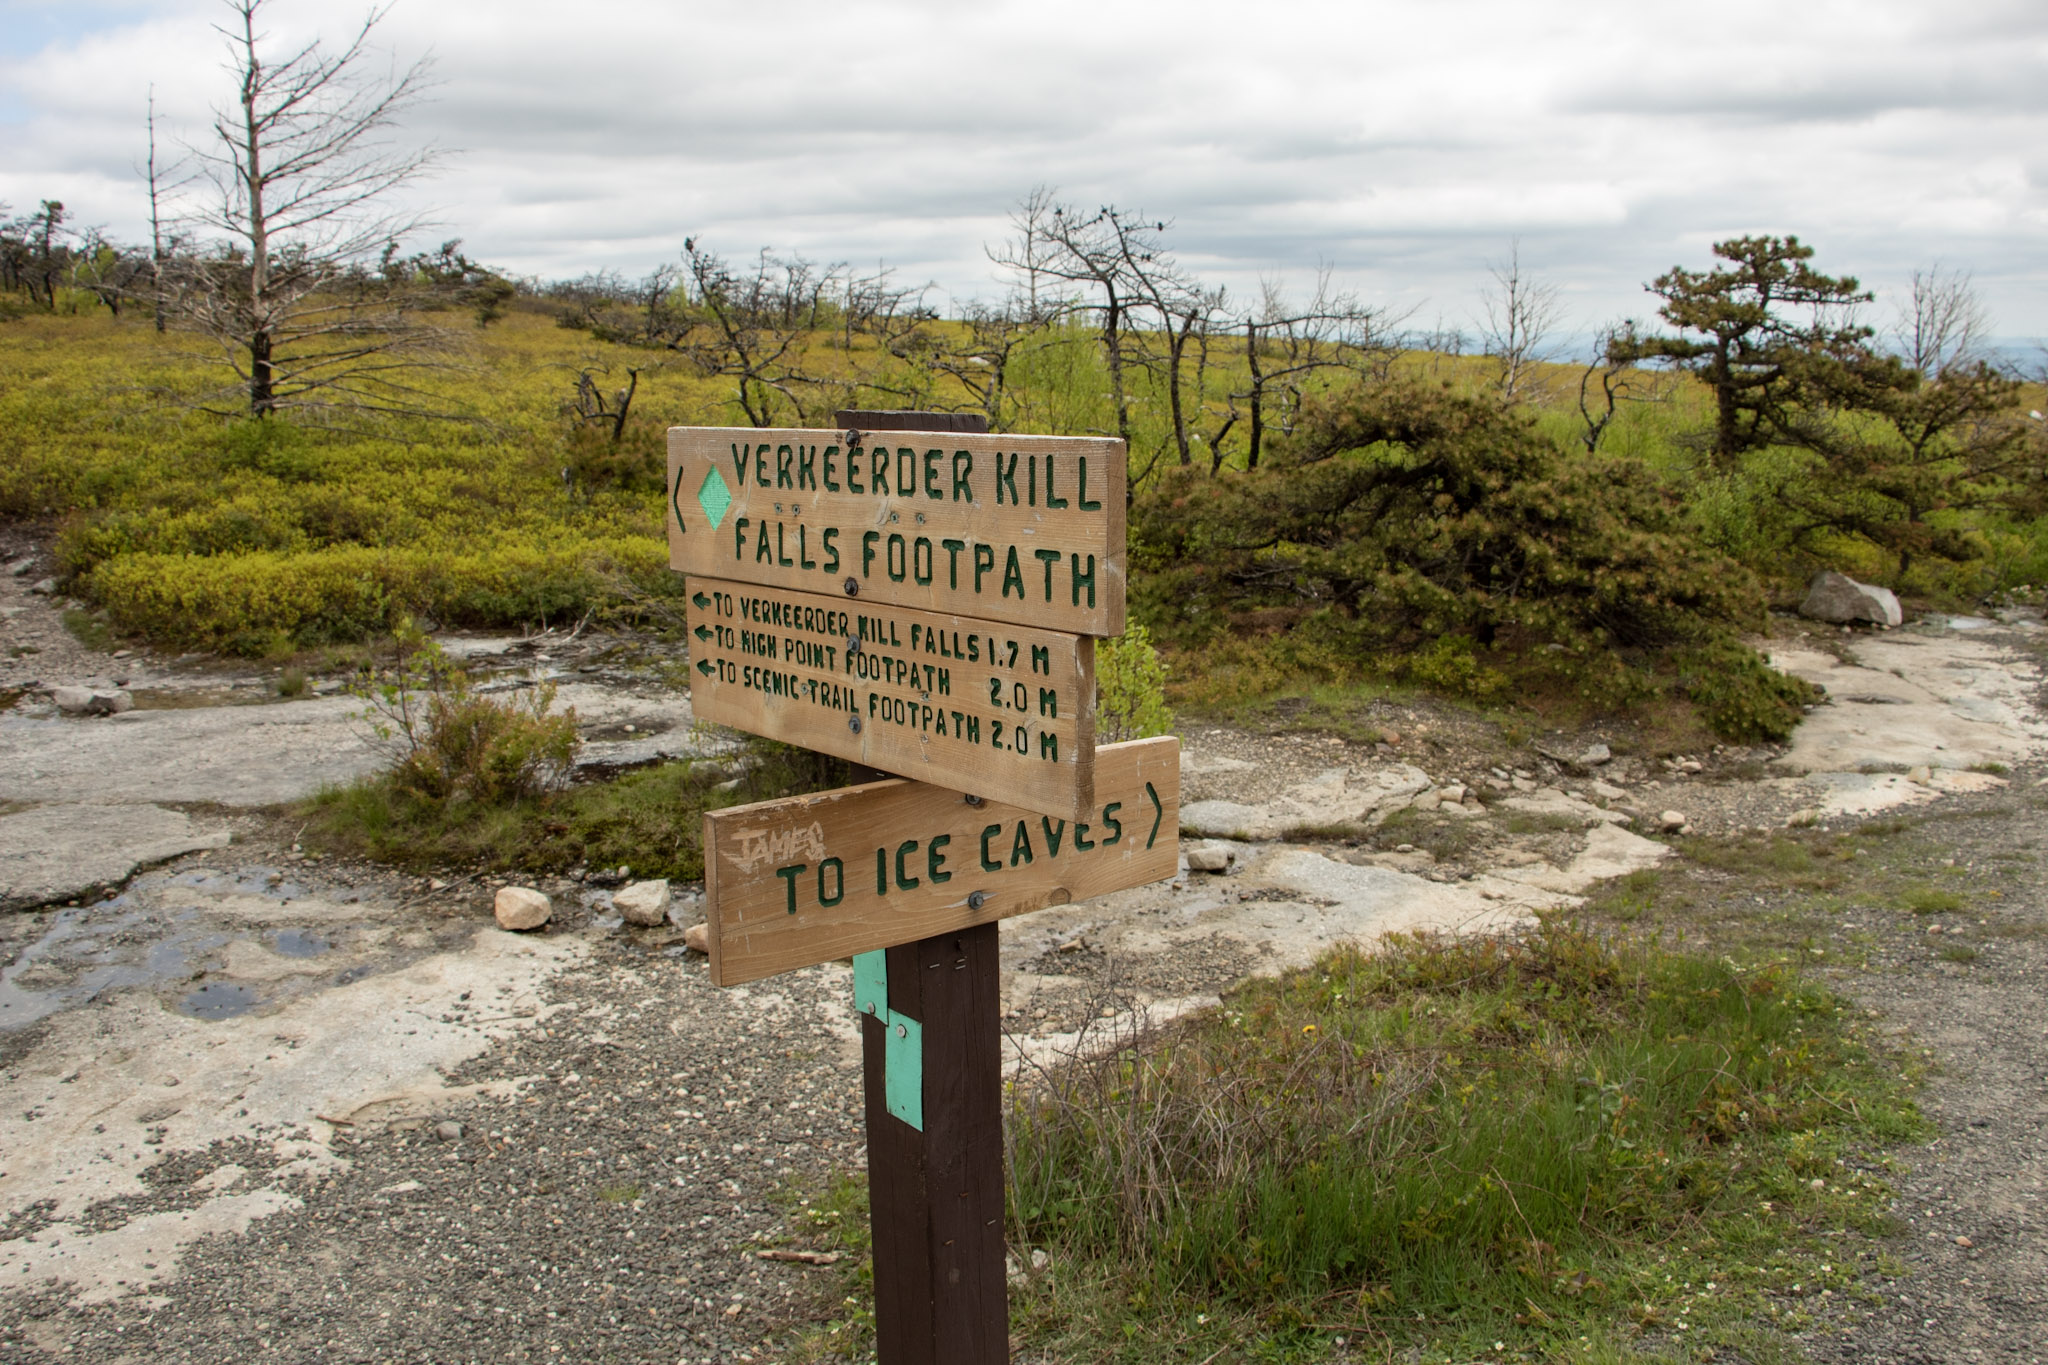
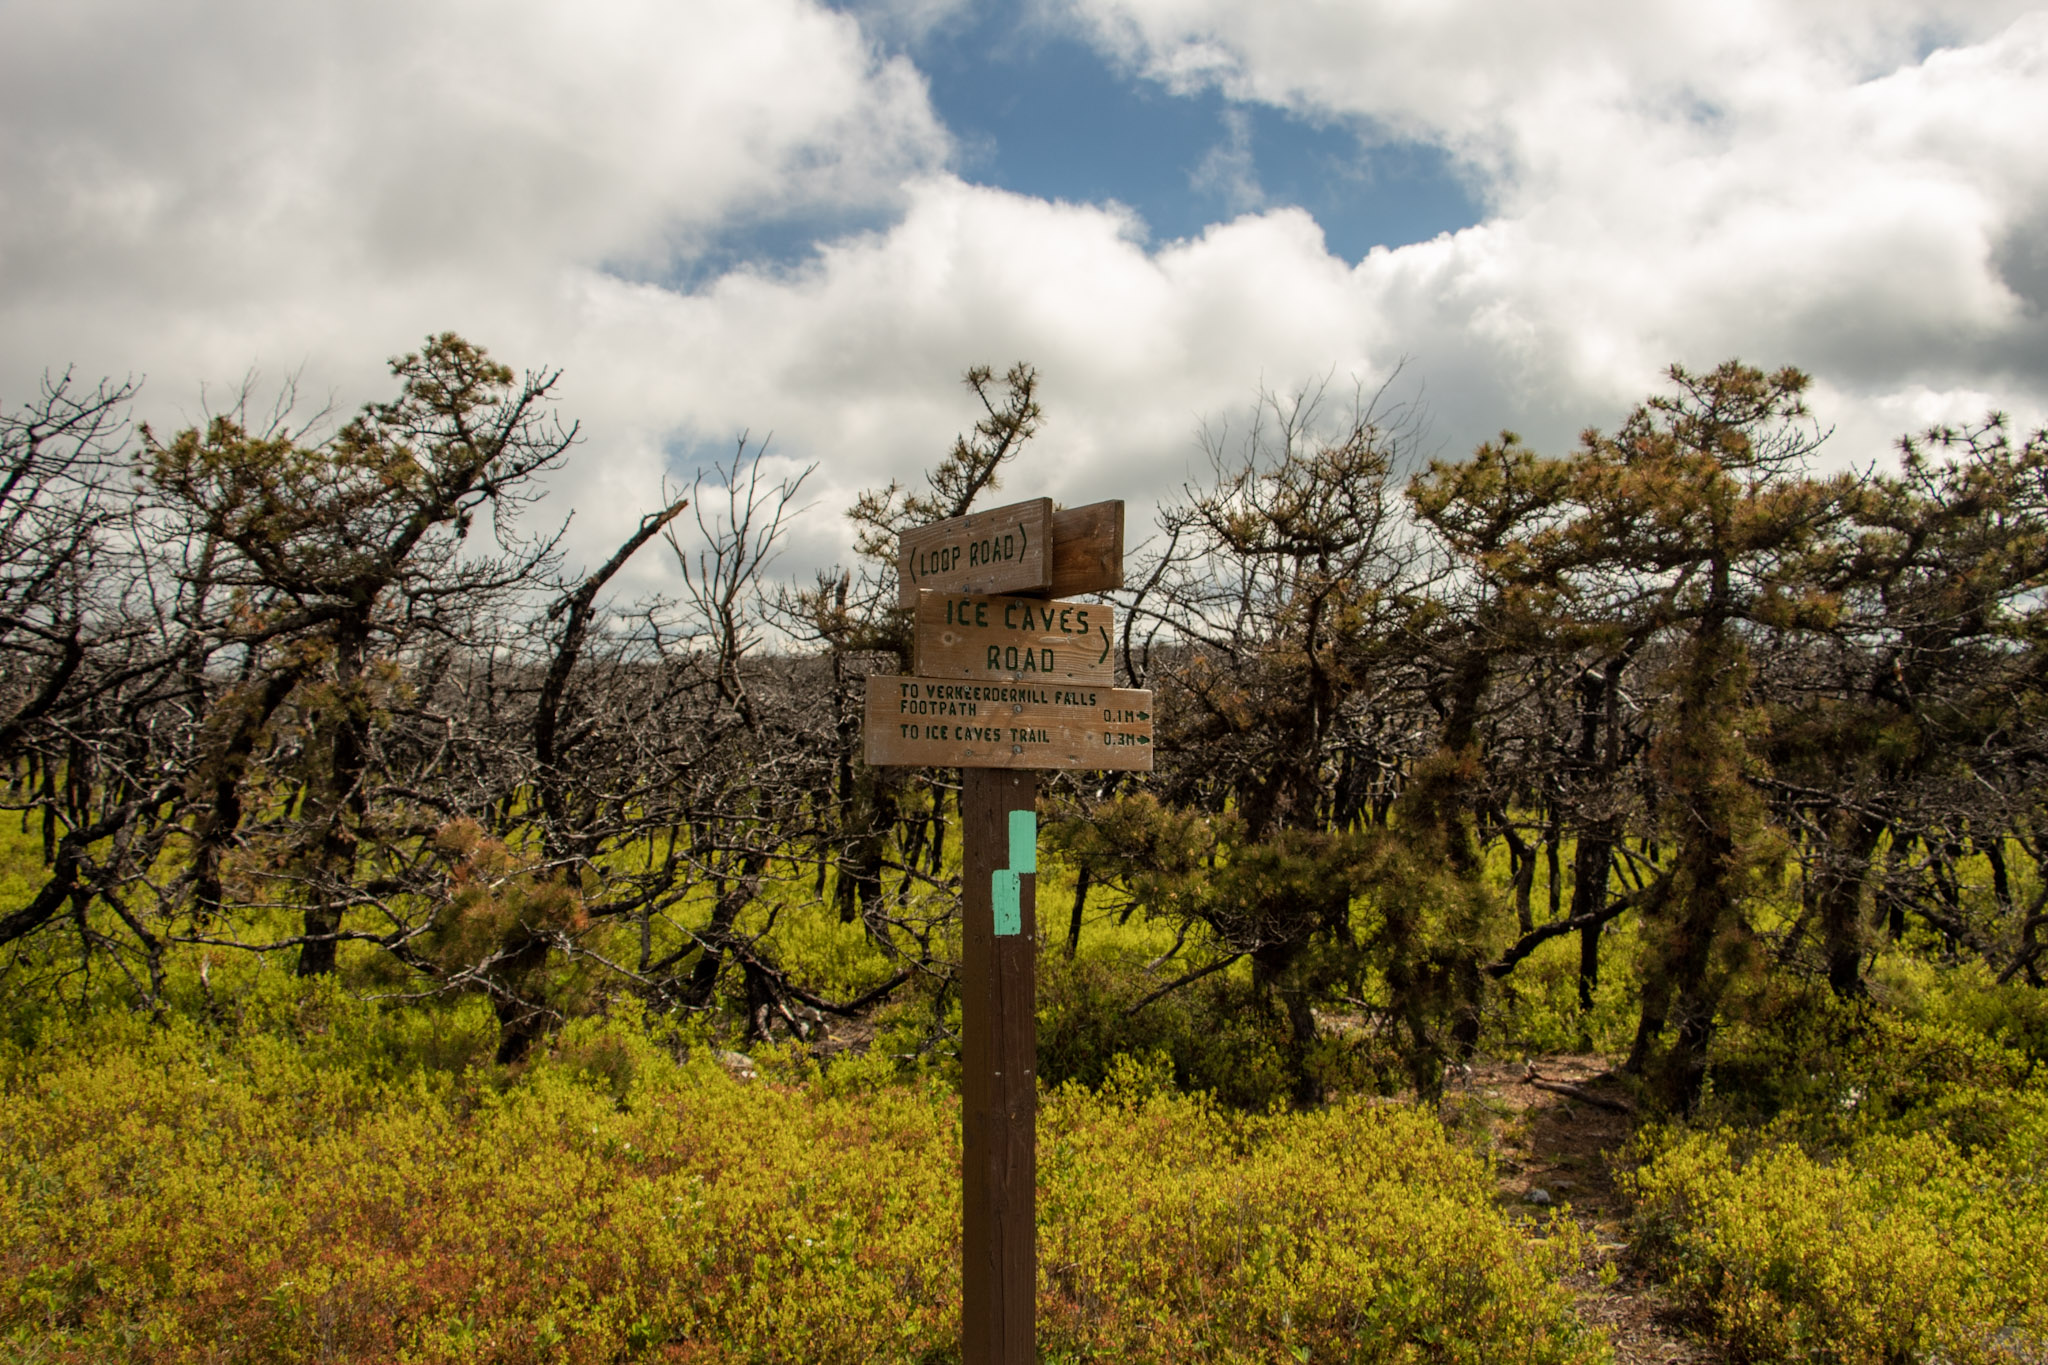
Loop Road will even out and we had an option to keep straight toward the waterfall or turn left toward the short trail to check out the view from Sam’s Point. It was pretty crowded and I just wanted to beat everyone to the waterfall so we saved Sam’s Point for the end. A short distance off Loop Road, we saw signs on our left to head toward Verkeerderkill Falls on the aqua blazed trail. If you wanted to check out the Ice Caves, continue straight from here. We couldn’t fit those in today, so we headed toward the waterfall.
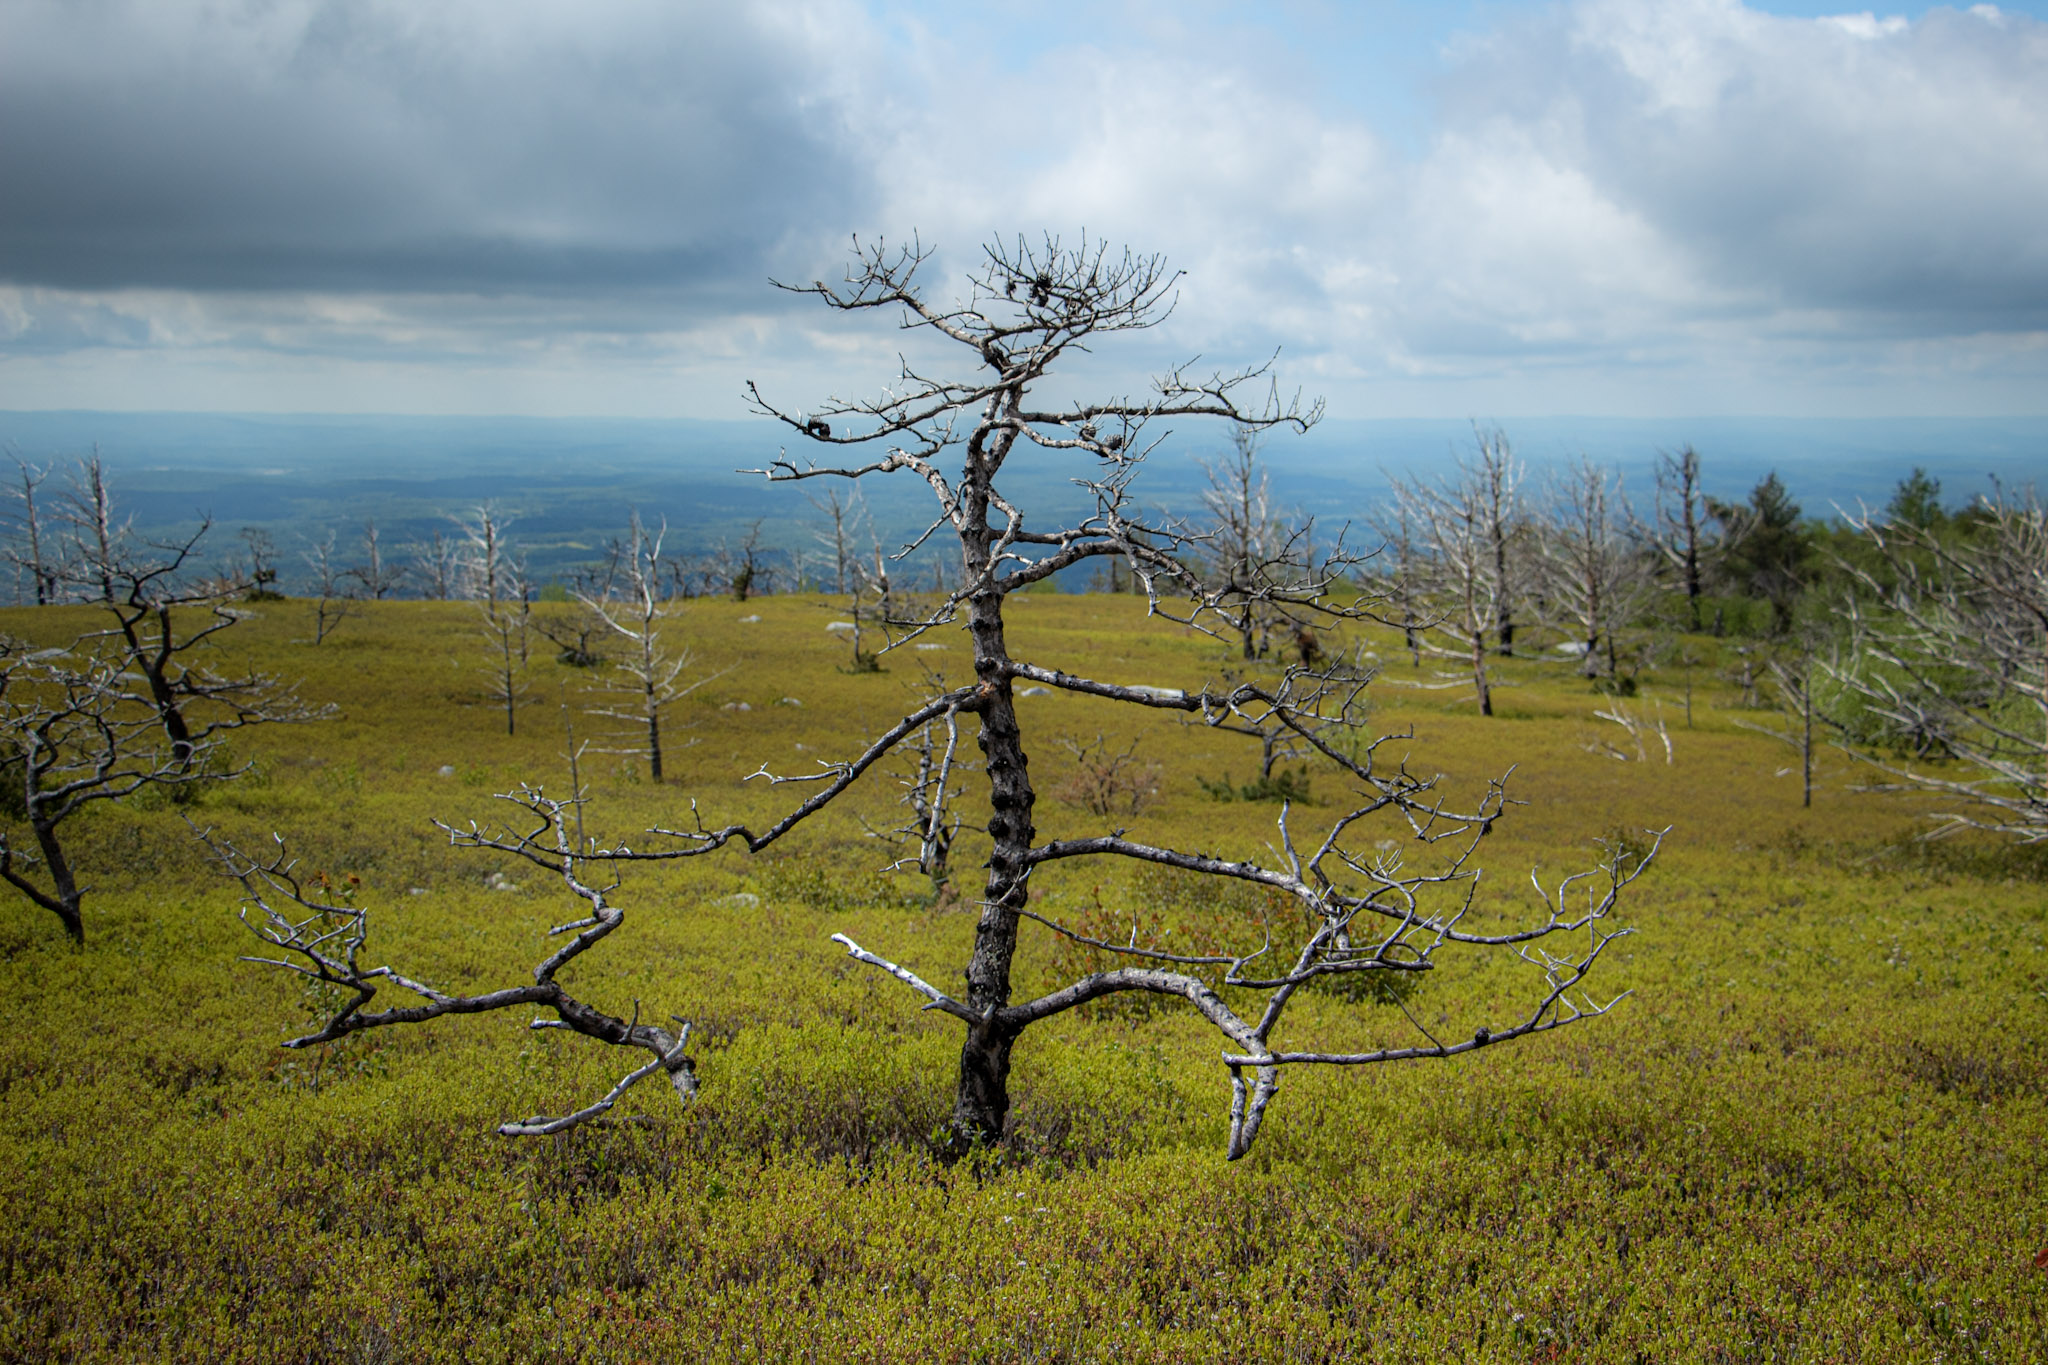
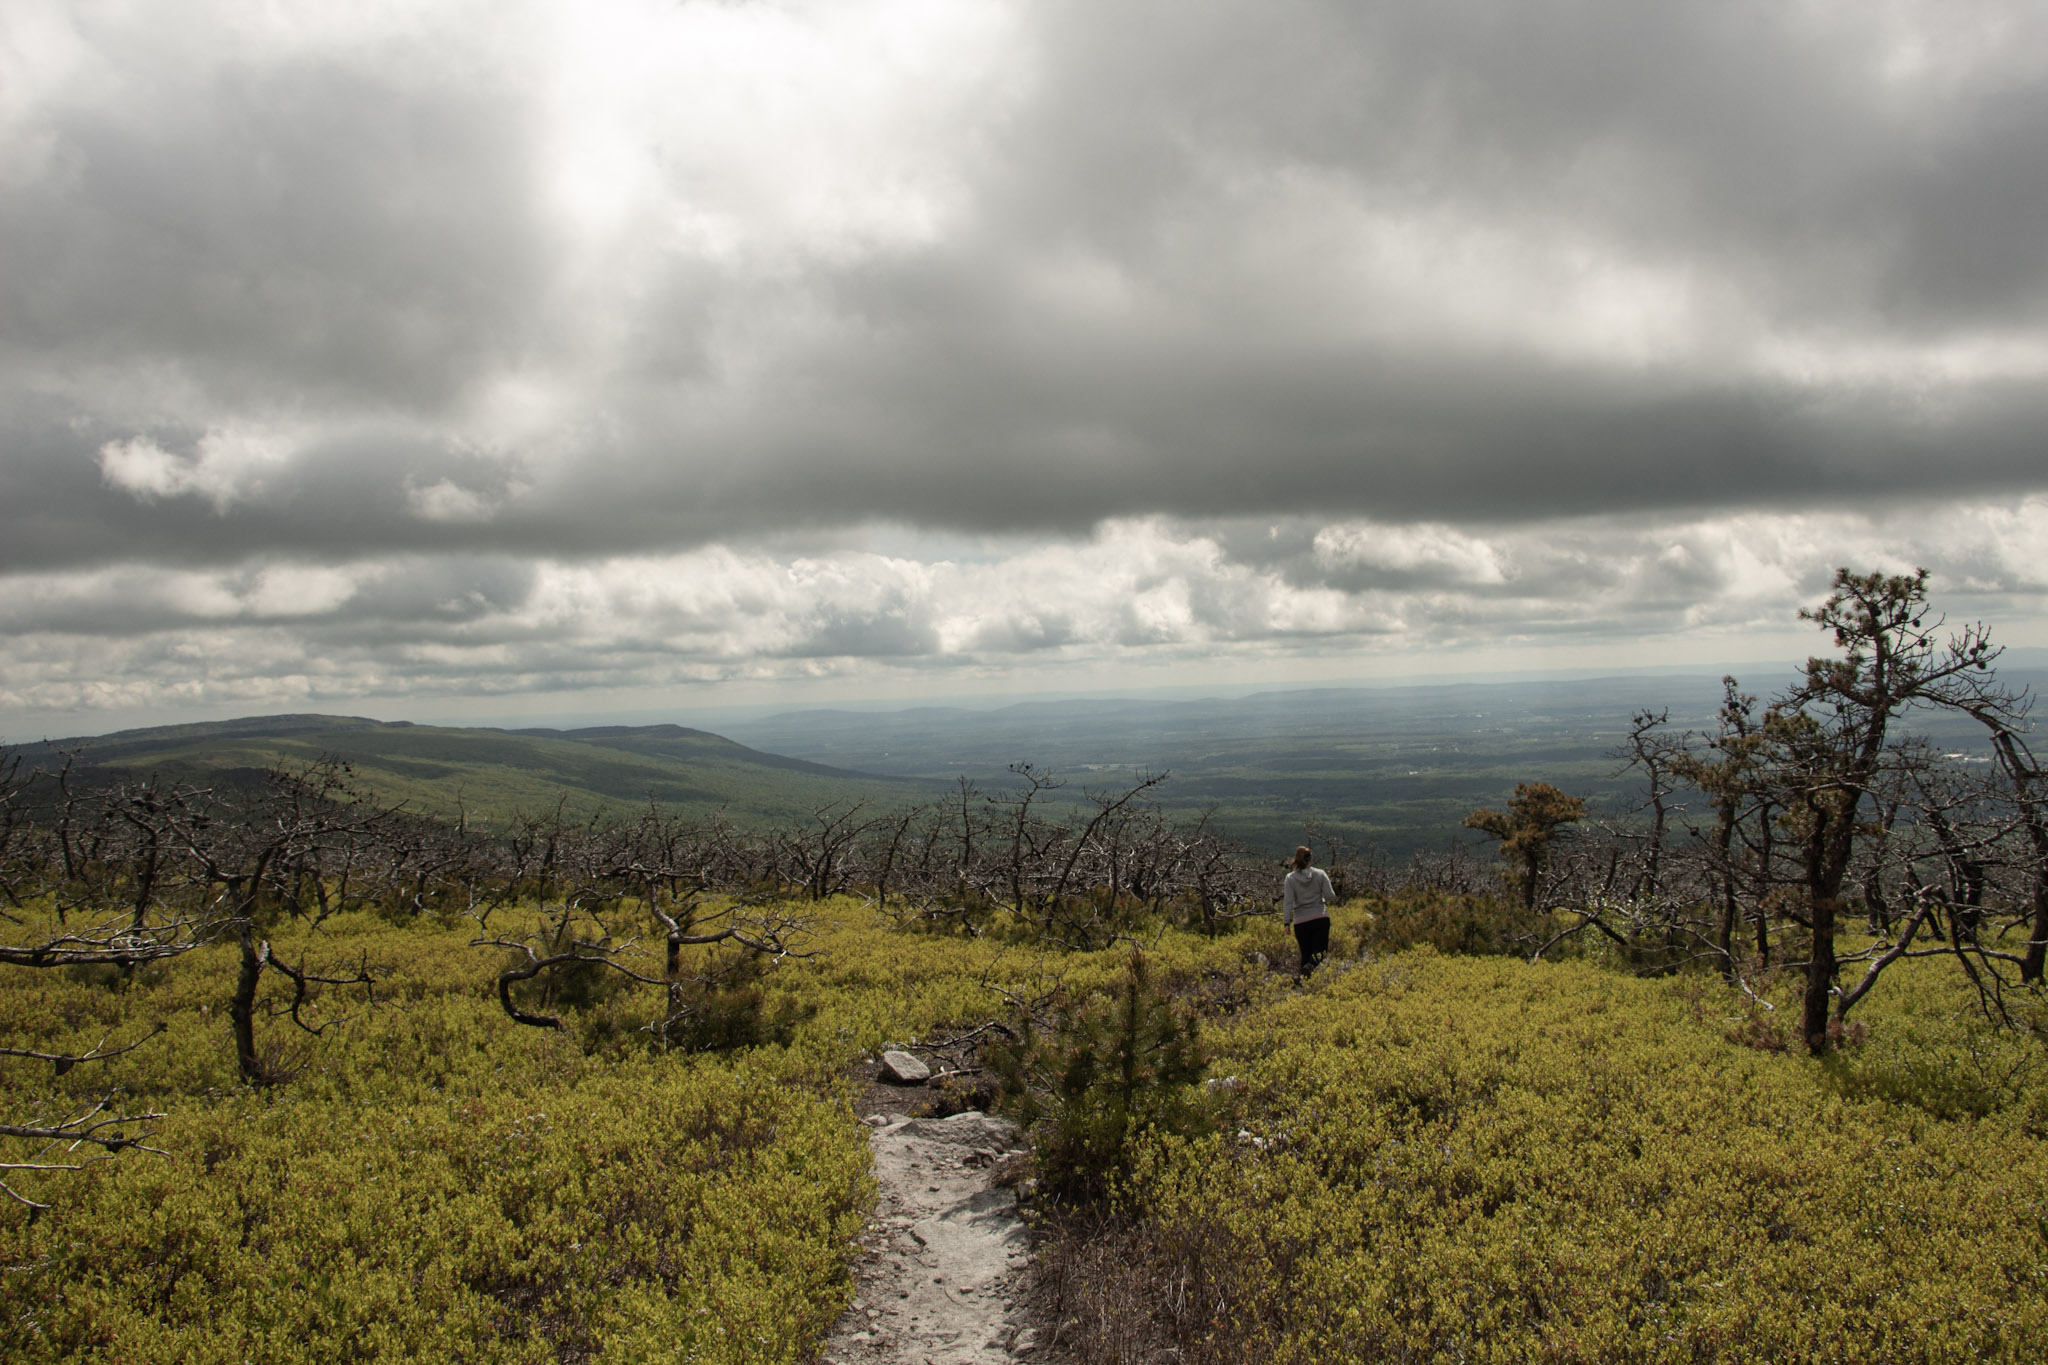
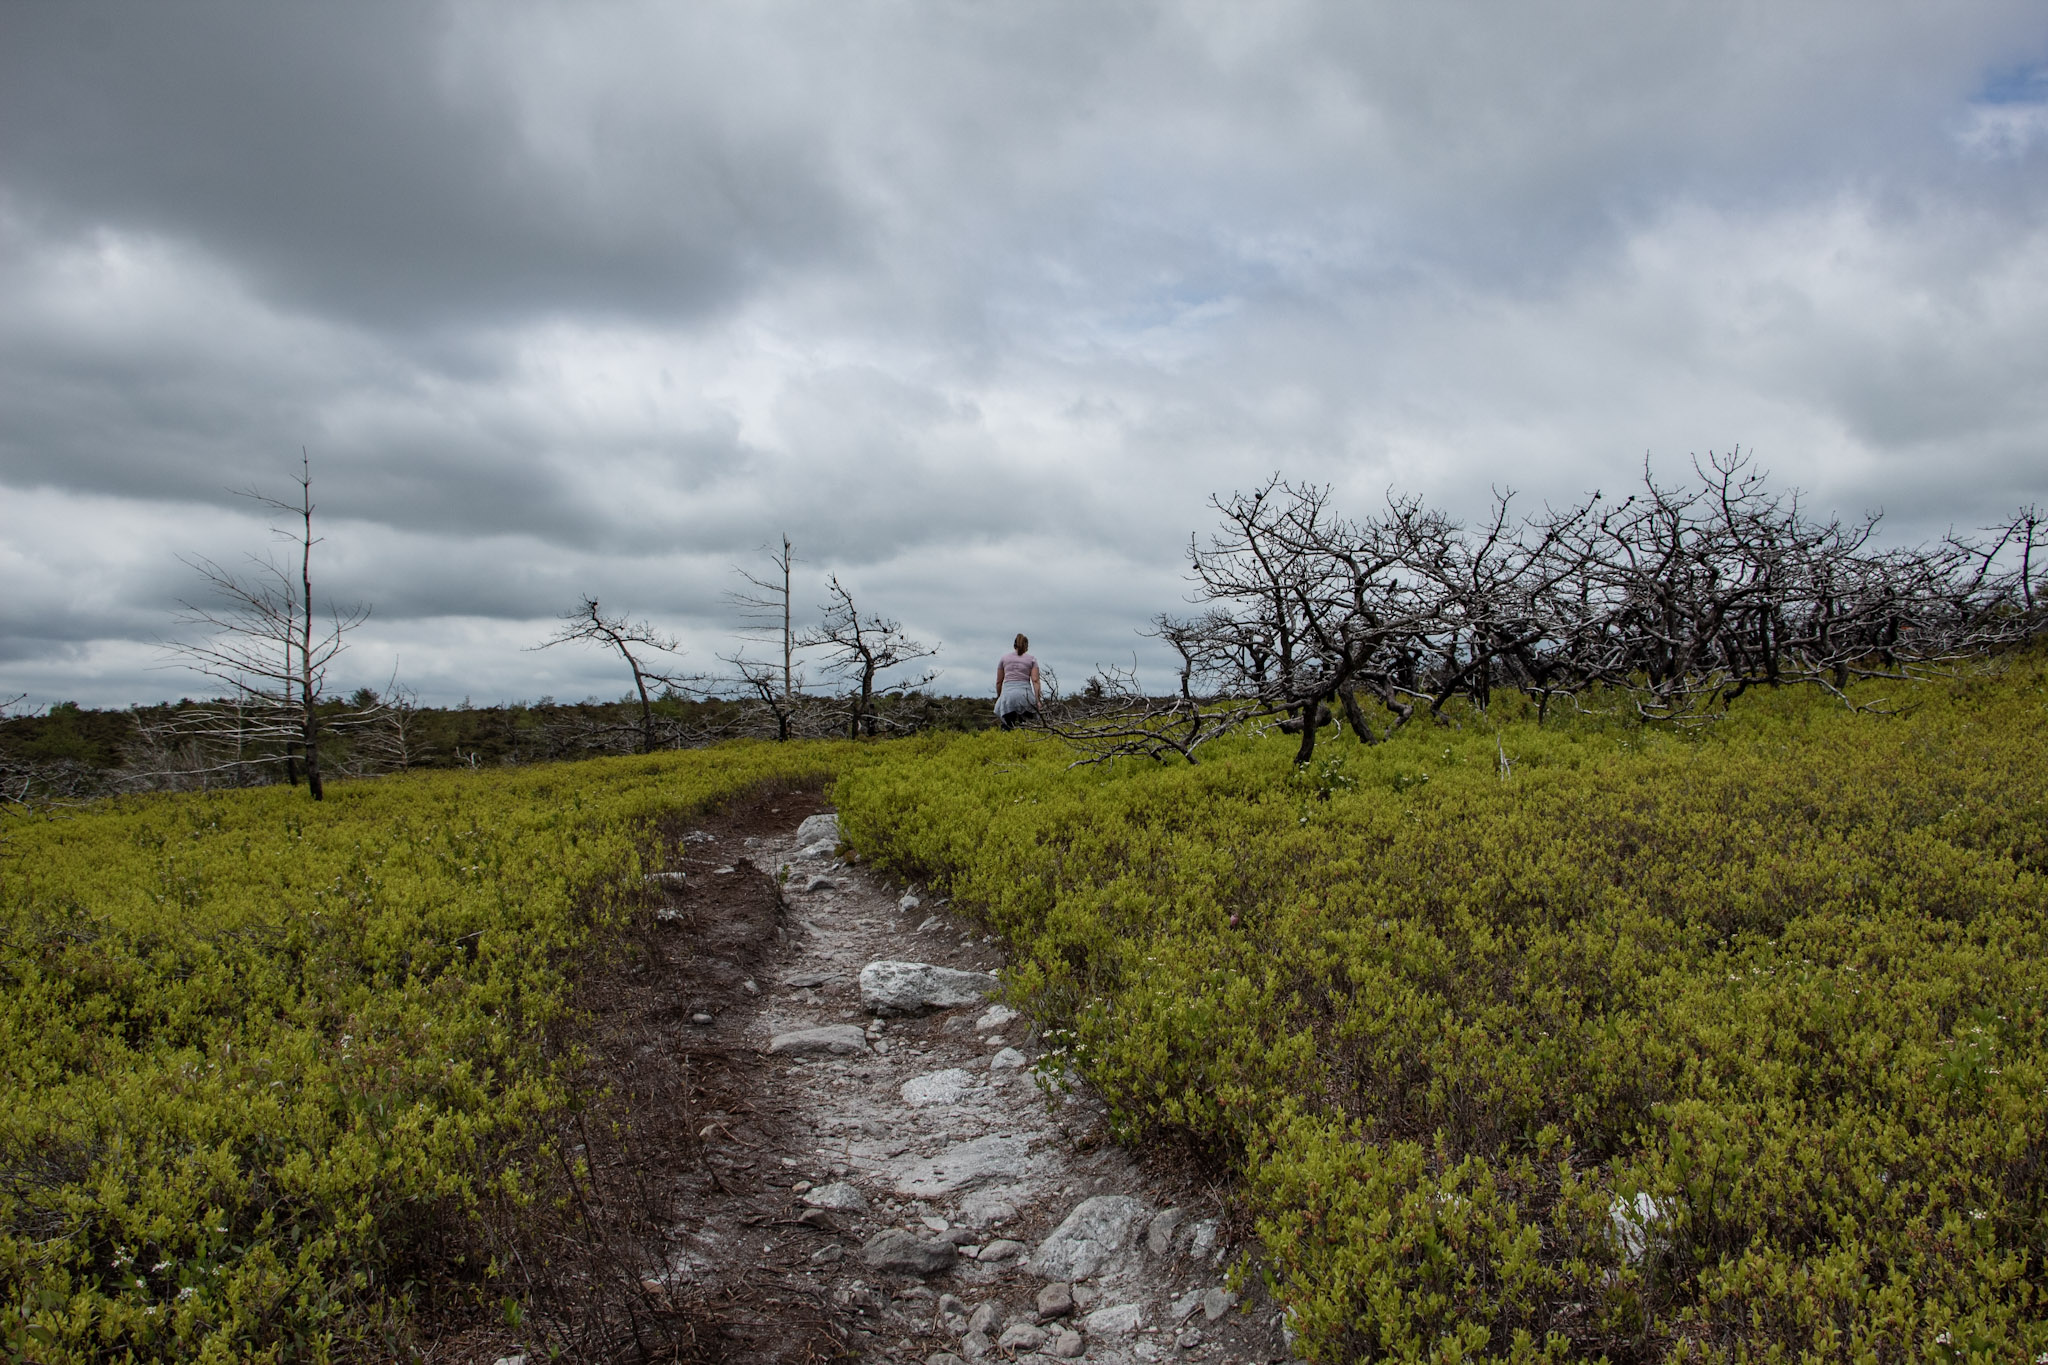
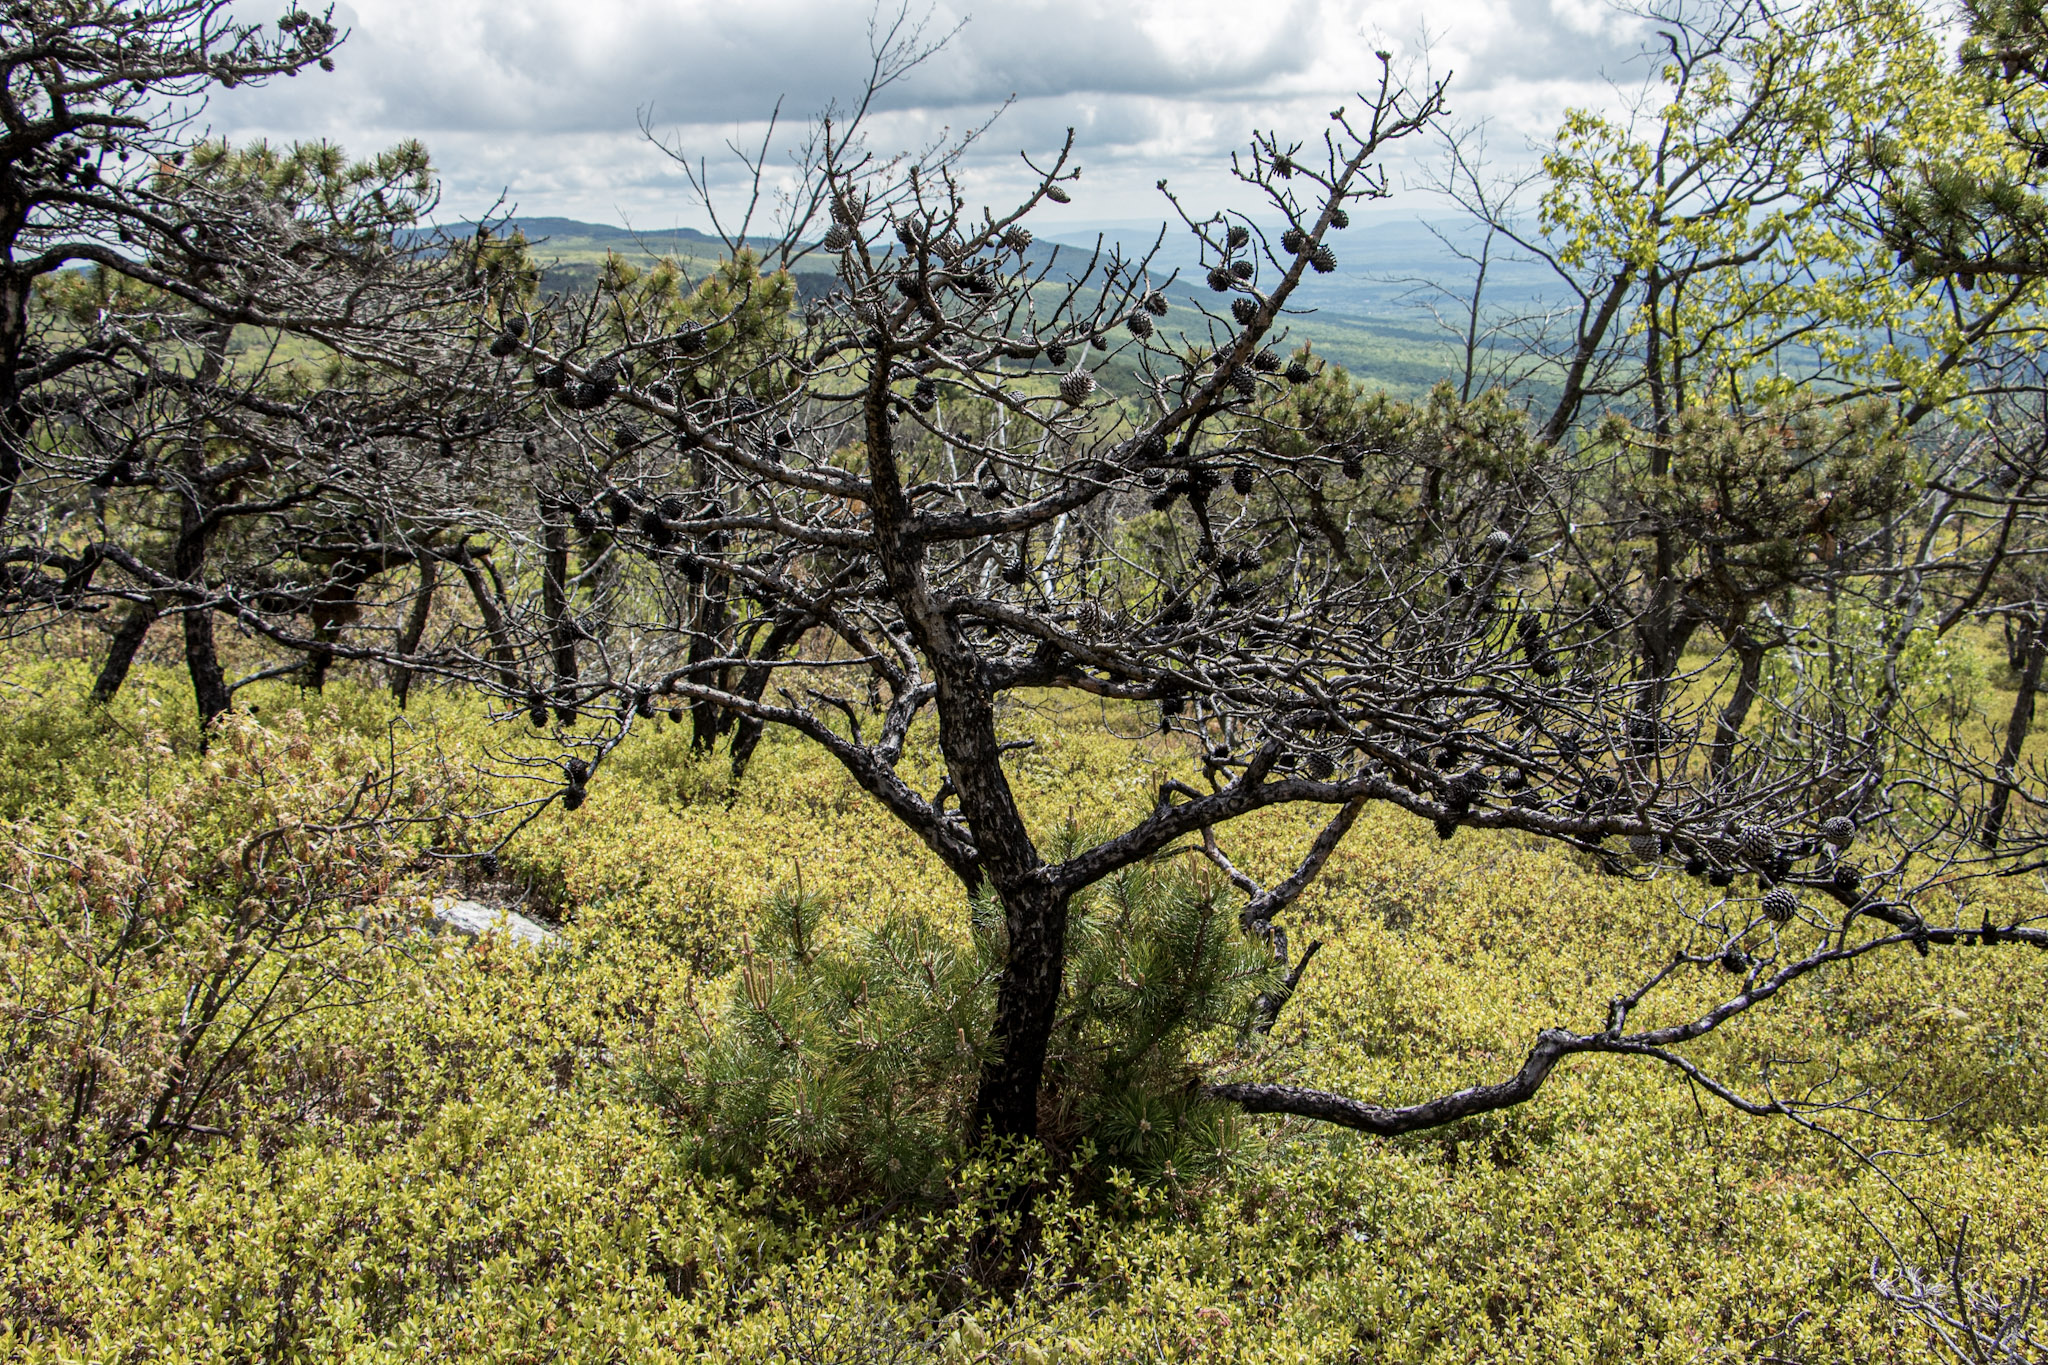
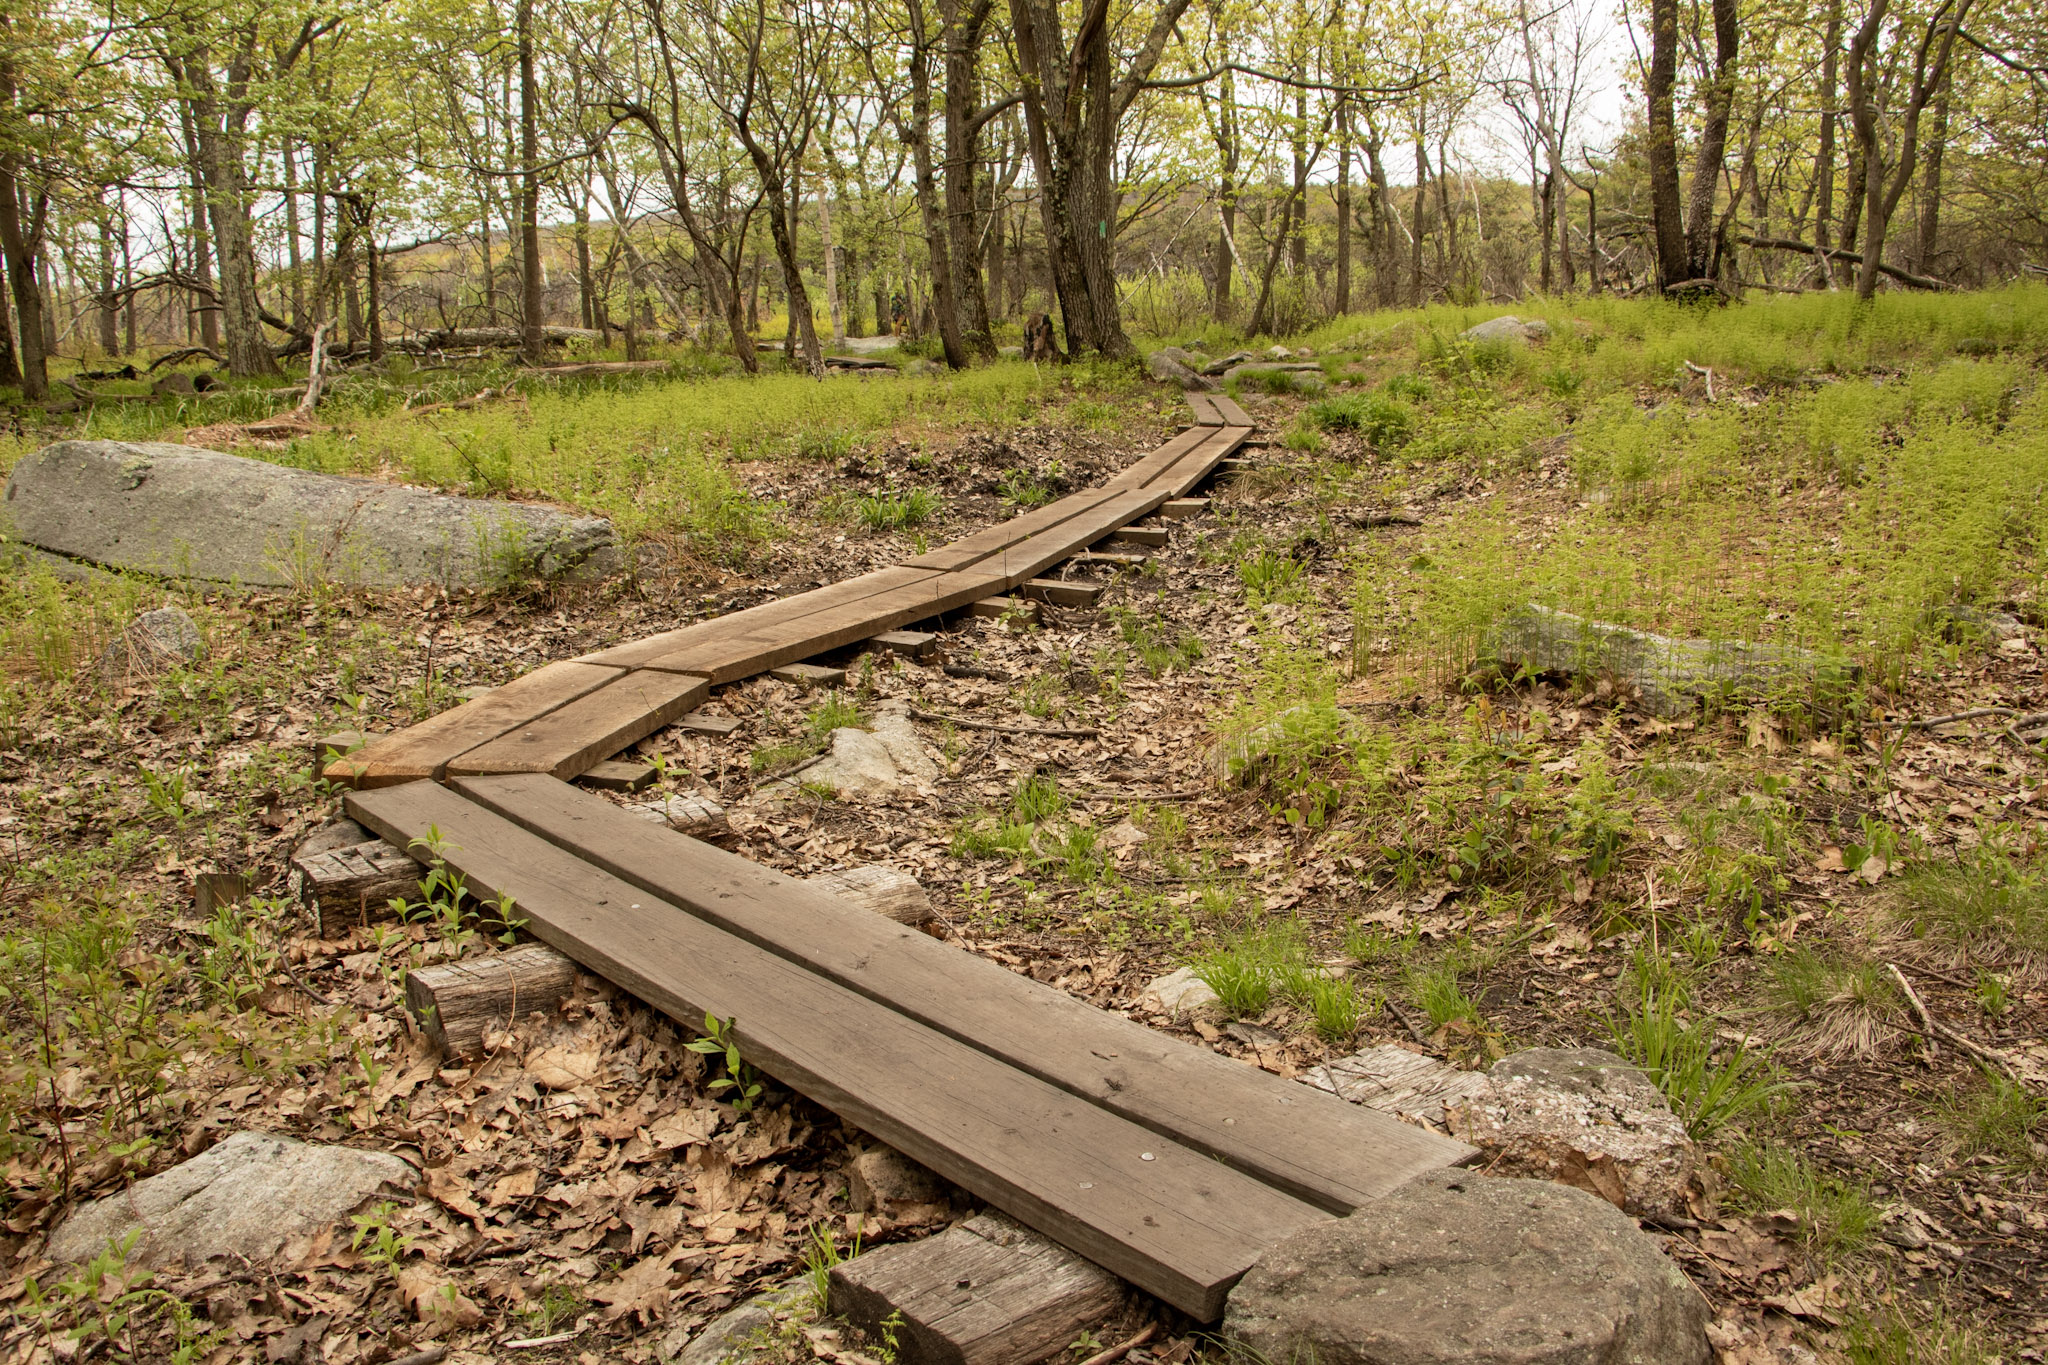
I did not anticipate the cool landscape we would be hiking through on this hike. Strolling along the trail you will the see rare dwarf pine trees offering very unique scenery. In addition, there are wide views of the Northern Shawangunk Ridge along this part of the trail. The trail will head downhill slightly. This isn’t terrible but the fact that it gets rockier, makes it a bit more challenging. As you get closer to the waterfall, there is a steep descend down.
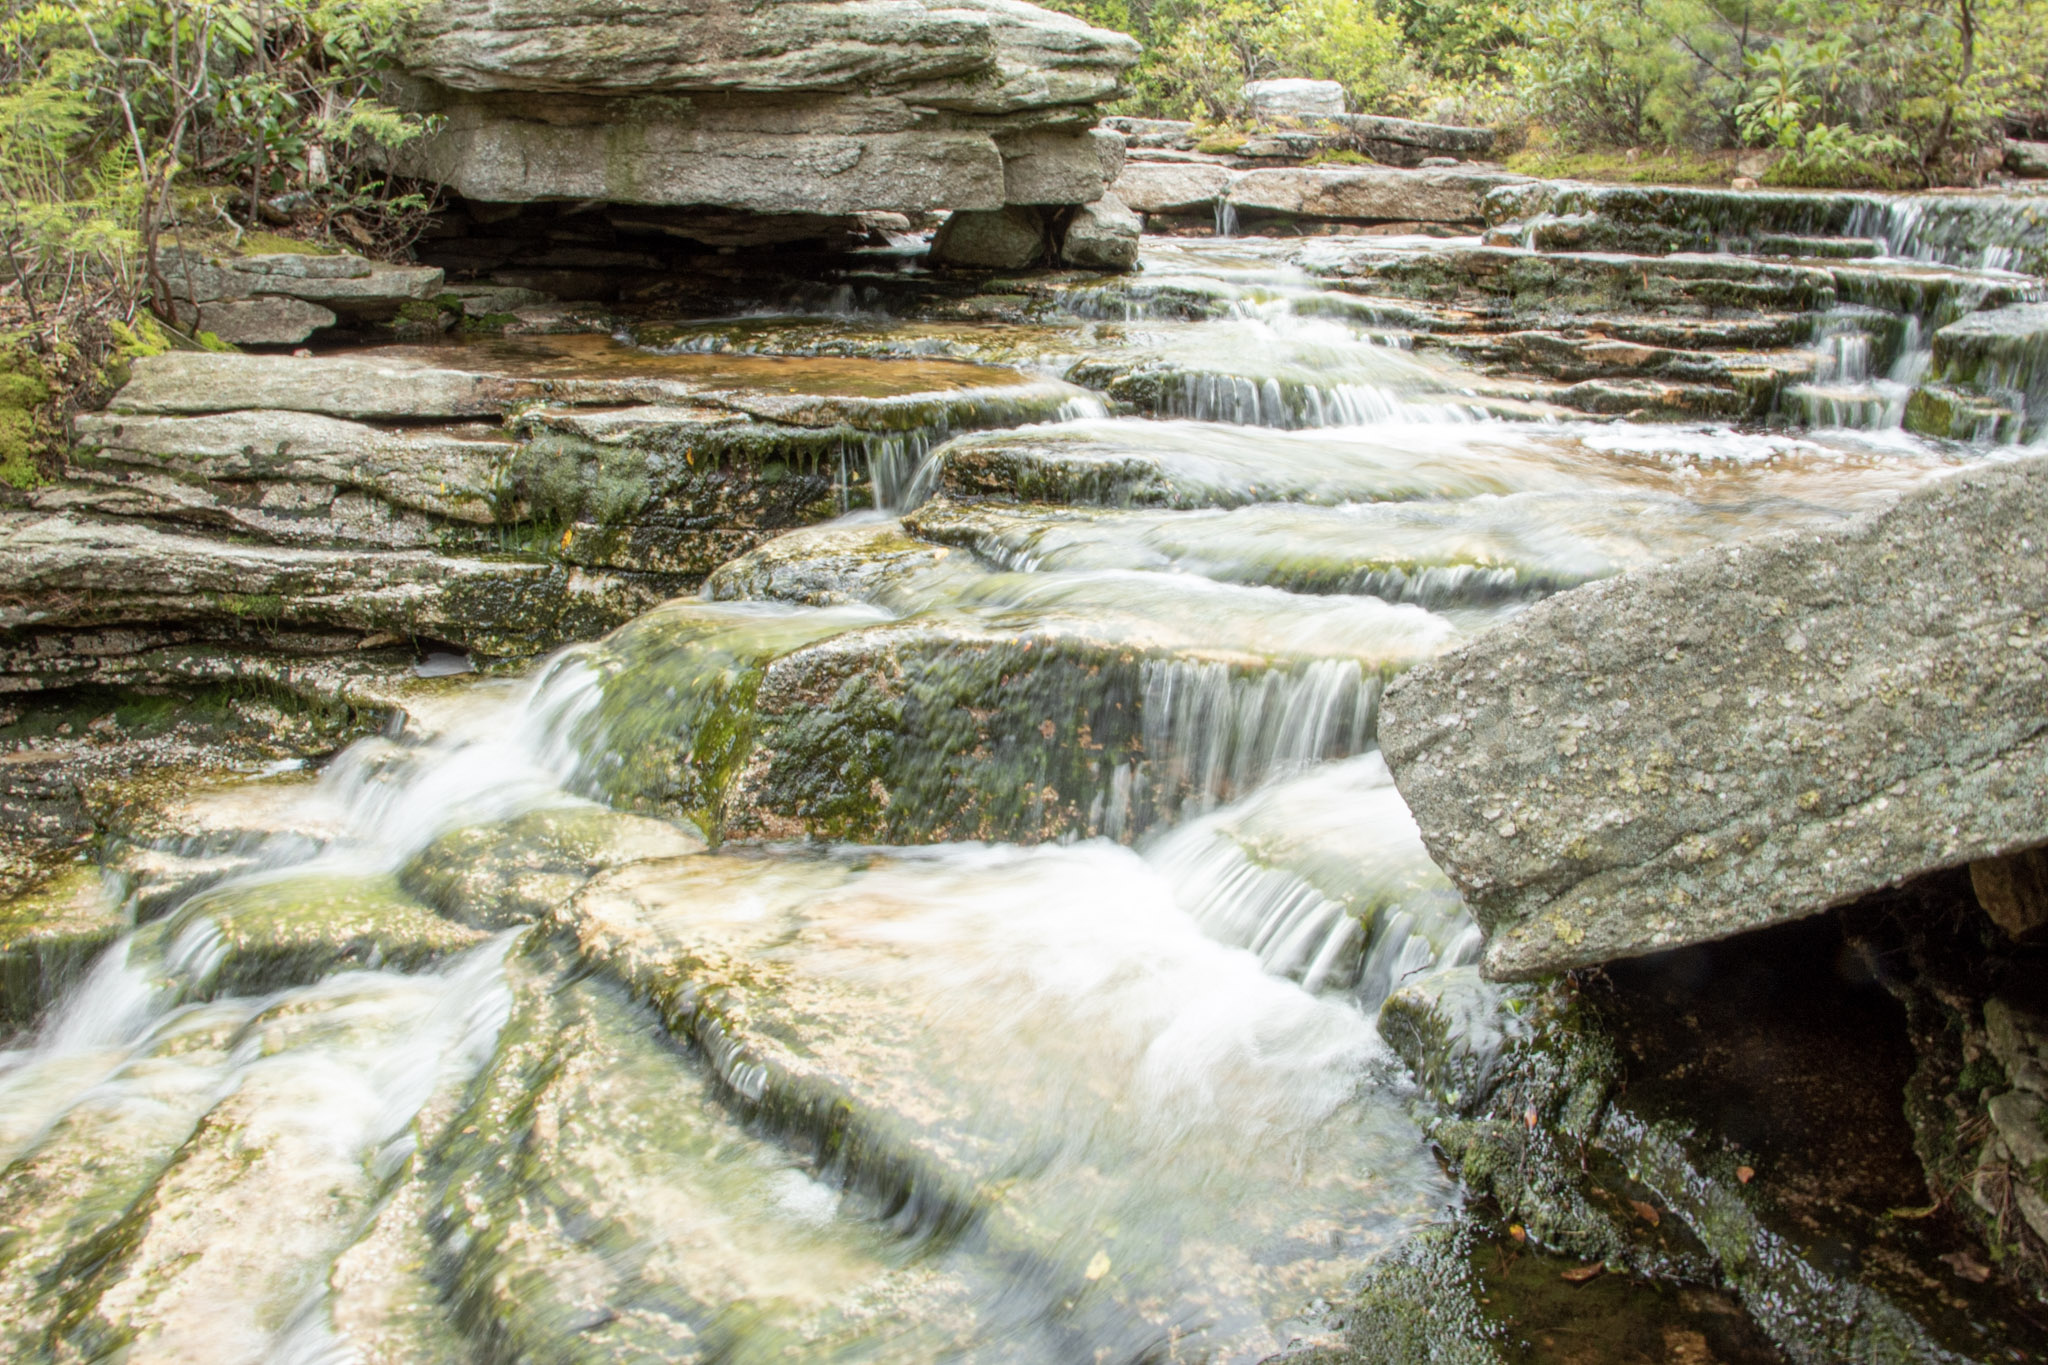
Eventually, we came upon a stream above the falls. Depending how high the water is on a given day, you may have to follow upstream to cross. We made our way to the cliff overlook and we were greeted with a large crowd. Then, I turned around and saw the amazing view of Verkeerderkill Falls! The water was flowing pretty well on this day. This is nice spot to take a break and relax. However with the crowd and popularity of the hike, we absorbed the fall briefly and started retracing our steps back.
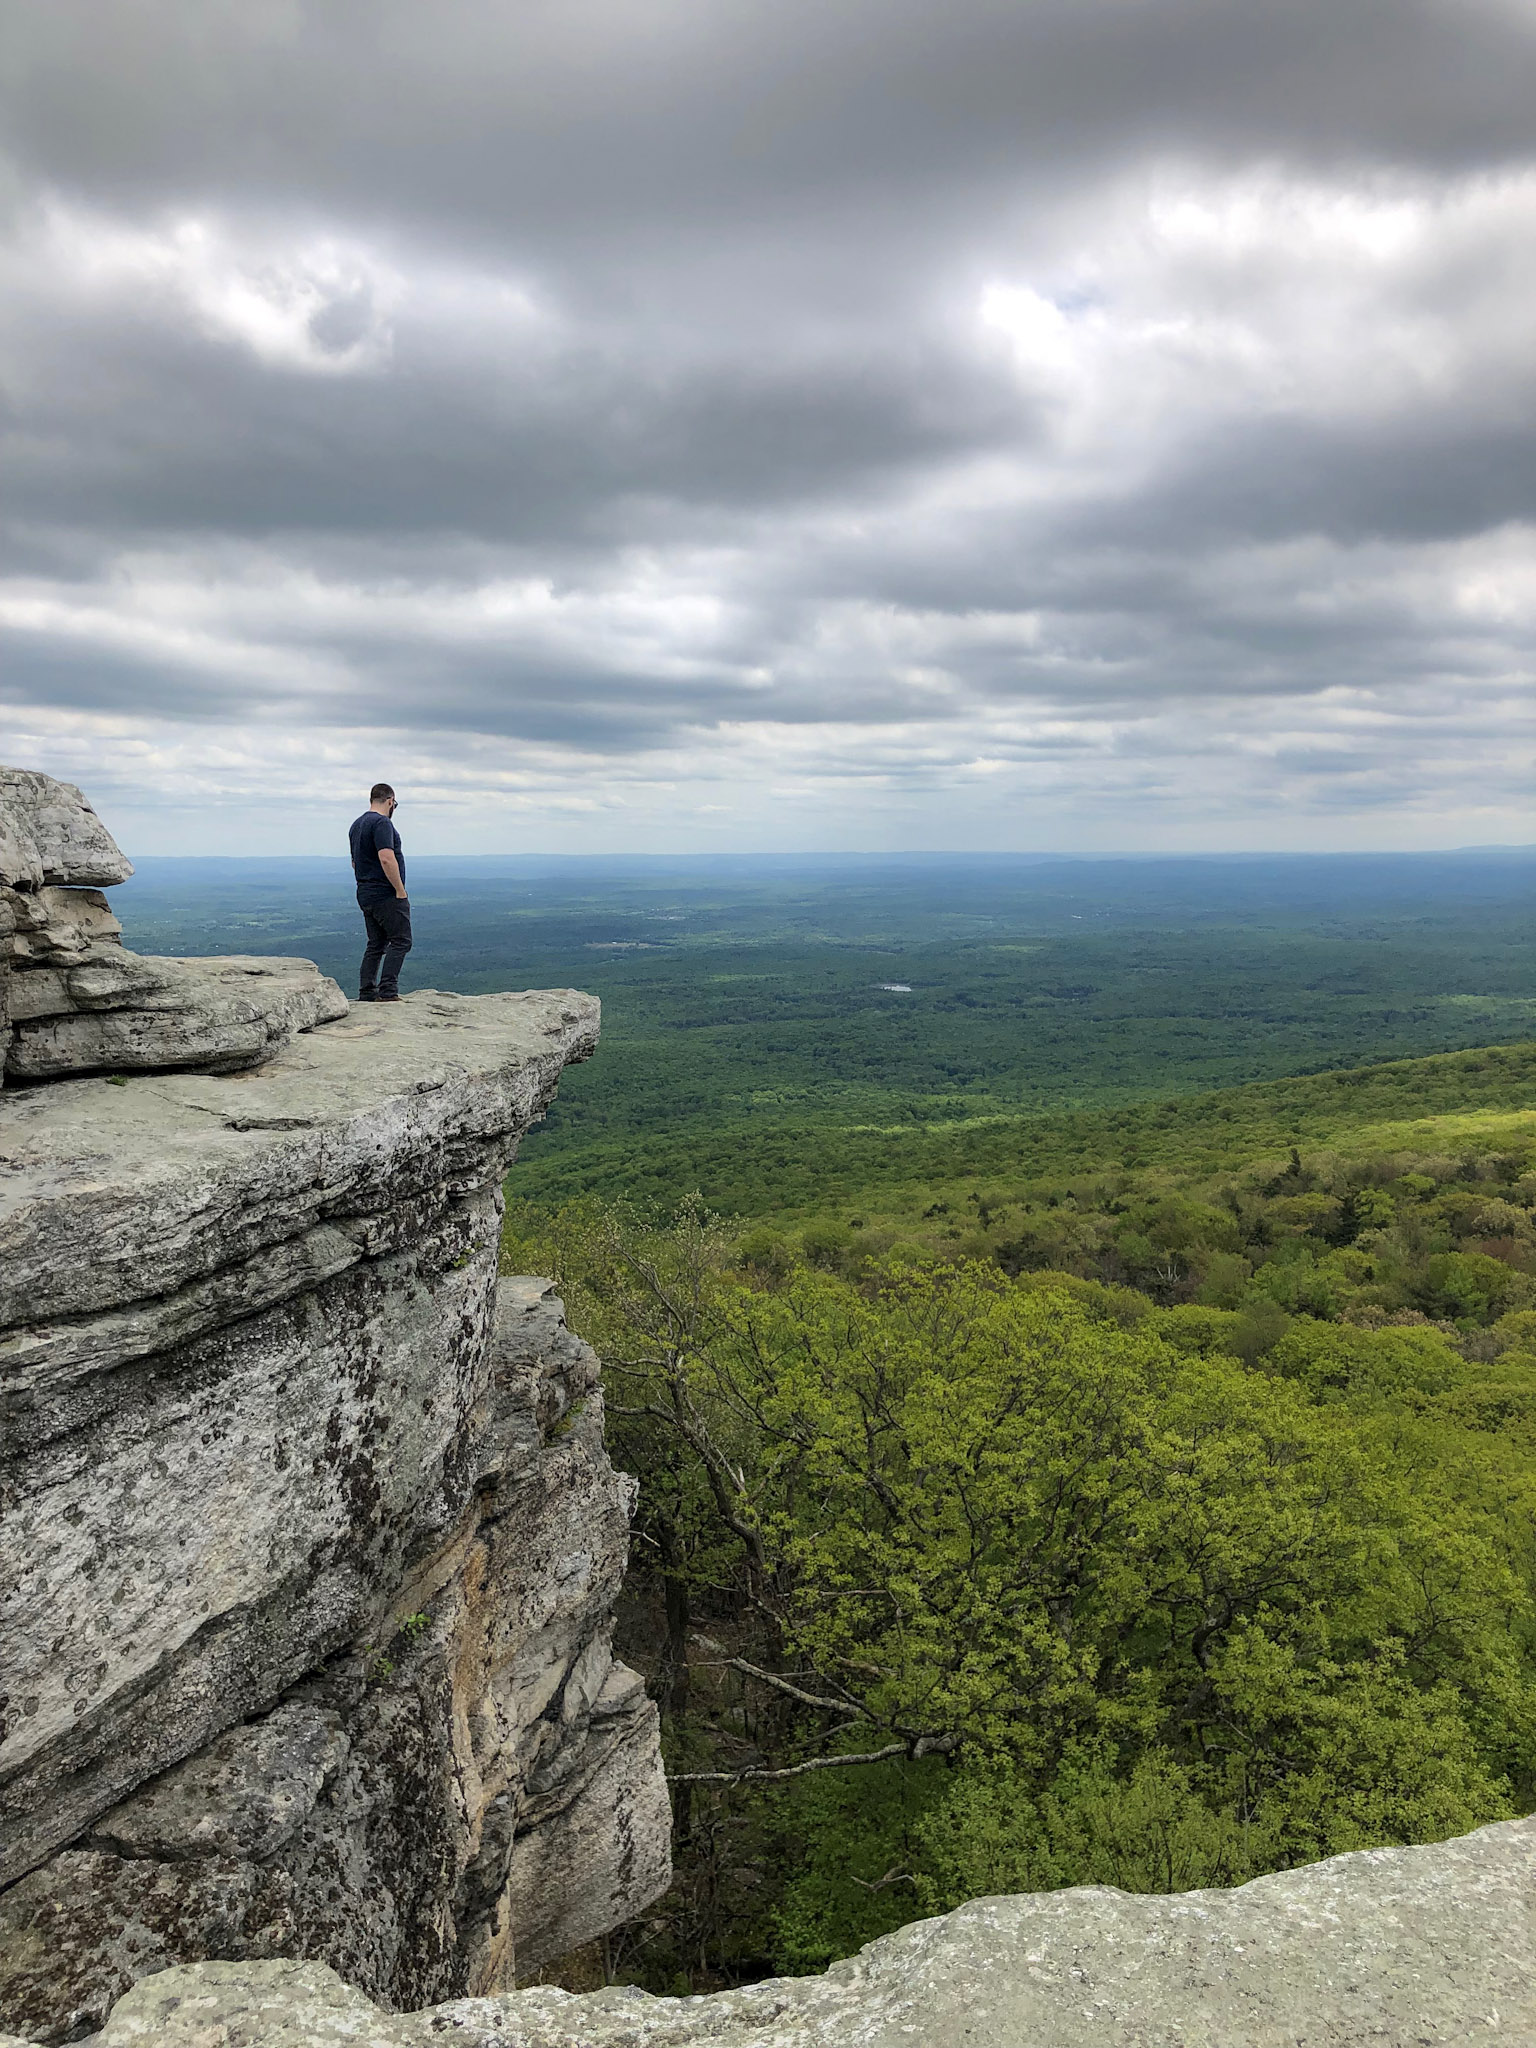
We finally made our way over to Sam’s Point. The views are outstanding. From the cliffs, you can see the Shawangunk Ridge and Wallkill Valley. Lots of space to take in all the scenery, grab a snack, or take a selfie. There were lots of selfies going on around us. Before we left, I had one thing left to do. I was waiting for the perfect moment. Mostly, I was waiting out the 20 plus Cub Scout group that were yelling and running around. In addition, there was this one kid (like in his 20s) with his mom who kept taking selfies and would NOT leave until he got the perfect one for Instagram. Come on dude. Once they left, I saw my opening and proposed to my amazing girlfriend! Even though I made her trek 6 miles on her birthday and endure 20 minutes of freezing wind atop Sam’s Point, she said yes. I didn’t realize how packed this overlook would be at all times. Sorta risky move. No backup plan. But in the end, everything went as planned. Then, we joyously made our way back down to the parking lot.
This hike has a lot of meaning for me going forward but this was a dynamite hike. When you can explore different landscapes and come across multiple features that this trail offers, there is not much more you can ask for in a hike. This is a great place to visit to spend the day.
MORE PICTURES BELOW:
HIKING FOR DONUTS
Hi, I’m Mark. I live in Connecticut. I take new trips every change I get. A good trip has a great hike, great food, and something fun to do. My goal is to search out new trips and share them to inspire others to try something new and exciting.
If you are looking for posts in a particular place, search City or State here.
SEE OTHER POSTS IN ARCHIVE
Archive
RECOMMENDED POSTS
RECENT POSTS
See the latest on Instagram and follow @HIKINGFORDONUTS
Mount Beacon Fire Tower, Beacon, NY
Mount Beacon is one of the most popular trails along the Hudson River. It offers different terrain for a good workout, old railway landmarks, and incredible views of the Hudson Valley as well as the Catskills and NYC on a clear day. Most people will hike to the top of the mountain overlooking Beacon. However, adding the fire tower to this hike is worth it. Check out the blog for details and pictures!
Trail Description: Mount Beacon offers gorgeous views of the Hudson Valley and you can see as far as NYC and the Catskills from the fire tower.
Trail Info:
Where: Beacon, NY Distance: 4.4 miles (3-3.5 hours) Difficulty: Moderate Trail Type: Out and Back Features: Views, Hudson River, Fire Tower, Mountains, Valley, Reservoir, Railway
How to get there:
788 Wolcott Ave Beacon, NY 12508
You will see the parking lot located the intersection of Route 9D and Howland Avenue in the City of Beacon. Parking can be limited here. For more info, https://www.scenichudson.org/mountbeacon.
Hiking Tips
Get there early for parking on weekends.
First half mile is the toughest. After that, it’s a breeze. Keep going!
Once you reach the white-blazed trail, take that up to fire tower. The White Trail is not marked as well as the Red Trail, look for faded markings on the rocks.
The Hike
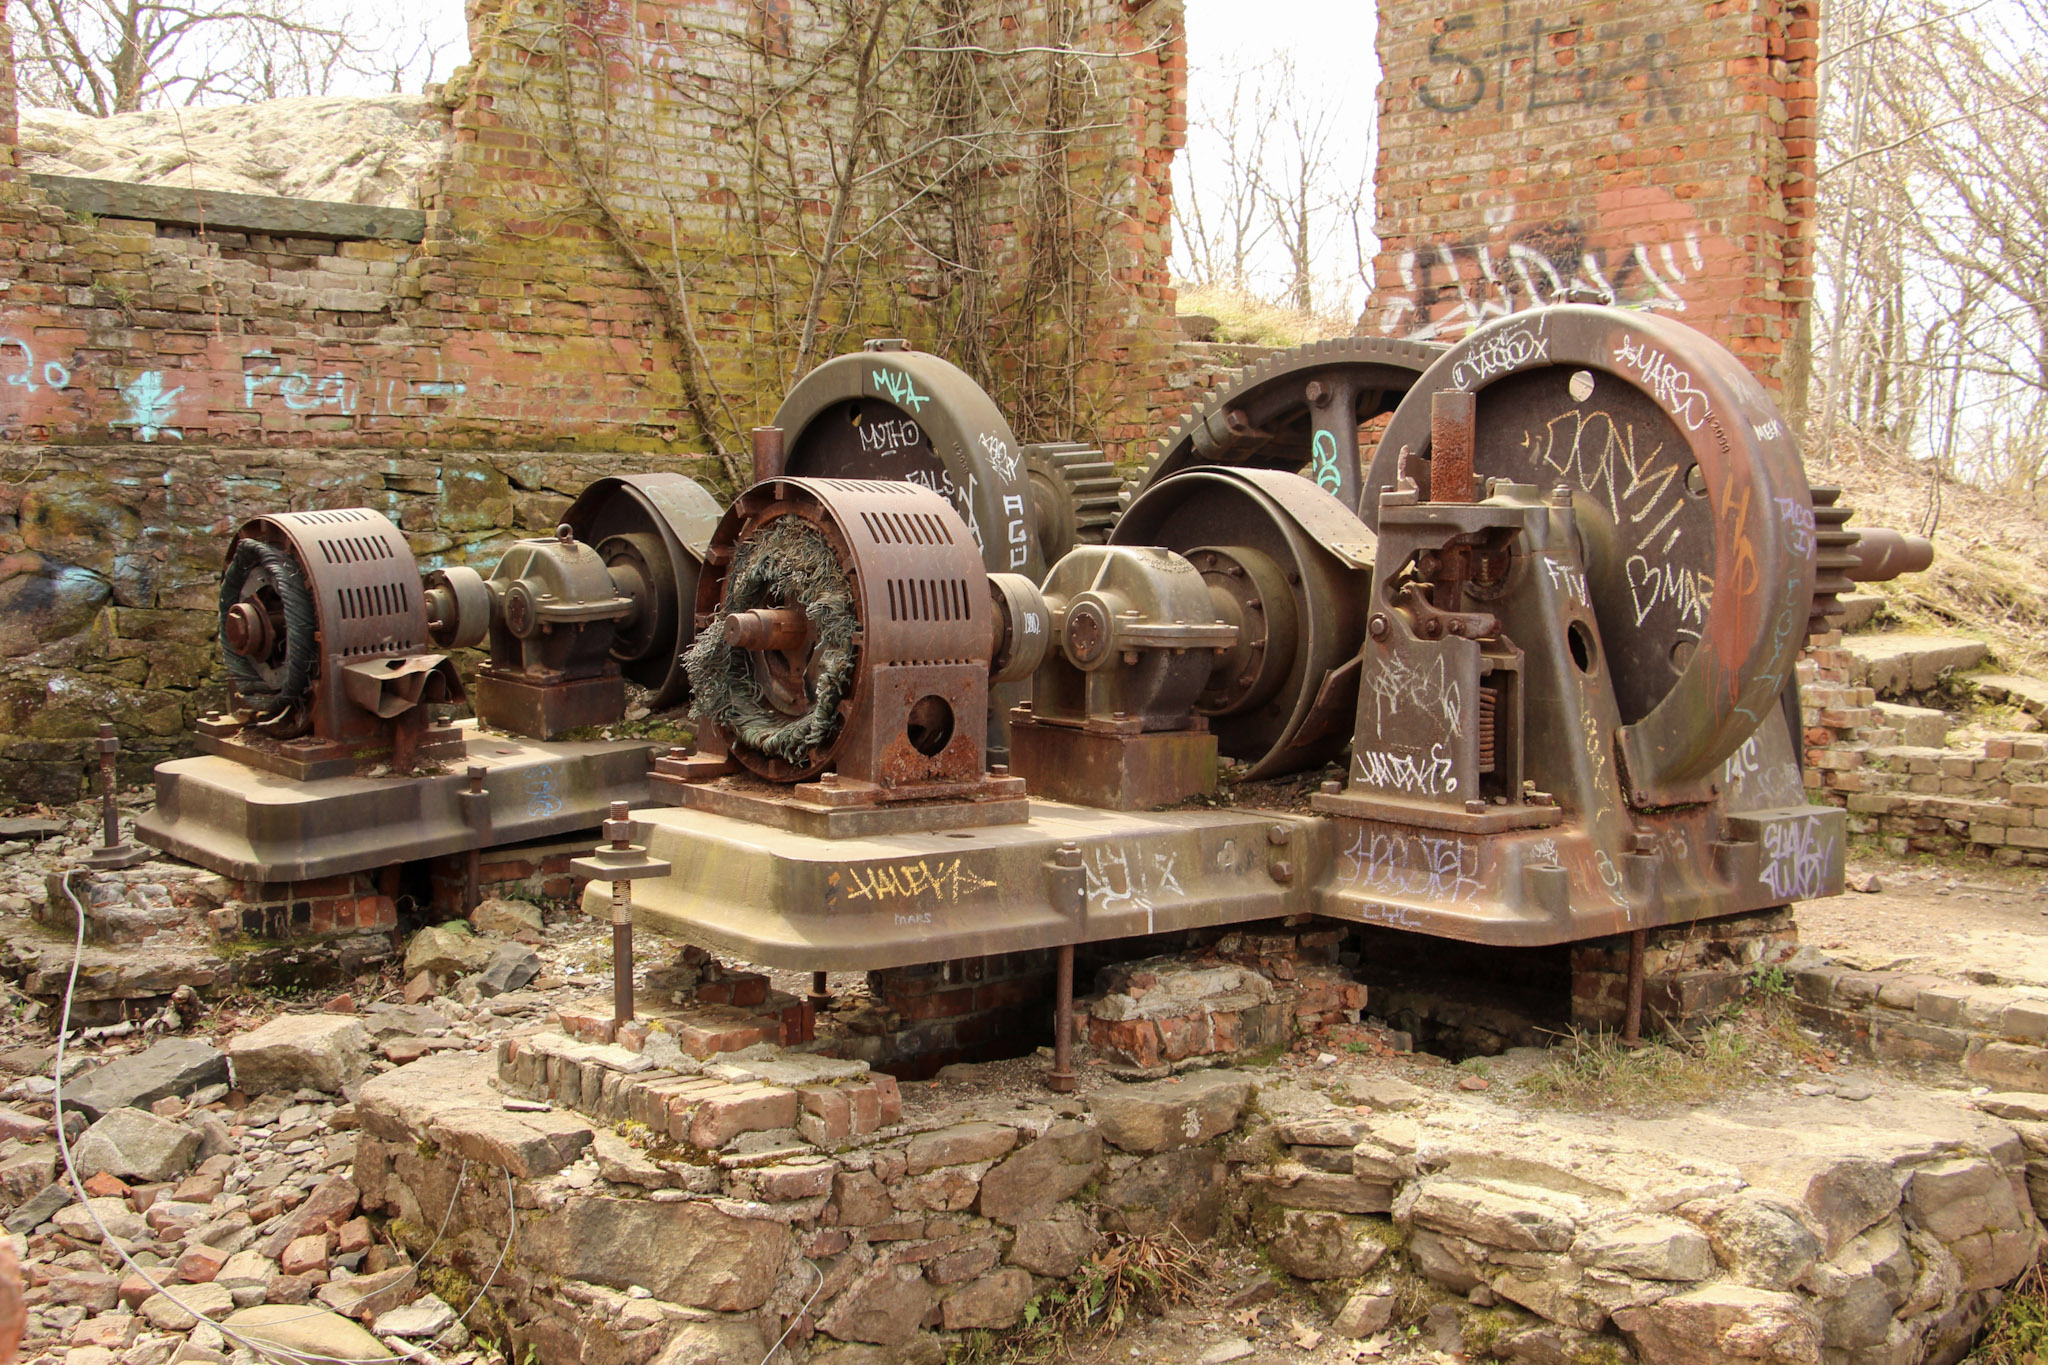
Mount Beacon is one of the most popular trails along the Hudson River. It offers different terrain for a good workout, old railway landmarks, and incredible views. The trail head starts at the parking lot where we found the information kiosk. From here, walk past the wooden gate and proceed along the gravel path on the red-blazed Casino Trail. We arrived at the ruins of the Mount Beacon Incline Railway. The railway was used as a tourist attraction for the views of the Hudson River as well as visiting a Casino Hotel at the top of the mountain in the early 1900s. This was the steepest railway in the world during its operation. Pretty wild! If you want to know more historic details, click here. After passing the ruins, we started making our way up the metal staircase continuing onto the red-blaze trail.
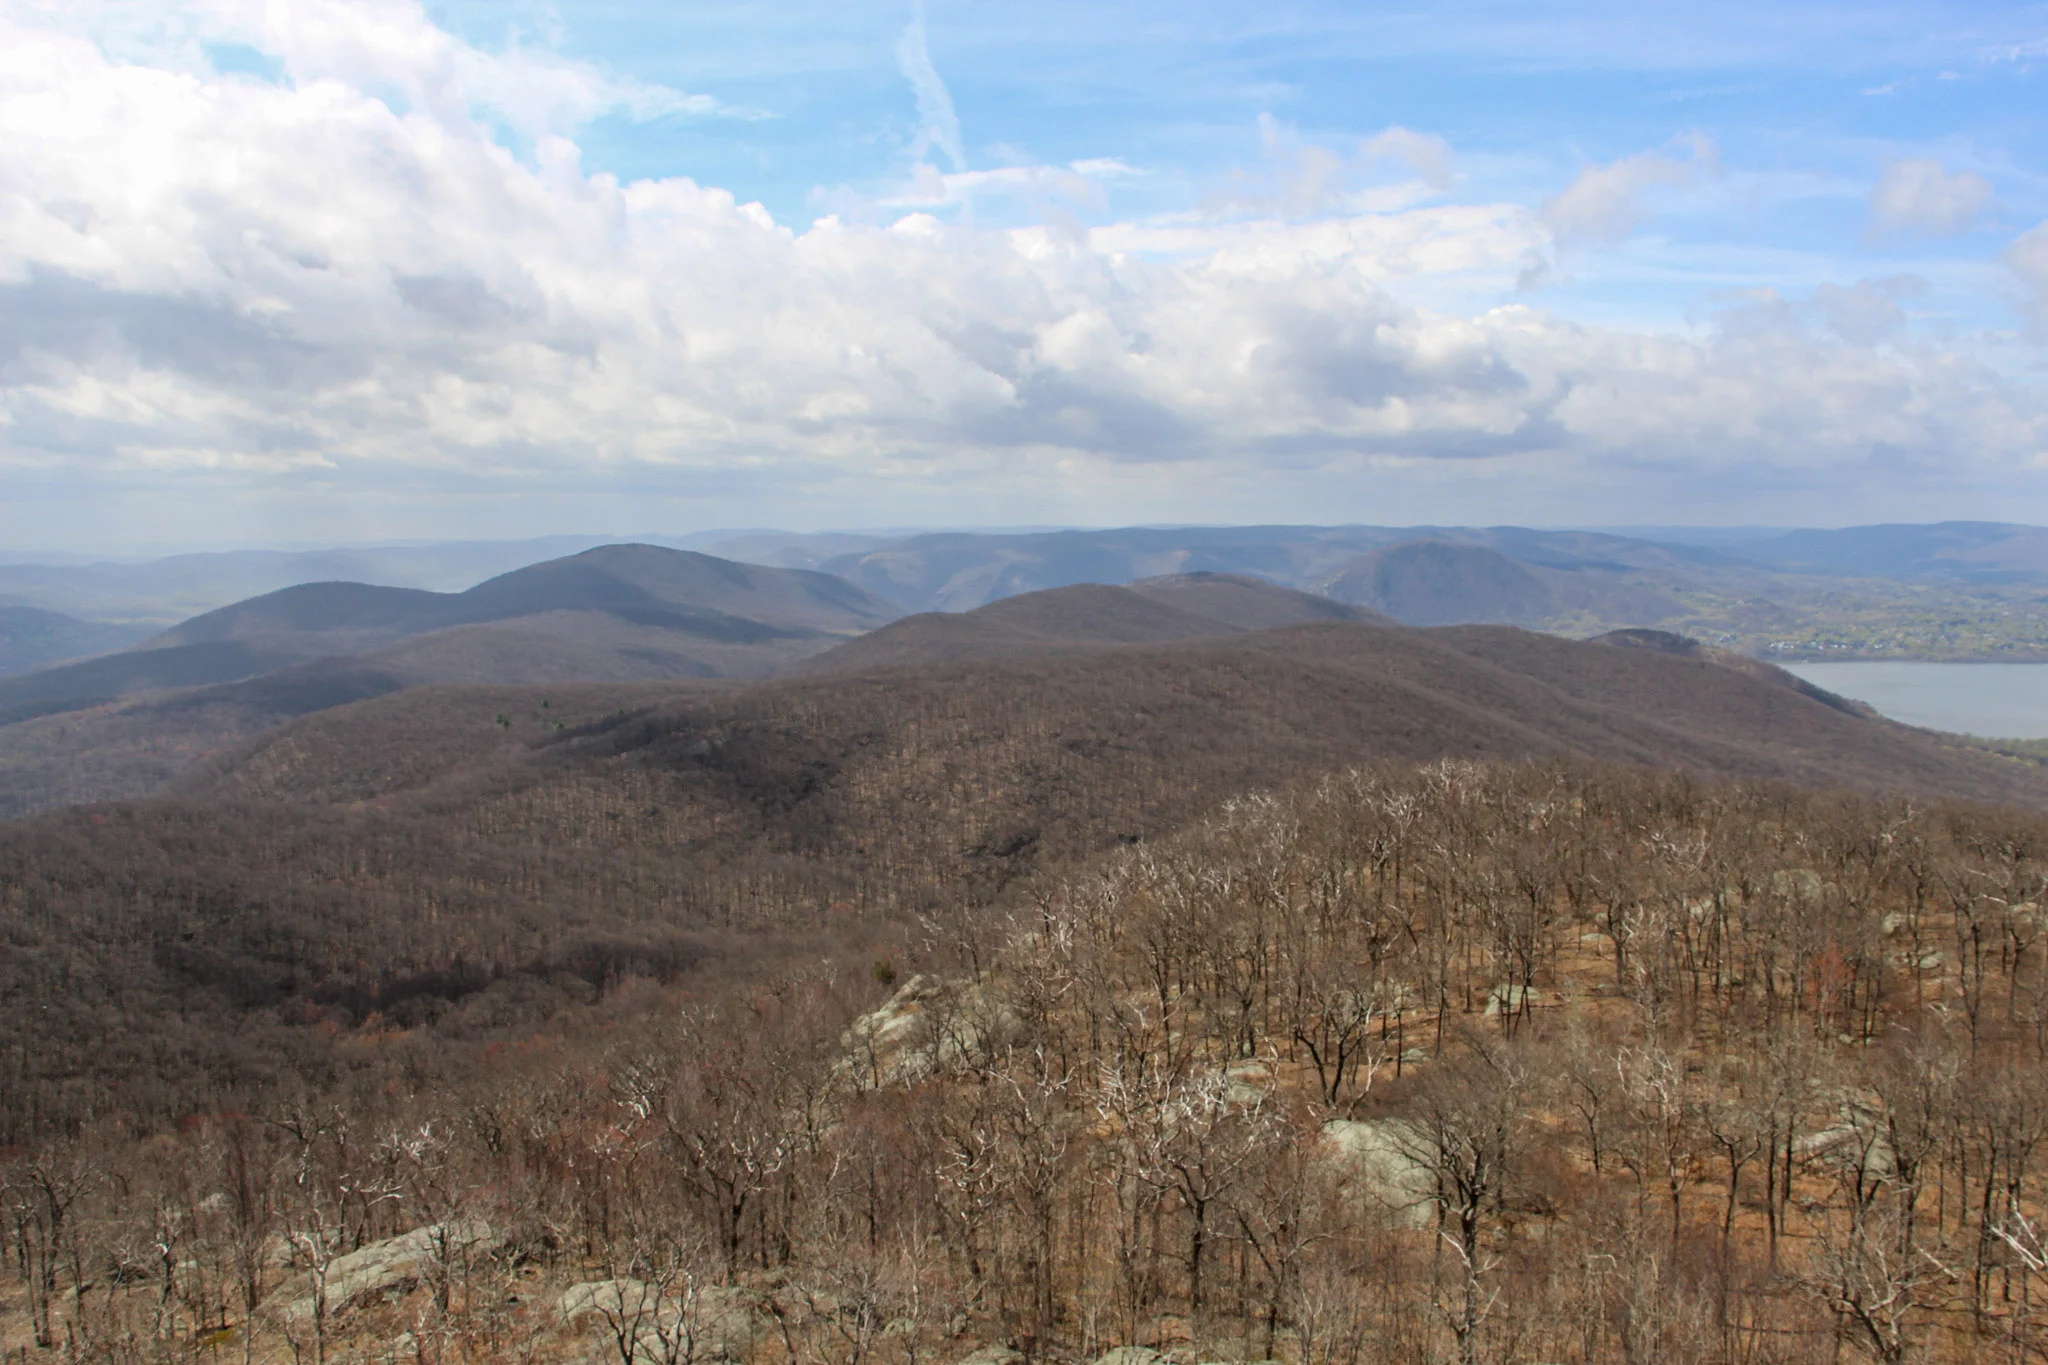
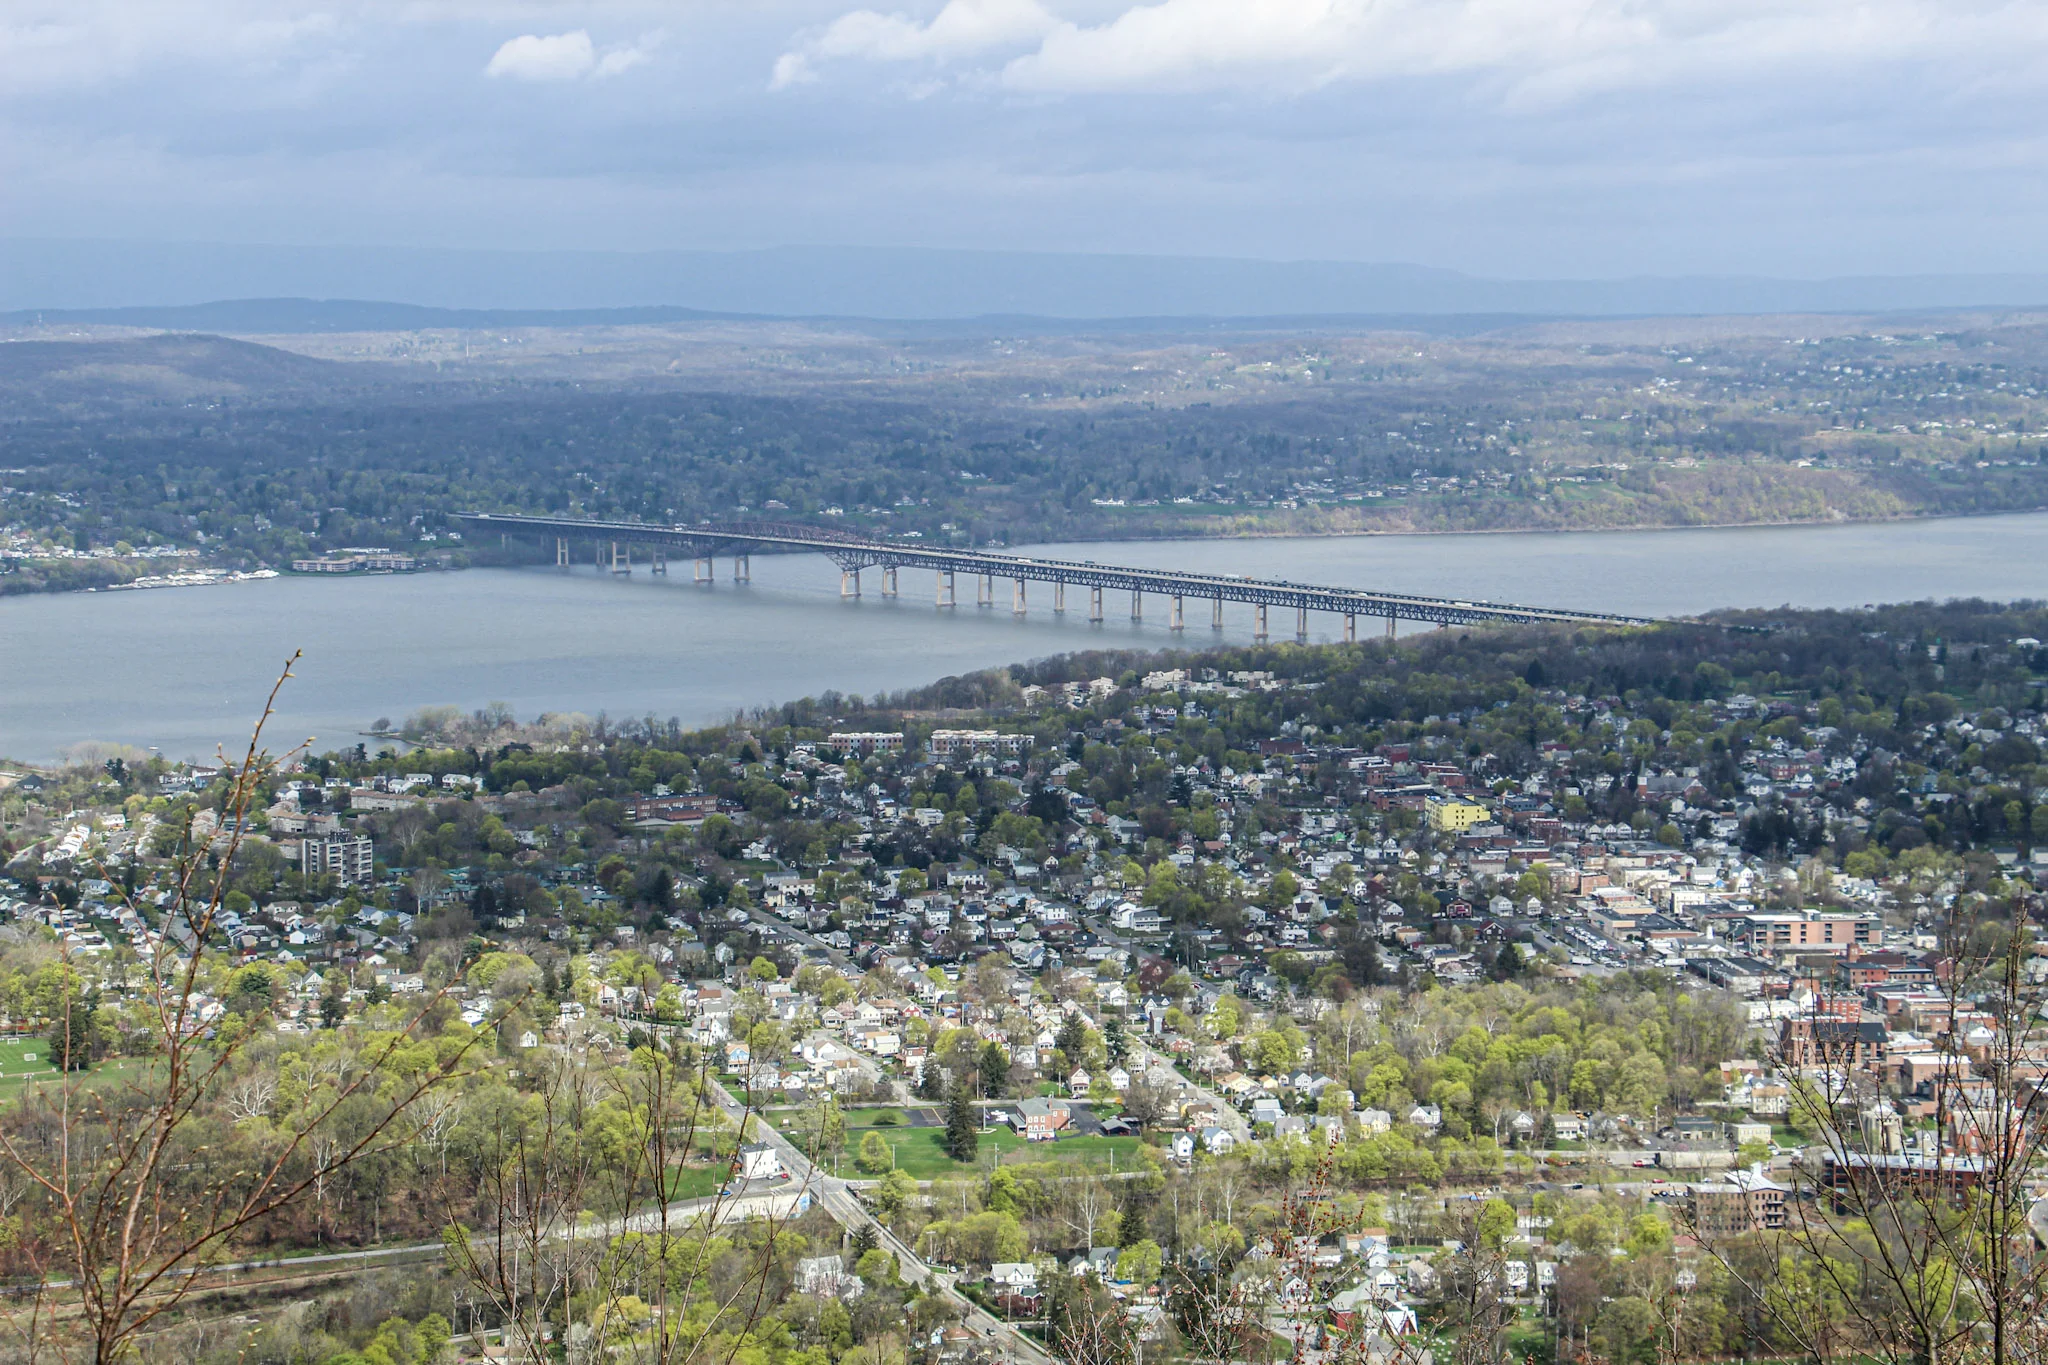
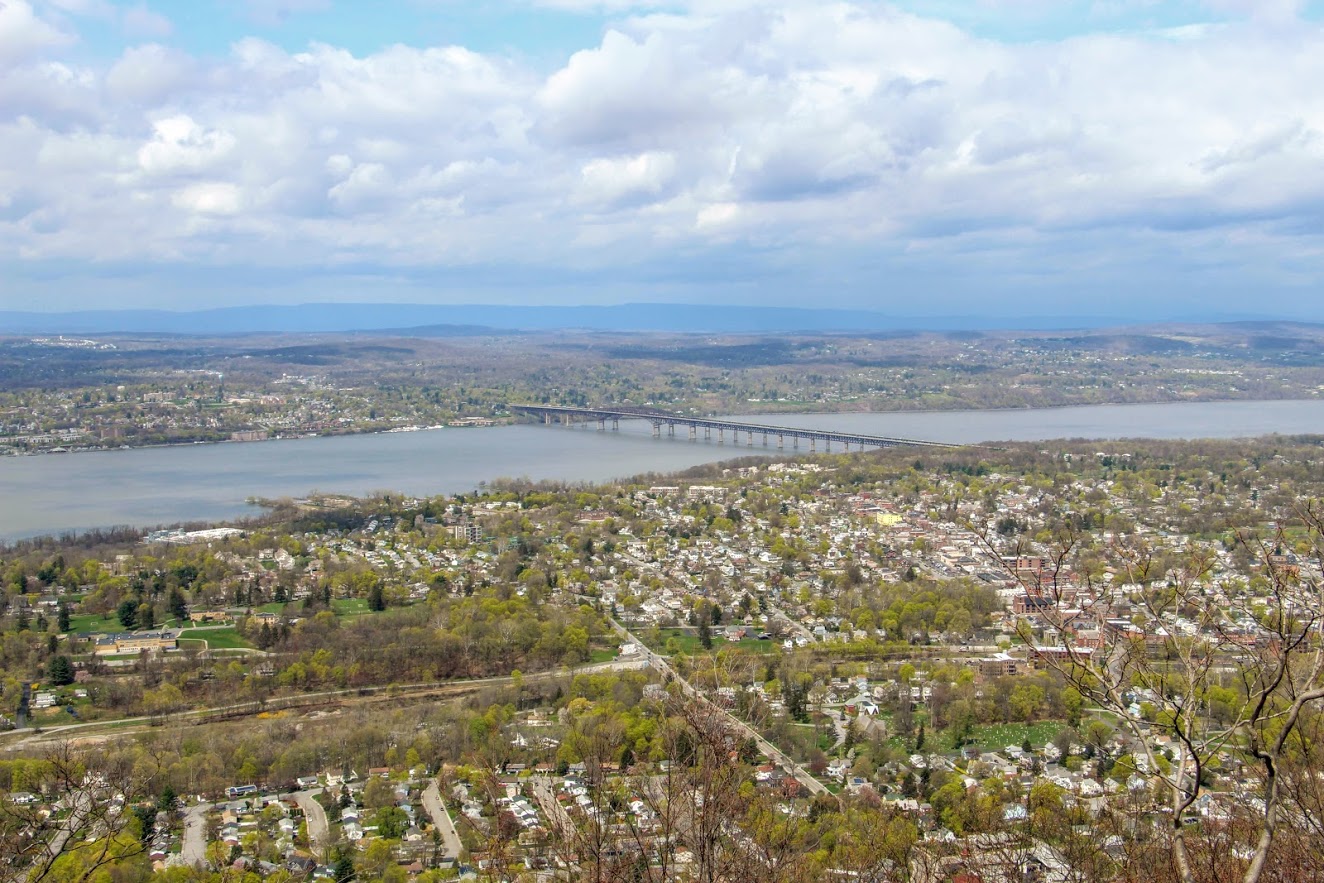
The tough part begins here, only for about a half mile. This is where you see happy faces coming down and not so happy faces going up. The hike will slowly begin to ascend up the mountain following the switchbacks. There may be areas that look unmarked but keep your eyes on the red markings. Eventually, the terrain will become rockier and even steeper uphill. Huffing and puffing our way up, the first glimpse of a view appears as we came up on the first landmark. The motor house of the railway has brick walls still standing and there you will find huge rusted gears and the motor. Past the motor house lies the foundation of what used to be the casino, which is where the first scenic view of the hike can be seen. The view from Mount Beacon stretches across the Hudson with stunning views overlooking Beacon. It is awesome that you can get this view only after hiking just over a mile. The hike started with overcast but amazingly the sky started opened up once we reached the overlook.
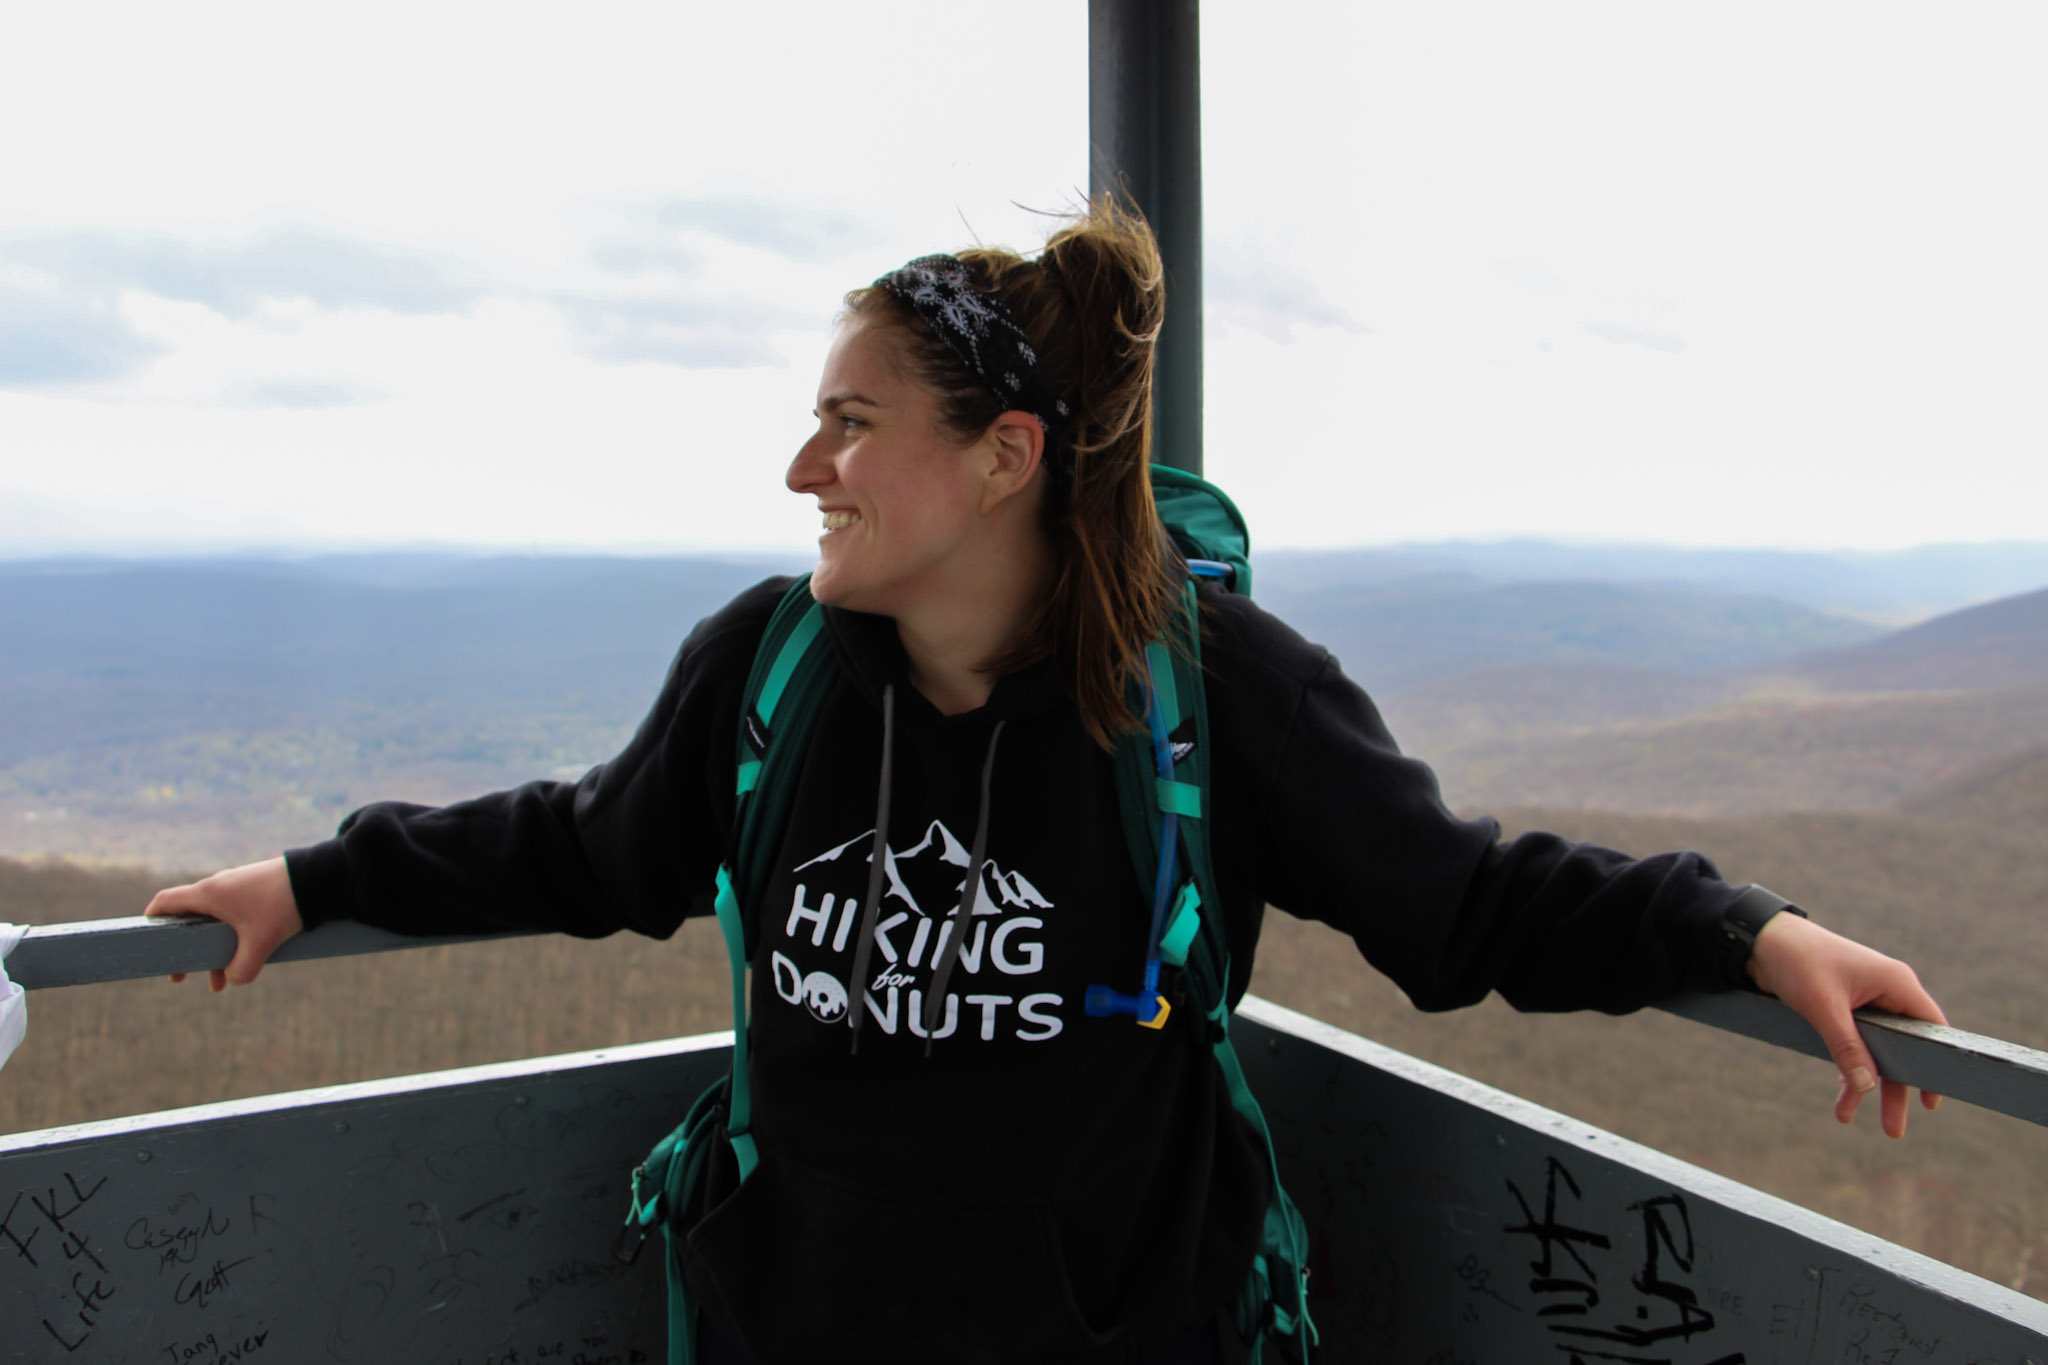
It was time to head toward the fire tower. We turned around from the look out, walked across the old casino ground toward the tower. Eventually, we noticed a red marking on a tree and followed that dirt road through two metal poles and continued on the red-blaze trail. We passed what looks to be a door or frame of an old car or truck on the trail. Additional steep climbing ensued for about 10-15 minutes until there is a clearing with a view of the fire tower. Shortly after, we arrived to the White trail. Before we reached the White Trail, we did notice an unmarked trail leading up the hill toward the fire tower but thanks to research we did not take that path. About 15 minutes later, we found ourselves making our way up the fire tower. This fire tower is pretty high. I was actually getting a bit nervous going up. By this time, the sky opened up completely and the views were an unbelievable 360 view. From the top, you will see Beacon Reservoir and Catskills to your northwest, the Newburgh-Beacon Bridge and Shawangunk Ridge to the west, and, to the south, the southern Hudson Highlands. Even as far down as NYC. And, probably more stuff I don’t even know! My girlfriend had to pry me off the tower. It was super windy but I just kept saying, “This is awesome”. Very fortunate to be able to have access to great hikes like this in the Hudson Valley. Oh, and there’s a donut shop 5 minutes away that is amazing for post hike donuts (Glazed Over Donuts blog post). I cannot recommend this hike enough!
More pics of the hike:


HIKING FOR DONUTS
Hi, I’m Mark. I live in Connecticut. I take new trips every change I get. A good trip has a great hike, great food, and something fun to do. My goal is to search out new trips and share them to inspire others to try something new and exciting.
If you are looking for posts in a particular place, search City or State here.
SEE OTHER POSTS IN ARCHIVE
Archive
RECOMMENDED POSTS
RECENT POSTS
See the latest on Instagram and follow @HIKINGFORDONUTS