


How to Hike The Beehive Trail, The Bowl, & Champlain Mountain, Acadia National Park
Trail Description: This hike climbs The Beehive via cliffs and iron rungs that leads to The Bowl (a pond), and then climbs up to the summit of Champlain Mountain. There are amazing views from the summits and various spots on the trail.
Trail Info:
Where: Bar Harbor, ME, Acadia National Park Distance: 4.9 miles (5-6 hours) Difficulty: Strenuous Trail Type: Loop Features: Views, Mountains, Water, Pond, Cliffs, Summit
How to get there:
Sand Beach Parking lot in Acadia National Park. There are restrooms here. In addition, there is beach access and other hiking trails.
Hiking Tips
If you have a fear of heights, the Beehive Trail is not recommended for you.
If it has rained recently and the trail is very wet, I would recommend not including the steep climb portion of the Beehive Trail on that day.
Be sure to take this loop trail counter-clockwise. You do not want to climb down the irons rungs nor clog up traffic.
This is the one of the most popular hikes. It will be very busy, start early!
The Hike
The Beehive loop hike at Acadia National Park is probably #1 on most tourists' itinerary. This is a short and steep hike with some exhilarating but dangerous sections using iron rungs to climb up the side of the mountain. The hike is not for the faint of heart. The experience alone makes this a bucket list adventure. So, of course, it was one of my top priorities visiting Acadia for the first time. My wife and I went for a few days last fall. Due to time constraints, I needed to ensure I got the best bang for my buck. Luckily, The Beehive trail intersects with the Bowl which connects to the trail that summits Champlain Mountain. Now, you could do all 3 of these separately but this was a no brainer. This allowed my wife and I to see more amazing views in the allotted time we had.
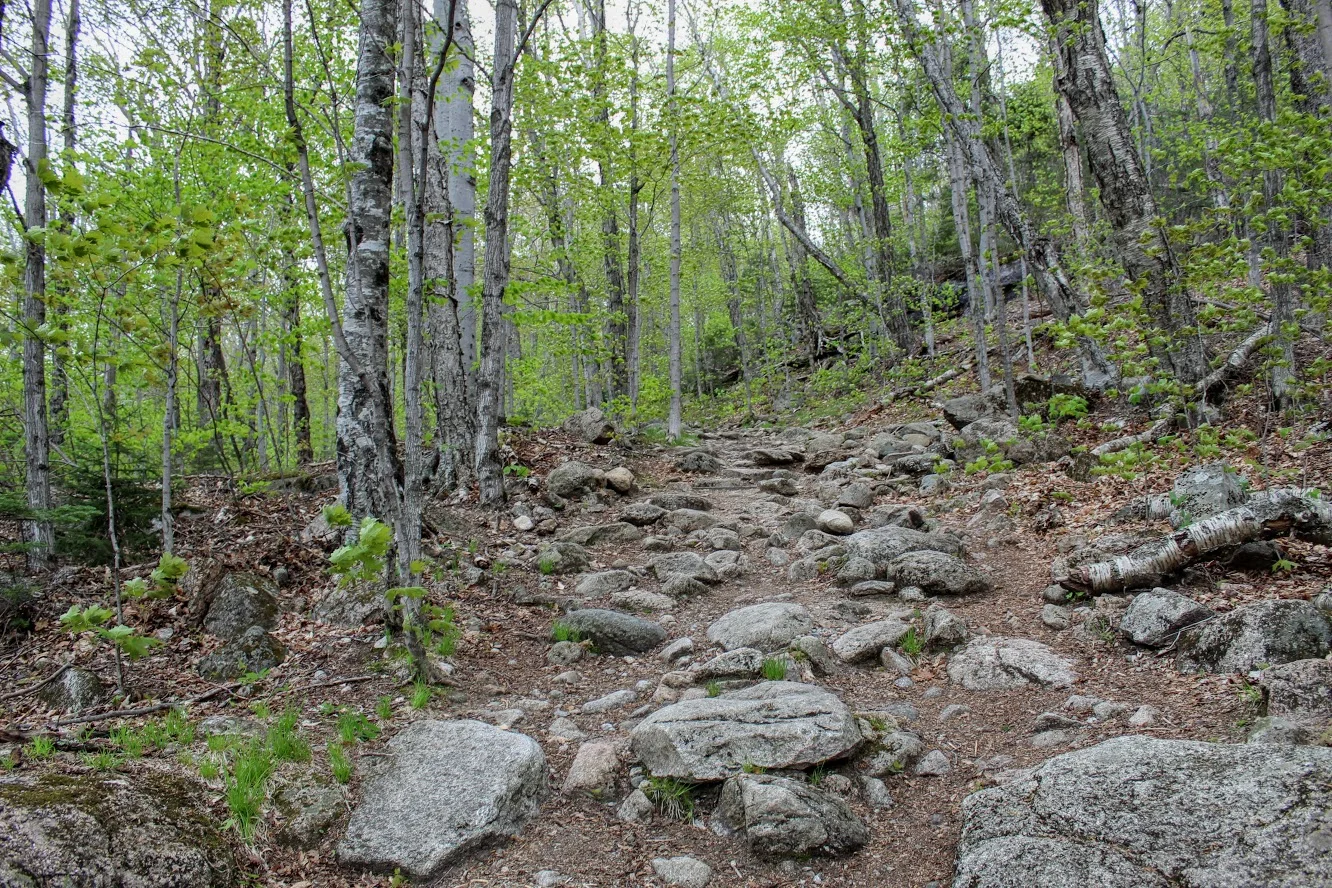
The trailhead is located on the opposite side of the street, about 100 yards across from the Sand Beach parking lot. From the parking lot, start heading on the gravel path to the right of the parking lot entrance as you walk up to Park Loop Road. Cross the road and the trailhead for the Bowl Trail will be right there. Just follow the crowd! The trail is flat but rocky to start. After 0.2m turn right onto the Beehive Trail where Bowl Trail goes straight. Follow the blue blazed trail.
This is where the climbing begins. First are the short staircases. Then, there are a few narrow ledges with sheer drops. Followed by climbing iron rungs used to assist in the ascent up the vertical rocks. All completely exposed. You have some options here if you are not comfortable going up the Beehive Trail using the iron rungs. There is an option to access The Beehive from the backside or skip it entirely and choose to head to The Bowl. I enjoyed this as it was challenging and thrilling. And, the views were awesome. However, it is not to be taken lightly. It is dangerous. Take your time and be thoughtful to your fellow hikers. This part of the hike is relatively short.


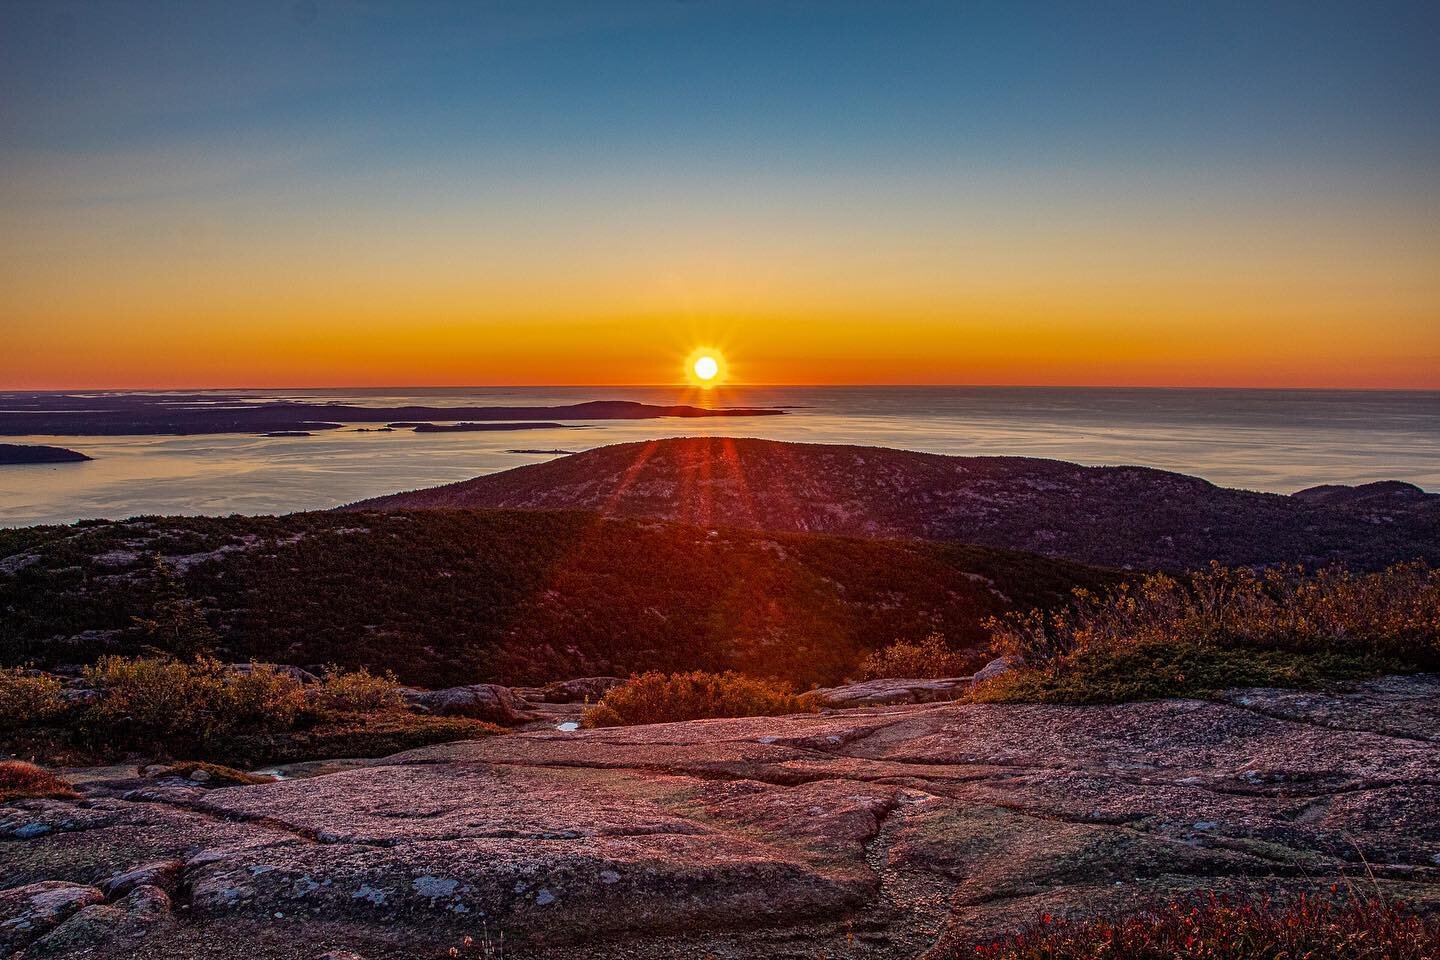
At around 0.6m, we reached the summit of the Beehive Trail and enjoyed some amazing views of Sand Beach and Great Head. The hard work is worth it!
Continuing on the blue blazed trail, go straight through an intersection where a connecting trail leaves left. At 0.9m, this is where we reached the shore of a pond, known as The Bowl.
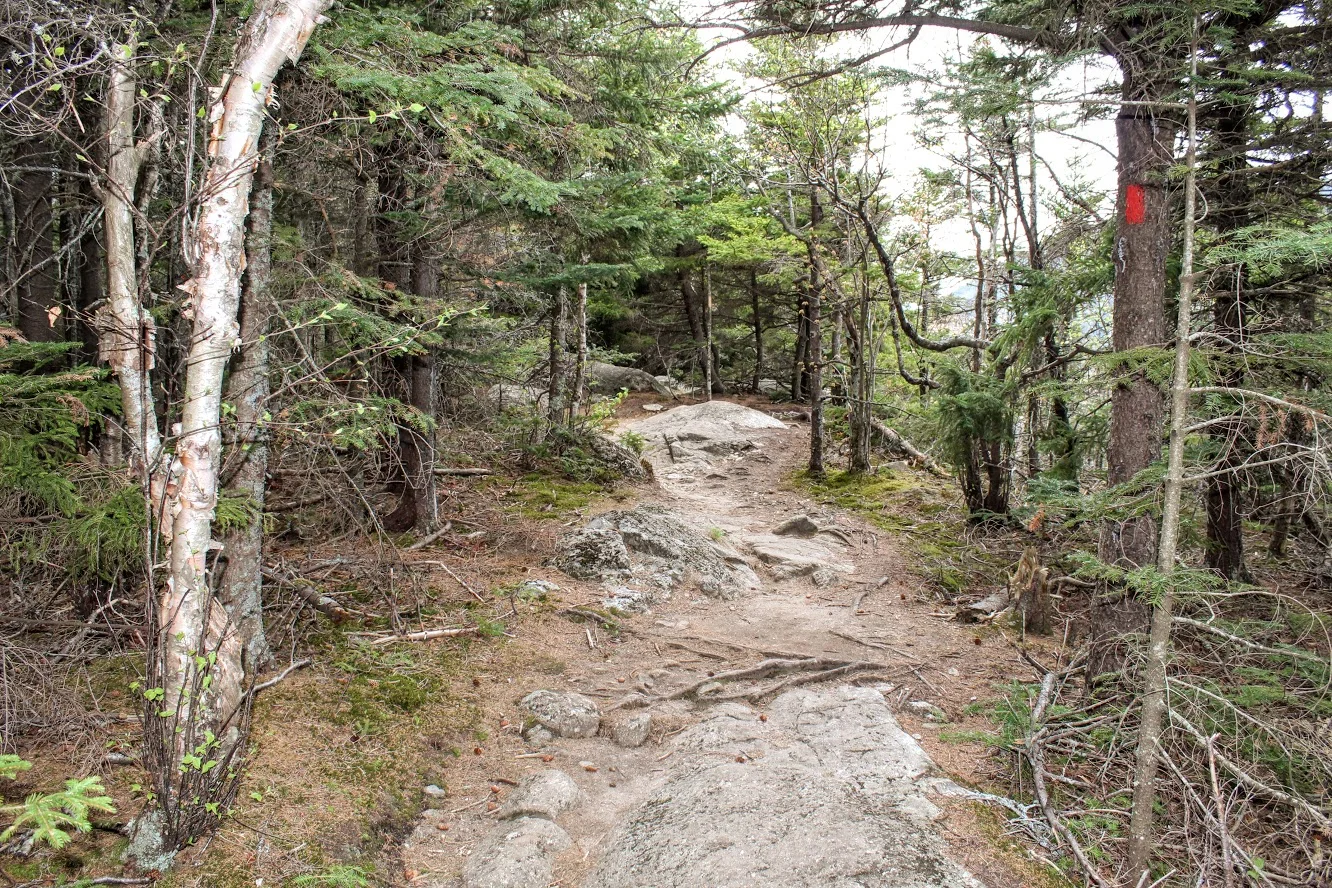
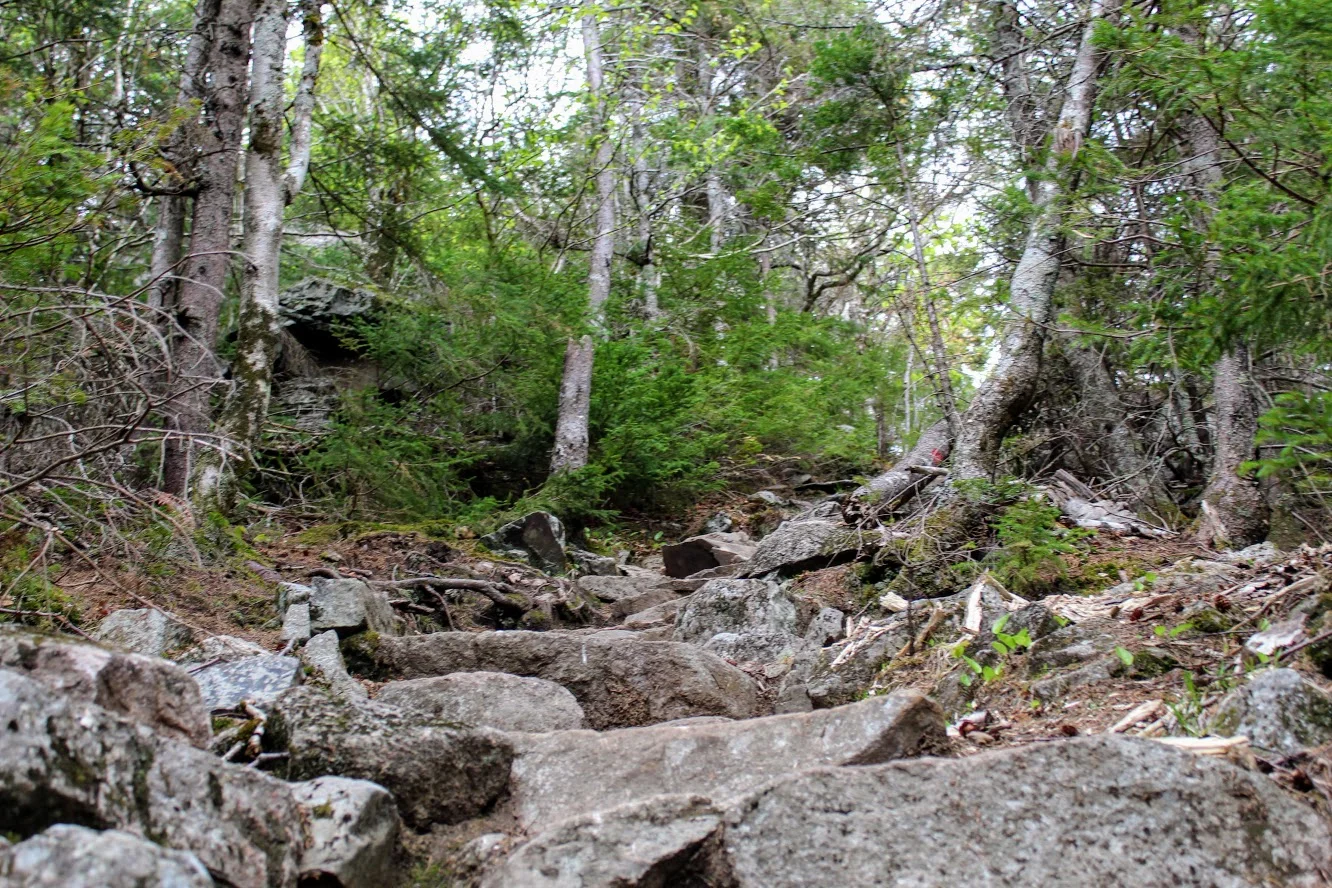
Follow the path with the wooden boards on the left along the shoreline for 0.1m to split in the trail. The Bowl goes left and Champlain South Ridge Trail will veer to the right. Take the right and follow Champlain South Ridge Trail. The sign indicates 1.6m to Champlain Mountain from here. There is an amazing view of The Bowl as you hike higher up the mountain.
Be weary of the blue markings along the trail and follow the cairns. There are more spectacular views at the summit of Champlain Mountain. This summit is less hectic than the Beehive so this is a good spot to have a snack and relax.


After soaking in the views, retrace your steps down to The Bowl. There are four paths leaving the summit, ensure you are heading the direction you came up. Once you get down to The Bowl intersection, bear right away from the pond and take the rest of the trail back to Park Loop Road for about 0.8m. You will pass two trails on the right leading up to Gorham Mountain and two trails on the left heading to the Beehive. Just keep going straight at all intersections.

This will lead you back to where you started. As mentioned above, we decided to combine all three trails so we can see more. I would highly recommend this particular loop in this fashion. Lots of great views. Amazing hike. The Beehive hype is real. Bucket list checked off.

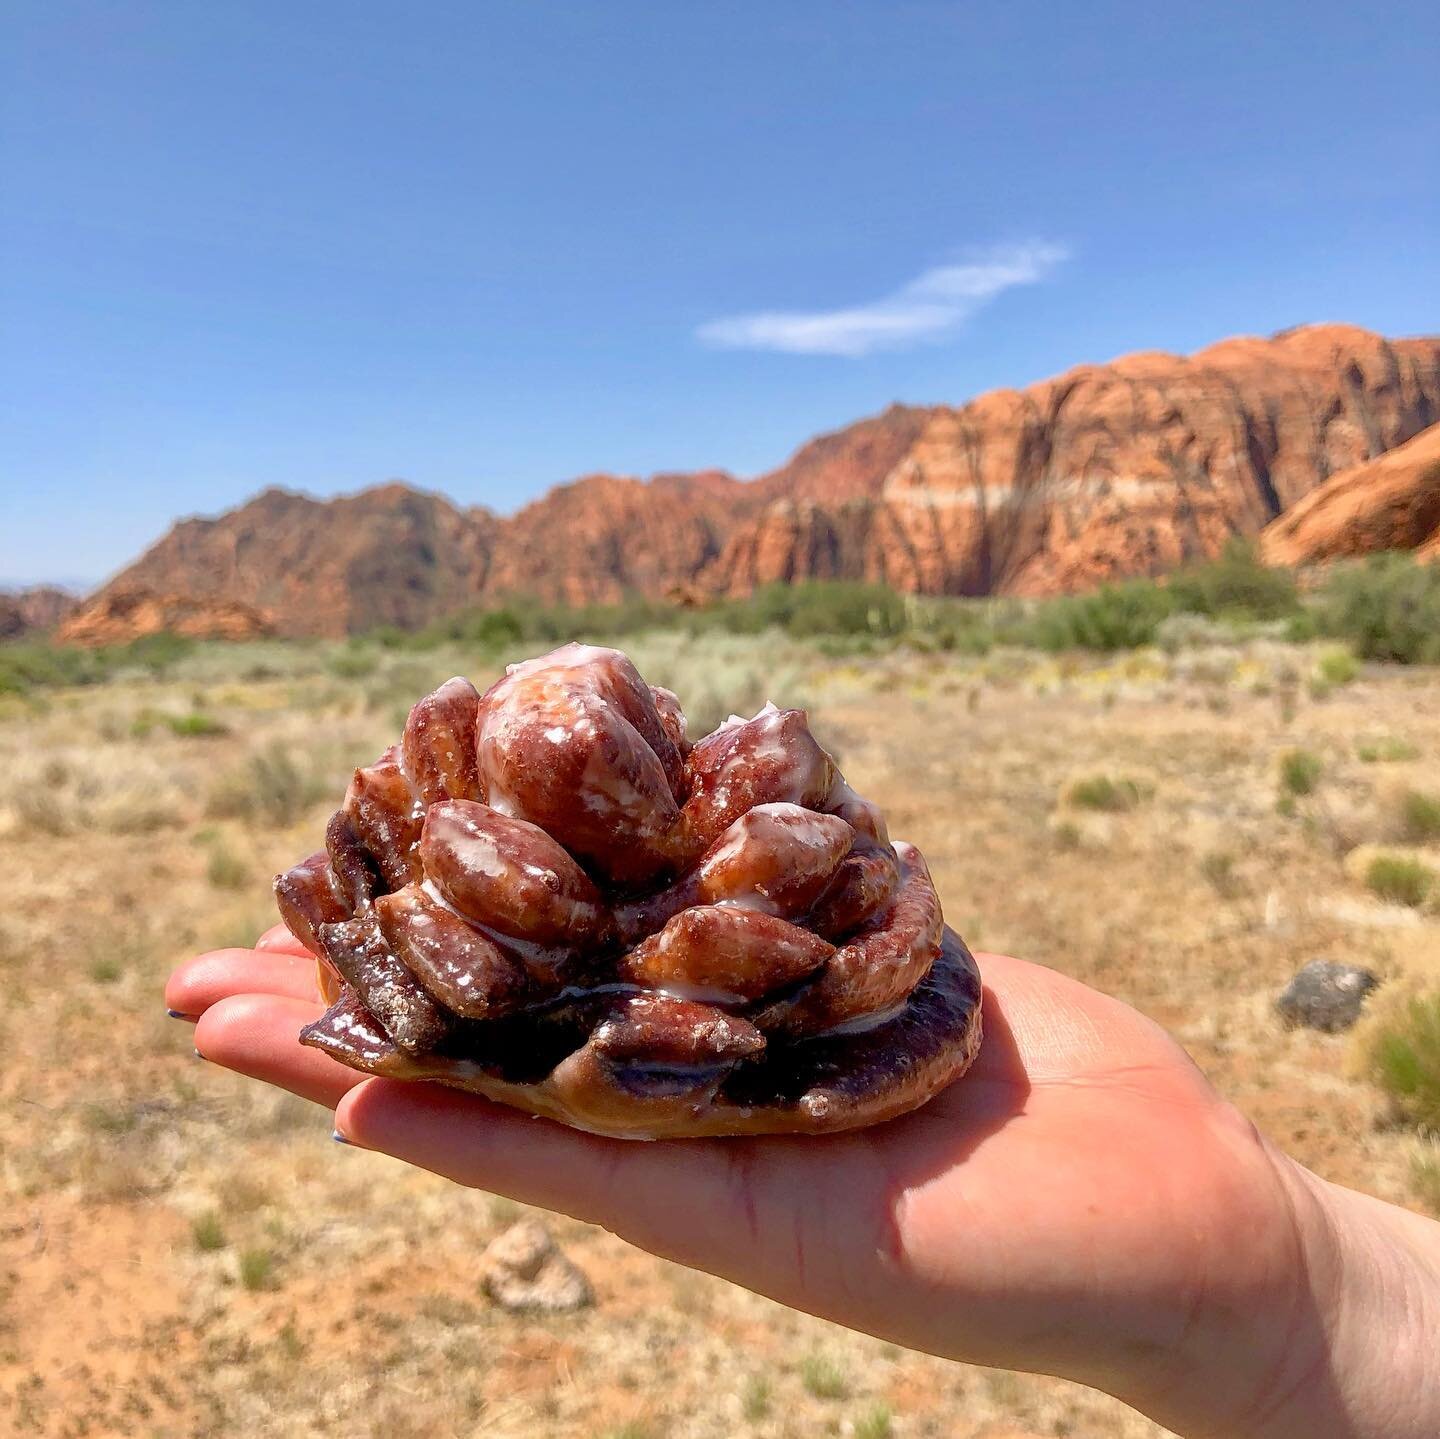
HIKING FOR DONUTS
Hi, I’m Mark. I live in Connecticut. I take new trips every chance I get. A good trip has a great hike, great food, and something fun to do. My goal is to search out new trips and share them to inspire others to try something new and exciting.
If you are looking for posts in a particular place, search City or State here.
SEE OTHER POSTS IN ARCHIVE
Archive
RECOMMENDED POSTS


RECENT POSTS


See the latest on Instagram and follow @HIKINGFORDONUTS


Elephant Rocks State Park
Elephant Rock State Park
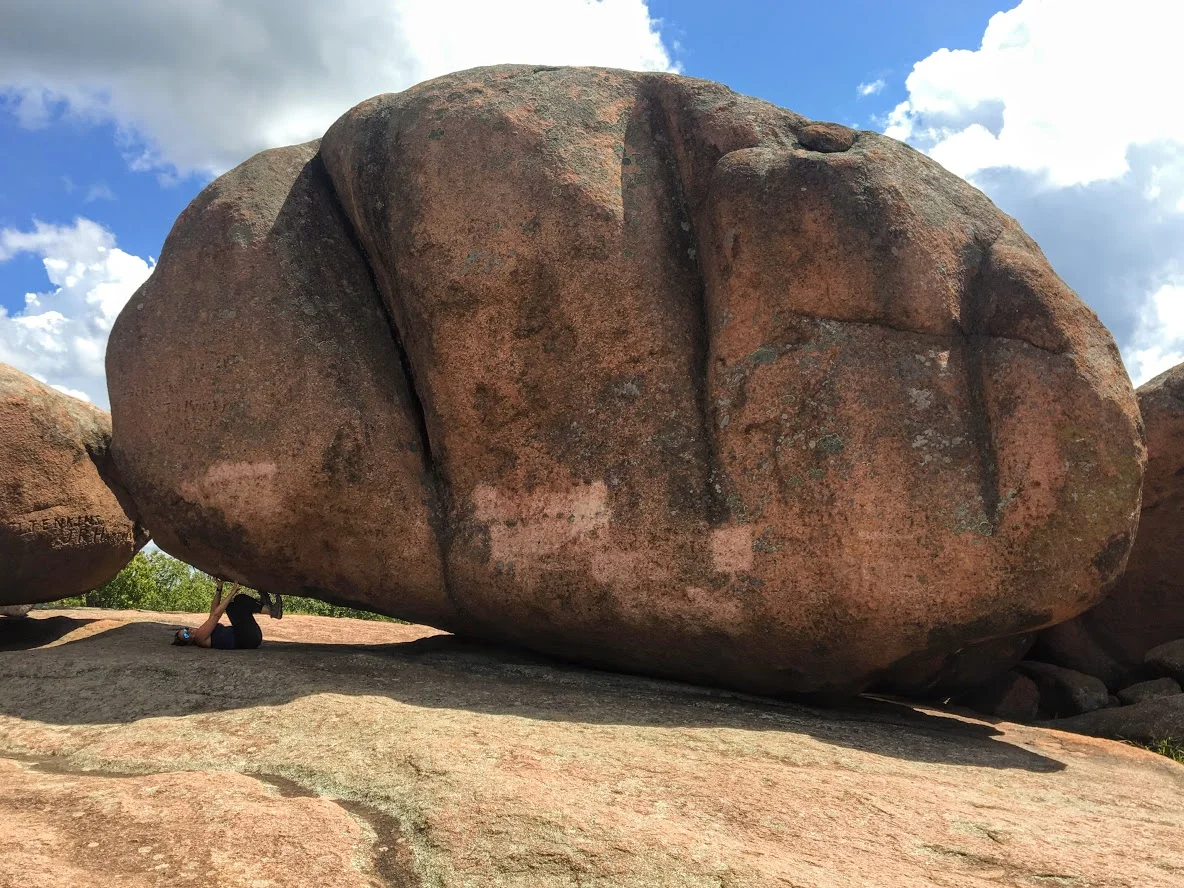
Trail Description: Located in Southeast Missouri, Elephants Rocks State Park has a unique attraction. The trail will lead you to large granite boulders which resemble a train of pink circus elephants.
Trail Info:
Where: Elephant Rocks State Park, Belleview, MO Distance: 1.4 miles (1 hour or until you are done exploring) Difficulty: Easy Trail Type: Out and Back Features: Boulders, Water, Quarry
How to get there:
The park was easy to find via GPS. However, you may lose cell signal nearby so make sure your map is up already. Here’s the address to put in your GPS:
7406 MO-21, Belleview, MO 63623
Hiking Tips:
This is a very popular destination. Prepare for crowds.
The Engine House Ruins Trail is less crowded and worth hiking.
The Hike
My trip to Missouri continued to mystify my original thoughts of the state. Prior to my visit to St. Louis, I stumbled upon online Elephant Rocks State Park. The main attraction for this park is there is the line of giant, 1.5 billion year old granite boulders that stand end-to-end, like a train of circus elephants. The pics looked intriguing online.This is a 2 hour drive south from St. Louis. I wasn’t sure if it was worth the drive. However, it just so happens, I chose another hike nearby and figured why not throw this in afterwards. Smart decision, always go all in on exploring in new areas. This park did not disappoint me.
Park entrance sign.
Elephant Rocks State Park is located in the St. Francois Mountains in Belleview, Missouri. The park was easy to find via GPS. Being labor day weekend, the park was packed. There is ample parking for lots of people. Picnic tables are scattered before the trail begins. There are bathroom facilities. Families can have picnics, enjoy the outside, and take their kids for some fun exploring the boulders. This is definitely a tourist hotspot.
Parking area , Boulders, And aMerica.
There are two trails to explore through the park. The main trail is called the Braille Trail. This is a self-guiding trail that winds among the rocks and takes you throughout the park. This is paved and accessible for people with disabilities, physical or visual. At different areas of the trail, we noticed interpretive signage with information of the landscape and the history of the park. The trail is one mile and marked as red. There are various viewpoints and we kept walking off the trail to explore more of the boulders.


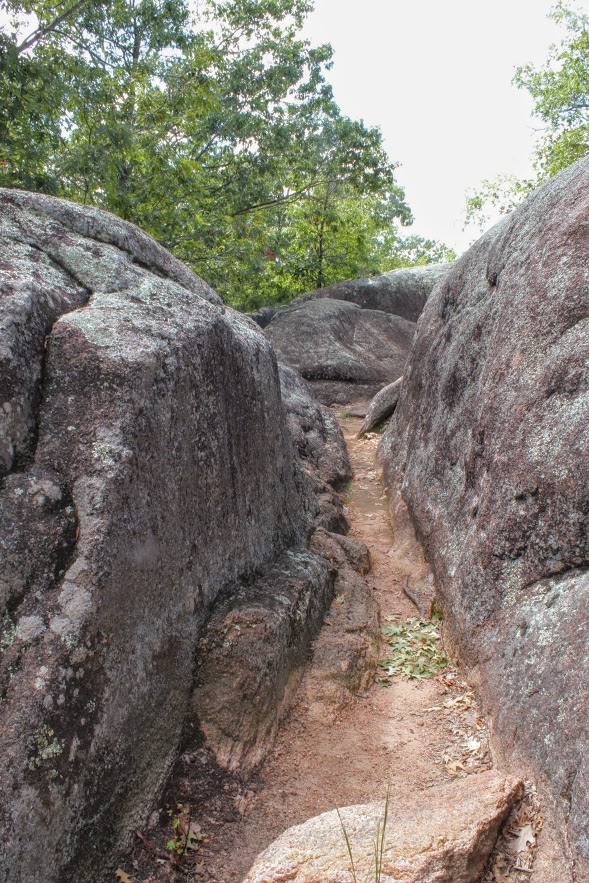
Once we reached the old engine ruin house, we noticed the blue marker trail to our left for the Engine House Ruins Trail. The terrain is more rugged but still easy. This added another 0.4 miles, which leads around the back side of the old quarry that connected us back to the Braille Trail. We followed the blue arrows on the trees and did our thing. There is some fun climbing that can be done on this section. Along with views beyond the bluff. Not many people tend to add this section of the hike so it was a nice break from the crowd.
old engine ruin house


pretty cool, this is in the middle of the park.
views from the top.
taking it all in. the best part.
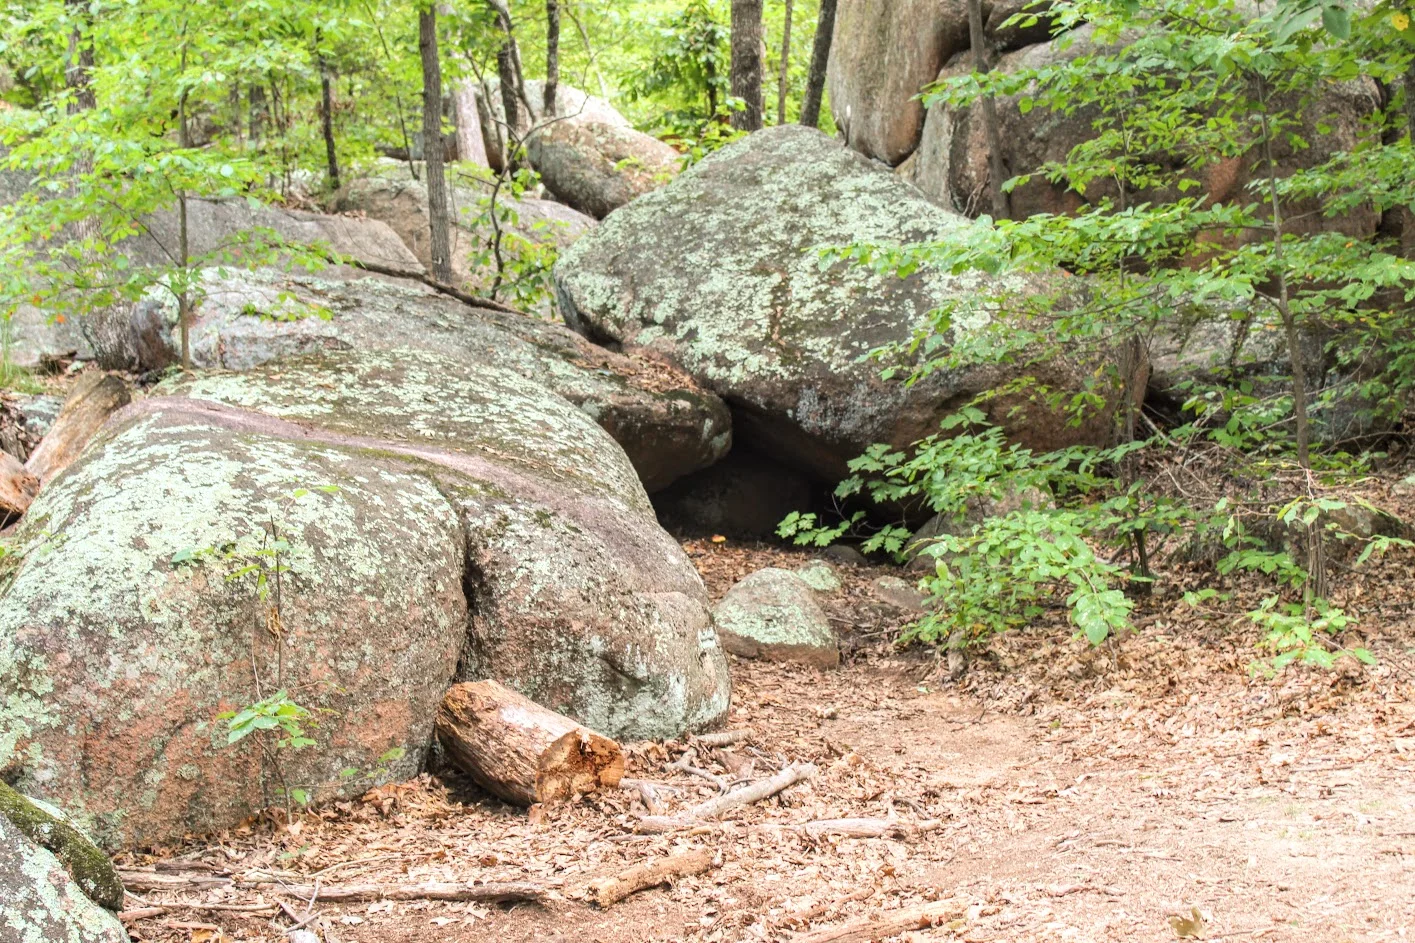
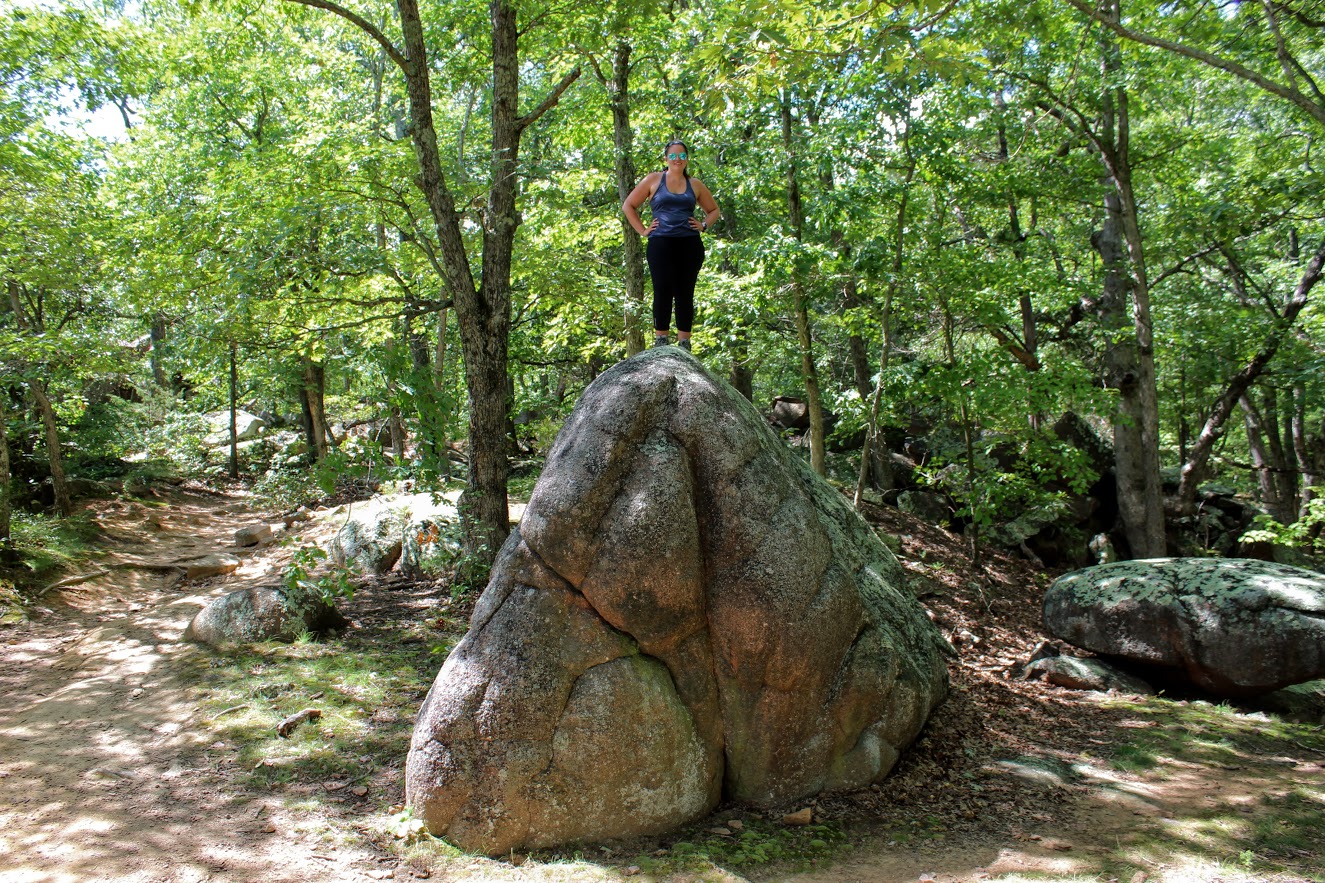
After connecting back to the Braille Trail, we slithered through the rocks and made our way to the giant boulders. Once I got the full view, I understood where the name of the park was derived. I could see the elephant like figure. Due to the crowd, it was tough to capture how breathtaking it was in person. Everyone was climbing between the boulder and snapping selfies. Children are fascinated by the size of the boulders as they enjoyed climbing. I found myself scaling the boulders and didn’t want to leave!


Trying to get a good picture amongst the crowd.
The elephant’s trunk rock.
rocks.
more exploring.
We ended up spending about an hour and half enjoying the park. That is about all you need. Very easy, go at your own pace and enjoy type of hike. And, if you want, you can throw in some climbing. When I booked a trip to St. Louis, did I anticipate incredible landscapes and geological boulders in the heart of Missouri? Heck no. But I am sure glad I got to experience them. The fun part about traveling is finding gems like Elephant Rock State Park.
Wow so strong!
Well….hello there. Just doin’ some climbing.

HIKING FOR DONUTS
A blog for the outdoors foodie enthusiast
Hi, I’m Mark. I live in Connecticut. I take new trips every chance I get. A good trip has a great hike, great food, and something fun to do. My goal is to search out new trips and share them to inspire others to try something new and exciting.
If you are looking for posts in a particular place, search by city or state here.
EXPLORE OTHER POSTS IN THE ARCHIVE
Archive
RECOMMENDED POSTS
MOST RECENT POSTS
See where I have been recently on Instagram. Follow @HIKINGFORDONUTS
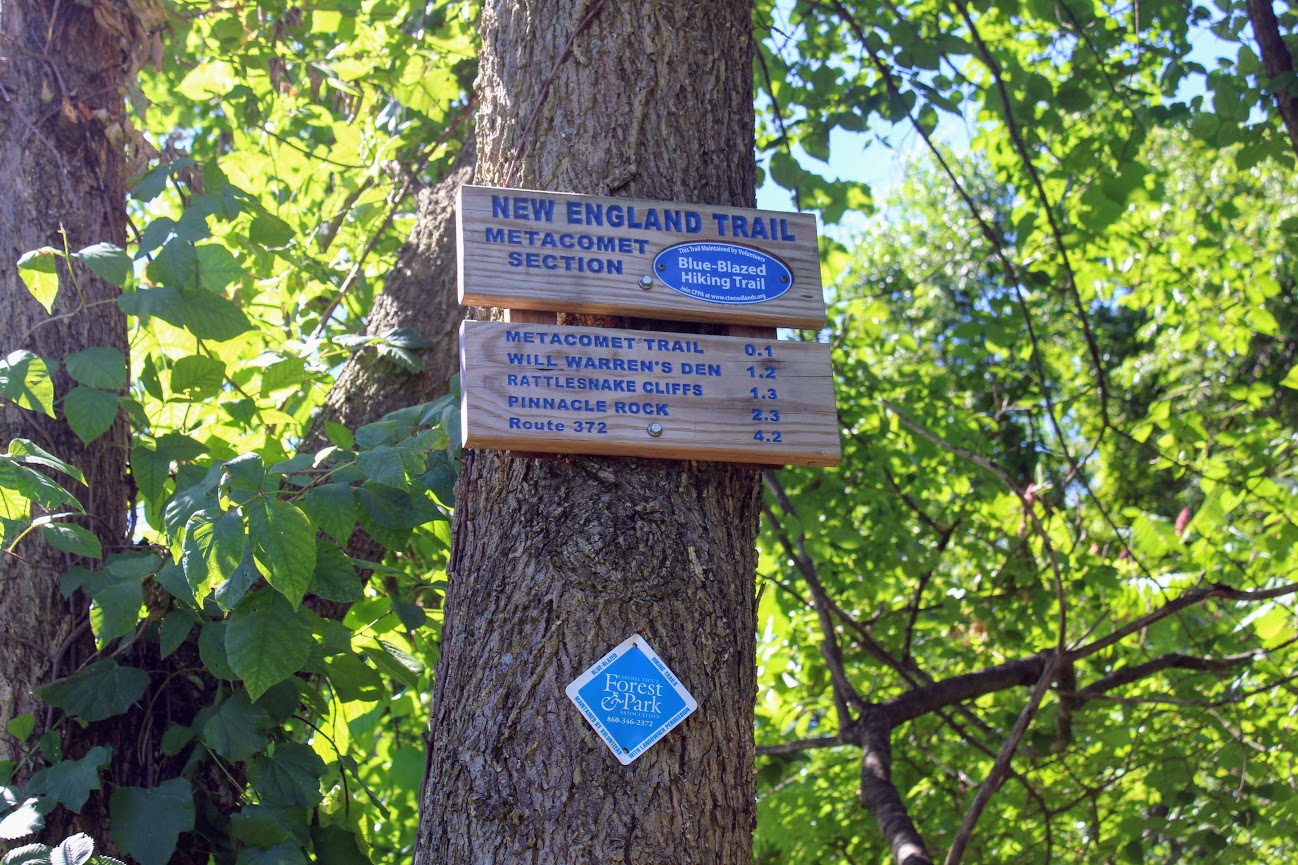
Rattlesnake Mountain to Pinnacle Rock via Metacomet Trail, Farmington, CT
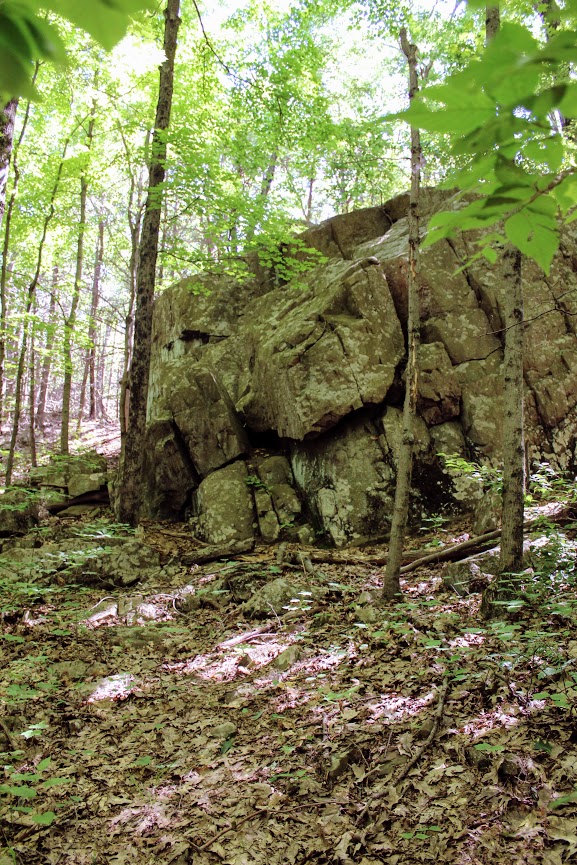
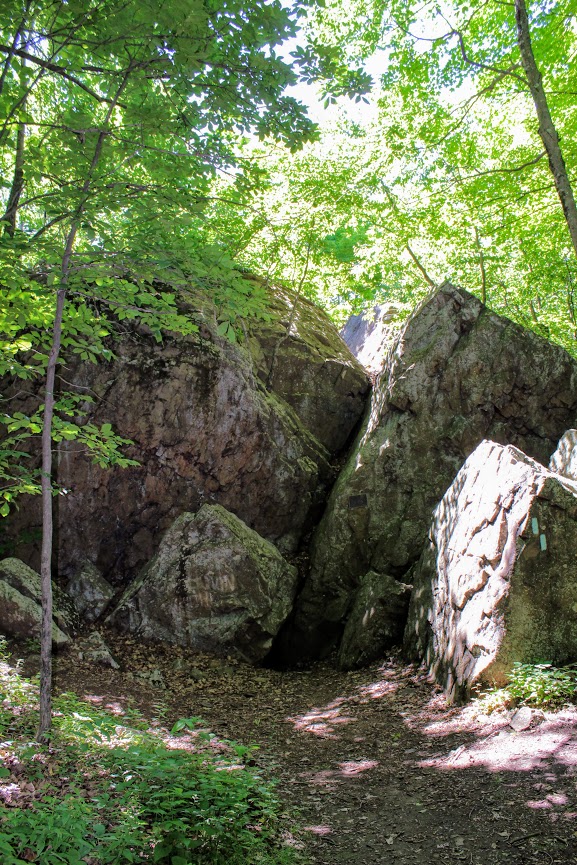
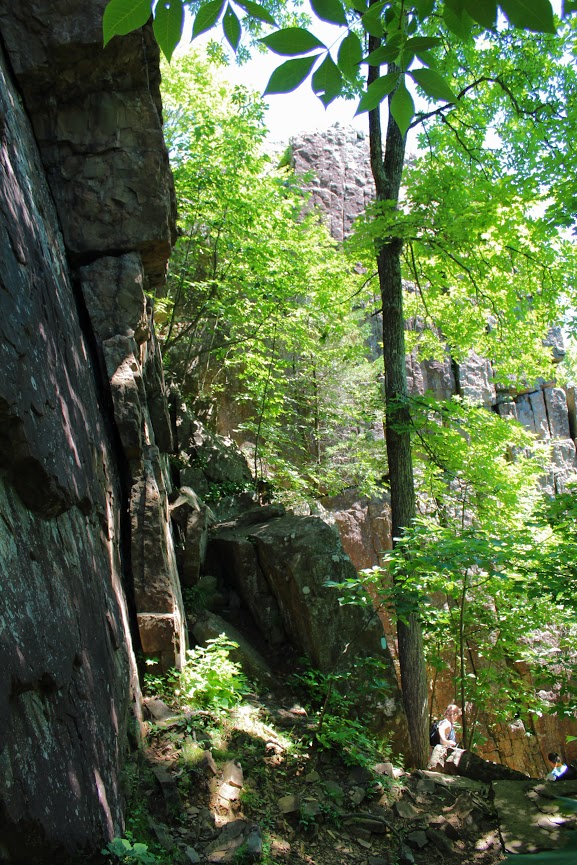
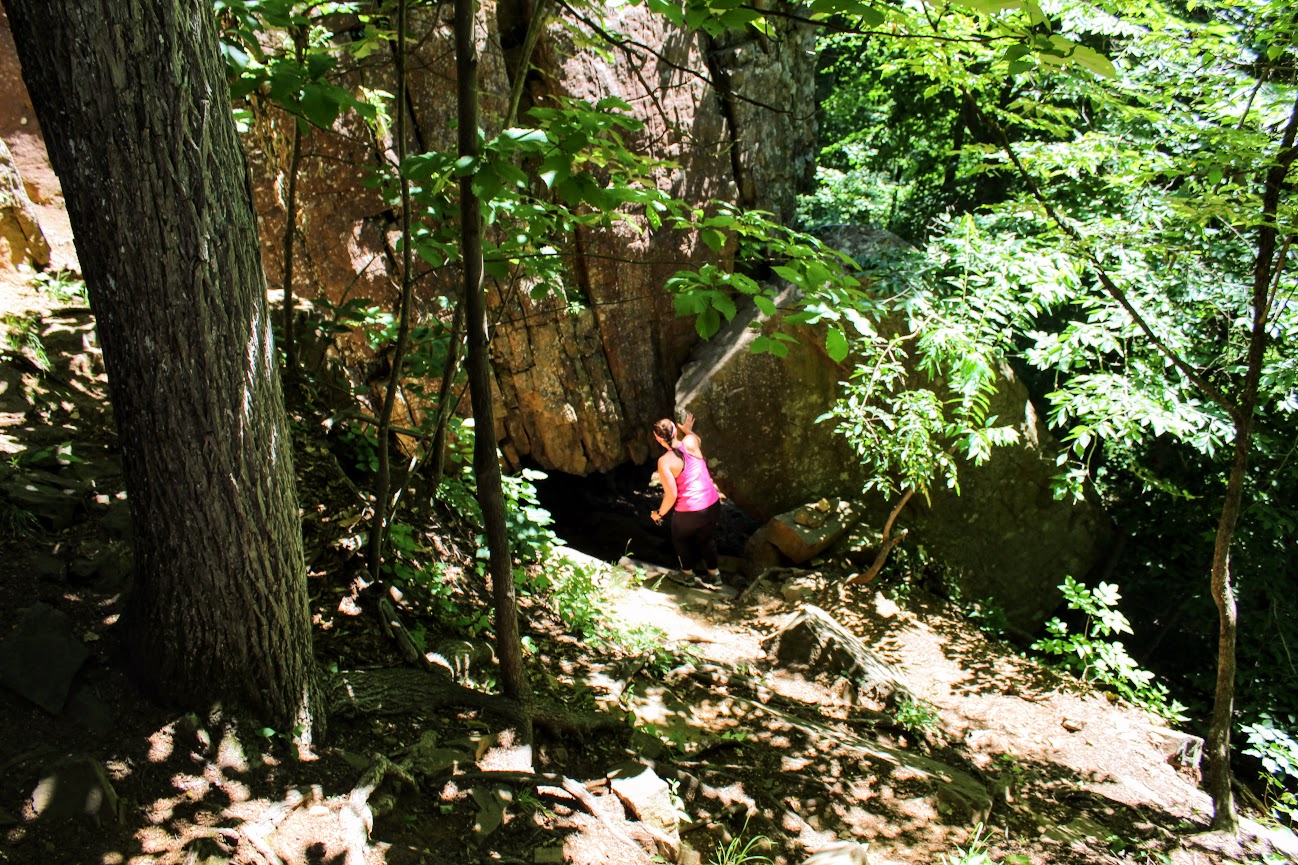
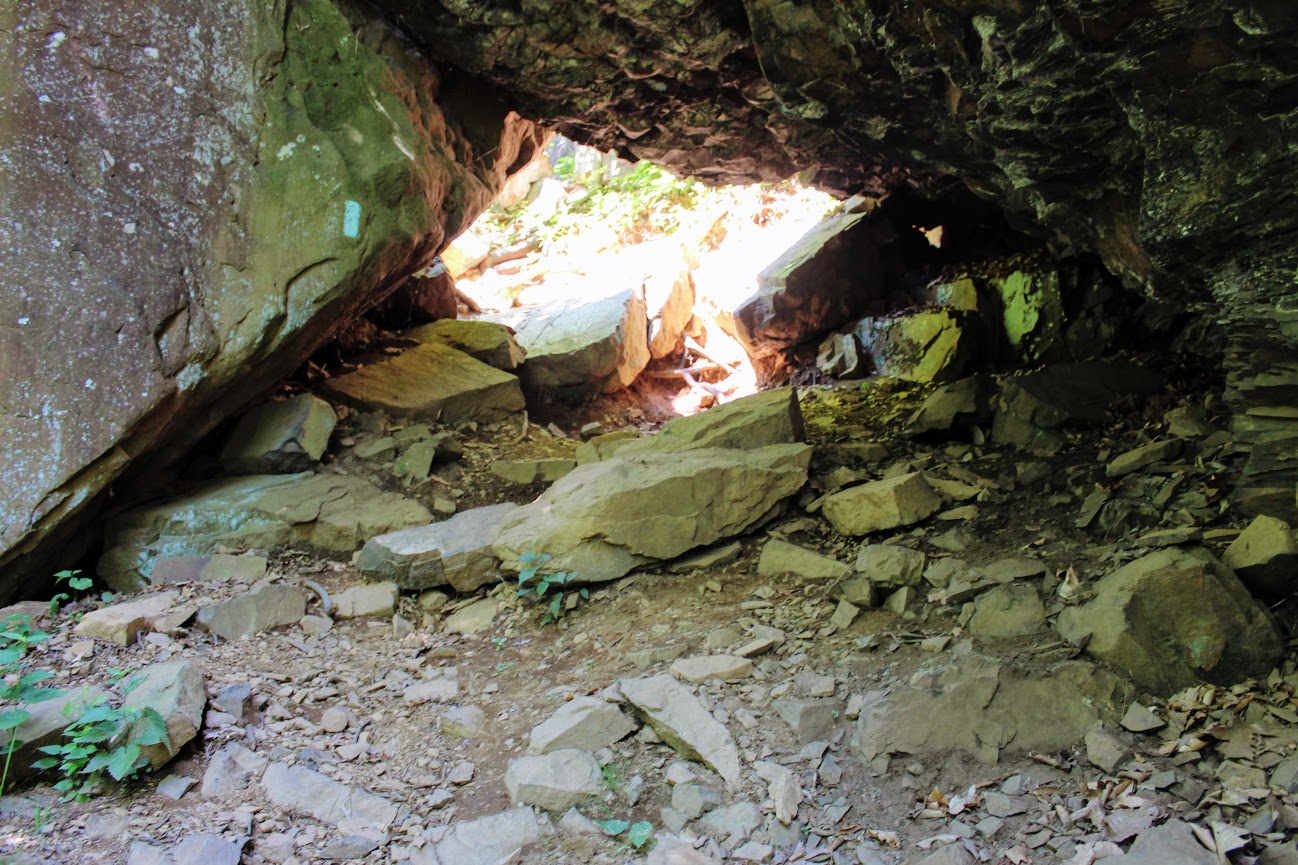
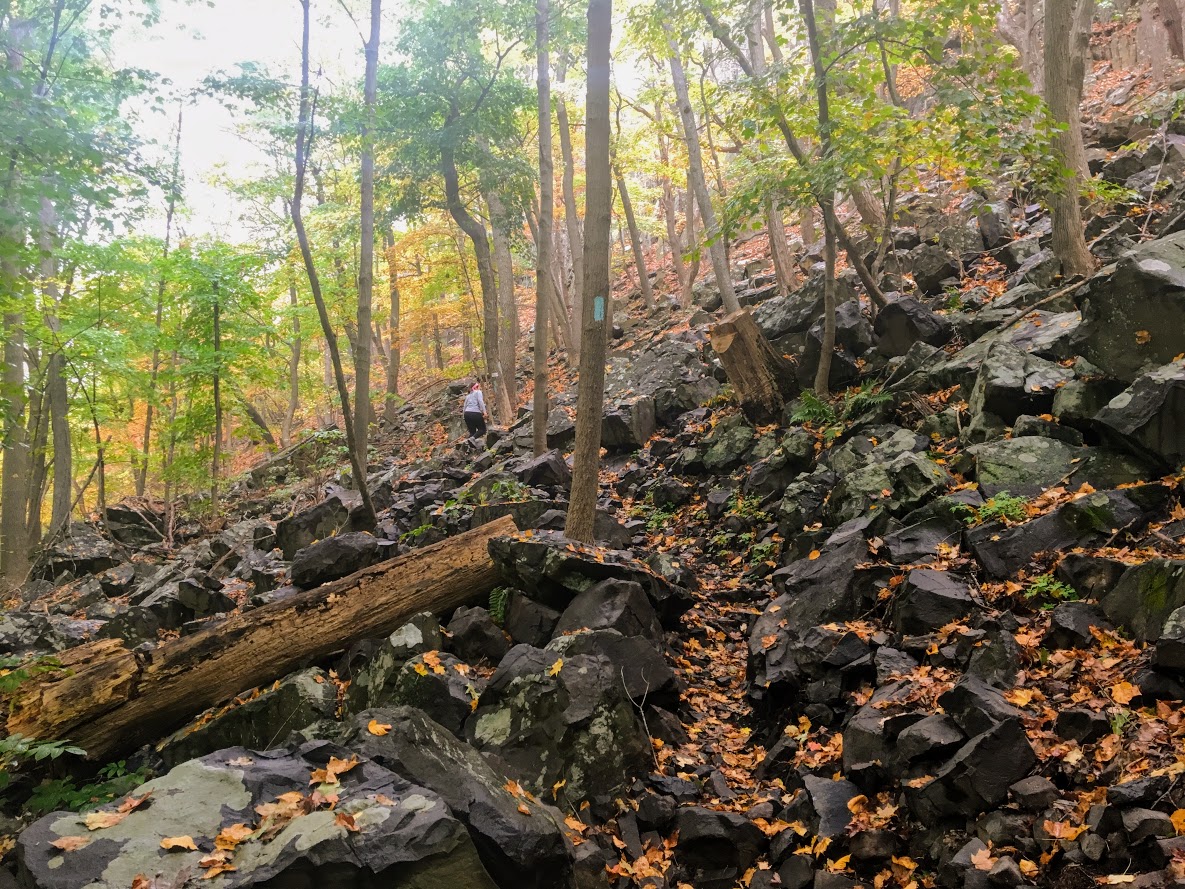
We headed on the trail to our left toward the Rattlesnake Cliffs. The trail starts out flat then begins to switchback up the side of the mountain. After a half mile in, the trail will ascend uphill and the terrain is rockier. We passed lots of large rock boulders as we got closer to the cliffs. This particular trail was very well-marked. We eventually came across the boulder rock cave known as Will Warren’s Den, which I later found out was a historical site.
Looking for a good hike in Connecticut? Well, I stumbled upon a hidden gem right under my nose. Rattlesnake Mountain to Pinnacle Rock trails are located in Farmington, CT and crosses over to Plainville, CT. This is part of the New England/Metacomet Trail. Finding the parking area can be tricky. There are 2 areas where you could start. Blue trail markers can be accessed from Pinnacle Street in Plainville. The GPS wasn’t picking this option up so my girlfriend and I chose to drive on RT 6 in Farmington. There is a small parking area on your right where the trail starts. If you GPS 200 Colt Hwy Farmington, CT 06032, that should find it.


Parking area off route 6.
From here, you can hike to the Rattlesnake Cliffs, which is a 2.6m out and back loop. Or you can continue to hike another 2 miles out and back to Pinnacle Rock. Thus, it will be 4.6m total for this hike.
HIKING FOR DONUTS
A blog for the outdoors foodie enthusiast
Hi, I’m Mark. I live in Connecticut. I take new trips every chance I get. A good trip has a great hike, great food, and something fun to do. My goal is to search new trips and share them to inspire others to try something new and exciting.
If you are looking for posts in a particular place, search by City or State here.
Explore other posts in the archive.
Archive
Start of trail
Once parked, we headed on the trail to our left toward the Rattlesnake Cliffs. The trail starts out flat then begins to switchback up the side of the mountain. After a half mile in, the trail will ascend uphill and the terrain is rockier. We passed lots of large rock boulders as we got closer to the cliffs. This particular trail was very well-marked. We eventually came across the boulder rock cave known as Will Warren’s Den, which I later found out was a historical site.
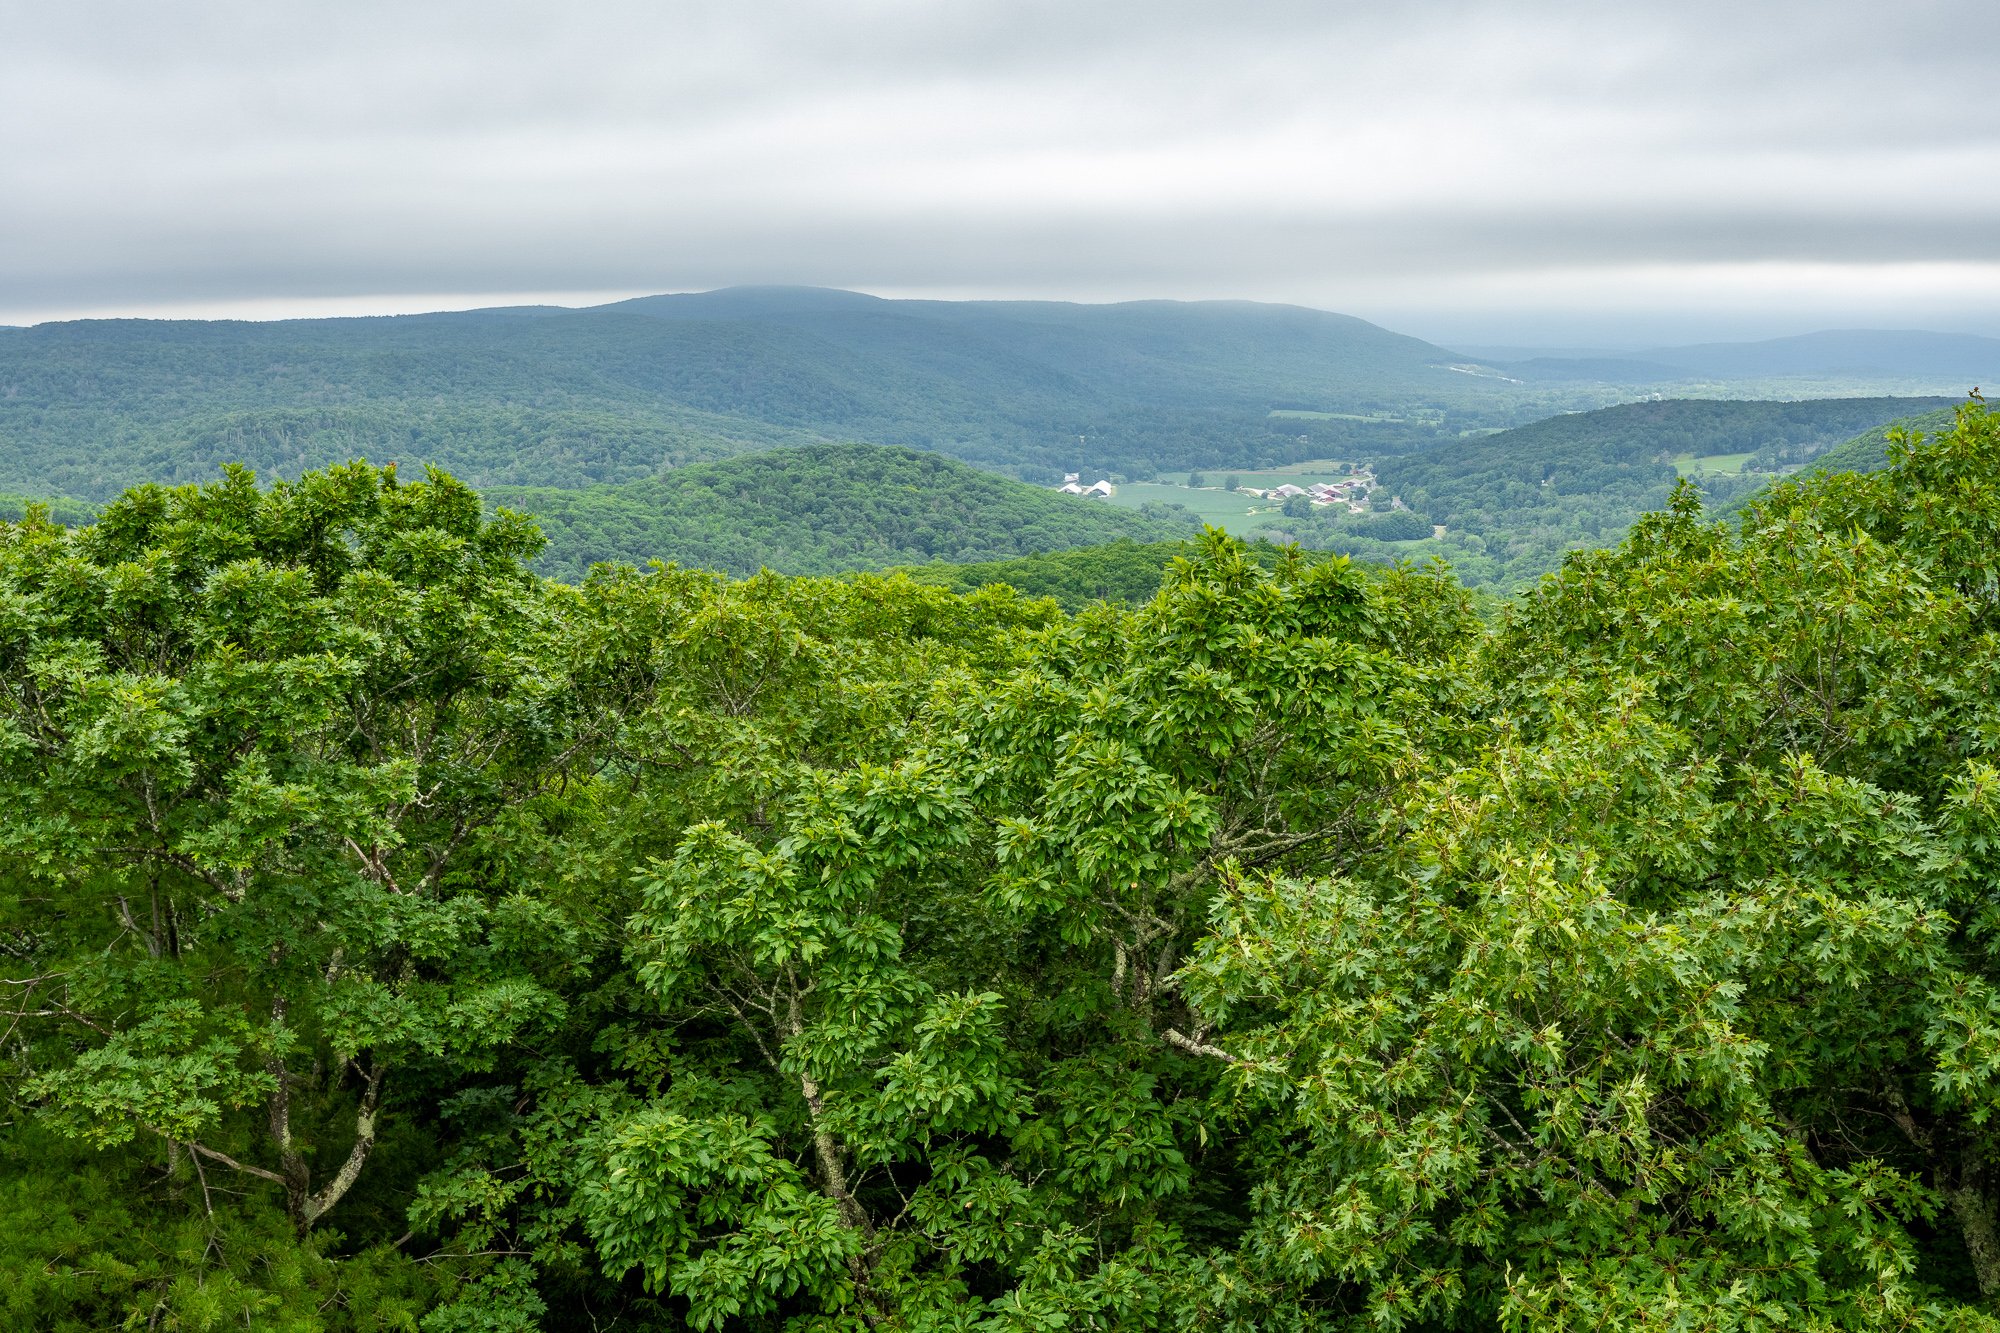
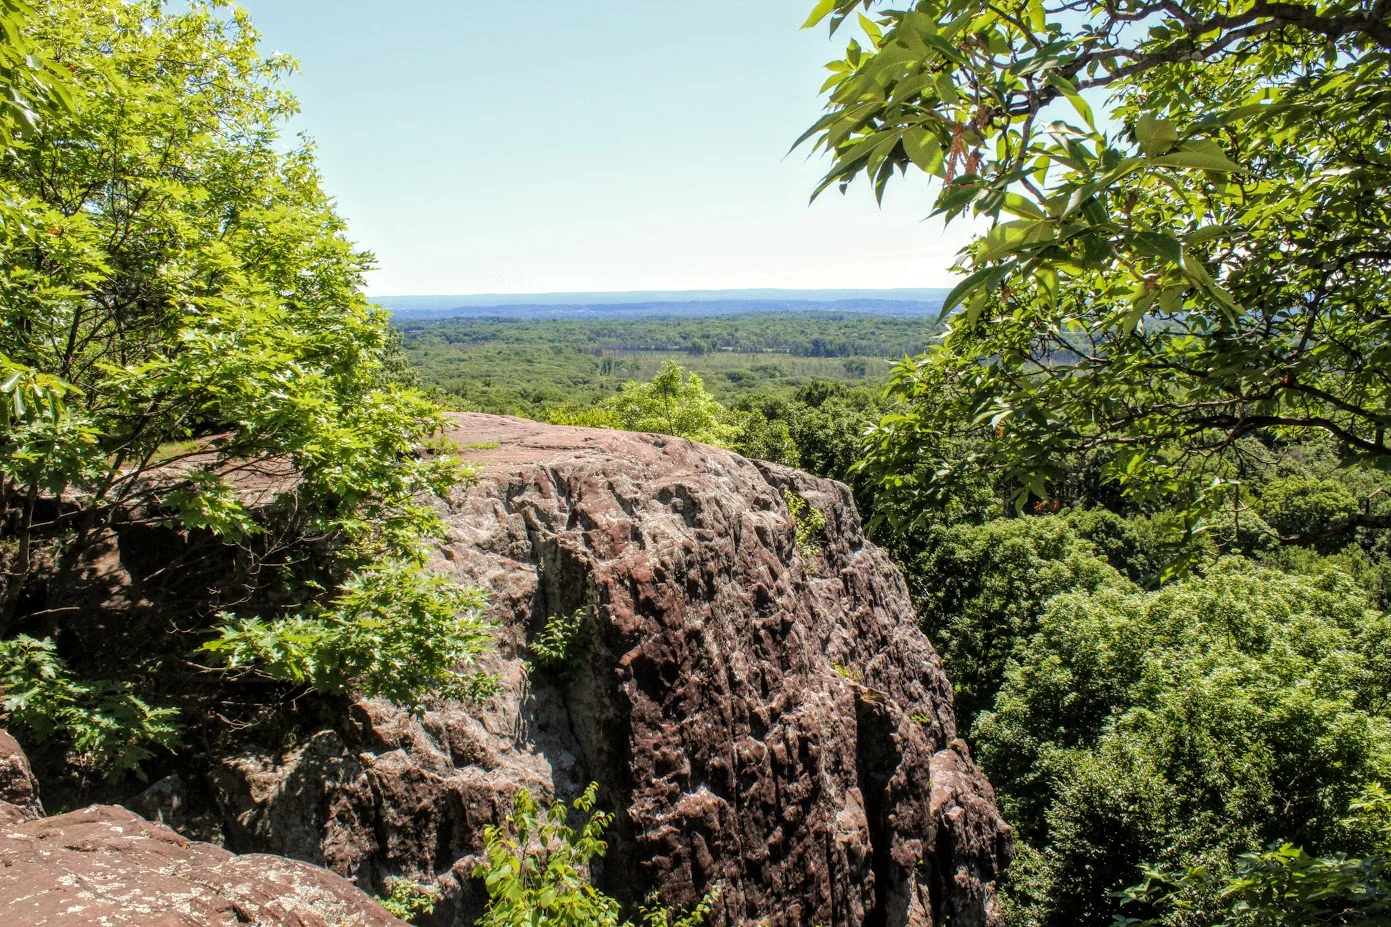
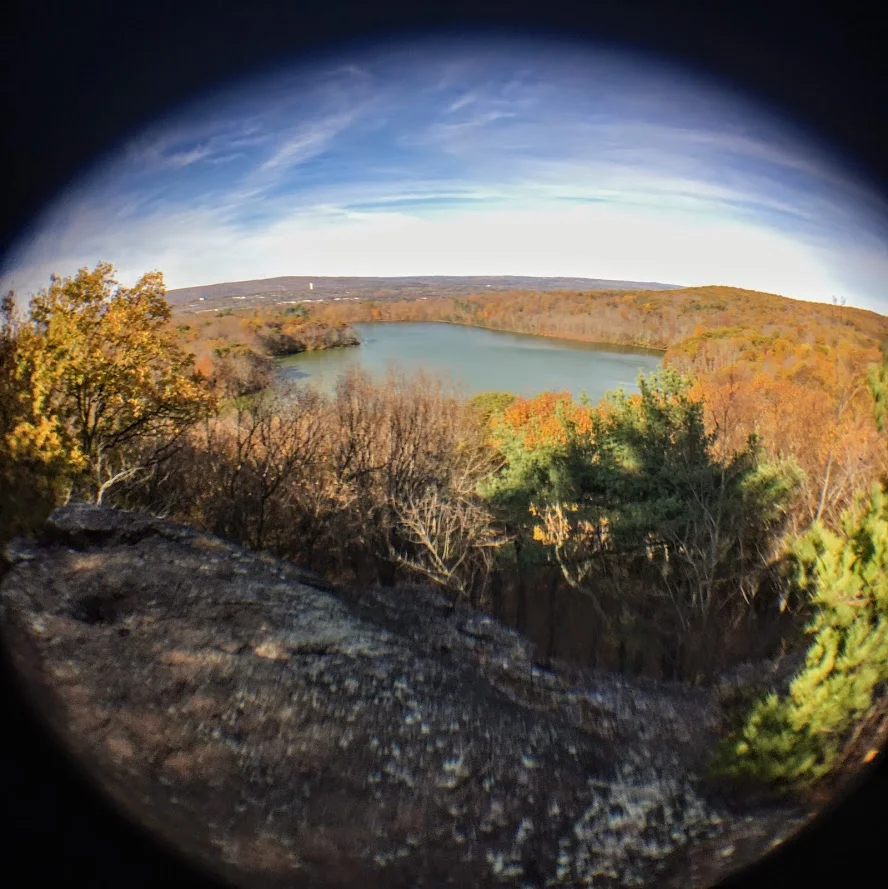
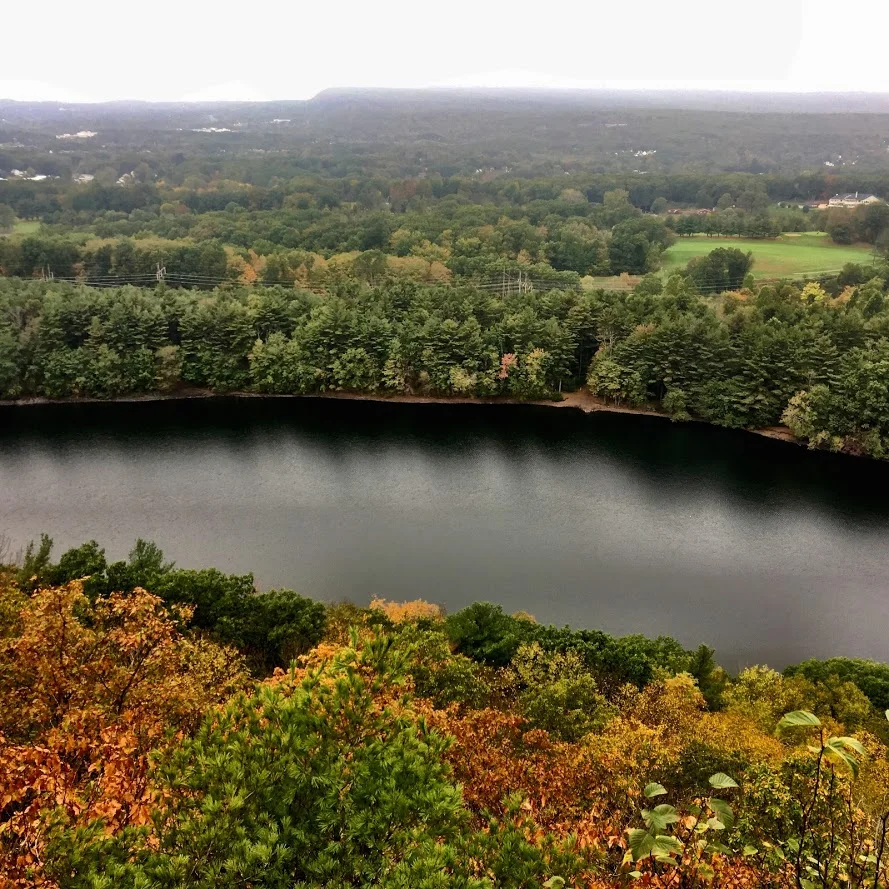
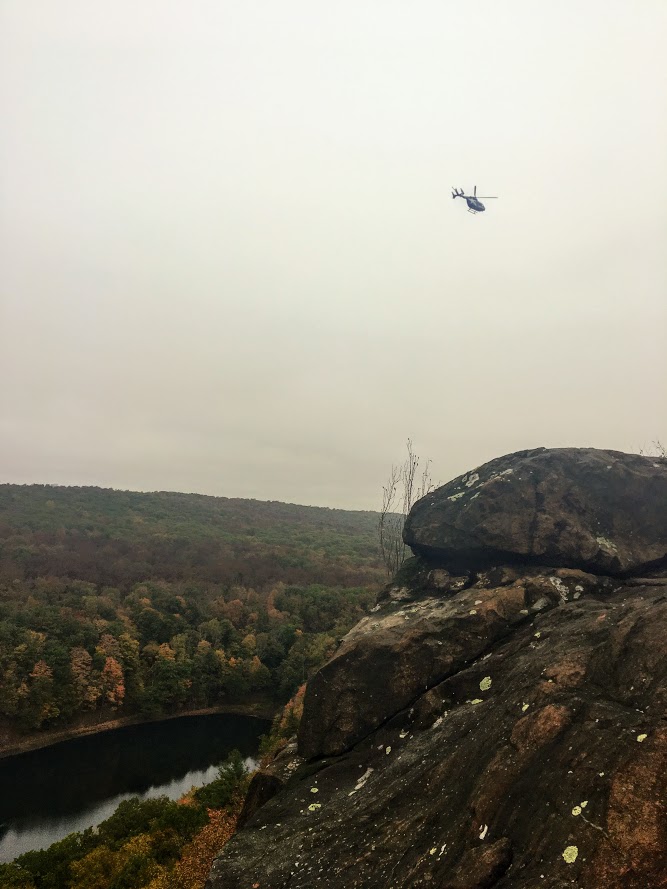
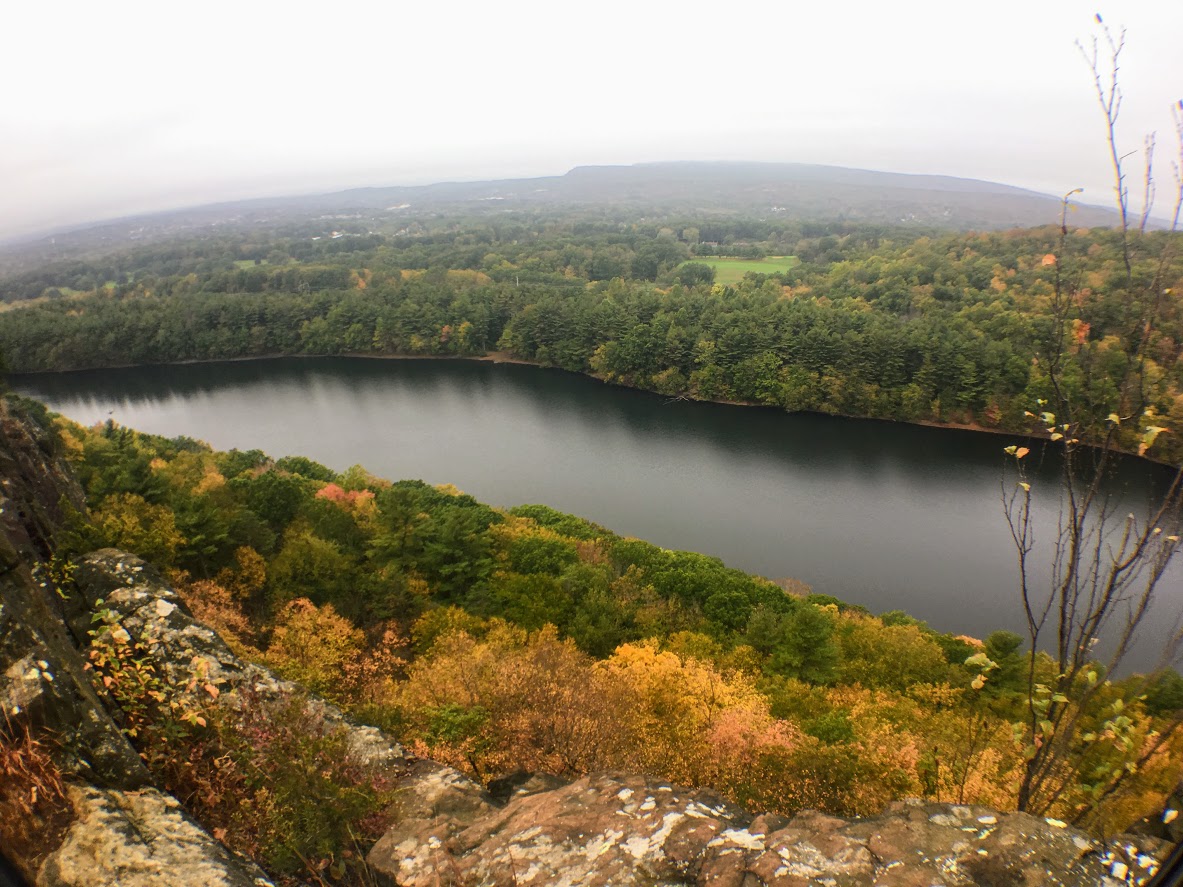
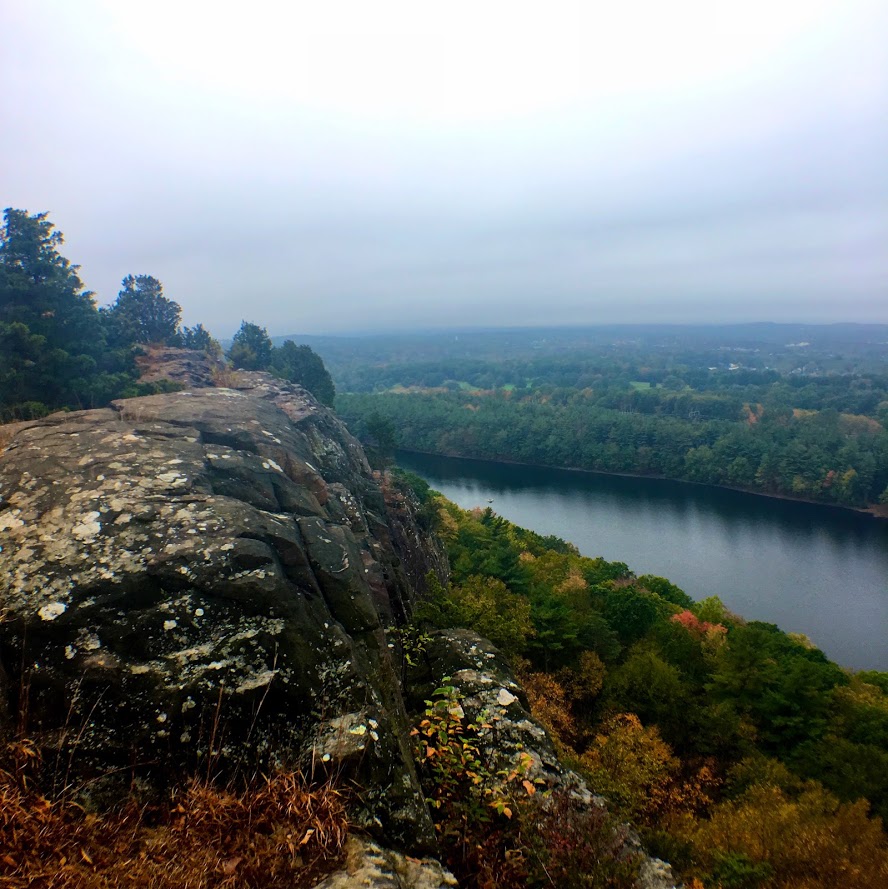
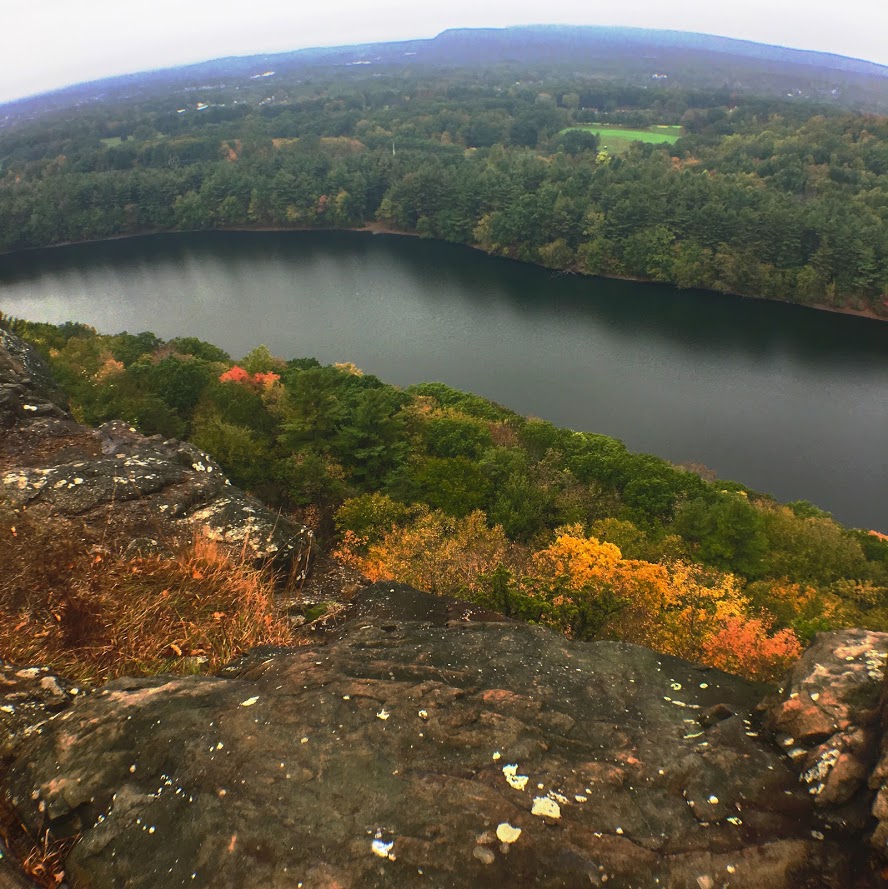
Not long after this, we reached the Rattlesnake Cliffs. Wow, what a spectacular view. I was absolutely stunned. On our left, we could see as far as the city of Hartford. And the sky was clear, so we could visibly see the biggest buildings in downtown Hartford. On our right, we could see the East and West Peak at Hubbard Park in Meriden and the Pinnacle Rock in Plainville. Great views all around. How did I not know this view existed? If this was all we did, I would have still ranked this hike very high on my list of CT hikes.

Views from Rattlesnake Cliffs.

hartford views to the left from the cliffs.

On your RIght from the cliffs.....

PANO VIEW FROM RATTLESNAKE MOUNTAIN CLIFFS.
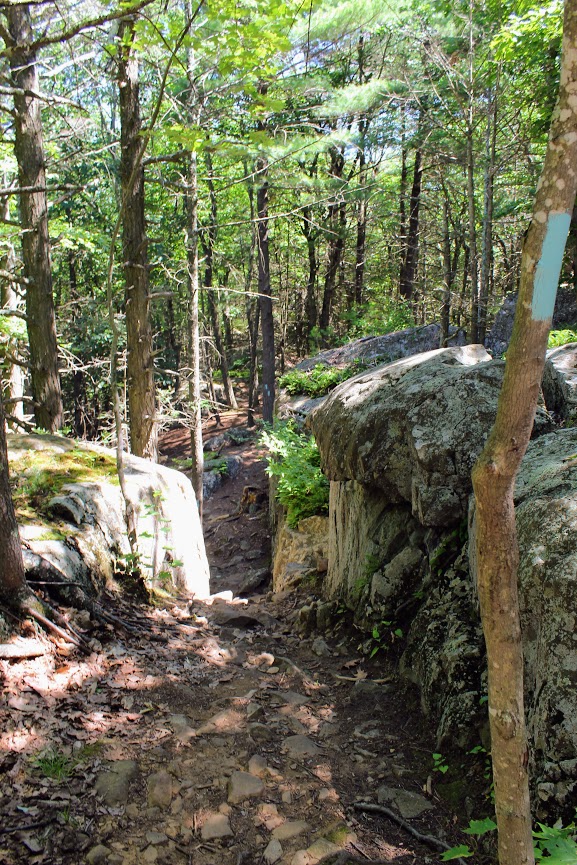
We hopped back on the blue trail down Pinnacle Rock and started making a steep descent. We witnessed other hikers take a wrong turn here by going straight down. We were able to stay on track. We continued hiking along the bottom of Rattlesnake Mountain and noticed a small tunnel formed by the rocks. We decided to climb through and found ourselves blue markers on the other side. Note, this is how you to get to Pinnacle Rock. There is a quite a bit of climbing on and over rocks for this section.
And, this trail is not as well-marked. There were areas we lost the blue markers. Sometimes the blue marker was faded on rocks and we didn’t notice until we got closer. If you do not come across blue after 5 min or so, I suggest turning around.

If you can't find blue markers, they may be on the rocks.
We reached the bottom and crossed an area under power lines that led us climbing up to the other side. We reached a dirt paved road and we saw a tree marked with blue and red. This took us to the final section before we reached Pinnacle Rock. You will be going uphill and start climbing the rock on your right to the peak of Pinnacle Rock.
The view of Pinnacle Rock is nice. But Rattlesnake Mountain has a higher wow factor. The view from Pinnacle Rock is not as appealing as you will see mostly homes. This is a big rock climber’s paradise and I did see a few people doing so. I will hike all day. But climbing isn’t for me.
RECOMMENDED POSTS

RECENT POSTS
See where I’ve been recently on Instagram, follow @HIKINGFORDONUTS

Crazy guy climbing up pinnacle rock.

VIew from the pinnacle Rock summit.

Top of pinnacle Rock with railings and rock seating to enjoy the views.
We headed back the same way we came. Took another peek from the Rattlesnake Cliffs before we headed back to the car. Such a great view. That is one of best views in CT. I was very impressed by this hike. This is easily one of my favorites now. It is very challenging. I would say it’s a moderate hike. Lots of different terrain and some climbing. Round trip is 4.6 miles but I feel like it’s closer to 5 miles. Definitely suggest hiking boots and a pack for this one. This took us about 3 hours. This is one New Englanders should add to their hiking list!
The review:
Rattlesnake MT to Pinnancle rock (farmington, CT), ~4.6m: 4.5 out of 5.
Old Furnace State Park, Killingly, CT
Old Furnace State Park is located in Killingly near Rhode Island. This is a great park for hiking, biking, and fishing. Exploring new areas is always fun, even if you get lost on the trails. Check out the blog to make sure you stay on the trails!


Scrolling through the list of the 2018 Sky’s Limit Hiking Challenge in Connecticut, I wanted to explore unknown parts of the state that would be new to me. I haven’t spent much time in the Windham County area, neighboring Rhode Island. I really had no idea where I was going and there was not too much info on the park online. But, I convinced my girlfriend to drive over an hour with a promise of beers and off we went.
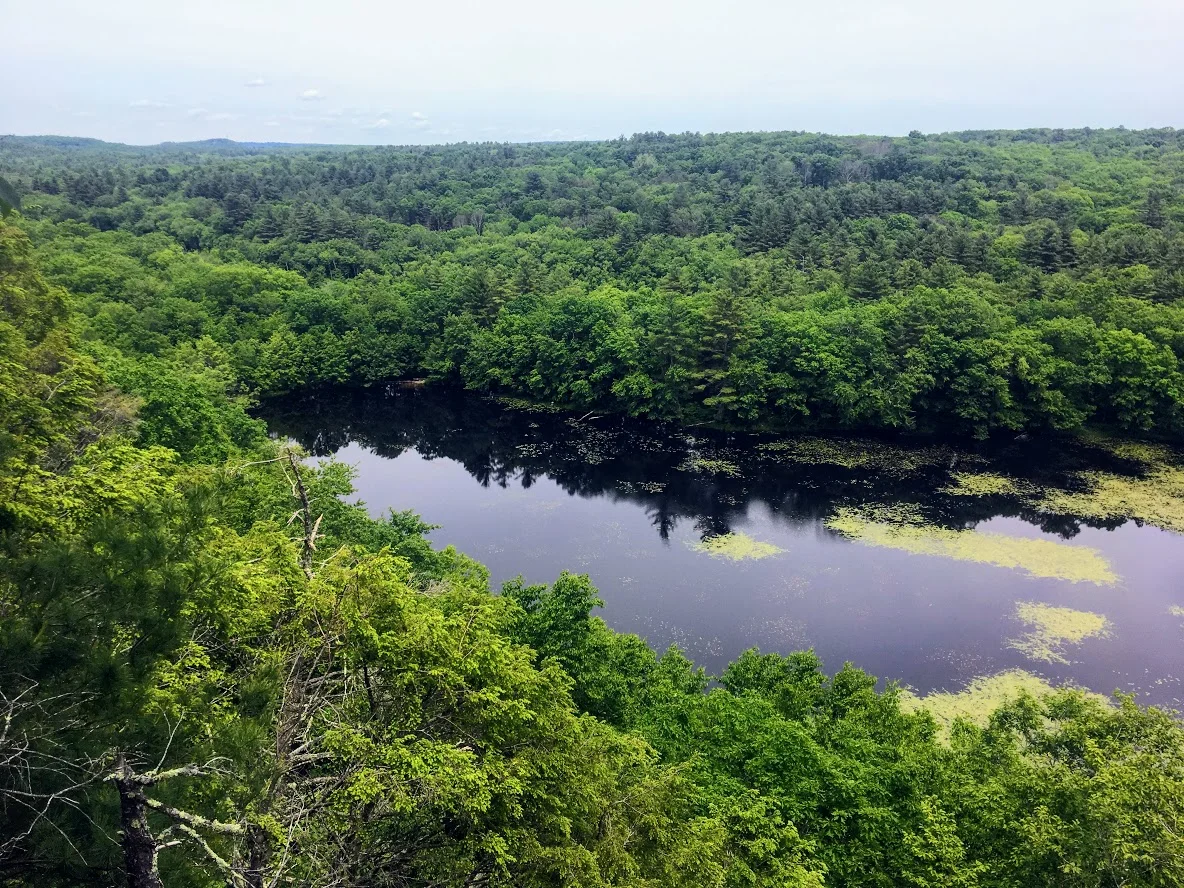
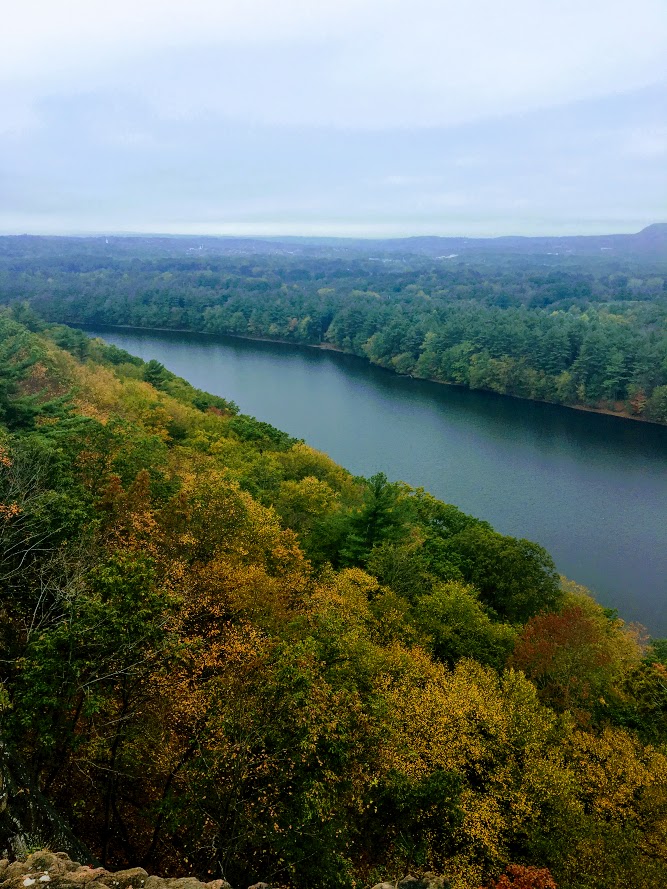
Old Furnace State Park is located in Killingly, CT. You will find the park entrance off Route 6 via Route 395. Ross Pond State Park is fairly close so my GPS took me there instead. If yours does the same, just keep going past that until you can take a left onto South Frontage Road and the park will be there on your left. The blue-blazed trail of this park runs about 3 miles. This particular hiking challenge calls for 2 miles round trip until you reach the overlook from the cliffs at 200 feet over Half Hill Pond. With this view you get a great look of valley stretching into Rhode Island.

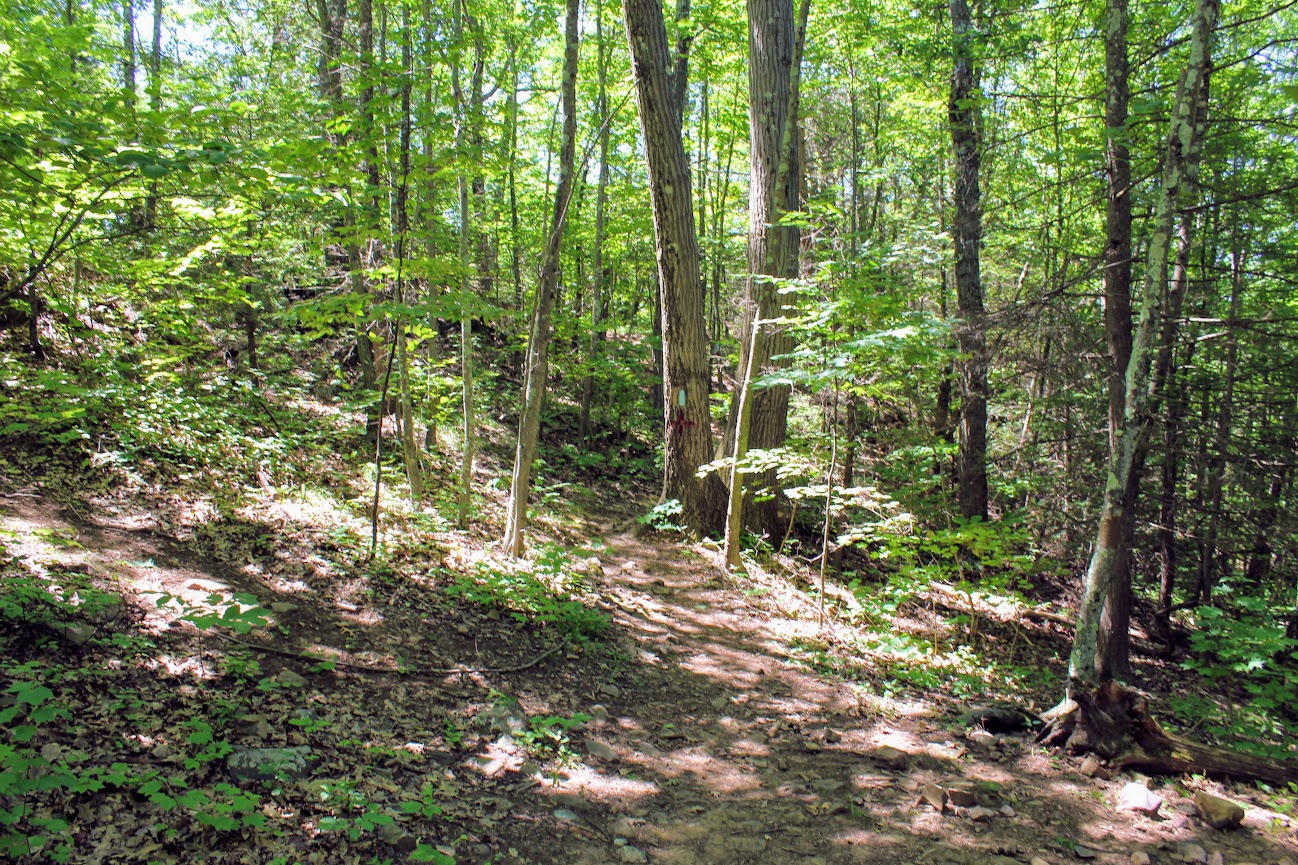
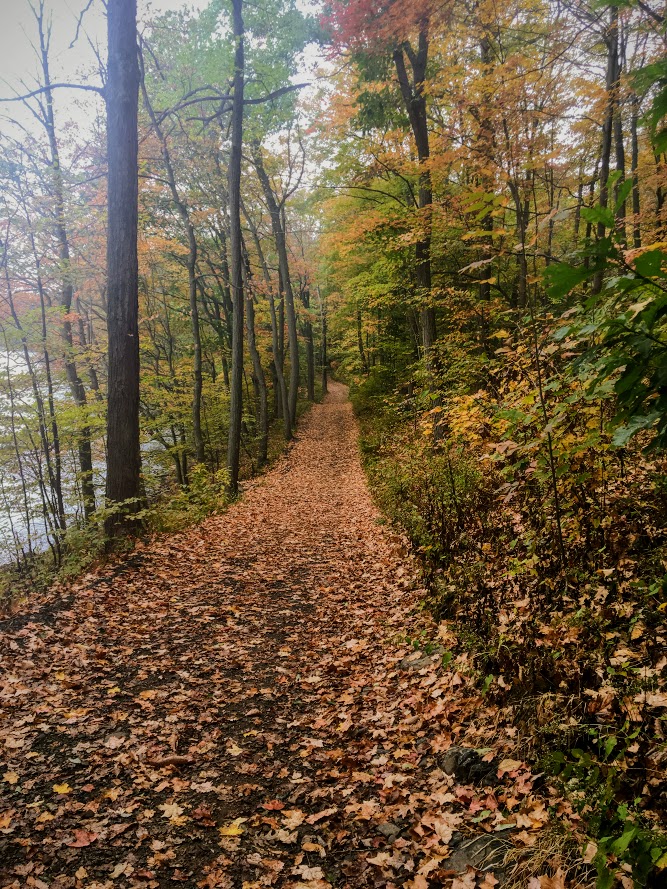
We finally found the parking lot and noticed there was mountain biking event going on. Apparently, this is a big mountain biking trail. I didn’t expect to see anyone. The hiking trail starts at the parking lot. I used the trail located at ct.gov here . The path instantaneously takes you into the woods.

As we began, we crossed a small brook that led us to crossing a small footbridge.


The trail was fairly wide open until we reached an unmarked section ducking through a brush of bushes. We found ourselves questioning our direction. Eventually, a blue marker did appear.


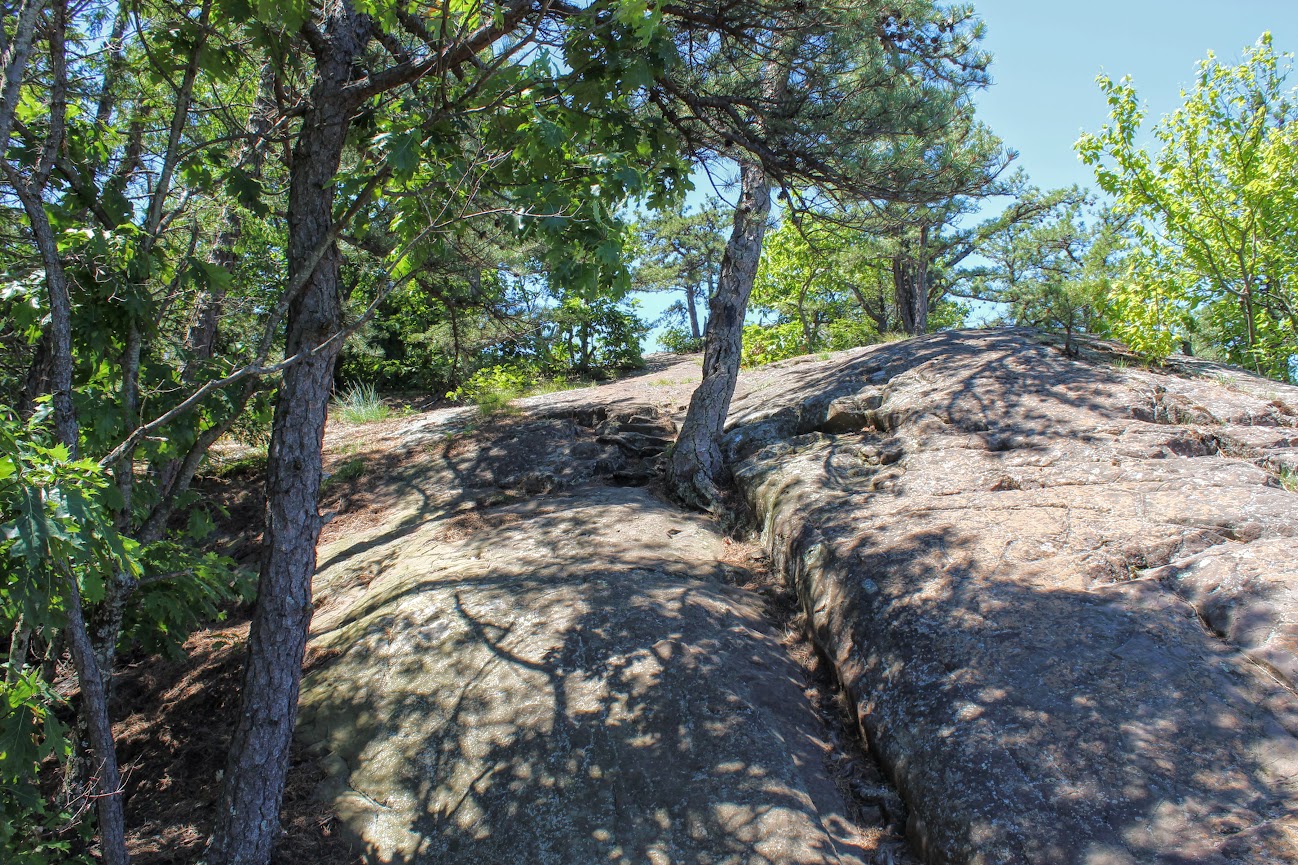
From here the ascent started to get steep. About a mile into the hike, we saw the path break into two. Unfortunately, we kept going straight and that was not correct and saw some brown marked trails.


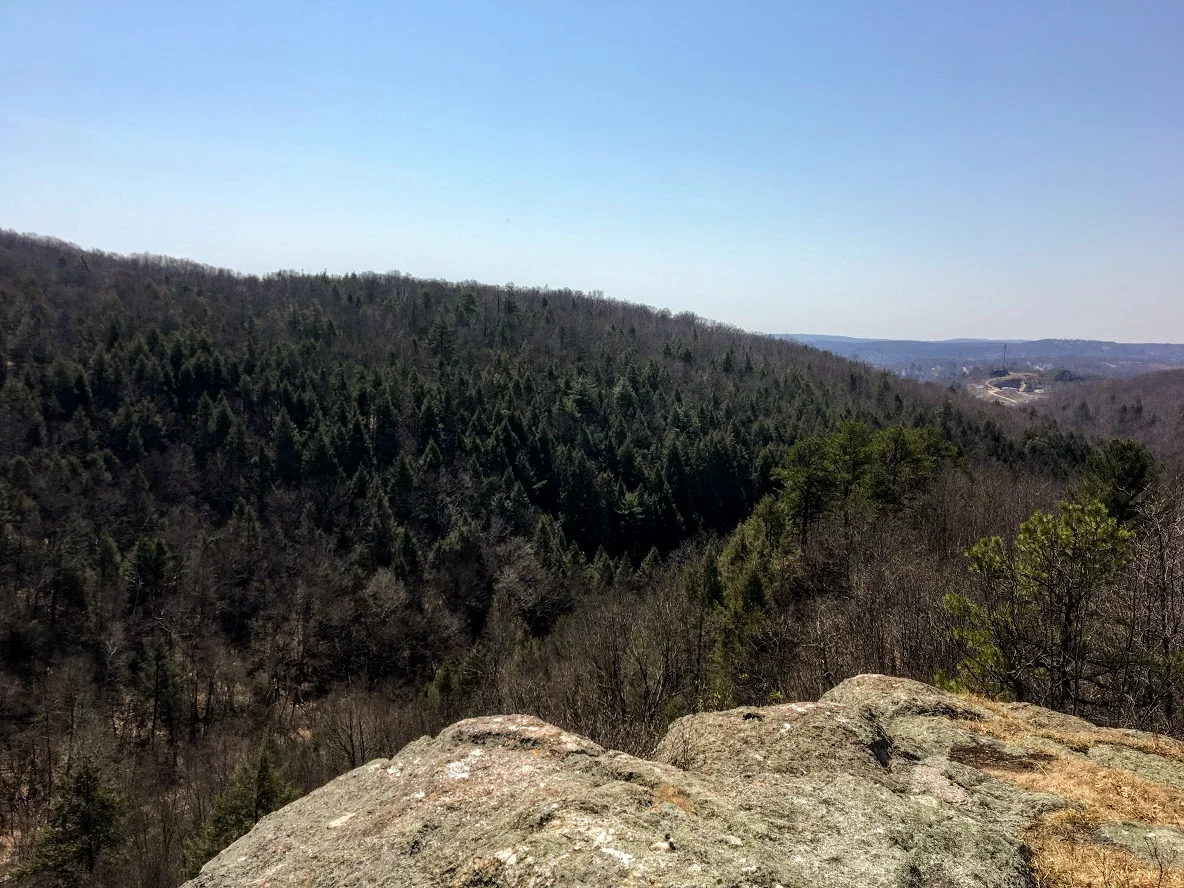
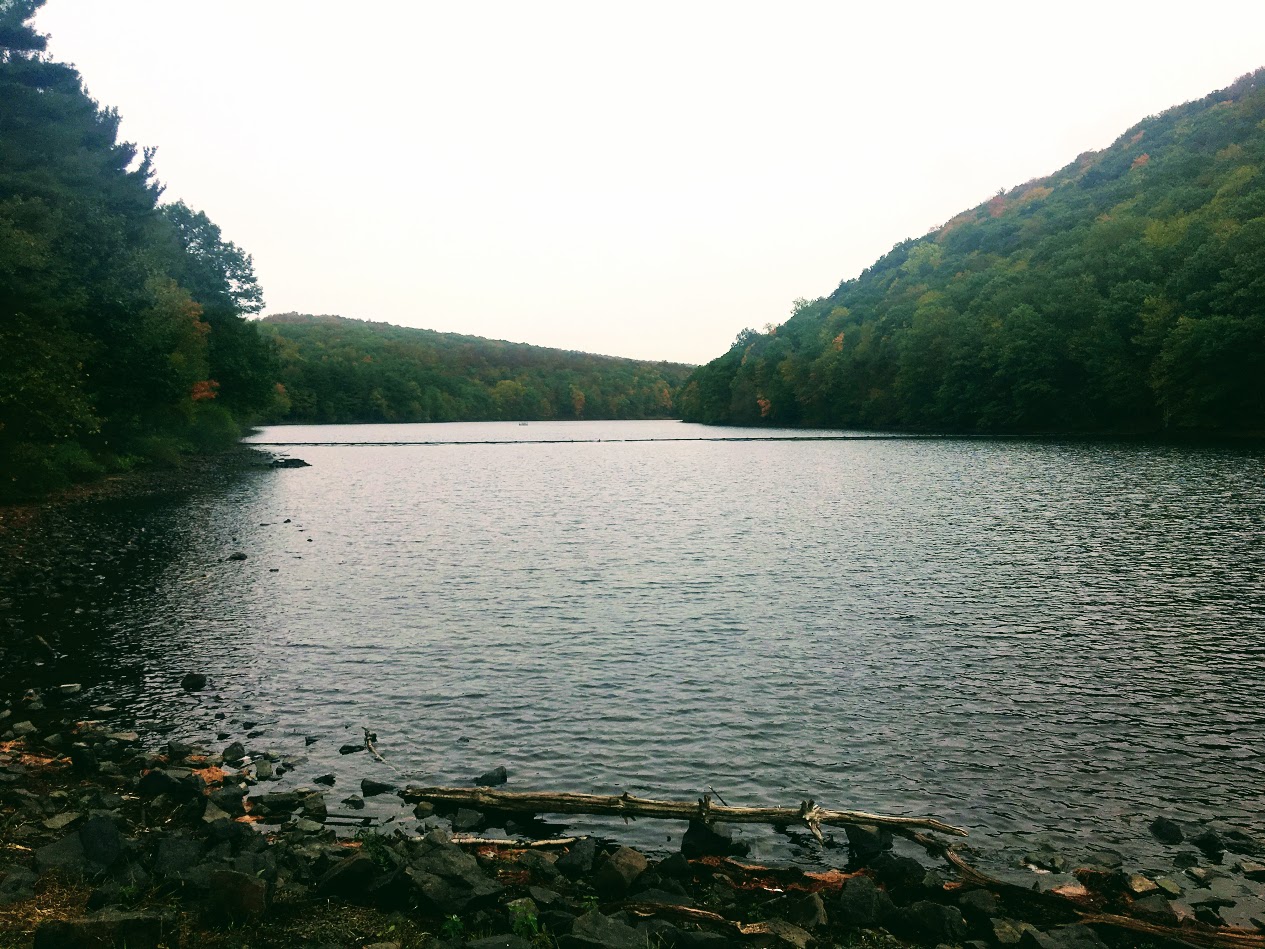
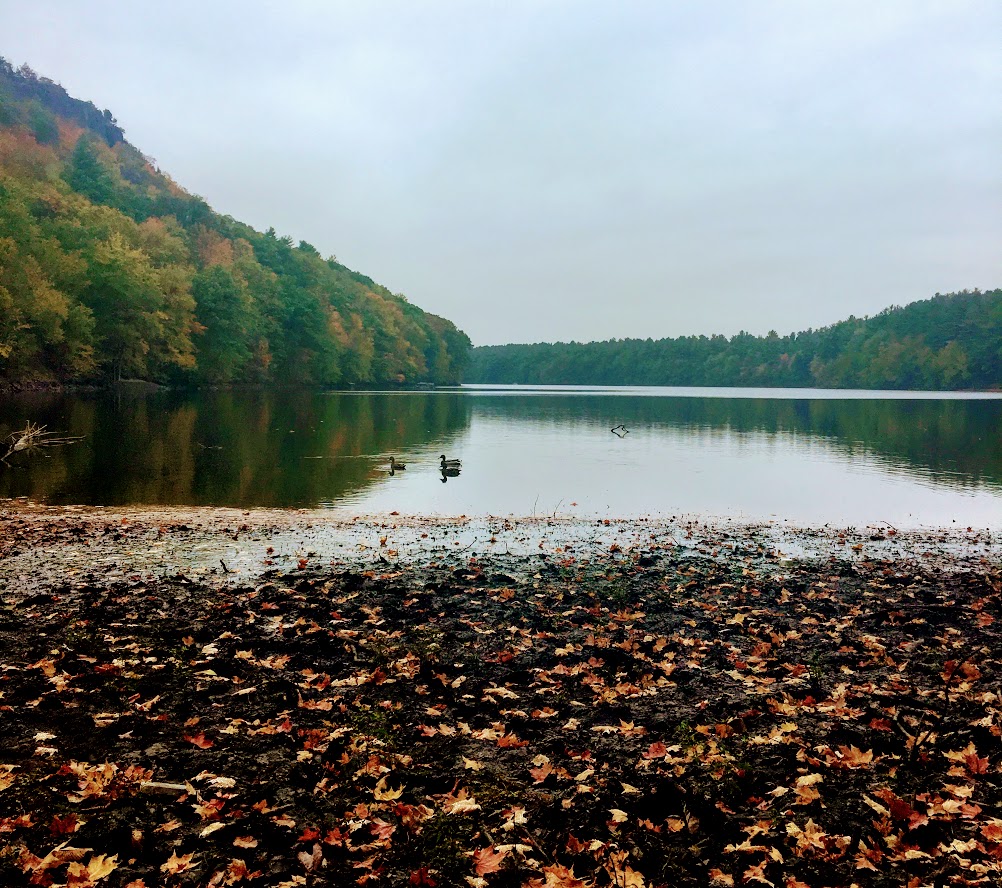
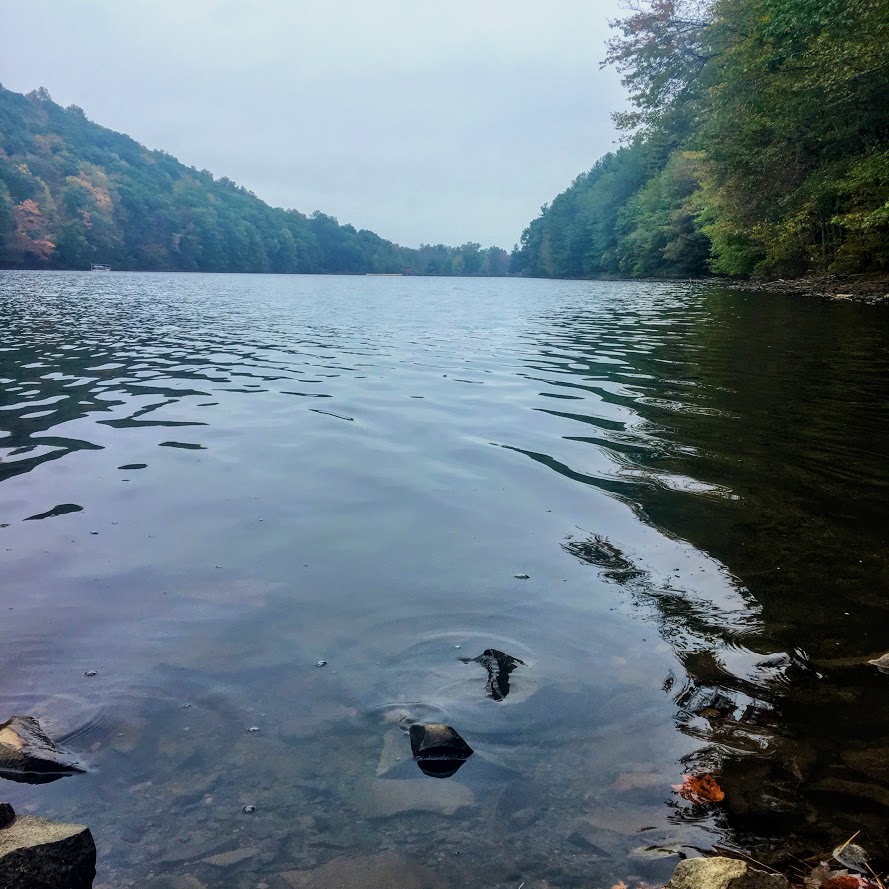
Thus, we circled back and took the path to the left which was the ridge along the pond. And, finally we found ourselves at the cliffs overlooking Half Hill Pond. The pond was completely filled with water lilies.


We stopped here because the trail was pretty buggy and I didn’t think the rest of the trail would offer much. But if you want to continue, this will lead you down to the parking lot and boat ramp at Ross Pond to Squaw Rock Road where you turn around and come back. If you are not from the area, the directions to the park could be difficult and the trail itself has areas that should be marked better. The hike itself was not hard. I would rate it easy. I would bring bug spray and pay very close attention for the blue markers. Looks like a good area to fish and maybe kayak as well. I’m sure this is a nice spot for locals but one time is probably enough for me.
The Review
Old Furnace State Park, Blue Trail, Killingly, CT (~2m): 2.5 out of 5.

HIKING FOR DONUTS
A blog for the outdoors foodie enthusiast
Hi, I’m Mark. I live in Connecticut. I take new trips every chance I get. A good trip has a great hike, great food, and something fun to do. My goal is to search out new trips and share them to inspire others to try something new and exciting.
If you are looking for posts in a particular place, search by city or state here.
EXPLORE OTHER POSTS IN THE ARCHIVE
Archive
RECOMMENDED POSTS
MOST RECENT POSTS
See where I have been recently on Instagram. Follow @HIKINGFORDONUTS
Artists Bluff Trail, Franconia Notch State Park
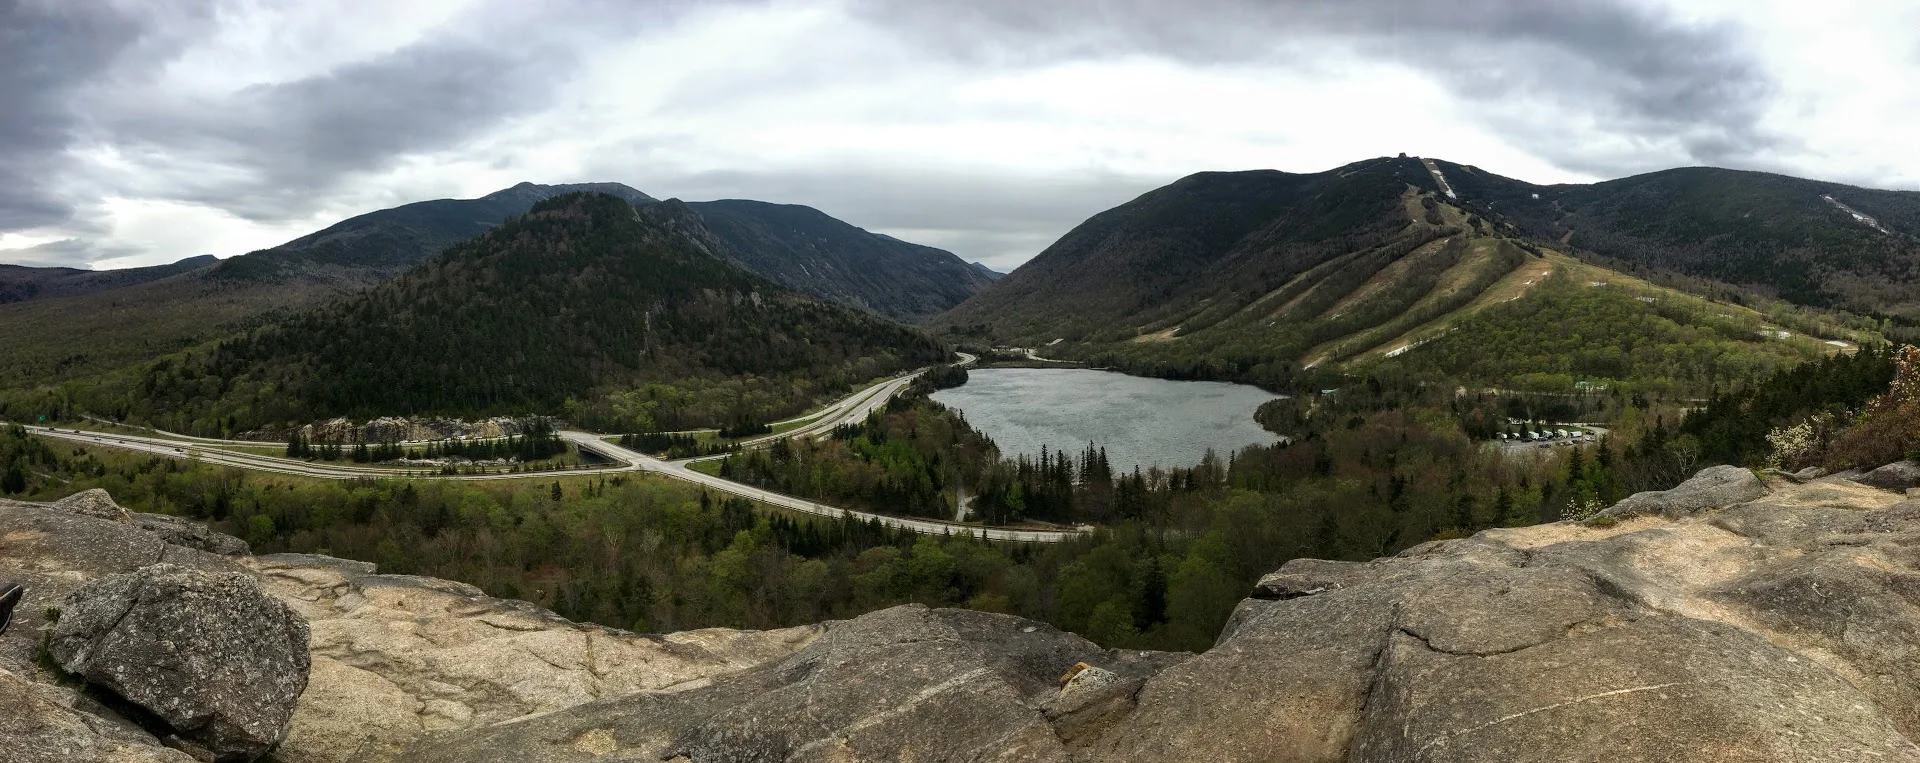
Artists Bluff is one of my favorite trails in the White Mountains of New Hampshire located in Franconia Notch State Park. This trail checks off all boxes for a great hike. The views are spectacular. Check it out!
Trail Description: The Artists Bluff Trail is a short hike that offers some of the best views of Cannon Mountain and Franconia Notch.
Trail Info:
Where: Franconia Notch State Park, Franconia, NH Distance: 1.5 miles (1-1.5 hrs) Difficulty: Easy to Moderate Trail Type: Out and Back Features: Views, Valley, Lake, Forest
How to get there:
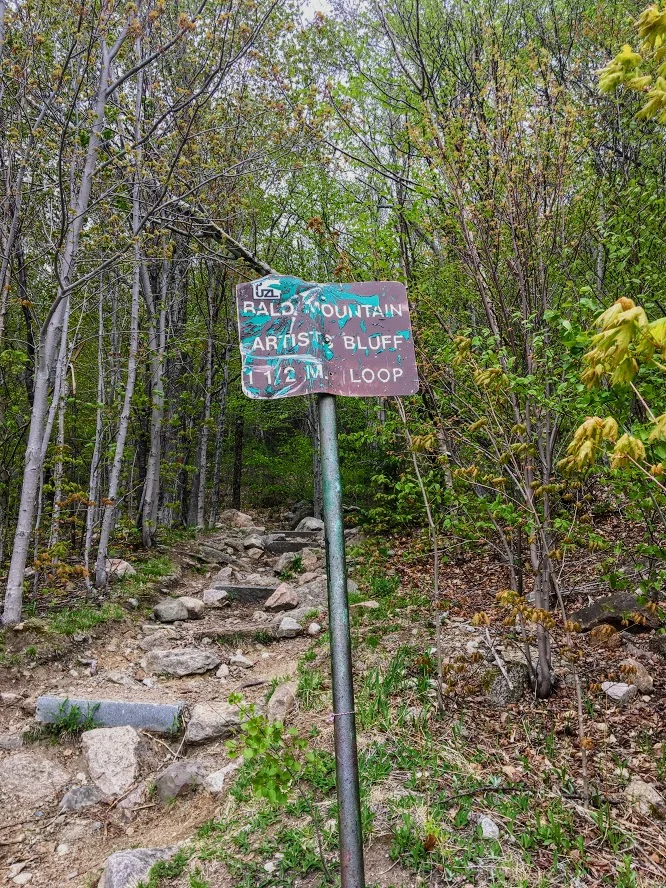
From I-93 (Franconia Notch Parkway) get off on Exit 34C toward the Cannon Mountain Ski Resort and head west on NH 18. Go up roughly a half mile where you see a large parking area on your right. Walking across the empty lot in front of you will lead to the signs for the Artists Bluff and Bald Mountain.
Hiking Tips
Shortly along the trail, there’s a fork in the path that not clear which direction to go. Stay to your right to follow the Artist Bluff Trail. The other option will take you on the Bald Mountain Trail and will take you longer to get to Artists Bluff.
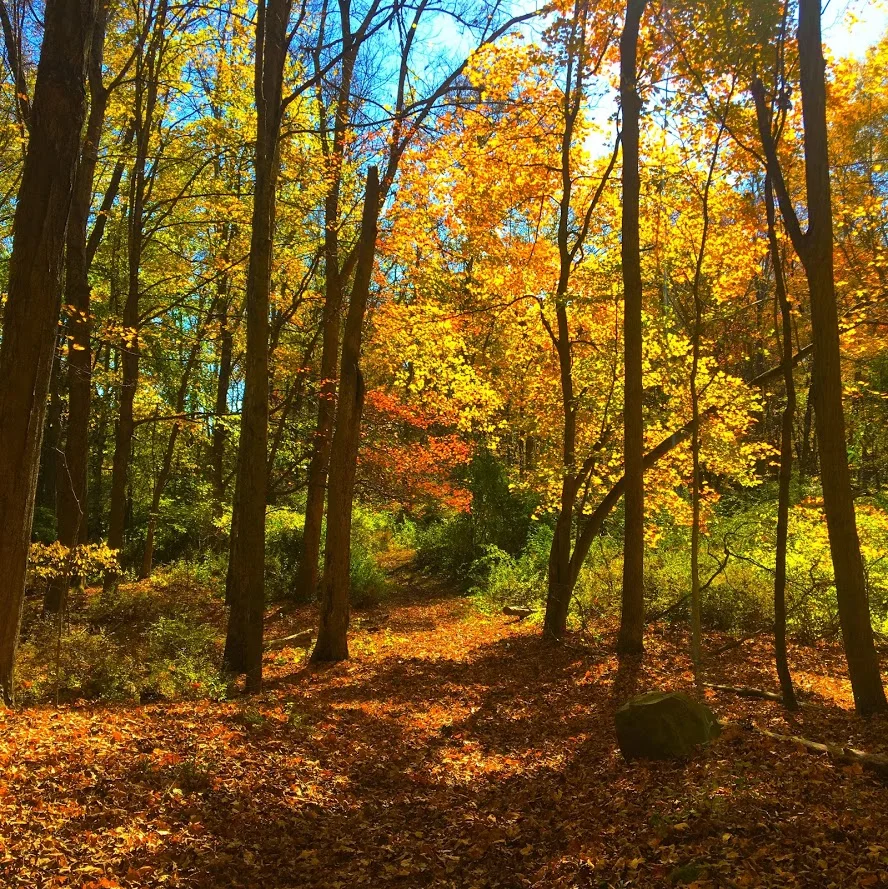
Great fall hike with amazing foliage.
The Hike
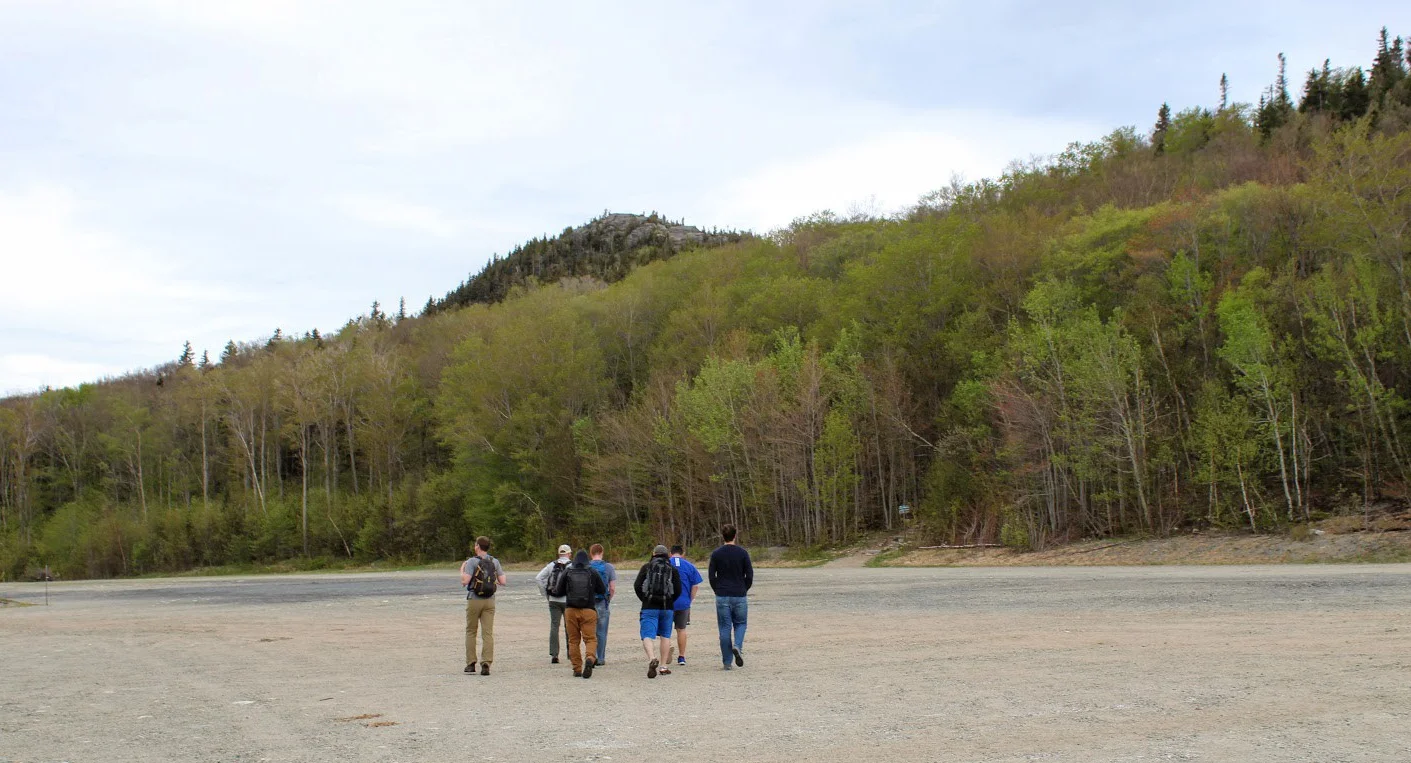
If you are looking for a great trail with amazing views that is relatively quick in New Hampshire, the Artists Bluff Trail in Franconia Notch State Park is exactly that. My friend owns a house close by and about 10 of us drove up for the weekend. After having too many beverages the night before, we wanted something relatively short on this morning. And, we wanted to beat the rain that was inevitable. We have hiked Artists Bluff in the past but it is a great hike and it is very satisfying. The loop is only 1.5 miles but it is challenging with steep sections. And, the trail will lead you to amazing views of Cannon Mountain and Franconia Notch.
Upon arriving we saw the parking lot off Route 18 on your right across from the Cannon Peabody slopes. We walked across the empty lot in front of us that led us to the signs of the start of trail for Artists Bluff and Bald Mountain.

We followed the Red marked trails to get to the bluffs. The trail starts off pretty easy then you have some steep inclines and declines as you get closer to the bluffs.


About .25 miles or so into the hike we saw split in the path to hike up to the summit of Bald Mountain on our left. This will add .5 miles to the hike. As we wanted to beat the rain, we stayed the course toward Artists Bluffs.

The trail eventually broke into the open and I saw views of Cannon Mountain. There was a storm recently in the Northeast and there were actually quite a bit of trees knocked down. I came across volunteers doing some maintenance to the trail and trying to clean up. After passing the volunteers, I came up to the rock that points to the direction of the bluffs.

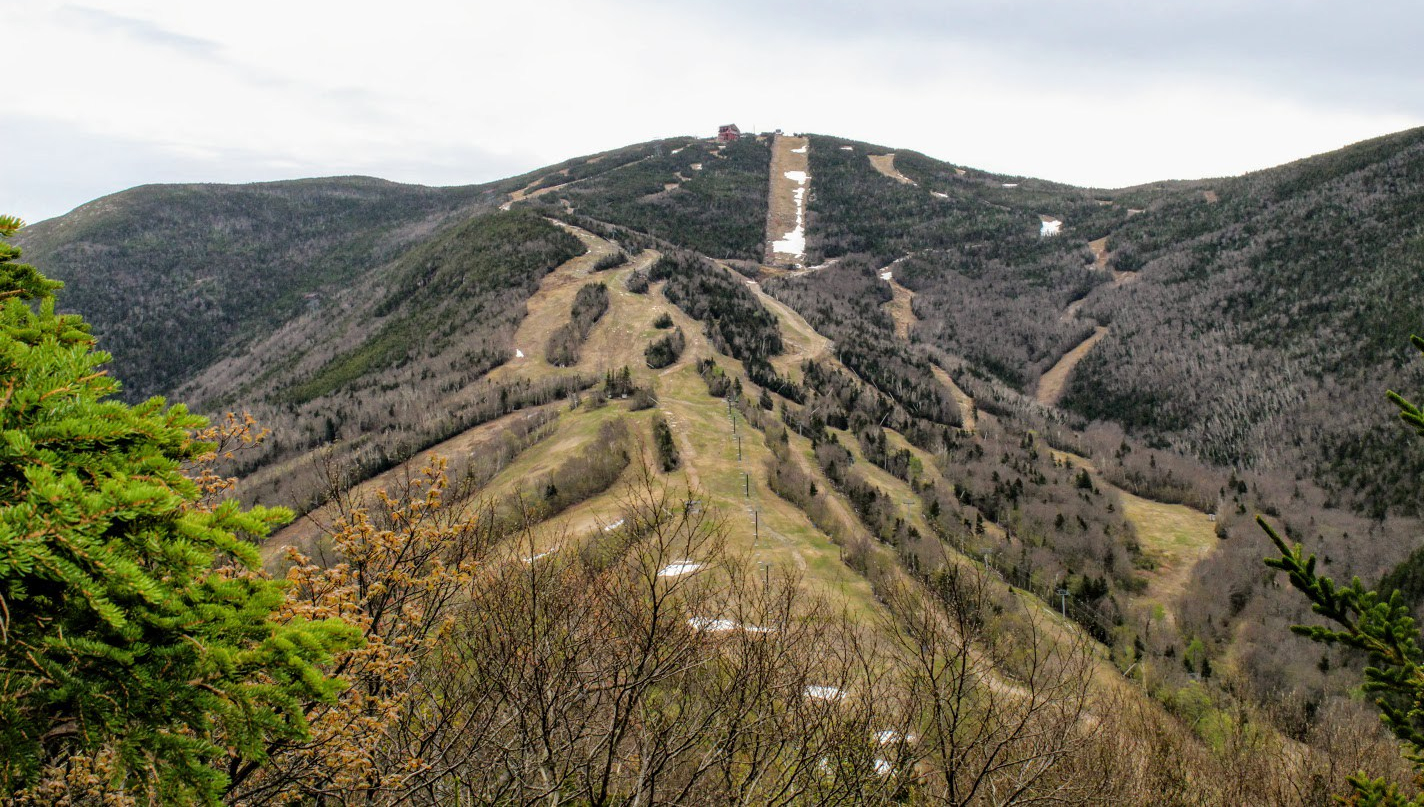
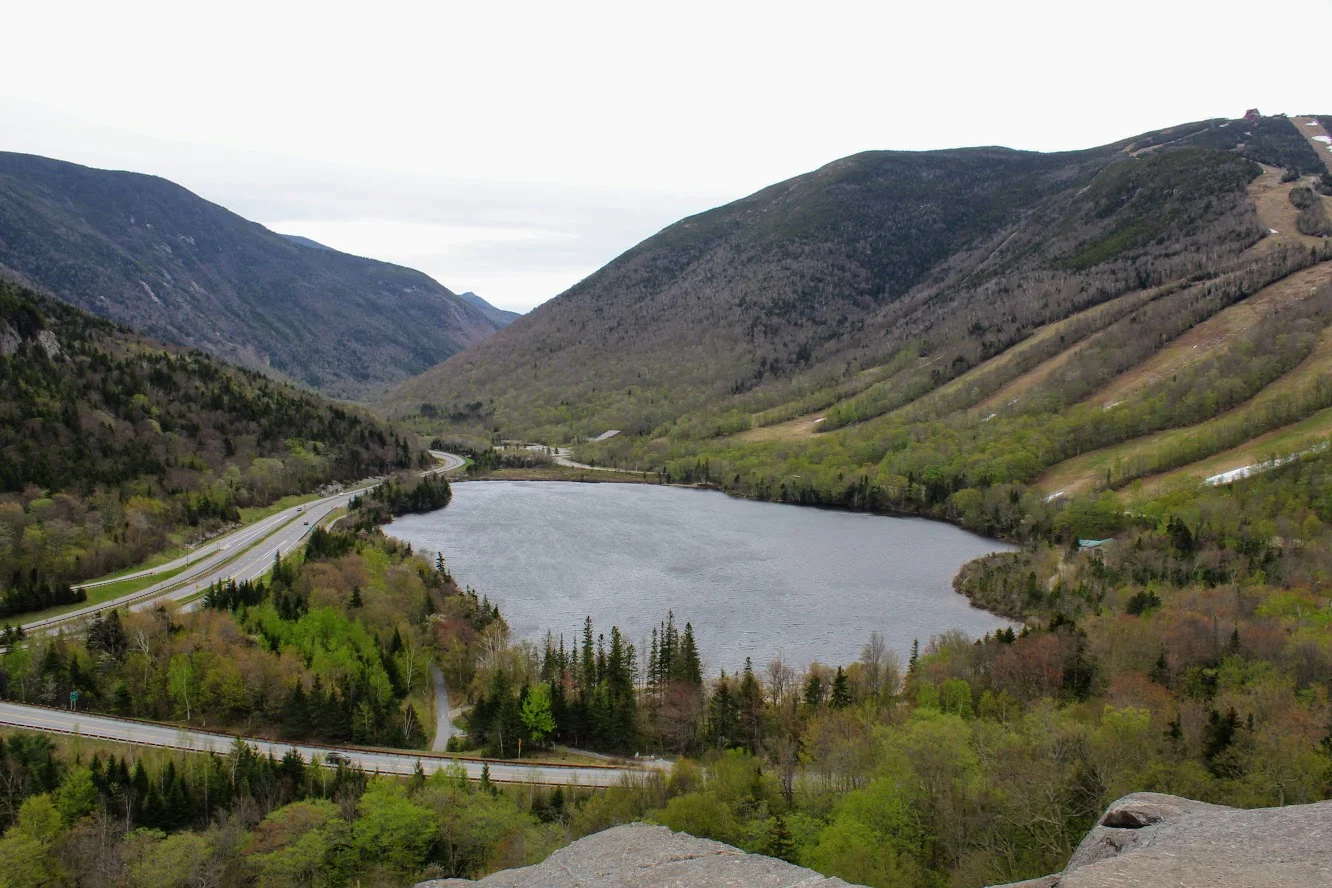
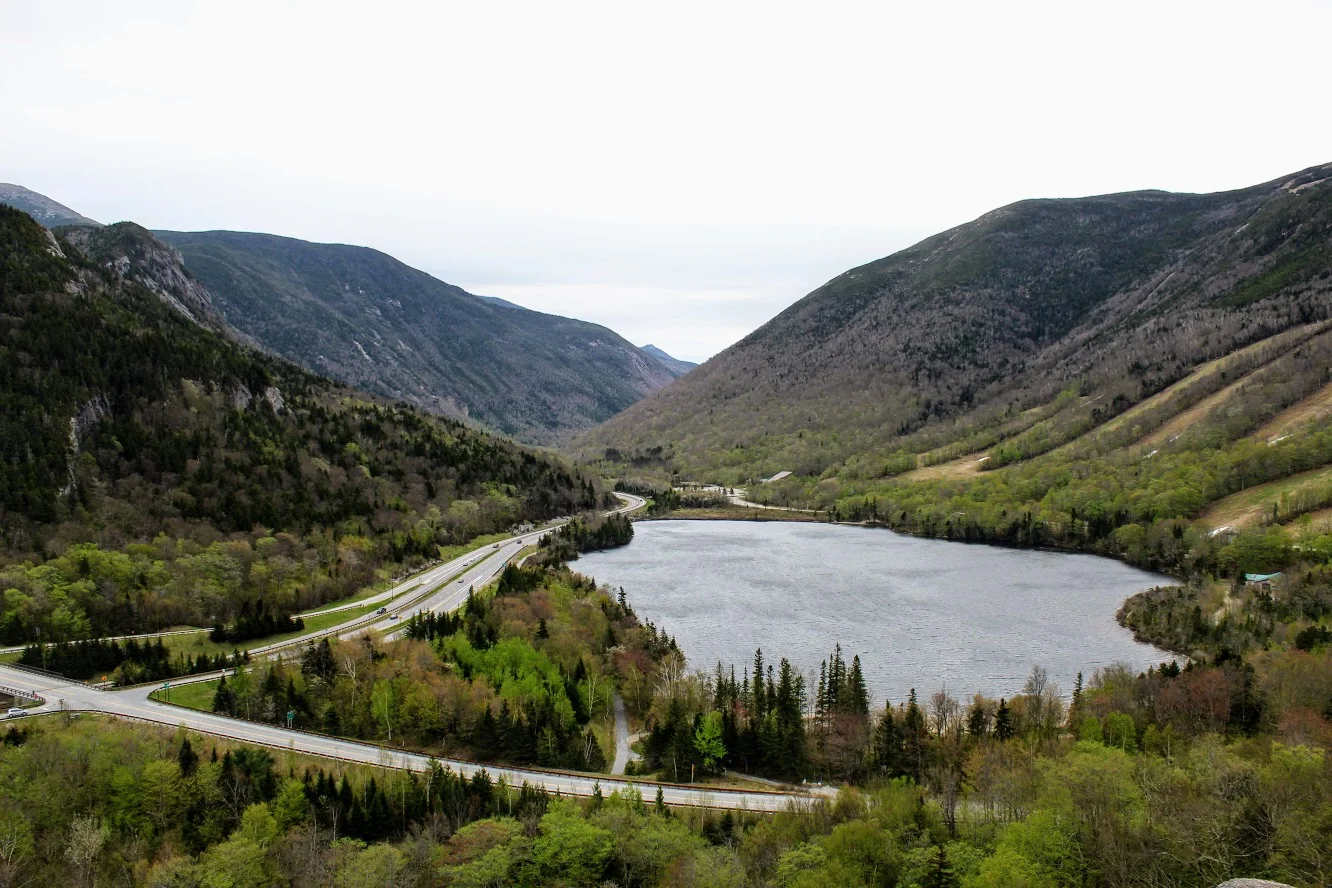
Artists Bluff stands at 2,368 feet high. The views at the top are amazing. You get a great outlook of the Franconia Notch. We hung out for about a half hour at the top reminiscing and questioning prior nights beverage consumption. And, then we decided to head back. The initial descend was pretty tough and rocky but the trail got easier as the path took us along Route 18 across from Echo Lake. And, this took us to where we originally started.

I would do this hike again and likely many more times. Each season of the year I am sure you get different views. Fall foliage would be the best. The trail is well marked and the forest is beautiful. Even though this is close to the highway, it is still far enough away and quiet as you hike. For a hike in the White Mountains, I would say this was an easy level hike. However, I could see this trail being moderate for others due to some the steeper sections. The hike will only take about an hour. But you will always add 20-30 minutes at the top taking in the views. The only thing that would have made this better is if I had some donuts with me!

HIKING FOR DONUTS
A blog for the outdoors foodie enthusiast
Hi, I’m Mark. I live in Connecticut. I take new trips every chance I get. A good trip has a great hike, great food, and something fun to do. My goal is to search out new trips and share them to inspire others to try something new and exciting.
If you are looking for posts in a particular place, search by city or state here.
EXPLORE OTHER POSTS IN THE ARCHIVE
Archive
RECOMMENDED POSTS

MOST RECENT POSTS
See where I have been recently on Instagram. Follow @HIKINGFORDONUTS
Arches National Park, Utah
Utah is filled of awesome and cool areas to explores. Especially, if you want to see some arches. Check out my blog on some must see landmarks in Utah!
Summer time is approaching and all I can think of is the endless possibilities to explore. A friend of mine recently went out West and sparked my memories of the trips I have taken. One of those trips was in Utah. In general, Utah is an underrated state. There is so much to do and so many cool national parks.
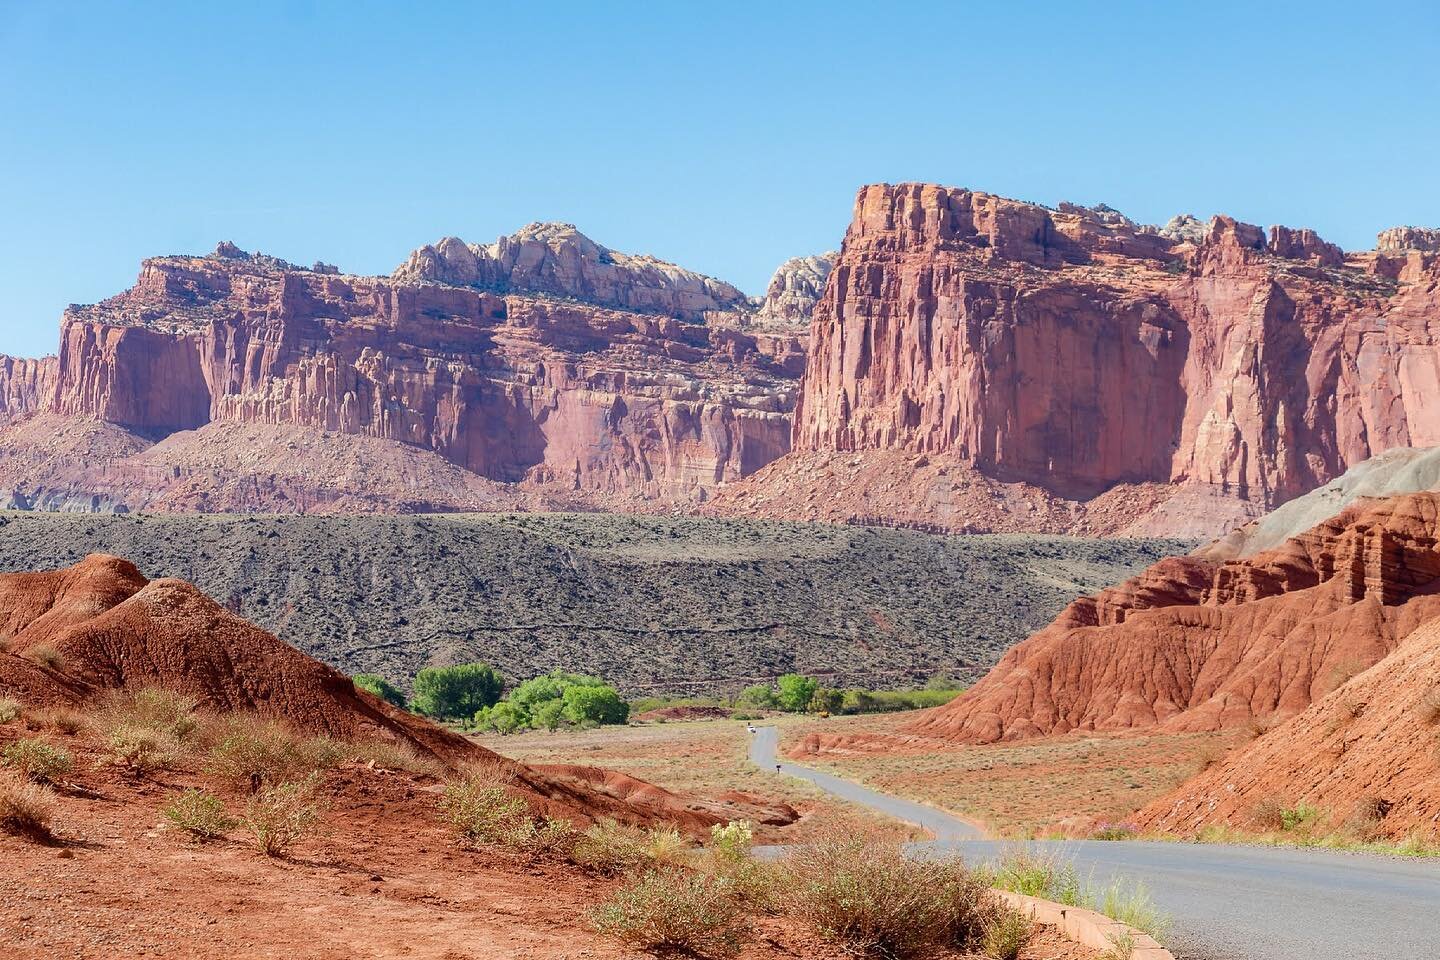
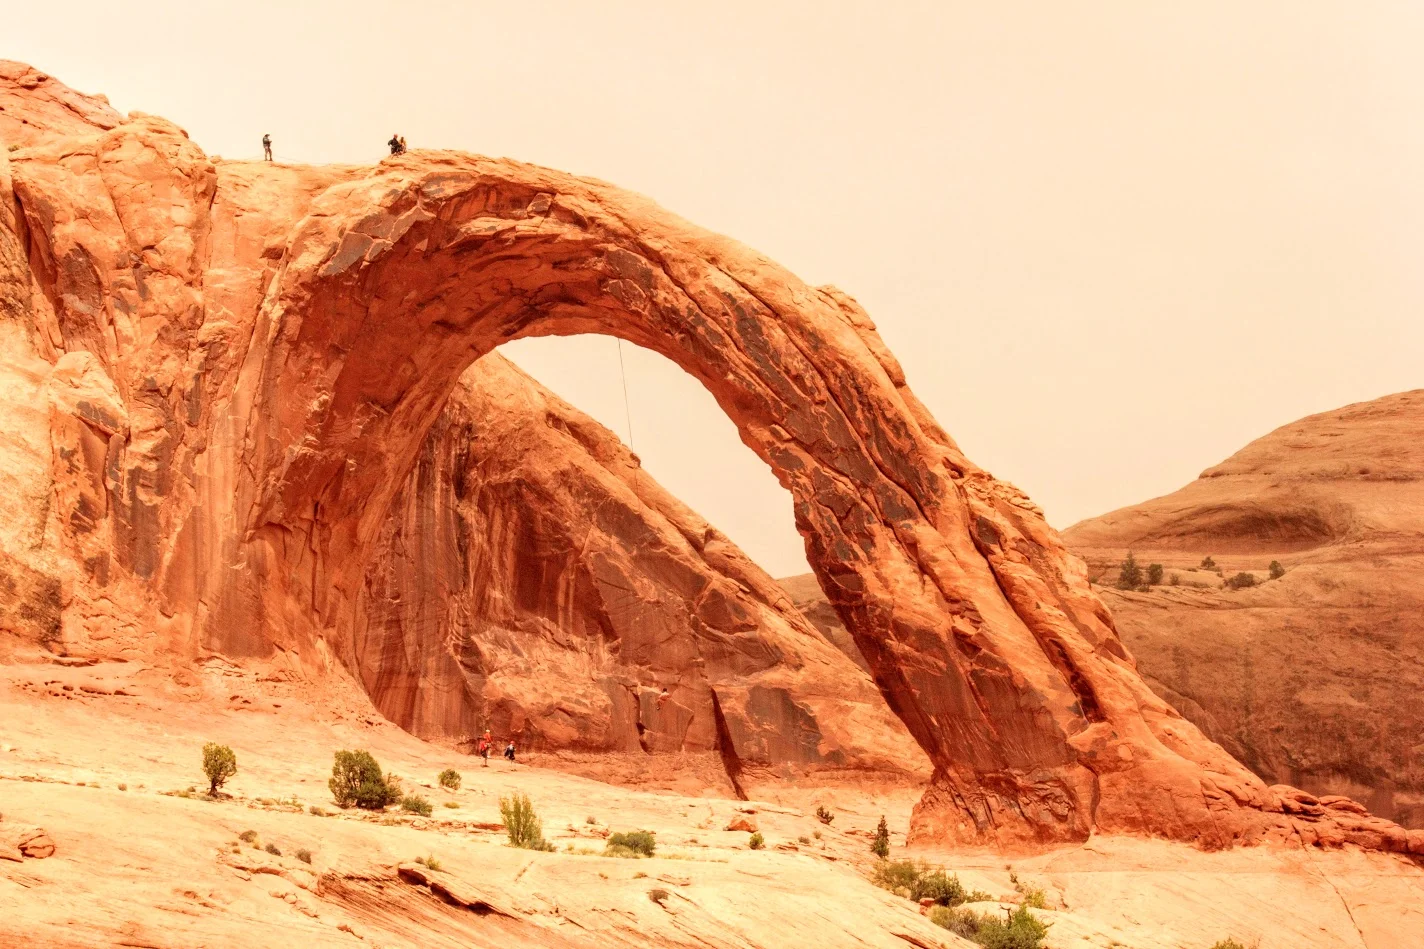
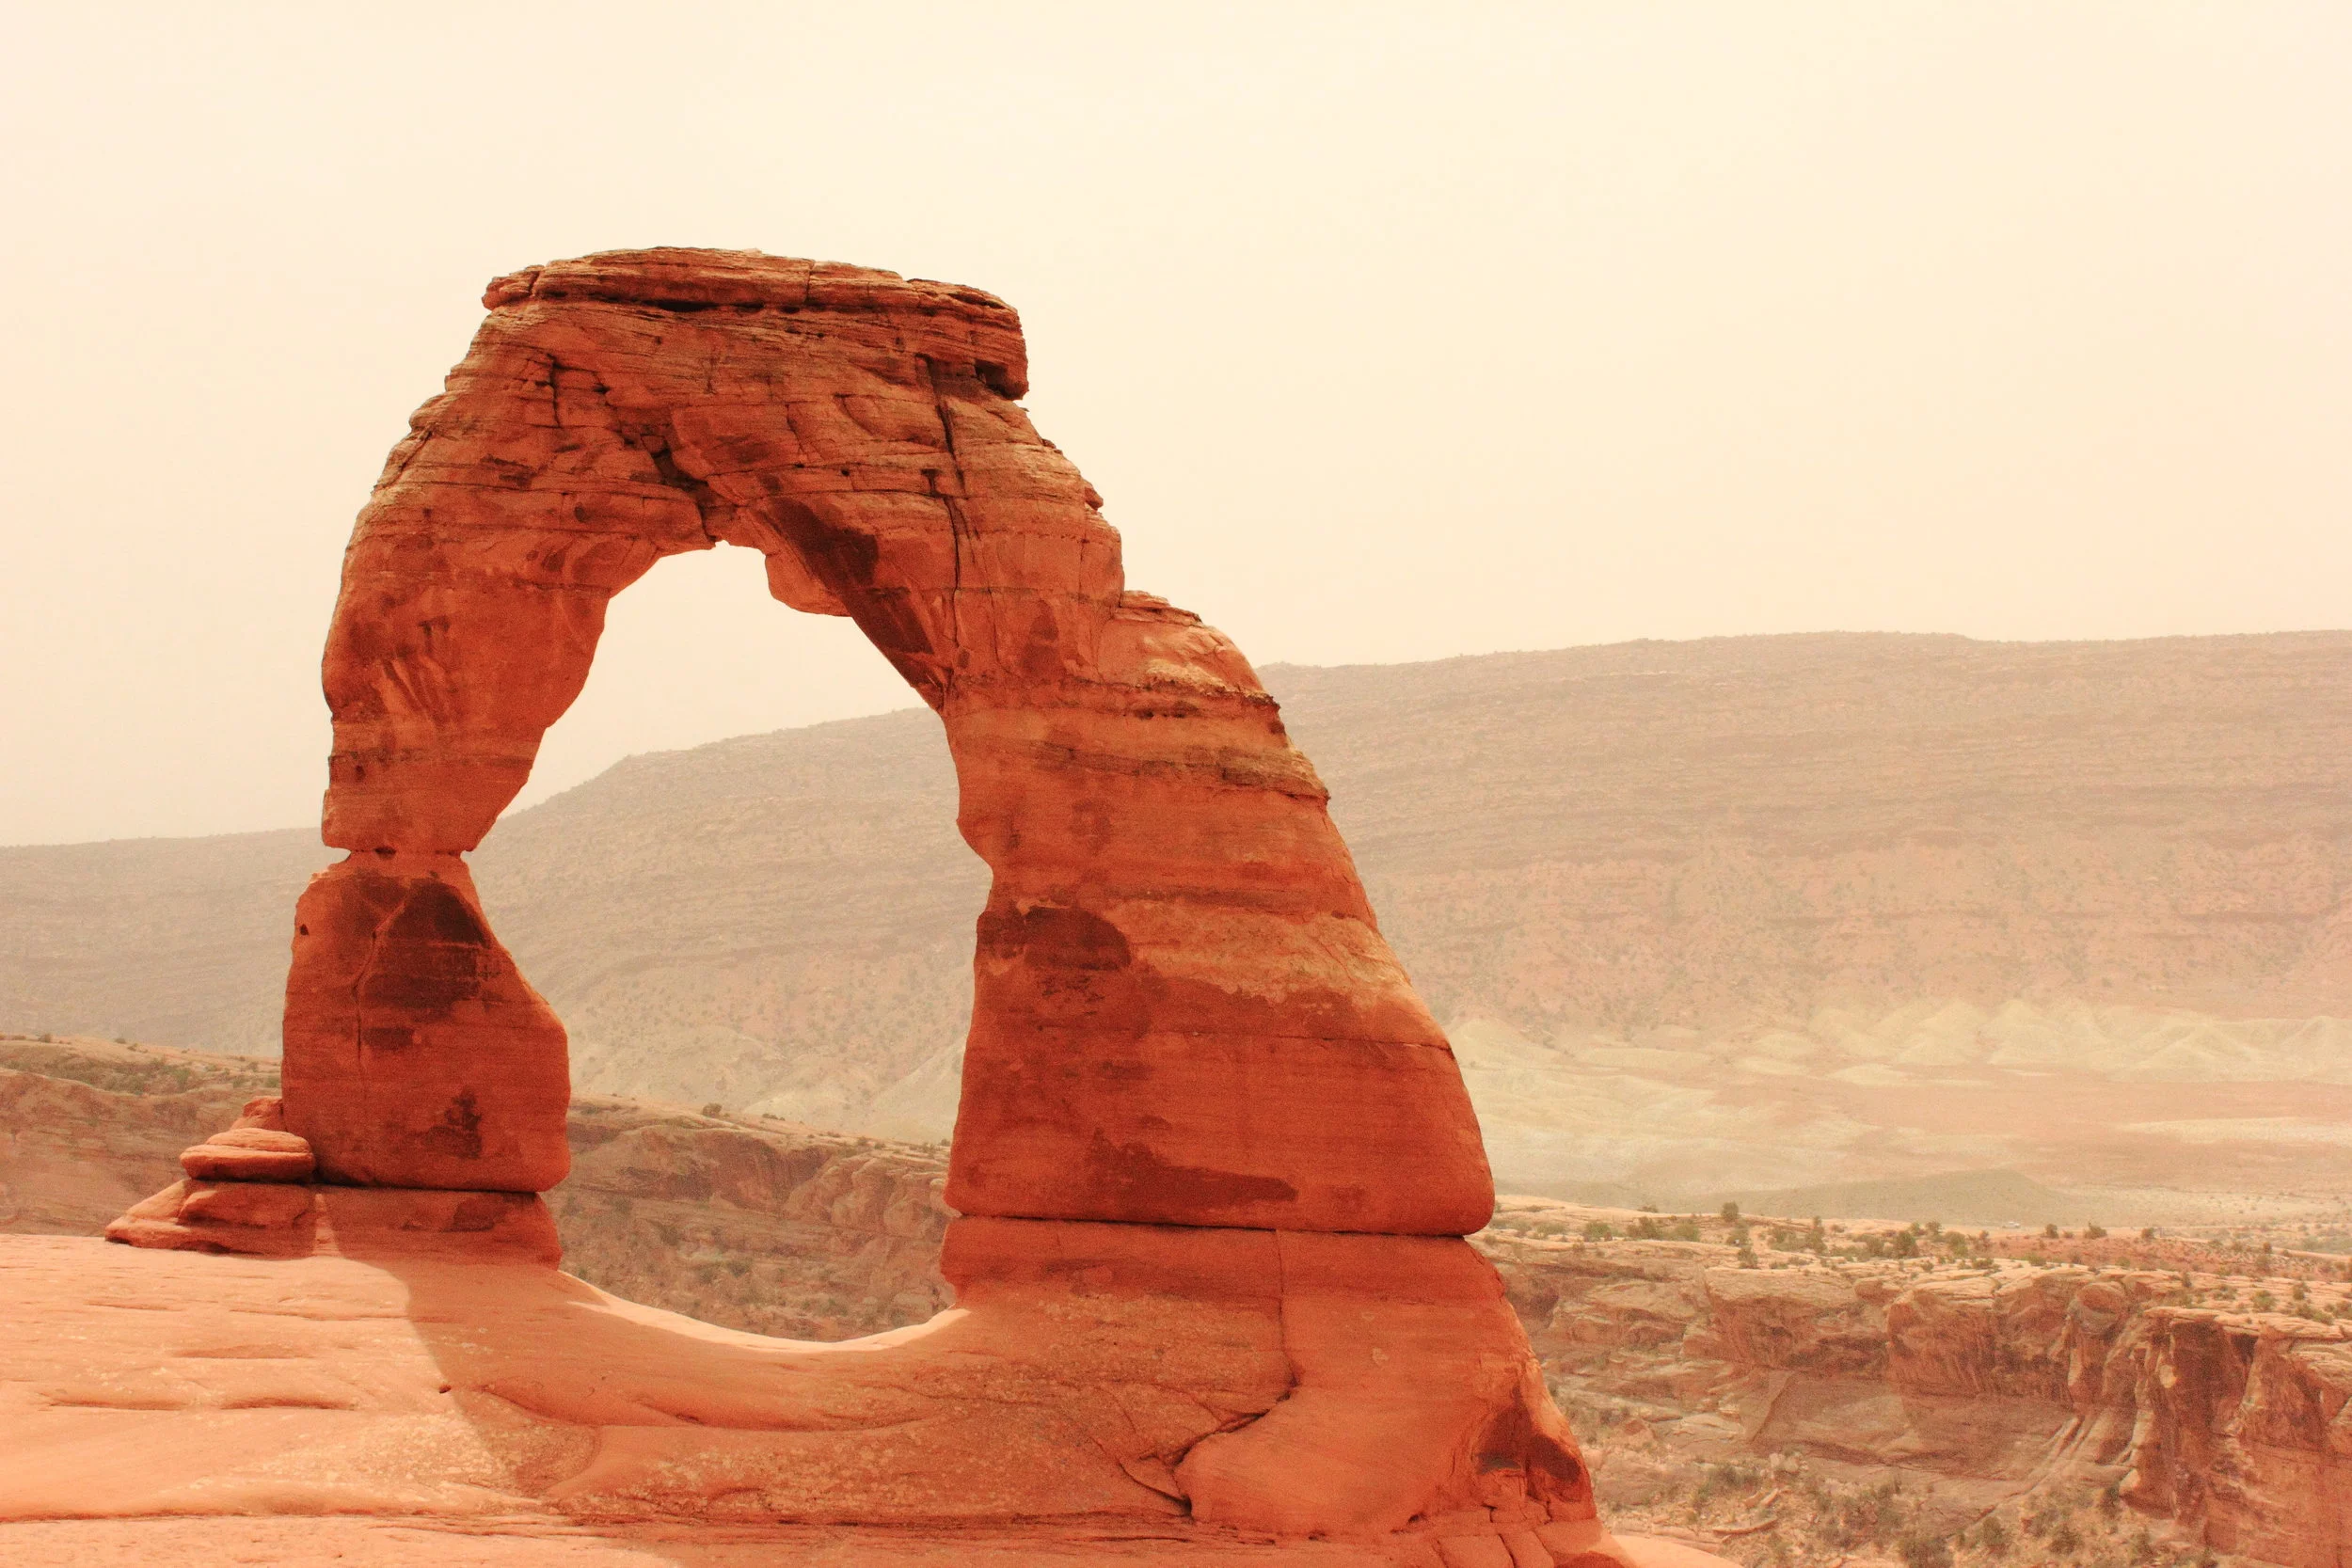
One thing about Utah, you can find many arches. You know…the rock sculptures that form natural bridges. There are over 2000 natural stone arches in Arches National Park alone, not counting the myriad of those found throughout Utah. After about 20 arches, you get the idea. You see so many in one area over and over you become a little too familiar. But they are awesome to see. You have to snap out of it and realize that you don’t see this type of scenery ever. With that said, my friends and I had a plan to hike to three very different arches that a each had a different and unique perspective. First, we would hike to Delicate Arch in Arches National Park, the most popular to visit in Utah. Second a hike to Corona Arch, just outside of Canyonlands National Park, this is popularly known for adventure junkies that try to rope swing through the arch. There are many vids on YouTube, check this out. You could not pay me enough. And finally, Mesa Arch, located in Canyonlands National Park's Island in the Sky District.

The first stop was Arches National Park for the Delicate Arch. The hike was about 3 miles round trip over exposed open rock that was quite slick. The trail begins at a large parking area near Wolfe Ranch. On this day, the wind gusts were up to 55 mph as you got closer to the arch. Not a smart decision to wear a hat. In addition, debris, sand, sunglasses, you name it was flying around. This is a very popular hike so the top was super crowded. Due to the popular photos you can take here, this will be a populated area most of the time. We had to wait in line in order to get a picture in front of the arch. For the view, it was definitely worth it. The trail is well marked with cairns. The hike isn’t that difficult and it’s a must when you are in the area.

Next on the arches list was the Corona Arch. The trail head of this hike was on the bank of the Colorado River. This hike was far more desolate. We may have seen a hand full of people on the trail. This is a very cool hike with some fun parts of climbing as you approached the arch. Round trip you are looking at about 3 miles also. As I mentioned above, some people actually climb the arch and will rope swing through it. We got lucky that day and ran into a group of crazies from Seattle who were doing just that. It was pretty intense to see in person. I would have never expected to actually see this in person. We had a chance to speak with them and they mentioned they tested the rope with a bag of rocks and the rope didn’t work. Yet, they went ahead and did it anyways! My buddy Corey actually filmed some one of the swings and swapped contact info with guy who did it. The west is indeed wild.


Lastly, we set out to see the Mesa Arch. Most people who visit Canyonlands National Park make the 0.5 mile hike out to the Arch, especially around sunrise. However, we were slackers on this day and got there around sunset time. The arch is off the edge of a 500 foot cliff, part of a 1,200 foot drop into Buck Canyon. Not much to say about the hike since it was so short. It is fairly easy, well-marked and the terrain is slickrock. Nevertheless, the views at the Mesa were incredible. You can get a keyhole view of White Rim country. Endless pictures were taken for sure. Utah has an unbelievable amount of must see landmarks and countless outdoors space to discover. If you make it out west to Utah, make sure you check out some arches. You won’t be disappointed.


HIKING FOR DONUTS
A blog for the outdoors foodie enthusiast
Hi, I’m Mark. I live in Connecticut. I take new trips every chance I get. A good trip has a great hike, great food, and something fun to do. My goal is to search out new trips and share them to inspire others to try something new and exciting.
If you are looking for posts in a particular place, search by city or state here.
EXPLORE OTHER POSTS IN THE ARCHIVE
Archive
RECOMMENDED POSTS

MOST RECENT POSTS
See where I have been recently on Instagram. Follow @HIKINGFORDONUTS
River Highlands State Park, Cromwell, CT
This is the first hiking trail review on the Connecticut hiking challenge trails. Check out the blog to learn more about the challenge!
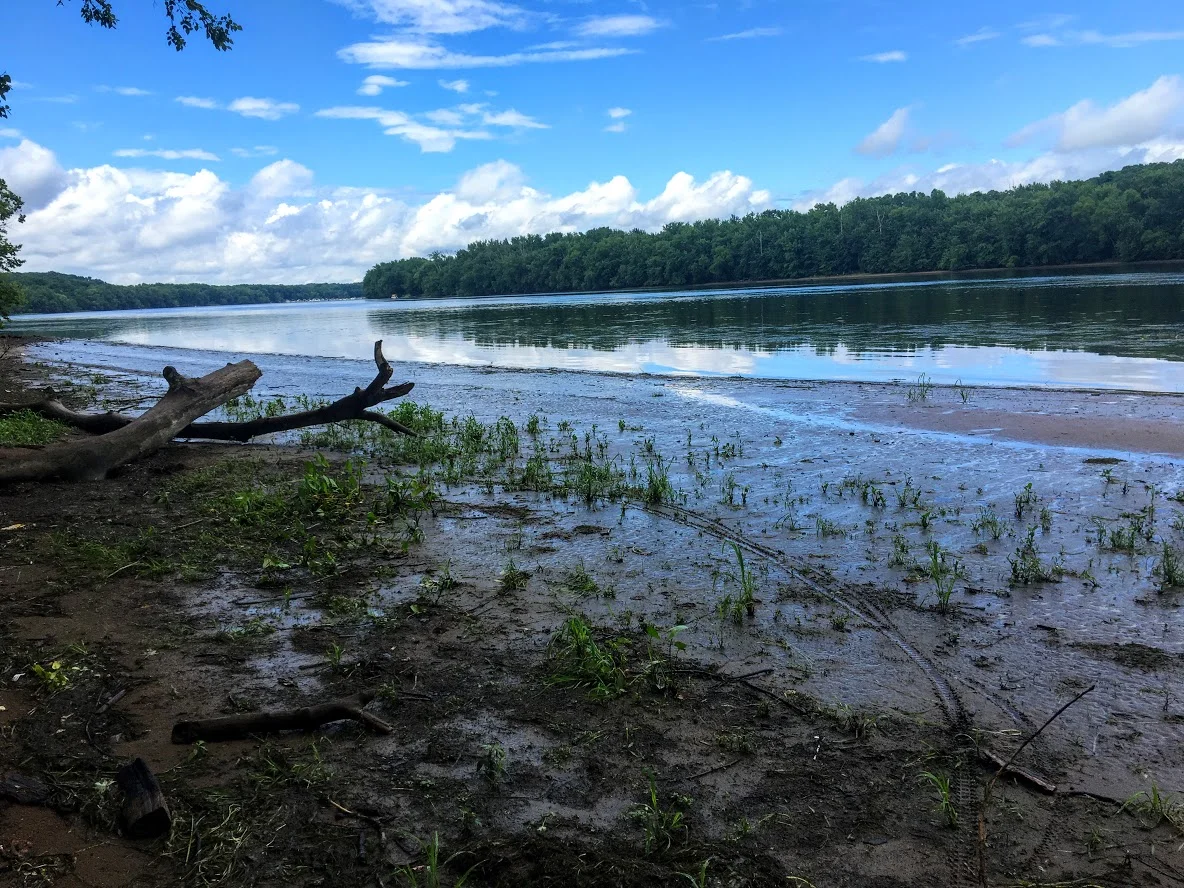
Trail Description: A view 150 feet up of the Connecticut River can be seen from the White Blazed Trail in the River Highlands State Park. In addition, there is water front with picnic tables to enjoy.
Trail Info:
Where: River Highlands State Park, Cromwell, CT Distance 1.5 miles (1 hr) Difficulty: Easy Trail Type: Loop Features: Views, River, Water
How to get there:
Directions in detail can be found here,https://www.ct.gov/deep/cwp/view.asp?a=2716&q=434748&deepNav_GID=1650.
River Highlands State Park, Field Rd, Cromwell, CT 06416
Hiking Tips
Good beginner hike or weekday hike after work.
Super buggy area. Bring bug spray.

The Hike
Finding good hikes in Connecticut is becoming less a challenge. And, that is a good thing. Most people just dismiss how much is truly out there. Recently my friend told me there is a hiking challenge in CT. I can’t believe I haven’t come across this. Of course, I googled and found Sky’s the Limit Hiking Challenge by the CT Department of Electric & Environment Protection (DEEP). They list 14 lesser known trails to encourage more hiking in CT state parks. There are rules and info here. You can win some prizes too. I think it is a great idea. I haven’t heard of most of the trails. I smell some new blog material. I am definitely on-board and will be joining in on the fun.
With that said, here in my very first hike of the Sky’s the Limit challenge. A rare weekday hike but if it is 90 degrees in May in CT, you get outside. Nichole and I went to River Highlands State Park in Cromwell, CT. This was an easier and quick hike. The hike offers views of the Connecticut River from 150 feet above the water. I would use this link for the trail maps. Directions can be found on the CT DEEP link above.


The park consists of multiple color trails. You can go multiple different directions. The biggest loop will take you about 2 miles but you can connect to many different trails and adventure as much as you want. The trails are very well marked and the terrain is pretty level. Maybe one or 2 short, steep sections. We chose the white trail from the parking lot. This takes you directly to the high bluffs overlooking the Connecticut River.

More river views.
From there we took the yellow trail down to the camping site. Typically, you can go to the bottom and walk out to get more views of the river. However, due to all the rain we had recently, the water was really high. Trees and picnic tables were covered. It is probably best to do this hike in the summer. Luckily, I did this a few years ago when the water was low.


After trying to snap some good IG pics, we continued to follow the yellow trail out to the parking lot. There are quite a bit of small bridges to cross over. And, this particular area is swampy and gets very buggy. Tons of mosquitoes. I suggest Deep Woods spray for this hike.


We did do some adventuring off the trails mentioned but it shouldn’t be more than 1.5 miles if you use the white to yellow marked trails. Barely took us an hour. This is a very good beginner hike. You don’t need boots but it is a wetlands area so it can be very muddy. It’s a good, quick hike for those locally.

HIKING FOR DONUTS
A blog for the outdoors foodie enthusiast
Hi, I’m Mark. I live in Connecticut. I take new trips every chance I get. A good trip has a great hike, great food, and something fun to do. My goal is to search out new trips and share them to inspire others to try something new and exciting.
If you are looking for posts in a particular place, search by city or state here.
EXPLORE OTHER POSTS IN THE ARCHIVE
Archive
RECOMMENDED POSTS
MOST RECENT POSTS
See where I have been recently on Instagram. Follow @HIKINGFORDONUTS
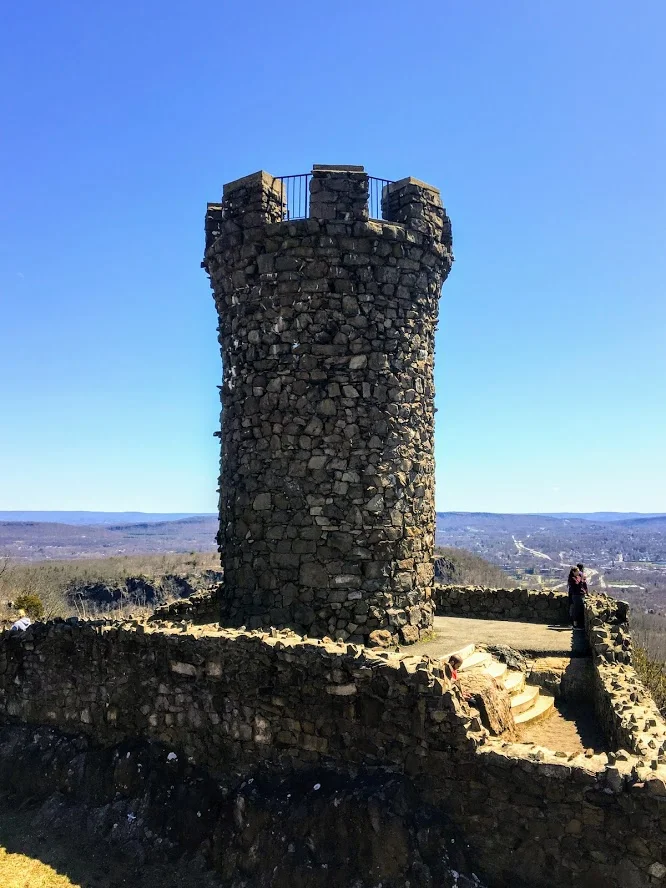
Sunset Rock State Park, Crescent Lake, Southington, CT
Check out the Crescent Lake trail in Southington, CT. This was a confusing trail but well worth the views. Enjoy!
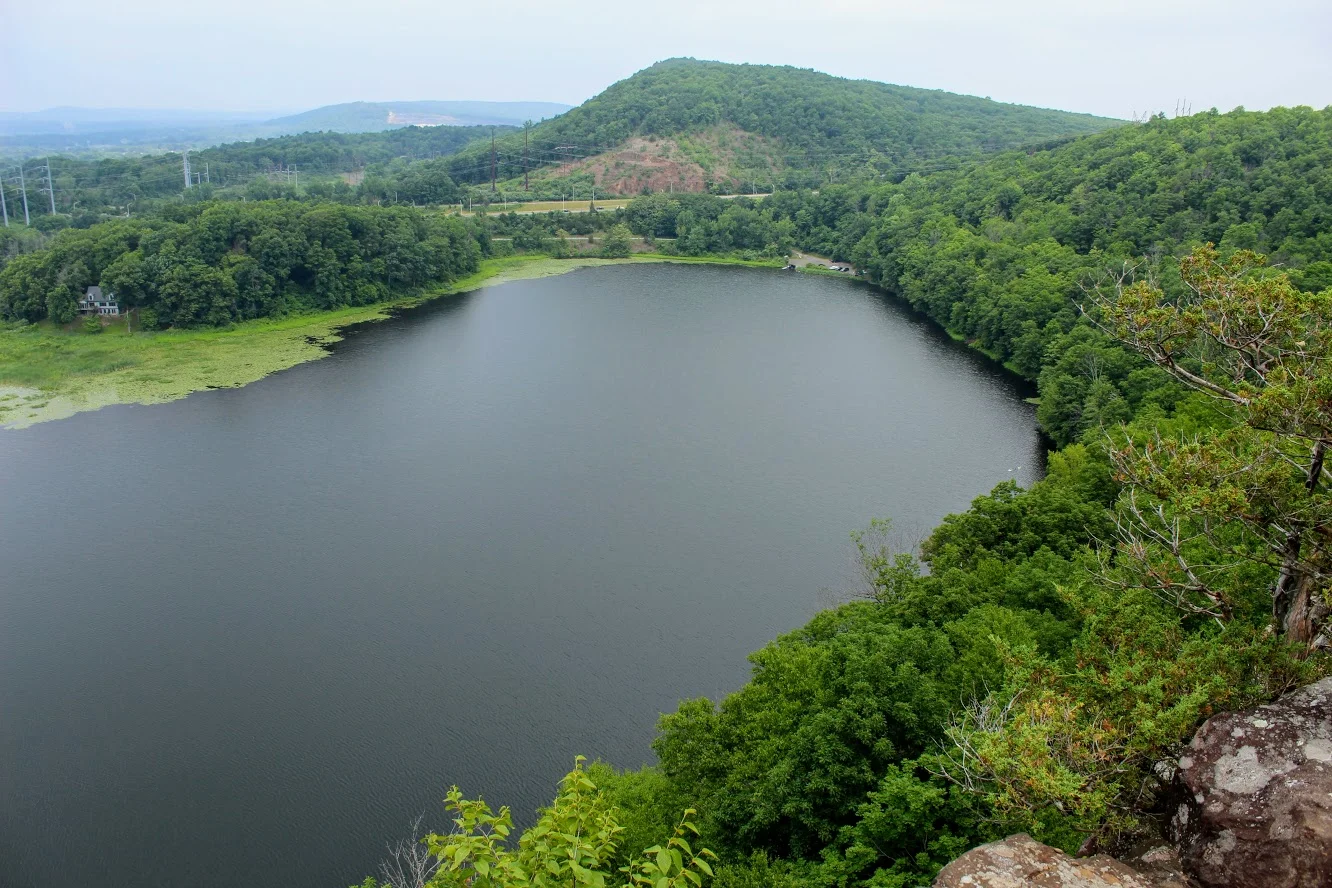
Trail Description: Sunset Rock State Park offers a scenic hike around Crescent Lake that connects to the Metacomet Trail.
Trail Info:
Where: Southington, CT Distance 3.2 miles (2-2.5 hrs) Difficulty: Easy to Moderate Trail Type: Loop Features: Views, Lake, Water
How to get there:
Address to GPS: 357 Shuttle Meadow Rd, Plainville, CT 06062. Parking lot is easy to find.
Hiking Tips
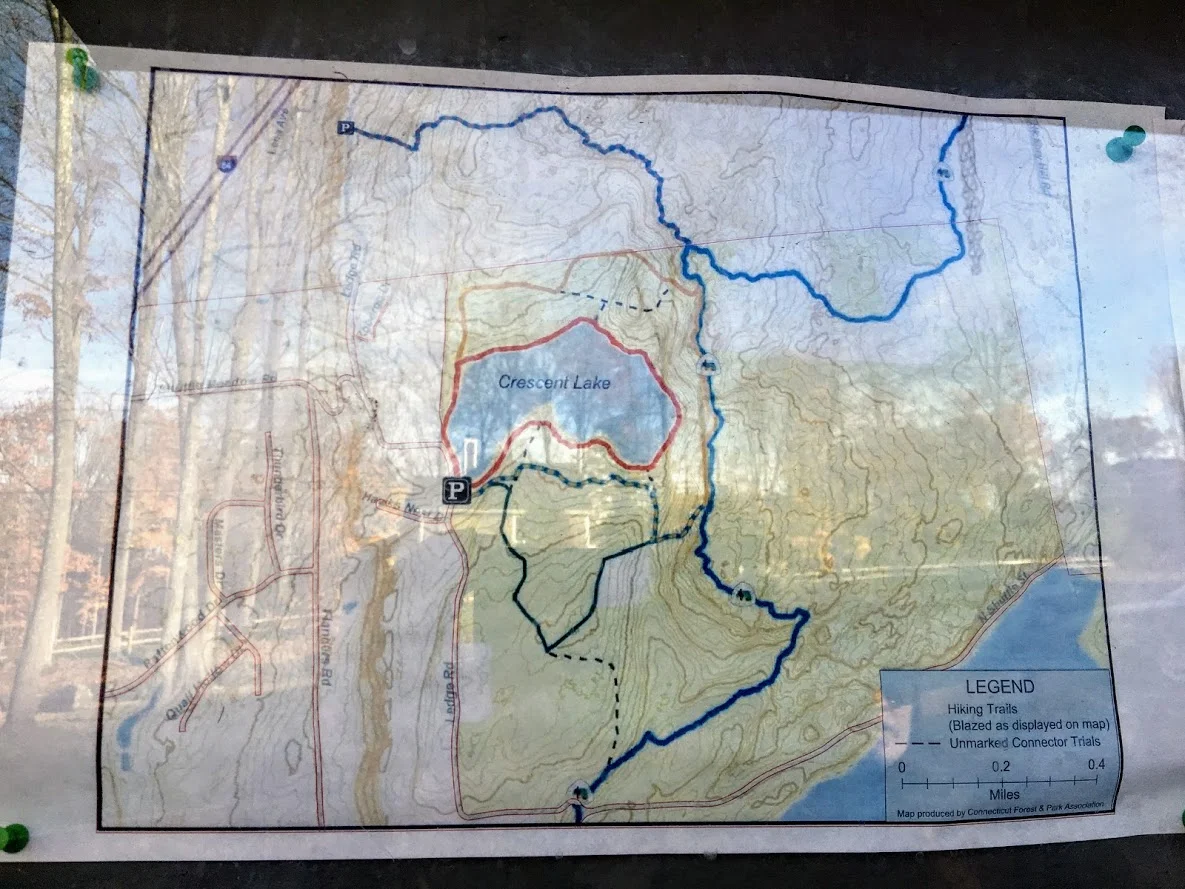
Three trails to choose from. The Blue to Orange trail takes you above the lake and is rockier and steeper. Much better views.
Be mindful if you lose the trail markings or end up on a different trail. There is a lack of trail markings. And, some confusing areas where trail markers change colors.
The Hike
On this brisk fall weekend, we decided to hike the Crescent Lake Trail in Southington, CT. This is one of those trails that there isn’t the best information online and it is poorly marked. I will do my best explaining but my advice is always have the map handy and make sure someone is good at directions!
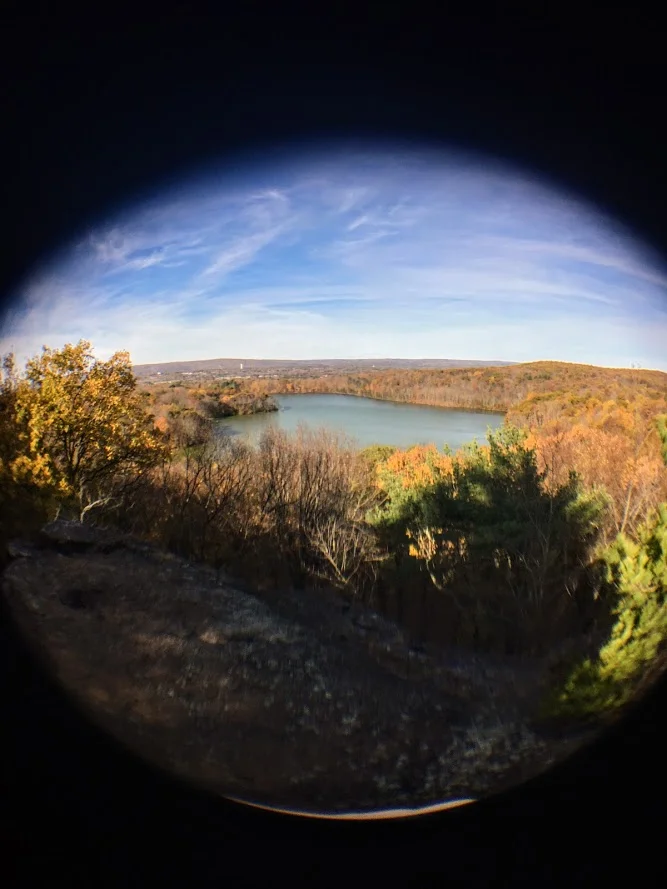
The parking lot is easy to get to, it is off Shuttle Meadow Road. Once you park you will see the lake right in front of you and potentially some people fishing. There are 3 trails. The Red trail is the lower level trail which is mostly flat. This is to your far left from the lot. This is roughly 2m. The blue -orange trails takes you the upper levels to get good views above the lake and this is rockier and steeper. This trail is to your right from the lot. This is about 3.2m and this connects to the Red at the end once you descend down. There is also a green trail, but not sure where that takes you. It appeared to be just a woodsy hike.
We got lost a few times but Nichole is really good with reading trail maps. The issue is lack of markings/incorrect markings. And, the Metacomet Trail connects so you have to be very careful when the colors change. We took the upper trail followed blue-orange markers until we saw just orange then to red. There we were some tough sections where you could choose 3 directions but there are big orange arrows on trees along the way so be mindful of those. There is also an intersection where you see trail arrows for the Metacomet at the top, keep going toward the blue orange and you will pass a camp fire pit. Minus the confusion, it was a cool hike and the view was awesome from the top. I could of took pictures for an hour….luckily, Nichole stopped me. The upper trail I would suggest hiking boots. It was a moderate hike for beginner to intermediate. Some of the inclines got our hearts beating and needing some water. I think this would be a good spot to snowshoe. I hope to keep the fall hikes going. Another local spot in the books, glad we decided to try it even though the reviews were suspect.
Review:
Cresent Lake Trail, 3.2m (Southington, CT): 4 out of 5


HIKING FOR DONUTS
A blog for the outdoors foodie enthusiast
Hi, I’m Mark. I live in Connecticut. I take new trips every chance I get. A good trip has a great hike, great food, and something fun to do. My goal is to search out new trips and share them to inspire others to try something new and exciting.
If you are looking for posts in a particular place, search by city or state here.
EXPLORE OTHER POSTS IN THE ARCHIVE
Archive
RECOMMENDED POSTS
MOST RECENT POSTS
See where I have been recently on Instagram. Follow @HIKINGFORDONUTS
Chauncey Peak Trail, Giuffrida Park, Meriden, CT
It is leaf peeper season here in the Northeast. There is no better time to go hiking than in the fall. I am going to attempt as many hikes as I can get in. Here's the first of many! And, one of my favorites.
Trail Description: Located in Guiffrida Park, the Chauncey Peak Trail offers a scenic hike with beautiful ridge line views of Bradley Hubbard Reservoir.
Trail Info:
Where: Guiffrida Park, Meriden, CT Distance: 2.8 miles (2-2.5 hrs) Difficulty: Moderate Trail Type: Loop Features: Views, Reservoir, Lake, Peak
How to get there:
This is fairly easy. Just GPS Guiffrida Park and the address should be 800 Westfield Rd, Meriden, CT 06450. Once you pull in, you will see the parking lot.
Hiking Tips
Start the hike to the right of the parking lot into the forest. Much easier route going up and down.
The trail has been updated and re-routed. Be sure to follow the blue trail around Chauncey Peak and past the landfill. Look for the Blue markings.
There are many great views from the ridge line, be sure to take them all in.
The Hike
It is officially fall. It is chilly in the morning, the leaves are changing, and it is getting darker out earlier. Time to get out there and be a leaf peeper. Sounds kind of sketchy…..But seriously, fall hikes are the best. I slacked a little bit this summer with hiking, but I intend to take advantage of the fall weather.
For my first fall hike, I chose the Chauncey Peak Trail at Giuffrida Park in Meriden, CT. This is my favorite hike in the Hartford area, hands down. I have hiked this trail multiple times and I enjoy it just as much each time. This is a very fun hike with great scenic views and a variety of terrains overlooking Bradley Hubbard Reservoir. Unfortunately, due to the fog on this day, it was tough to get that view in. I like to start the hike veering to the right under the trees into the woods on the Blue trail. You will get the strenuous part of the hike done in the beginning. You will immediately be on the incline ascent up the peak, this will be steep and rocky stretch. This won’t last too long. Once you get to the top, you will keep following the blue trail and this will bring you to the ridge line for great panoramic views. Once you are done taking hundreds of pictures, you will descend down until you meet a footbridge that takes you to the bottom of the reservoir. You will follow out the blue trail to the white trail along the water’s edge to the parking lot. This part will be flat and serves as a nice cool down.
The trail is well marked. They are taking great care of it. When I hiked this originally I got lost but since then the markings have greatly improved.I would consider this a moderate hike. You need hiking boots. Depending on the weather, it can be very slippery. I was slipping on the leaves and loose rocks myself due to some wetness. I finished hiking under 2 hrs. If you want a nice short day hiking with challenge and rewarding views, I highly recommend this trail.
Review:
Chauncey Peak Trail, 2.8m (Meriden, CT): 4.5 out of 5


HIKING FOR DONUTS
A blog for the outdoors foodie enthusiast
Hi, I’m Mark. I live in Connecticut. I take new trips every chance I get. A good trip has a great hike, great food, and something fun to do. My goal is to search out new trips and share them to inspire others to try something new and exciting.
If you are looking for posts in a particular place, search by city or state here.
EXPLORE OTHER POSTS IN THE ARCHIVE
Archive
RECOMMENDED POSTS
MOST RECENT POSTS
See where I have been recently on Instagram. Follow @HIKINGFORDONUTS